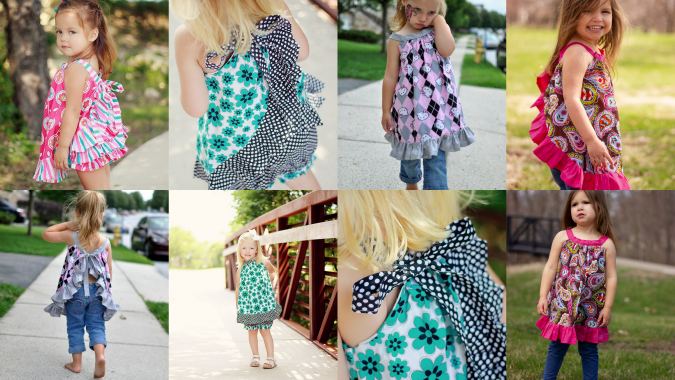
I am having so much fun designing baby patterns that I am going to keep it going for a while. This time, I have come up with something that is sure to excite you, a back- open baby pinafore pattern.
I am sure, every little girl baby has a pinafore of some kind and mothers love to dress up their little ones in pinafores. It is a vintage pattern that has not lost its charm over the years!
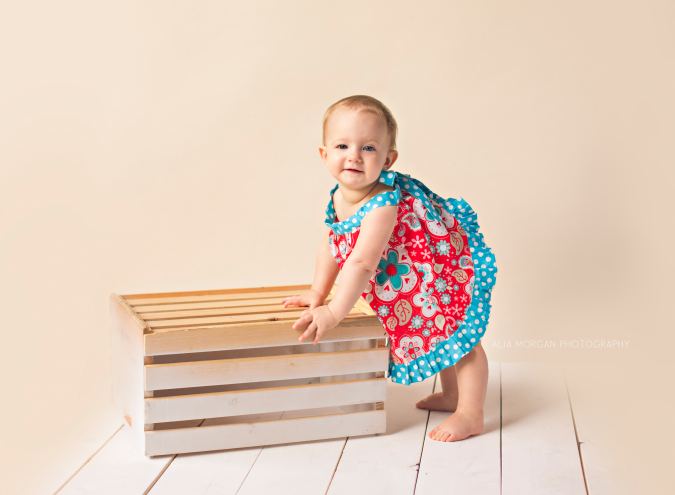

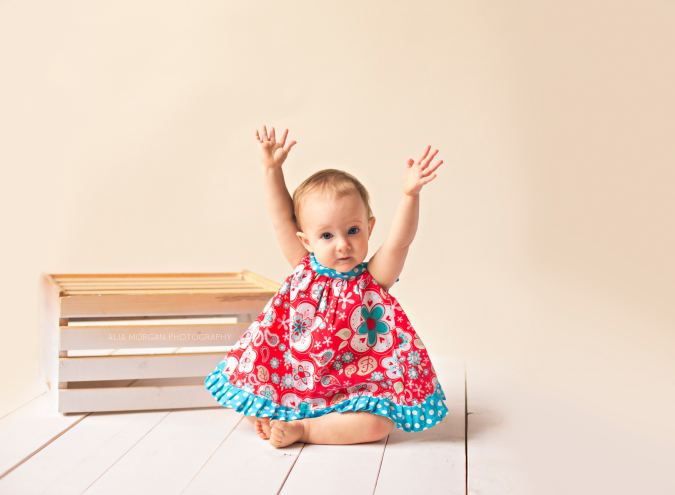
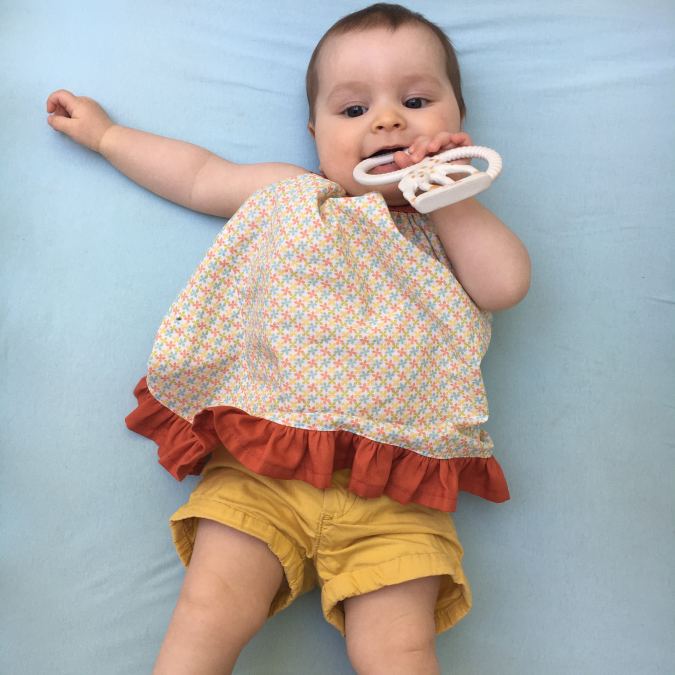
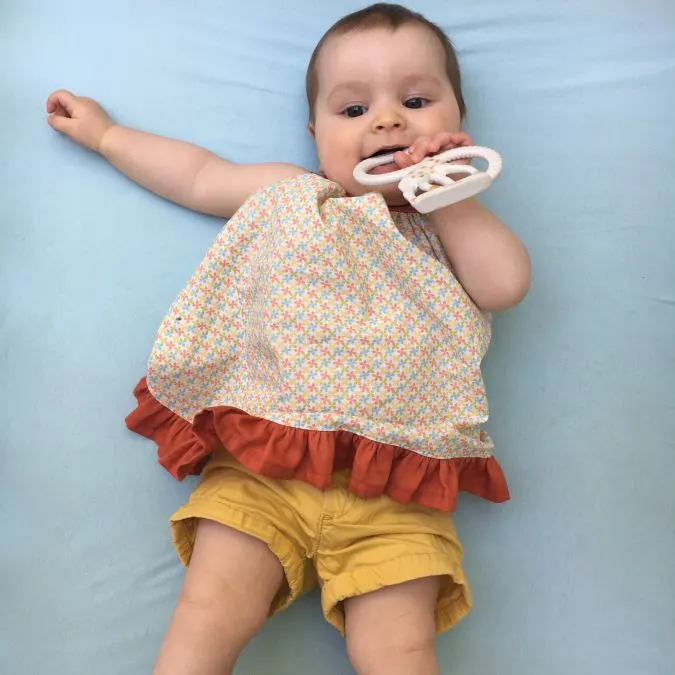
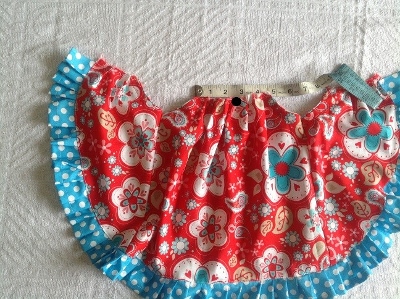
This pattern is again inspired by one of the pinafores dresses my daughter had as a baby. This was the best pinafore design she had. The beautiful ruffles along the back looked beautiful when I tied the strap in a bow.
This pinafore pattern was also very easy for on and off because of the back-open design and the single tie for fastening. I loved it so much that she had half a dozen of these pinafores when she was a baby.

I find that these pinafores are easy and quick to sew even for a beginner seamstress. They don’t require a lot of sewing and are free from the hassles of zipper and button attachment. There are multiple ways you can sew them; You can cut and sew the ruffle or use lace instead of the fabric ruffle to sew a quick boutique-style baby pinafore. You can also mix and match fabrics for the ruffle, body, and ties.


This simple and easy DIY tutorial in pdf format includes printable templates which make it easy for beginners. I had released this pinafore sewing pattern earlier, as a paid one in multiple sizes. This is my best selling pattern to date. Now, I have made the baby sizes from newborn to 12 months free for all to sew.
15 Minute Baby Dress from a Rectangle
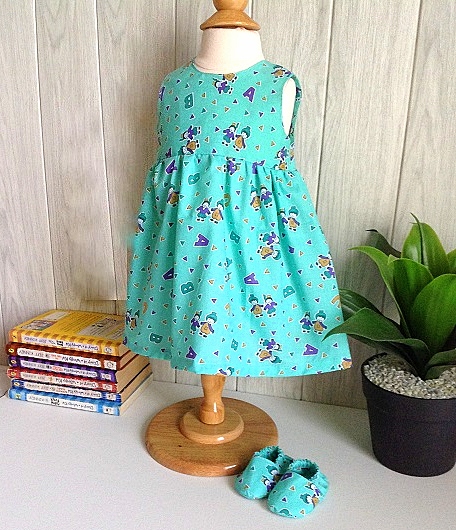

Baby Pinafore Pattern
Materials Required
- Cotton Fabric for the dress body- requirements specified in the table below
- Cotton Fabric for the neck-tie and ruffles- requirements specified in the table below
- Sewing Notions
- Fabric Marking Pen.
- Single-Folded Bias Tape- Optional.
- Enter your e-mail address below to download the template.
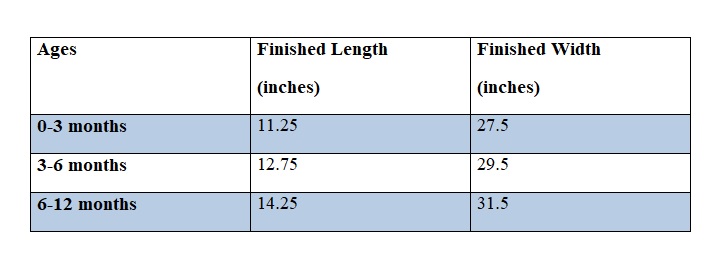
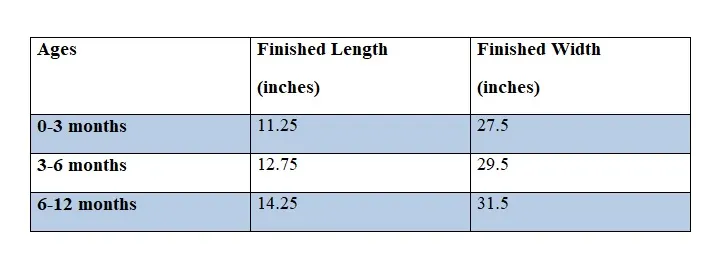
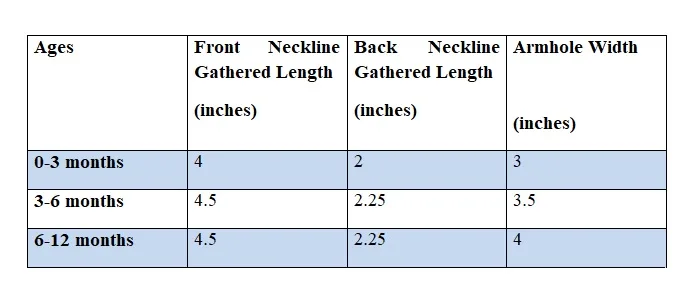
Approximate Finished Measurements
Table-1
- Pinch to zoom for mobile users.
Fabric Requirements
Table-2
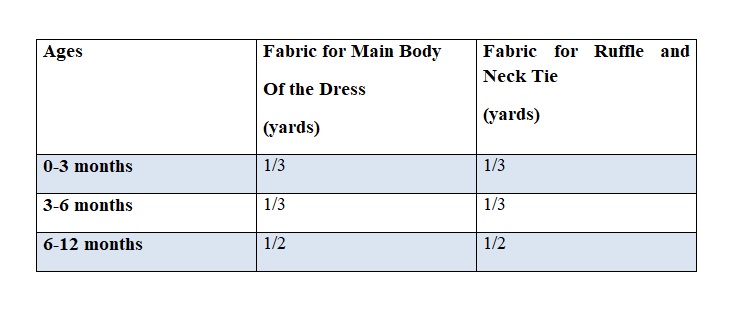
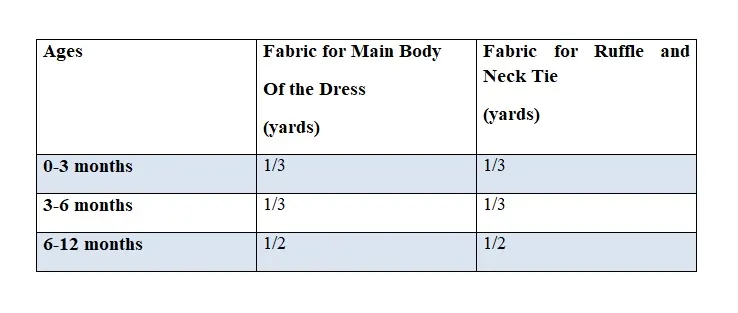
All the fabrics used here are 44 inches in width.
The fabrics shown here are only for illustration purposes and as such may vary from the original.
The seam allowance is 3/8 -inch unless otherwise specified.
I suggest you read the entire pattern once before starting to get a general idea.
All seams are to be pressed open.
All seams are to be finished by zig-zag or serger.


Take the required fabrics for the pinafore body and ruffles.
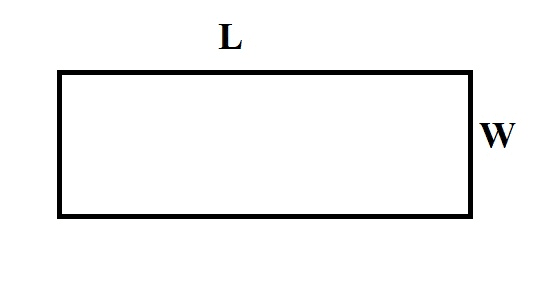
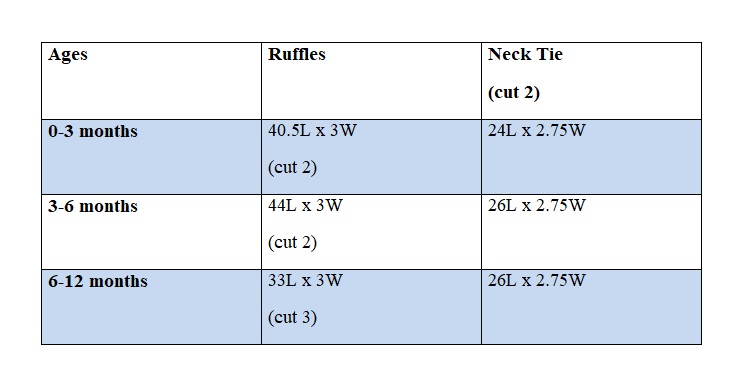
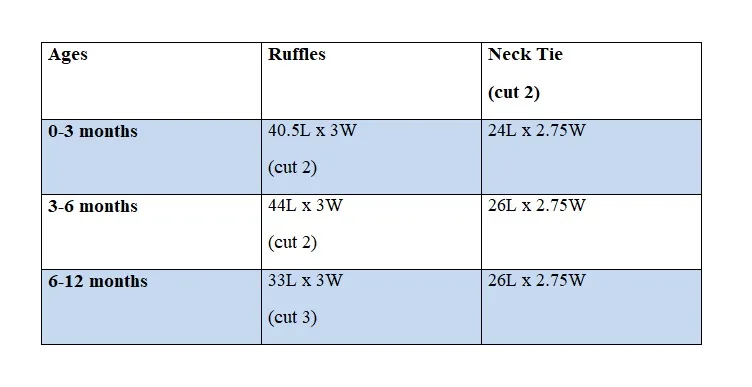
Measurements
Table-3
In the table below “L” stands for the length and ‘W” stands for the width of the fabric.

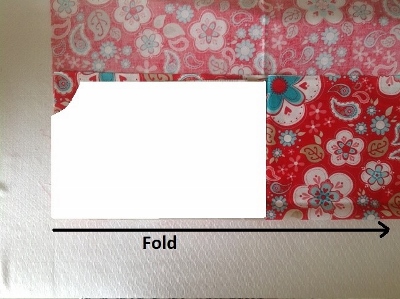

Cut the pattern template for the front piece of the dress at the end of this pdf. Fold the fabric to fit the width of the template and keep the template on the fold. Mark around the template and cut to get the front piece of the dress.

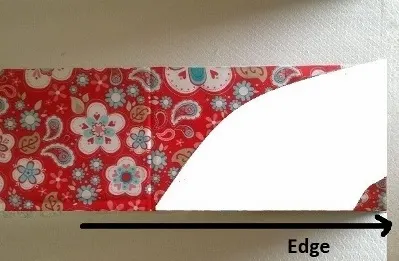
Next, cut the pattern template for the back piece and keep it along the edge of the fabric. Mark around it and cut to get one of the back pieces. Repeat the steps to get the other back piece.
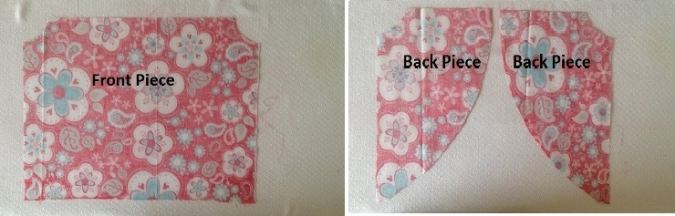
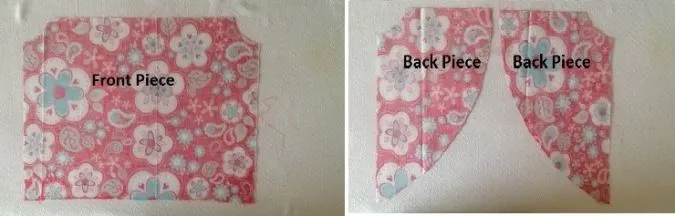
Your front piece and your back pieces will look like the above.
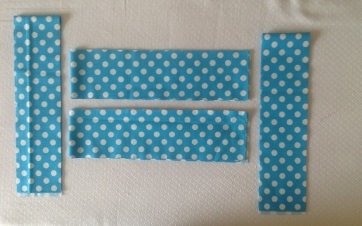

Cut the fabric strips for the ruffles and neck-tie, referring to the table-3 above.
Let’s finish the armholes of the dress. For that, we need 4 pieces of single-folded bias tapes, 10-inches long (you can either use the readymade ones or make your own as shown at the end of this tutorial.

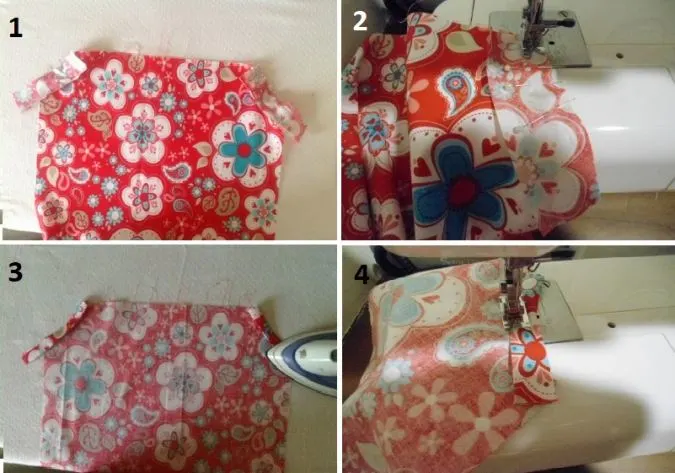
1) Open one of the folds of the bias tape and align its edge along the edge of the armhole, on the right side of the fabric as shown above and pin. 2) Sew the bias tape to the armhole along the edge, removing the pins as you go. 3) Fold the bias tape completely over to the wrong side of the fabric and press. 4) Sew along the folded edge of the tape to secure. Repeat the same with the other armholes.
Next, we join the front piece and back pieces together.
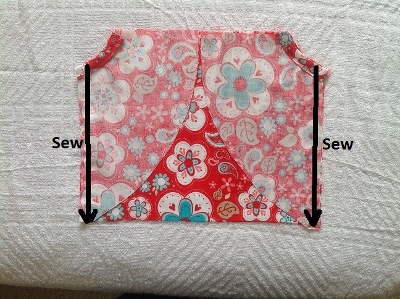
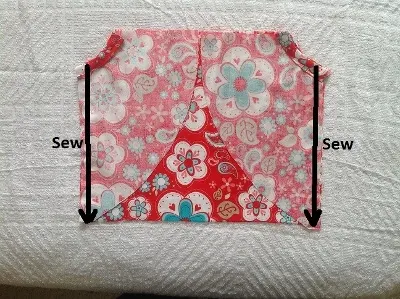
Keep the back pieces over the front piece with the right sides together and aligning the top and side edges. Sew along the two side seams.
Let’s do the ruffle.


1) Take the fabric strips for the ruffle and join them along the shorter sides. 2) To hem the ruffle, fold one of the longer edges of the ruffle by ½-inch and press. 3)Fold by another ½-inch and press again. Repeat the steps on the two shorter sides. One of the longer edges is left raw; this is where we gather the ruffle. 4) Sew down the three folds.
Next, we gather the ruffle.

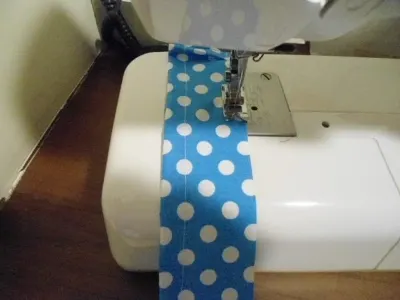
Sew a basting stitch along the raw edge of the ruffle (to do a basting stitch you will have to turn the upper thread tension of your machine to zero and stitch length to the longest). Leave a long tail of thread, 6 to 7 inches long to pull and gather the ruffle.
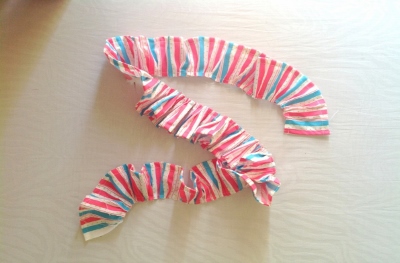
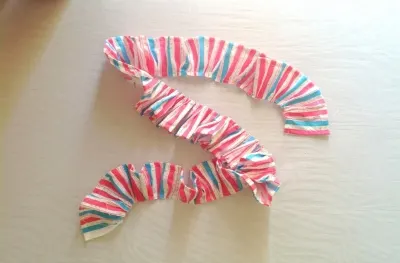
Pull the thread from the bobbin gently and gather the ruffle (picture for illustration purpose).
Next, we attach the ruffle to the lower edge of the dress. Adjust the gathering in the ruffle to make it uniform and to match it with the lower edge of the dress.

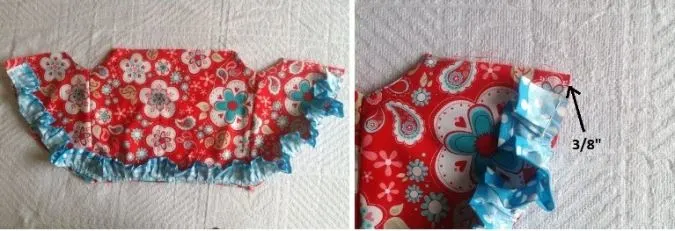
Keeps the ruffle along the lower edge of the dress, with the right sides together, aligning the raw edges and pin. Note that 3/8 -inch is left at the top of the back piece on both sides while pinning (this is the part that goes into the neck strap).
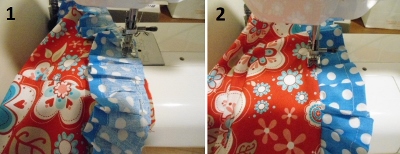

1) Sew the ruffle to the bodice, removing the pins as you go. Zigzag to prevent fraying. 2) Turn over to the right side and topstitch along the seam line of the dress and ruffle to make it neat and crisp.
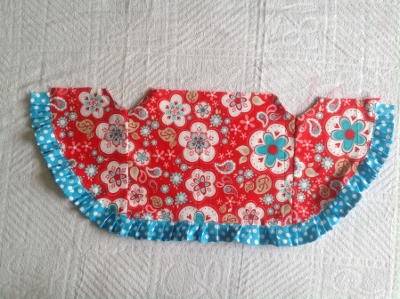

Our dress would now look like this.
We need to attach the necktie. For that, we need to gather the front and back neckline first. The table below gives the lengths of the neckline after gathering.
Table-4


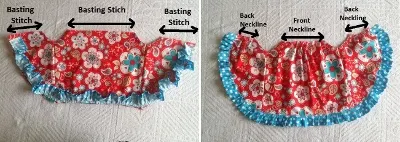
Sew a basting stitch along the front and back neckline as marked in the first picture. Gather them to a length given in the table-4 above.
Let’s do the neck-tie. Take the fabric strips for the neck-tie, referring to the table-3 above. Join them along the shorter sides (just as you did for the ruffles) to get the desired length.
Next, we finish the edges of the tie.
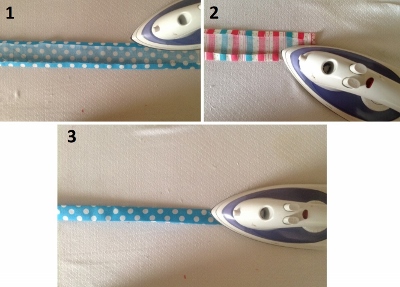

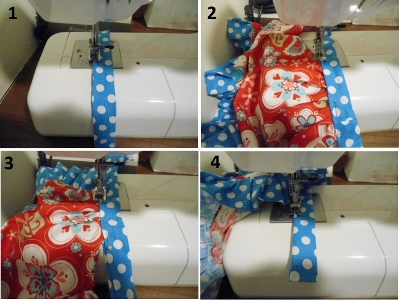
1) Fold the two longer edges towards the wrong side by 3/8 -inch and press. 2) Repeat the steps on the two shorter sides (second picture for illustration purpose). 3) Fold it in half lengthwise and press to set.
Let’s attach the tie to the dress. For that, we mark the center of the tie and the center of the front neckline.

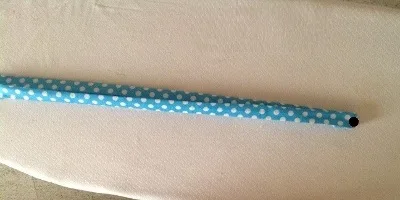
Fold the tie in equal halves and mark its center as shown by the black mark above.
Mark the midpoint of the front neckline by measuring with a tape.

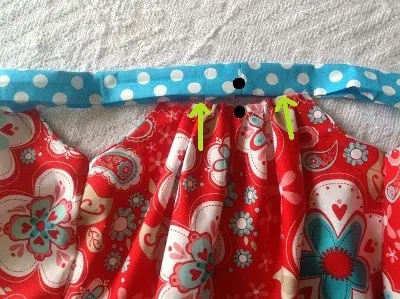
Insert the front neckline into the tie by 3/8 -inch, matching the marked points and pin.
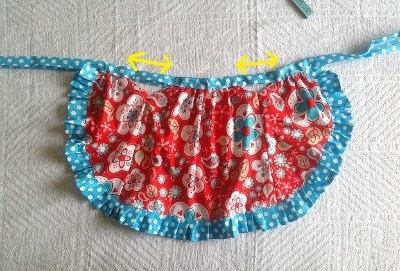
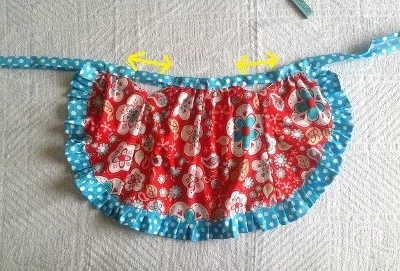
Leave a small length of the tie for the armholes (denoted by the yellow lines), referring to the table-4 above, and insert the back neckline into the tie on either side and pin. Keep pinning till the entire back neckline is inserted into the tie.

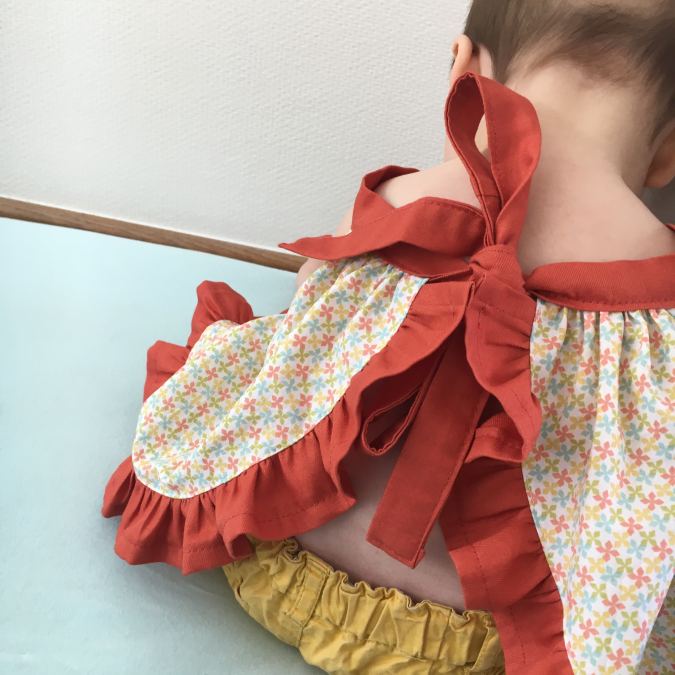
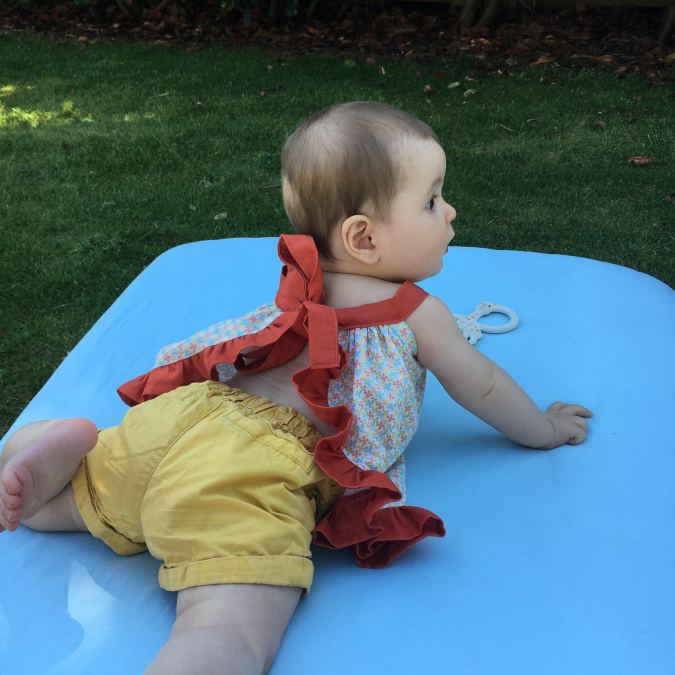
Start sewing the tie shut from the shorter edge and continue sewing till the whole neckline is sewn into the tie and till the tie is sewn shut till the other shorter edge.
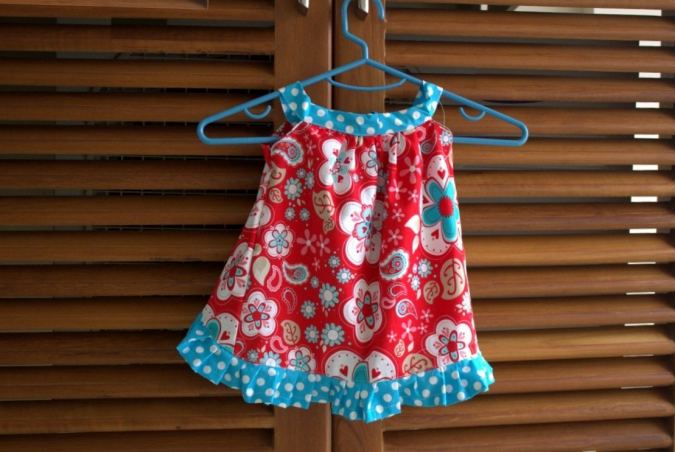
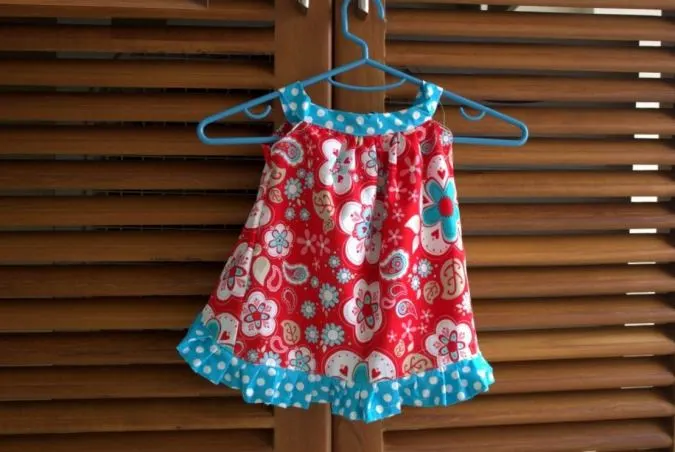
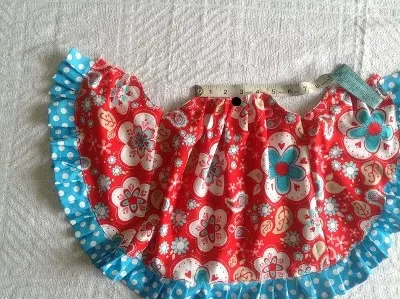
Our pinafore is ready!
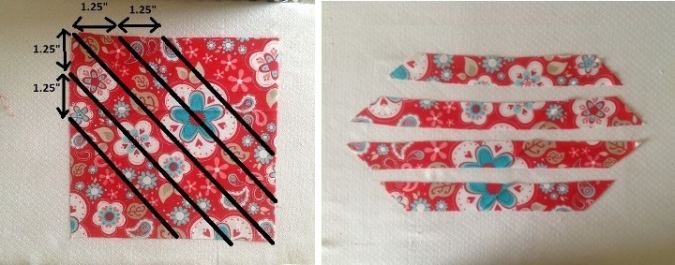

Cut a 10 inch by 10-inch square, keeping the selvage as one of the sides (selvage is the side of your fabric which does not fray. You sometimes see the manufacture’s name printed on the selvage). Draw lines parallel to the diagonal side at a width of 1& ¼-inches as seen in the picture. Cut along the lines to get 4 pieces of bias tape.
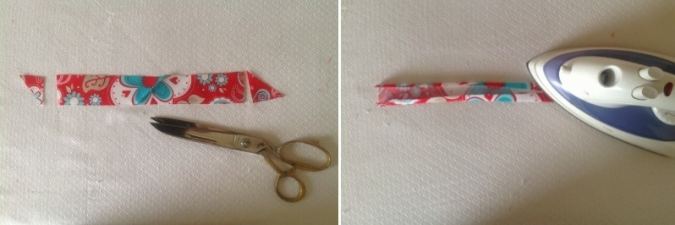
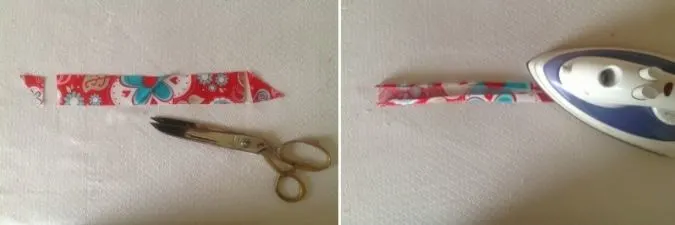
Take one of the pieces, cut off its two slanting edges, and make them straight. Fold the two long sides in towards the wrong side by 3/8 -inch and press. Your single fold bias tape is ready.

Have a look at the webstory for the post here: DIY Ruffled Pinafore for Baby/Toddler
Pin it for later here,


Sheryl
Tuesday 31st of March 2026
Cute pattern, but I modified the pattern for a 1st birthday & she already walking: cut the bodice width 2” (less bulky) & 2” shorter. Cut armhole depth 11/2” deeper by marking placement of top & bottom of arc cut out, then moved down & pinned the pattern. At the end of the arc cut, draw with a straight edge connecting to 1st top marking & cut. I adjusted the neckline piece at the arm hole opening to 1 1/2” & made the back closure velcro with bow on outside overlap to prevent a choking hazard if accidentally caught on latch, handle, knob, furniture, toys or play equipment.
Shawna
Tuesday 6th of June 2023
are your measurements for the ruffles in inches? its a beautiful little dress and I can't wait to make it for my granddaughter!
Surayya
Monday 12th of June 2023
Yes, the measurements are in inches.
Denise Johnson
Friday 28th of May 2021
Love it
Blessed Nana
Wednesday 17th of June 2020
Very cute, but seems to be to big for my granddaughter though the whole neck, shoulders. So I added a little bit of elastic in the front and back to help pull it together a little tighter. Hopefully it will help. Thanks so much for sharing this wonderful pattern!!
Sheryl
Tuesday 31st of March 2026
@Blessed Nana, Yes, my exact thoughts on adjustments needed when I looked at and measured pattern pieces before cutting them in fabric. So, I studied the photos of the baby models & decided it was hanging too loosely around the neck & to bulky around the bodice. Arm holes also looked tight, even with the required inches of circumference. I think it is because it uses a flat piece at the neckline to complete what should be a rounded top of a regular arm hole. But yes, my project turned out being adorable with matching diaper cover.