Baby blankets with hood are of course needed to keep your little one warm and cozy. But who will not love a fancy baby blanket with animal ears? It would definitely make your little one more cuddly and cuter.


I love the sight of a little one covered in cozy hooded blankets with animal ears. The long rabbit ears hanging on the sides, the naughty cat ears or the cuddly bear ears, all these are indeed pleasing to the eyes of the beholder.

Baby blankets and hoodies with animal ear seem to be the “in thing” now and the stores are stuffed with these things. But why spend a fortune on these when you can make one very easily and quickly?


Blankets do not involve a lot of sewing and making the animal ears is easy when you have the templates. Moreover, when you make a blanket all by yourself, you can experiment with different fabric textures, prints, and colors to create your own.


Earlier, I had made a reversible blanket with hood. It is still one of my most sought after patterns. This blanket pattern is more fancy and cuter compared to my earlier blankets.
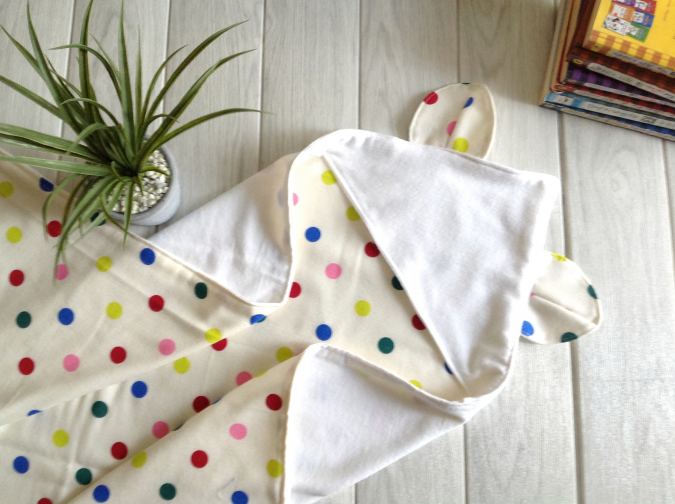
Here I have made simple ears that have just two layers of fabric. You can add an extra layer of fleece or batting to make the ear fluffier and more three dimensional.


Sew Baby Blanket with Animal Ears
The material requirements given below is for a finished blanket of size 35” x 35”. You may increase or decrease the amount of fabric depending upon the size you choose to make.
Materials Required:
Flannel, fleece, or medium-weight cotton fabric for the blanket front, hood, and ears- 1& 2/3 yards.
Again, flannel, fleece, faux fur, or medium- weight cotton fabric for the blanket back, hood, and ears- 1& 2/3 yards.
Sewing Notions.


Gather your supplies.


Cut the blanket front and back pieces to 36” 36” dimensions.


Cut the hood pieces into triangles with sides measuring 13.5”. You can cut one from the front fabric and the other from the back fabric.


Use the ear template and cut two sets of ear pieces on the fold, from both the fabrics.
Let’s start sewing.
- Seam allowance is ½- inch unless otherwise specified.
We start with the hood.


Layer the hood pieces with the right sides together and the edges aligning. Pin the long edges together.


Sew along the pinned edge to join.


Turn over to the right side and press ( make sure to keep the iron slightly warm and not hot. This is to prevent the fleece from melting).


Topstitch along the pressed edge to make it neat and crisp.
Next, we sew the hood to the blanket. Here we are using plain fleece fabric as the blanket top. So, we keep the printed side of the hood facing up.


Place the hood along one of the corners of the blanket, aligning the raw edges and pin along the two raw edges.


Sew along the pinned edges to join.
We move on to the ears.
- Here I have opted for rabbit ears. If you opt to make cat ears or bear ears, refer the steps at the end of this tutorial.


Place one plain and printed earpieces layered, with the right sides together and aligning the edges. Pin the two pieces along the curved edges. * Note: If you wish to add an extra layer of fleece or batting, place it below the above two pieces while pinning.


Sew along the two curved edges to join.


Clip the curves and cut the corners.


Turn over to the right side and press.


Next, keep the printed side of the ear facing up. Fold the two curved edges towards the center, overlapping slightly at the lower edge. This would give dimension to the ear ( here you can see that I have topstitched along the edges of the ear, which has made it lose some of its dimension. So, I decided to cancel this step).
Repeat with the other ear pieces.
Let’s sew the ears to the blanket.


Place the lower raw edge of the ears along the raw edge of the hood, about 2- inches from the corner and pin. * Note that the ears are placed with the wrong side up and are facing inwards while pinning.


Sew the ears to the blanket.
Let’s sew the back of the blanket to the front.


Take the back blanket piece and place it over the front blanket with the right sides together and edges aligning. The hood with the ears is now sandwiched in between the blanket front and back.


Sew the blanket front and back together, leaving a gap of about 5- inches to turn it inside- out.


Clip the corners and trim the edges to reduce the bulk in the seam.


Pull the right side out through the opening.


Keep pulling till the right side of the blanket is turned completely out.


Poke the corners out, tuck the raw edges of the opening in and pin it closed.


Press with a warm iron.


Topstitch close to the edge to make the blanket look neater and to sew the opening shut.


Our hooded baby blanket with animal ears is ready!
If you opt to sew the blanket with bear or cat ears, follow the few steps below.


After the ear is done, fold it in half, with the right sides together and aligning the edges. Sew a curved line from the bottom edge till ½- inch from the top as shown above.


Open and the lower edge of the ear will look uneven like this.


Trim the lower edge to make it straight and our ear is done.
Find the webstory for the post here, DIY Animal Ear Baby Blanket Pattern and Instructions
Pin it for later:
![]()
![]()
Donna
Saturday 29th of October 2022
Do you have dog ears like snoopy?
Surayya
Saturday 29th of October 2022
I am sorry, currently I do not have dog ears for the pattern :(
Lesley
Saturday 26th of February 2022
I made this with micro fleece and a cotton jersey. I found it tricky as both fabrics had stretch. It did turn out really well, but next time I may use flannel fabric or other non stretch fabrics as that would be easier to handle.
Many thanks for the great patterns.
sharon
Friday 28th of August 2020
I really love the pattern! You did a beautiful job! Thank you.
Carol
Friday 28th of August 2020
Will try & resize this for the 18" doll- looks awesome
Sandra :)
Thursday 29th of October 2020
Oh that's such a fun idea!!!!!!
Surayya
Friday 28th of August 2020
That's a nice idea!
Petra
Friday 13th of March 2020
Looks so nice and easy. Will go get material and sew a few for the new grandchildr on the way