
Free Baby Booties Sewing Pattern
Well, its a baby pattern again. I have made a diaper cover, a bib, and now its the time for a cute pair of booties for those tiny little feet. Made in matching fabric with his/her dress, nothing can look cuter on your little munchkin than these.
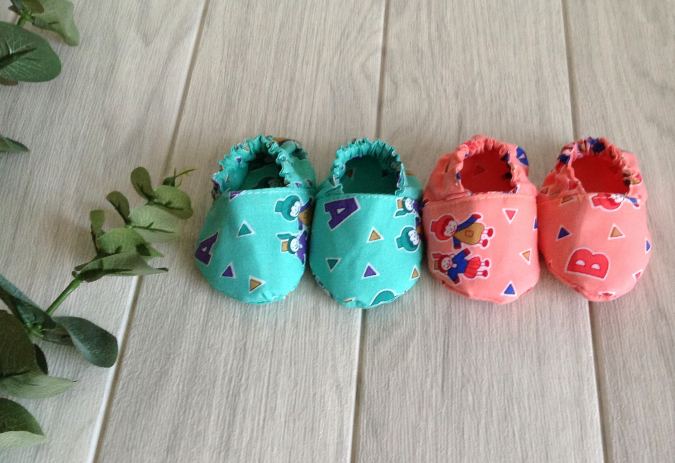
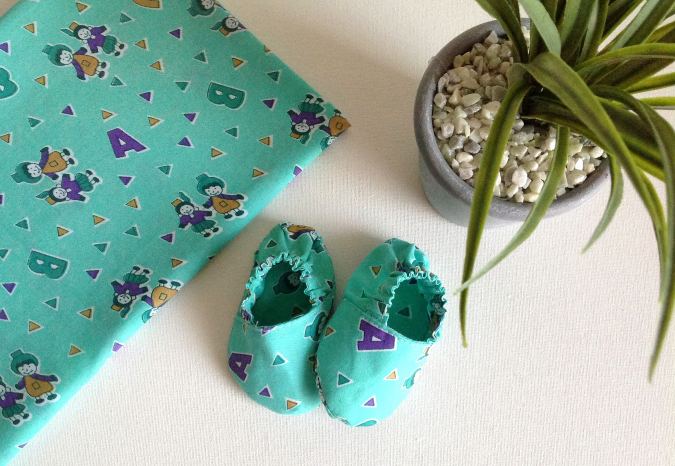
This fabric baby booties pattern gives you the freedom to choose the type, print, and color you like. For the summer months, you can choose canvas for the outer and heavyweight cotton for the lining.
You may also use cotton or corduroy for the outer. Sewn-in fleece for the lining, these booties are a perfect pair to keep those tiny feet warm and cozy during the winter months.
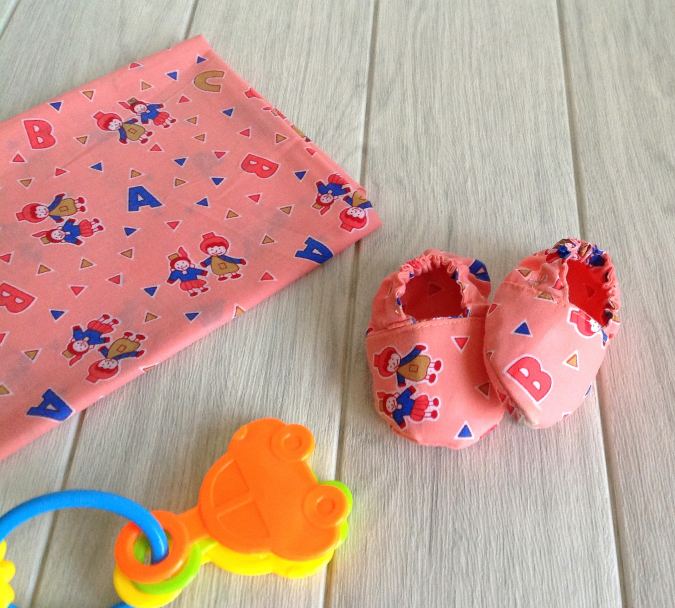
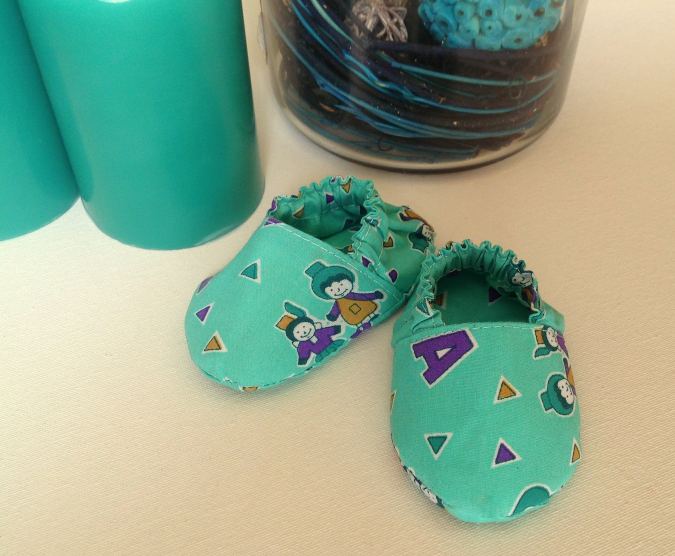
This baby booties sewing pattern is meant for babies who have not started toddling. If you wish to make one meant for those unsteady steps, use a jiffy grip for the outer sole.
You can also use an extra layer of felt in between the lining and outer sole for that extra thickness.
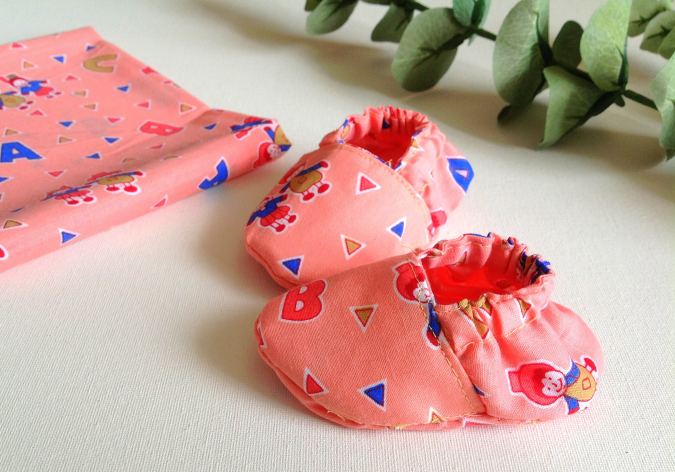
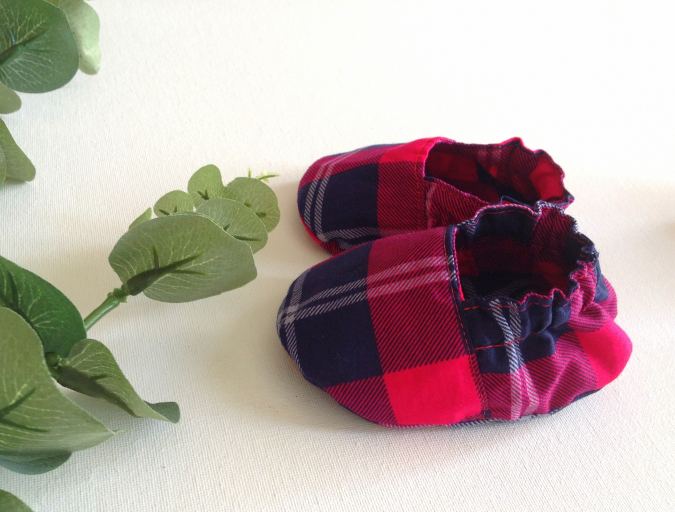
This is an easier version of one of my earlier fabric booties pattern with straps and other embellishments. In this tutorial, I have made it simpler for beginners and free for all to sew! Templates are available from newborn to 12 months in size.
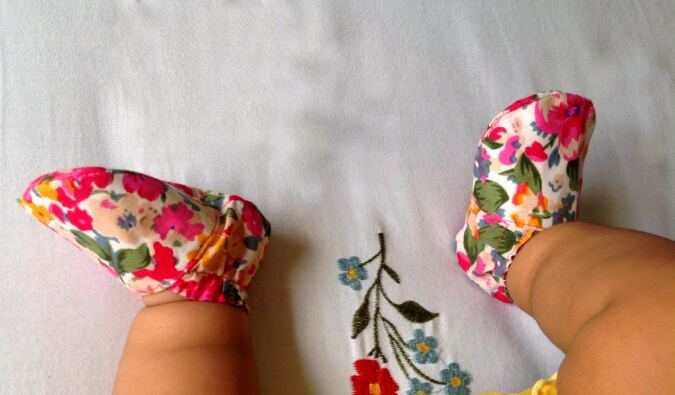
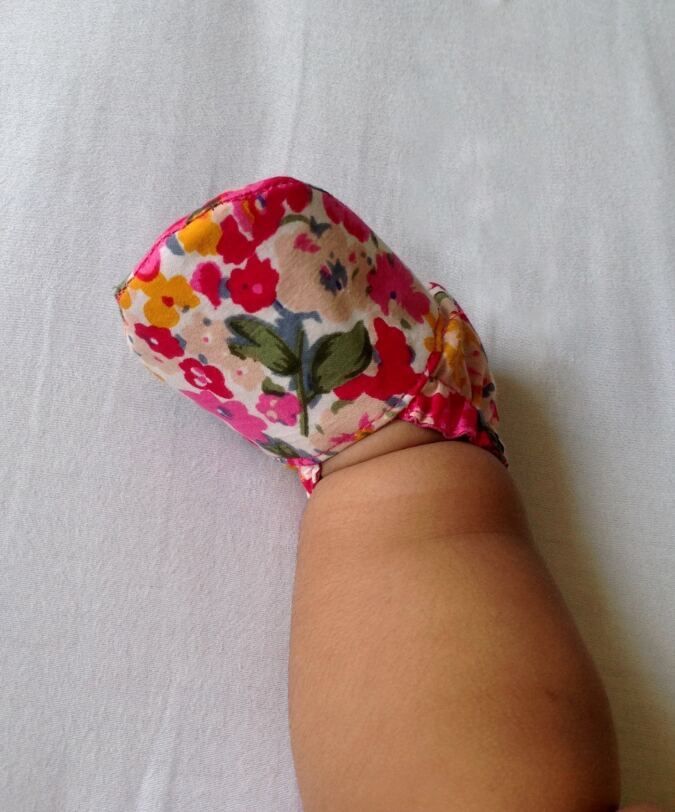
Here are a few pictures of our little model wearing these adorable baby booties. Aren’t they just the cutest?
If you love to see more of my baby patterns, find them below,

Reversible Baby Bib in 5 steps.
Reversible Baby Blanket in 15 Minutes.
Reversible Hooded Baby Blanket.
Baby Booties Sewing Pattern
Materials Required:
- Cotton fabric scraps for the outer sole, heel, and upper.
- Cotton fabric scraps in a coordinating (or contrasting) color and print for the sole, heel and upper lining.
- Small pieces of interfacing for the sole and upper.
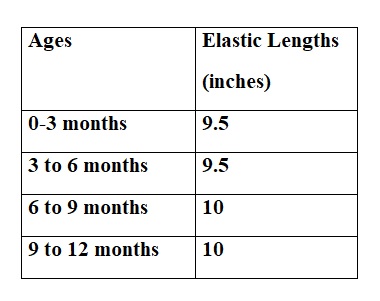
- 3/8-inch elastic- Requirements specified in the table-2 below
- Small pieces of jiffy grip (optional).
- Felt Pieces (optional).
- Ornamental buttons (optional).
- Sewing Notions.
- Pattern Template. * Enter your e-mail address and click the subscribe button to start downloading the template automatically.
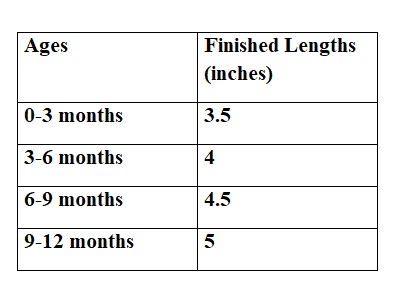
Finished Lengths
Table-1
Elastic Requirements
Table-2
I suggest you read the entire pattern before starting to get a general idea.
The seam allowance is 3/8 -inch throughout unless otherwise specified.
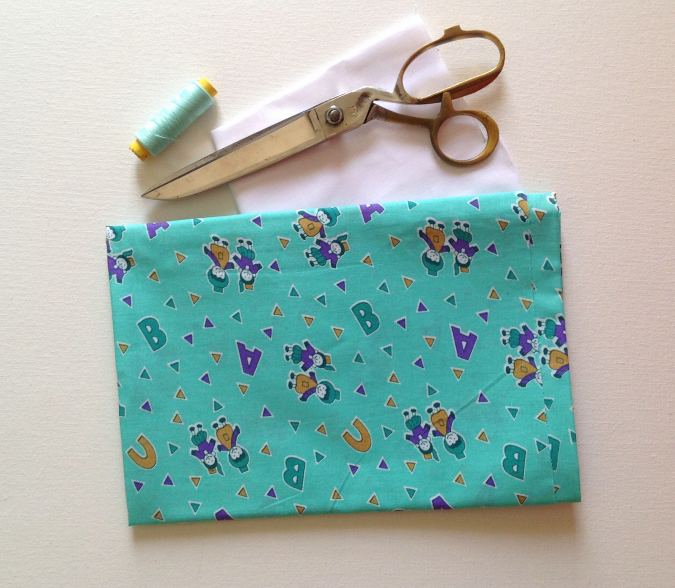
Take the fabric and the interfacing required for the booties’ outer and lining.
Cut the pattern templates for the upper, sole and heel at the end of this PDF.
You will need:
- Two uppers from the main piece, two from the lining piece and two from the interfacing pieces.
- Two sole pieces from the main fabric, two from the lining and two from the interfacing.
- Two heel pieces from the main fabric and two from the lining.
Keep the templates on the fabric, mark and cut out the pieces. * Note that you will need to transfer the black dots to the pieces.

For the right sole piece, you will have to flip the template horizontally after marking the left sole piece.
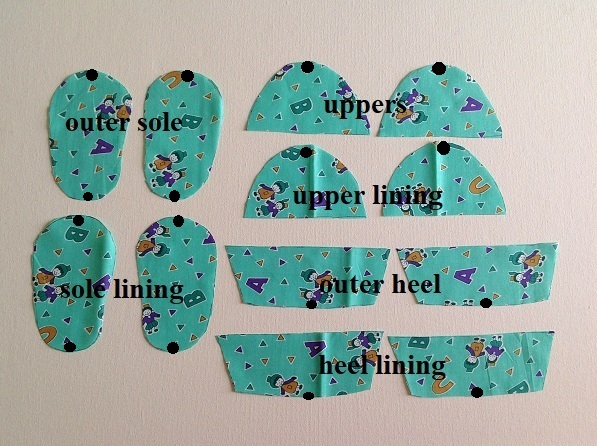
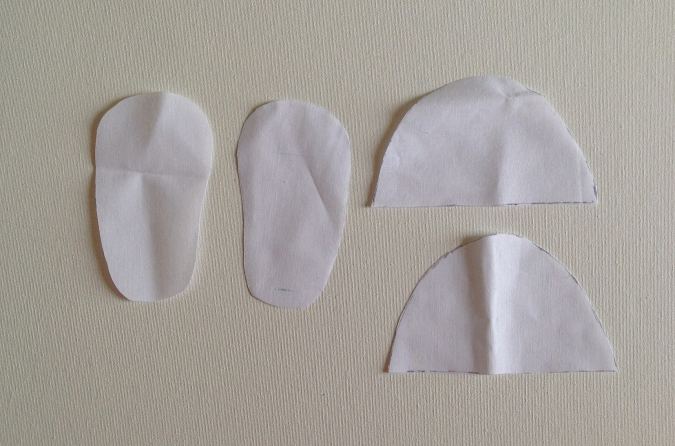
You will have your pieces like these.
Sewing
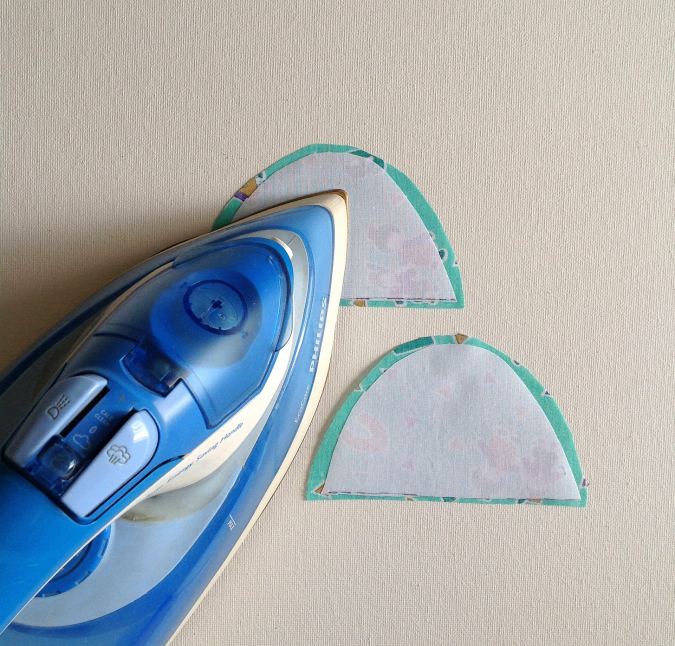
Fuse the interfacing to the wrong side of the main upper pieces, following the manufacturer instructions. Make sure to leave equal space all around while fusing.
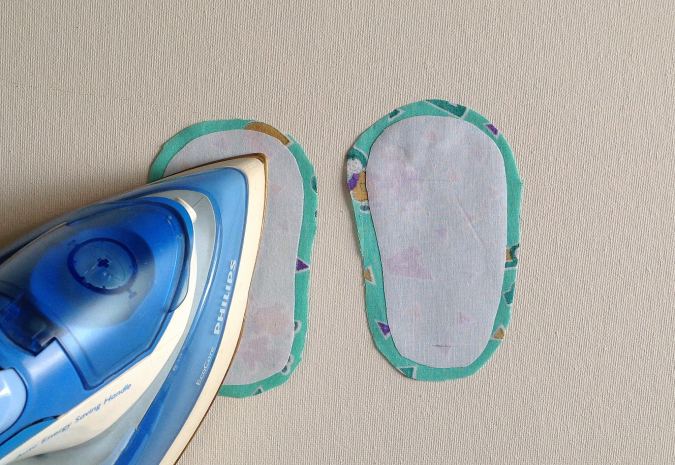
Repeat the same on the two sole lining pieces.
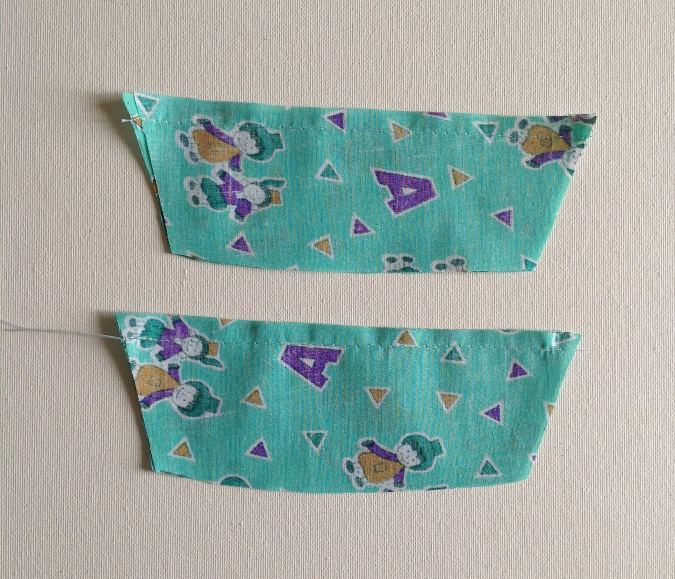
Take one heel piece and lining and layer them with the right sides together, aligning the edges. Sew them together along the straight upper edge. Repeat with the other set.
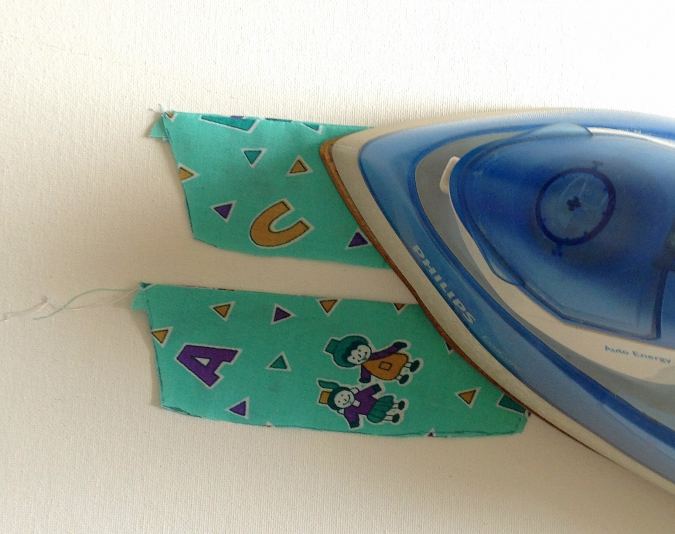
Turn over to the right side and press.
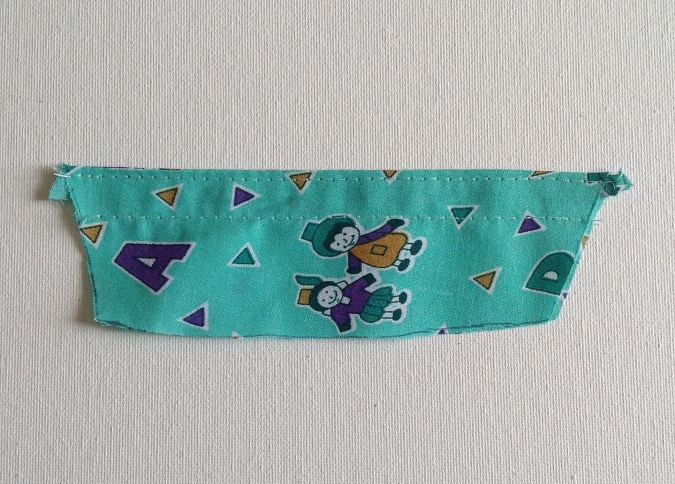
Topstitch along the upper edge. Next, sew a straight line, ½-inch below the upper edge to make a casing for the elastic.
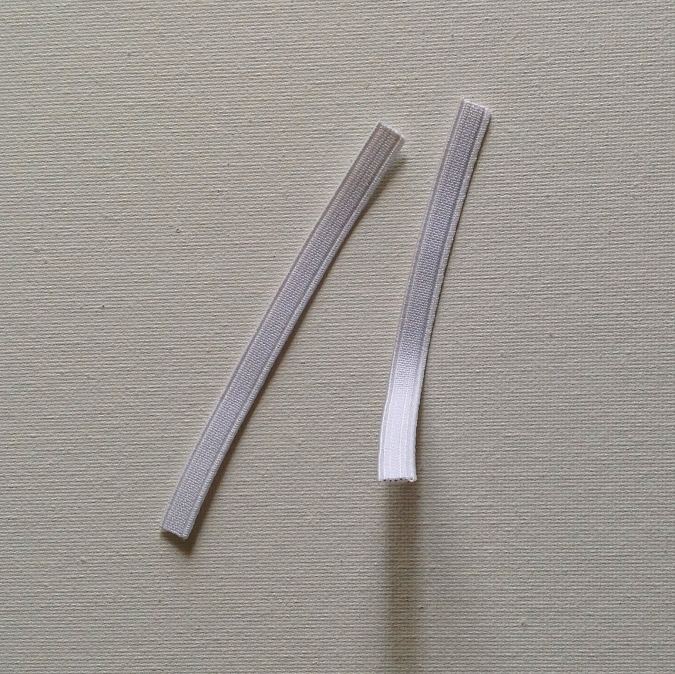
Take the required length of elastic, referring to the table-2 above and cut it into two equal halves.
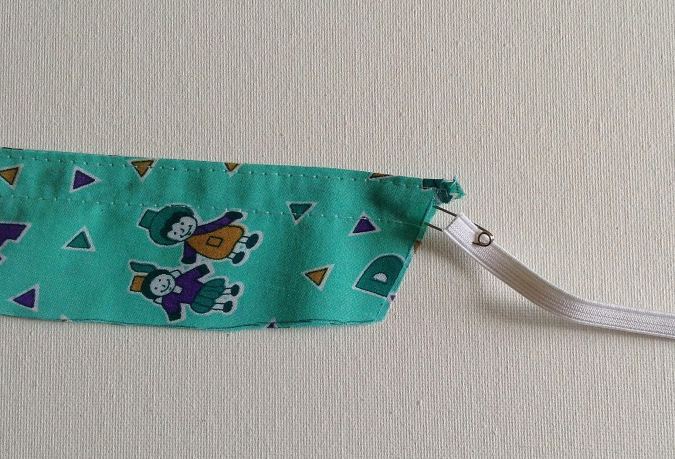
Take one of the elastic pieces and insert them through the casing in the heel using a safety pin.
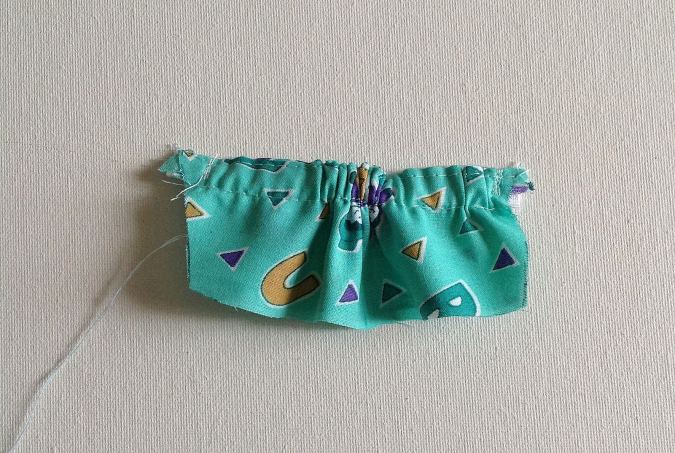
Secure the ends of the elastic on both sides by sewing back and forth a few times.
Repeat the steps on the other heel piece, lining, and elastic.
Next, we attach the heel piece to the main upper piece.
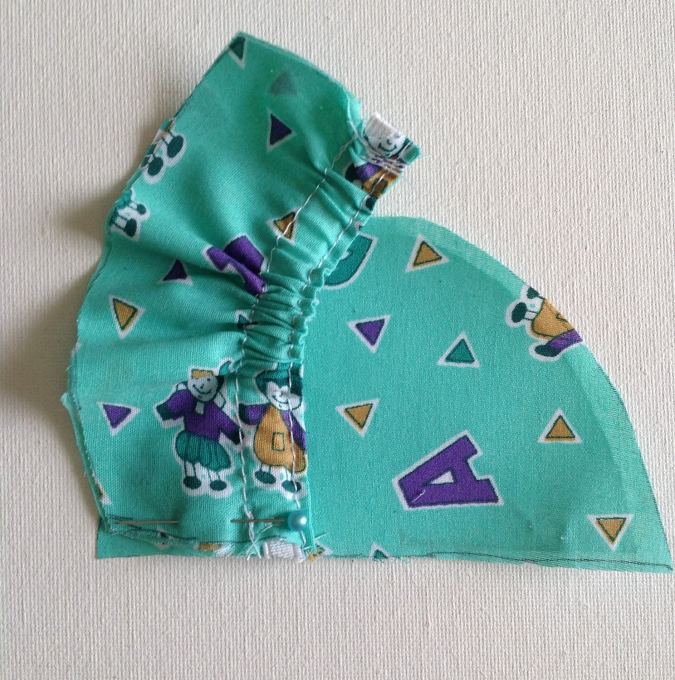
Keep the straight shorter edge of the heel piece, aligned with the straight edge of the main upper piece, with the right sides together and pin. Note that the elasticized edge faces the center.
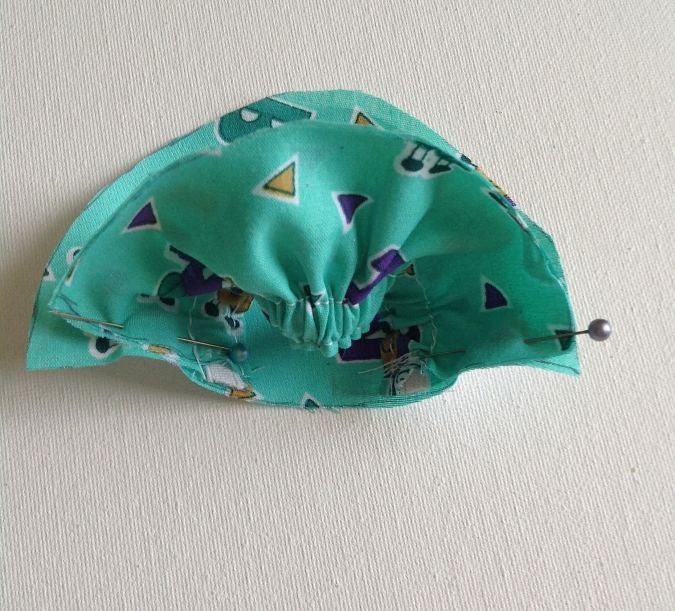
Do the same with the other shorter edge of the heel piece and pin.
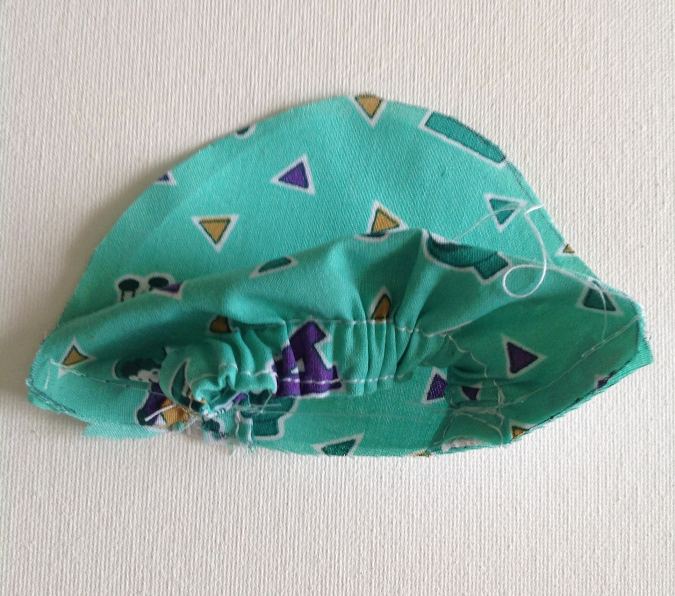
Sew the two pieces together along the pinned edges.
Let’s attach the upper lining to the main upper piece.
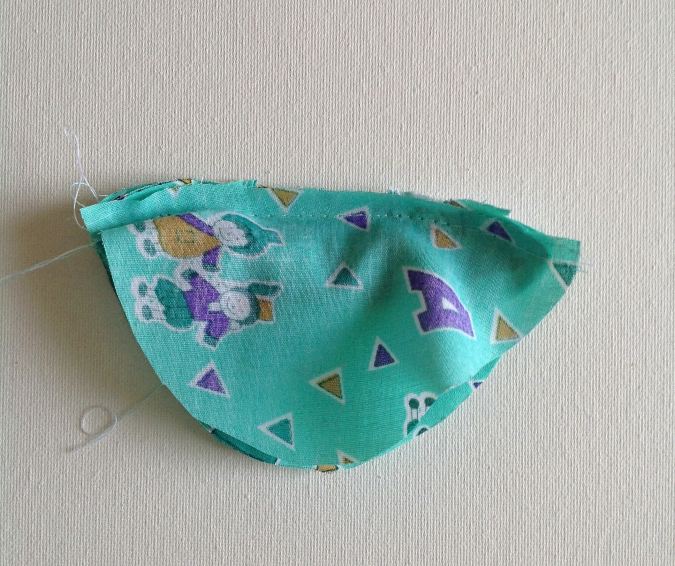
Keep the upper lining over the done upper, with the right sides together and aligning the edges. Sew along the straight edge, leaving a ¼-inch seam.

Turn the lining over to the right side, pull out the heel piece tight and you will see that your bootie has started taking shape.
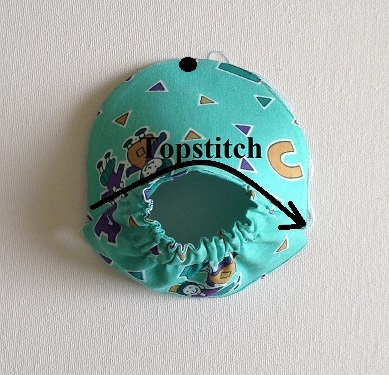
Topstitch along the straight edge of the upper to make it neat and crisp.
Next, we attach the sole lining to the finished upper.
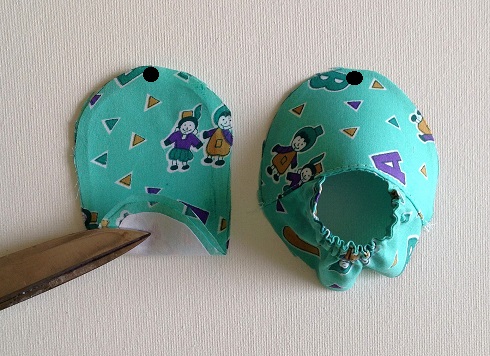
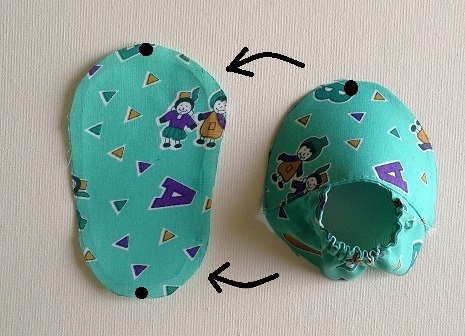
Place the sole lining with the right side facing up and keep the upper over it matching the center markings (dots).
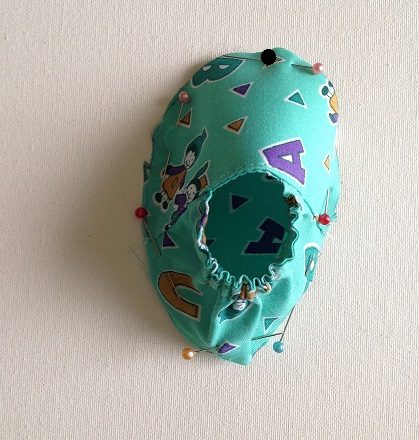
Pin all around, aligning the edges.
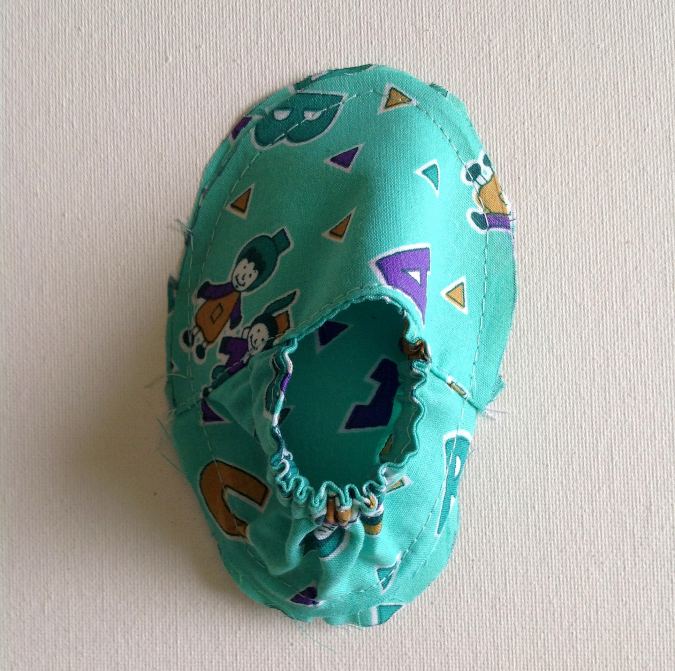
Sew around the edge, removing the pins as you go.
- If you would like extra thickness for your sole, you may now cut the felt sole in the size of the main sole piece, keep it under the lining and sew.
Let’s now attach the outer sole piece to the booties.
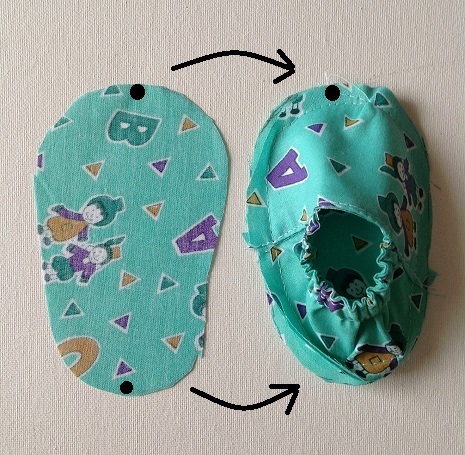
Take the relevant outer sole piece and keep it over the done upper piece, with the right sides together and matching the center markings (dots).
Pin all around, taking take care to align the edges.
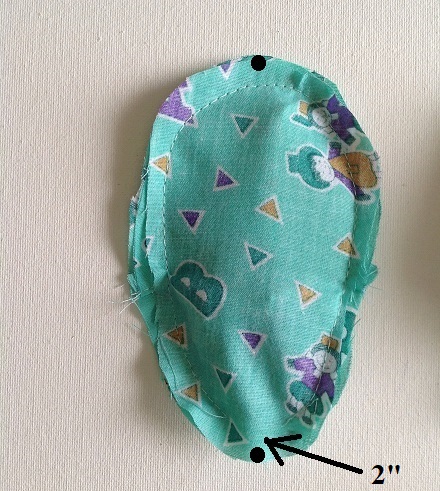
Sew around the edge, leaving a small gap of about 2-inches to turn it inside-out.
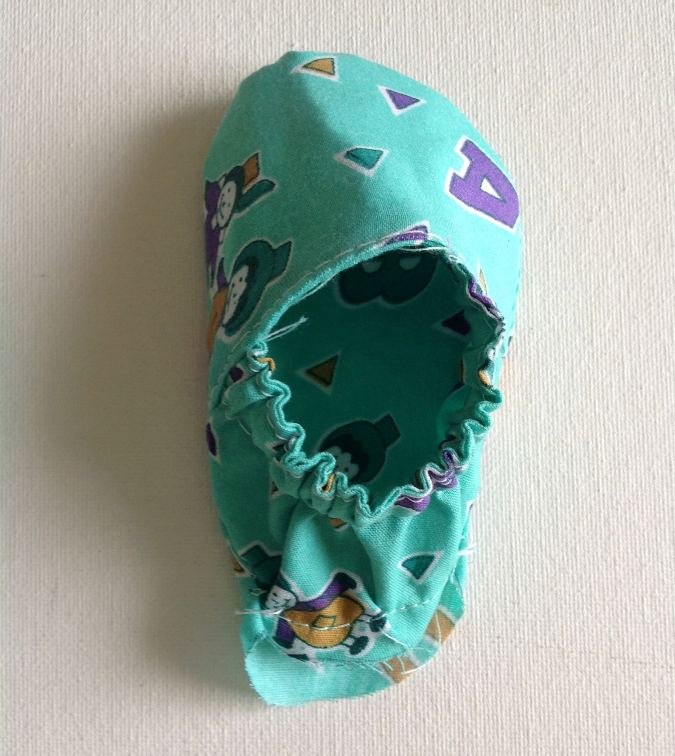
Turn the bootie inside- out.
Next, we need to sew the opening closed.
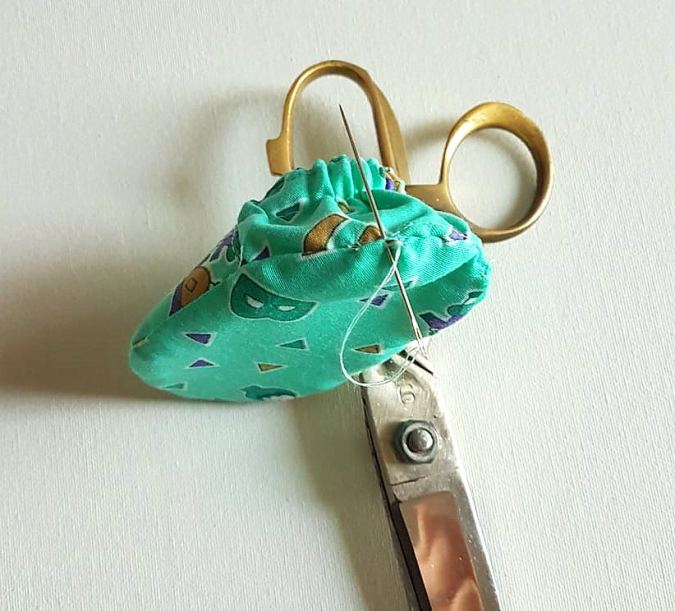
Hand-sew the opening closed using slip-stitch, tucking the raw edges neatly in.
Repeat all the above steps on the other pieces to get the other bootie done.
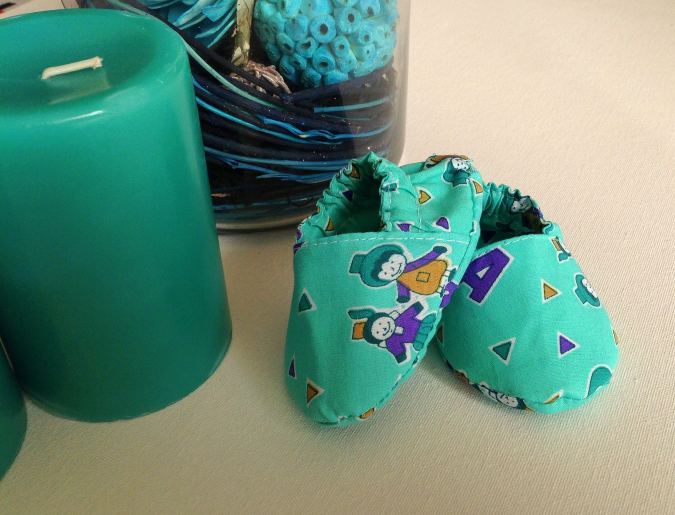
Our booties are ready.
Have a look at the webstory for the post here: The Best Free Pattern for Handmade Baby Booties
Pin it for later here,
Wow it is really helpful thanks
Look easy .. gonna give it a try!
Thanks. Great pattern! Made the 0/3 for a preemie just used a slightly shorter elastic piece and also gathered the top piece and added a removable stitch that way baby can grow into them. Only thing the momma has found that will stay on babys tiny feet
could you please share with me the specific kind of interfacing you use?
I have used Pellon fusible interfacing. You can use any medium- weight fusible interfacing.
thank you! 🙂
I cannot print the template. It’s a blank page????
Your Adobe reader might need an update. Try updating it.
excellent easy to follow tutorial and pattern, very pleased with how mine came out! I wish I could attach a photo!
Thanks, I am glad you like it!
Bueno lo intentaré para mí muchacho. De 8 meses 😊
Fabulous pattern thank you. I find it much easier to sew the opening closed at the end if you leave the opening to turn on the side rather than the heel.
Hi there i ordered the pattern but didnt get the email yet
The pattern has been e-mailed.
Can this be made without the interfacing?
I don’t recommend making it without the interfacing as the booties wouldn’t be able to hold the shape. Otherwise, you may try using a felt sheet to replace the interfacing to hold the sturdiness.
great idea thank you want to do for baby dolls
Sorry having trouble with downloading this pattern too – I have checked that I have the latest adobe update – and when I enter my email address it just opens a new google page….?
Was able to download the diaper pattern as a red download button appeared after I entered my email details – am I missing something on the baby shoes and dress pattern…?
You should be able to download the pattern pieces from the new page. Try refreshing your browser.
HOw long after payment is made for my dowload
The pattern would be e-mailed in PDF format within 24 hours of payment.
@Surayya, is it A4 size I’ll use in printing?
Yes, you need to use an A4 size paper for printing.
I purchased the pattern but have not received the email any help is appreciated!
The pattern has been e-mailed. Please check your inbox.
Purchased the pattern and never received the download.
The pattern has been e- mailed in PDF format. Kindly check your spam folder too.
Love these bibs and baby shoes.
These turned out just darling! I agree that you should leave the side seam open rather than the heel for turning and hand sewing.
Thanks for the pattern!!
Sew Cute! 😊
I found these booties so adorable and easy that I made four different pairs to include on a diaper cake for a surprise baby shower for a coworker. The booties AND your bonnet pattern (of which I made two) were the most talked about portions of the diaper cake. I’m starting on the newly released bubble rompers for another expectant mom. Thank you for making these adorable patterns and easy instructions available to us! I’ll try to attach a picture. Unable to attach any sorry!
Thank you so much for your kind and thoughtful message!I’m delighted that you’ve enjoyed the patterns and instructions, and I hope you have a wonderful time making the bubble rompers as well.
Love these simple. Cradle shoes
thank you
Why do you use 3/8 inch seam allowance instead of the standard 1/4 inch?