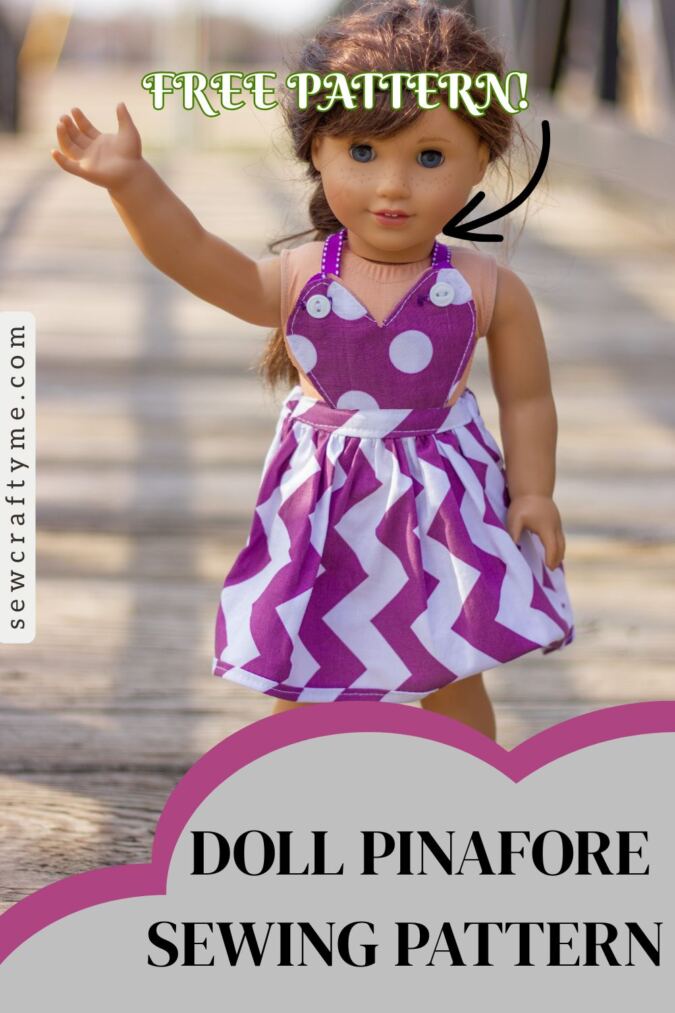
Give your little girl’s AG doll a gorgeous makeover, with this doll pinafore sewing pattern. This is an easy pinafore pattern, with a heart-shaped bib.


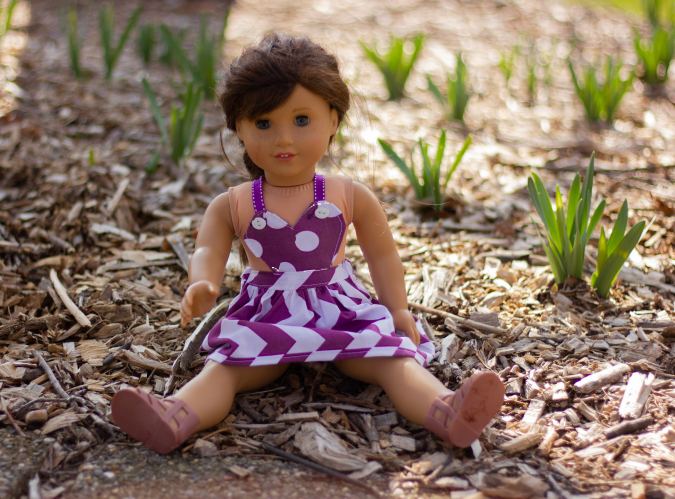
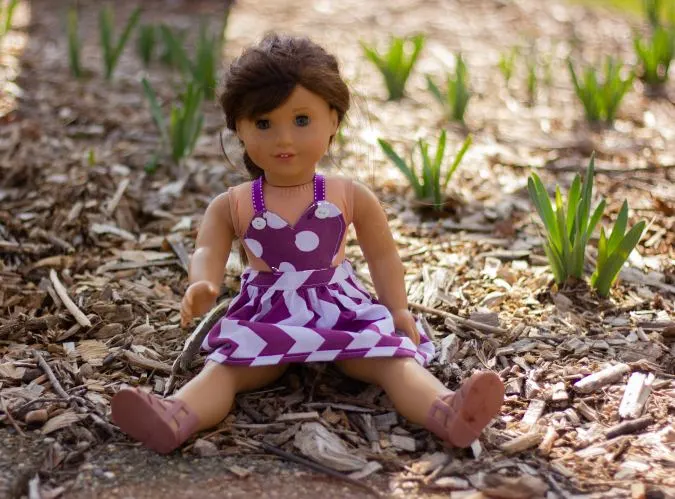


This vintage style pinafore sewing pattern has an elasticized back and a flat front for a perfect fit. Use different fabrics for the bib and skirt and add embellishments like lace and ricrac to sew a variety of clothes for your girl’s dolly!


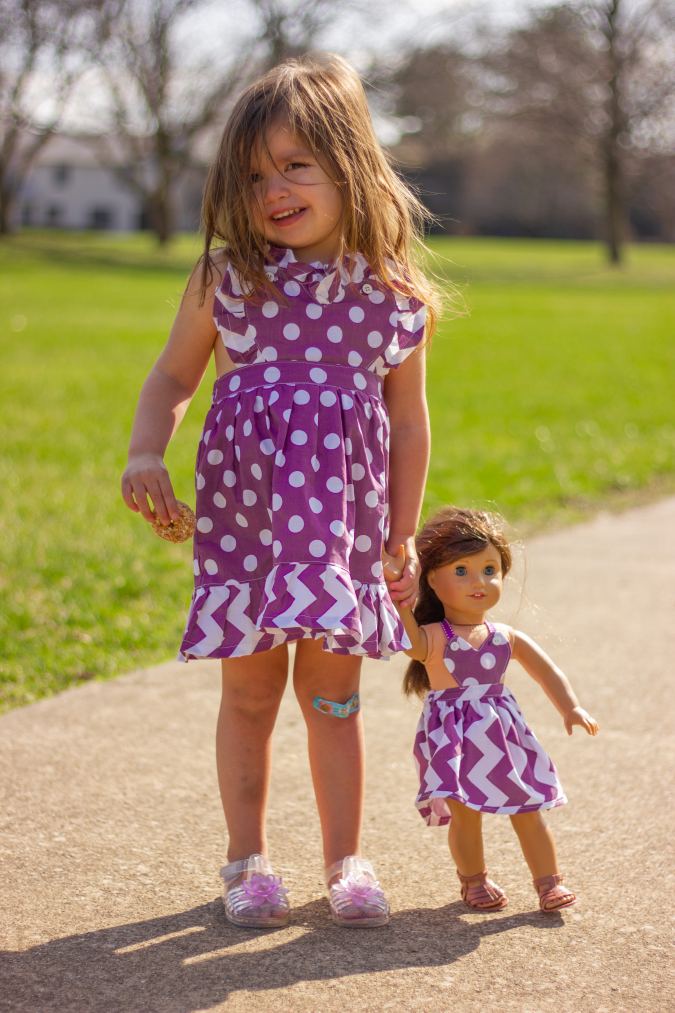
This is a miniature replica of my girl’s Scarlett Heart Pinafore Pattern. So, how much happier can your little one get than sewing a matching set of dress for her and her dolly?


If you would love to see more of my AG doll patterns, find them here:
Midi/ Maxi Dress Sewing Pattern for AG Dolls
You can follow the written pattern below or purchase an Ad-free PDF for just $2.50, Add to Cart here. The pattern will be e-mailed to you.
Doll Pinafore Sewing Pattern
Materials Required.
- Medium weight cotton fabric scraps for the pinafore.
- 3/8-Inch elastic for the back skirt- 6-inches.
- Buttons for the strap- Two.
- Sewing Notions.
- Bib Template.
The fabrics shown here are only for illustration purposes and as such may vary from the original.
The seam allowance is 3/8-inch unless otherwise specified.
I suggest you read the entire pattern once before starting to get a general idea.
All seams are to be finished by zigzag or serger.
Cutting Dimensions.


Front Skirt Piece- 12” length and 6.5” width
Back Skirt Piece- 12” length and 6.5” width
Front Waist Band- 6.5” length and 1.75” width
Back Waist Band- 12” length and 1.75” width
Back Strap- 8.5” length and 2” width (cut 2)
Sewing


Take the fabric required for the pinafore.
Cut the template for the pinafore bib.


Fold the fabric and place the template on top of it. Mark and cut around the template to get the bib piece and the bib lining.
Cut your skirt, waistband, and strap pieces, referring to dimensions above.


You should now have a pile similar to this.


Next, place bib lining, right sides together, on top of the bib. Align raw edges and pin carefully.
Sew around the bib, removing the pins as you go, leaving the bottom edge open for turning the bib right side out.


Clip the curves to reduce the bulk in the seam.


Turn the bib right side out through the opening.


Press to make it neat and crisp. Topstitch around the edge of the bib.
Zig zag the lower edge to prevent fraying.
Next, we’ll gather the skirt front. For that, turn the upper thread tension of your machine to zero and the stitch length to the longest to get a basting stitch.


Sew a basting stitch along the upper raw edge of the skirt front, leaving a long tail of thread, 6 to 7– inches long to pull and gather it.

Pull the thread from the bobbin gently and gather the skirt front.
Let’s do the front waistband


Take the front waistband, fold its two longer edges towards the wrong side by 3/8-inch and press to set. Fold it in half lengthwise and press once more.
Take the back waistband and finish it in the same way as the above.
Next, we attach the front waistband to the skirt front.


Adjust the gathering in the skirt front to make it uniform and to match the length of the front waistband. Open one of the folds of the waistband. With the right sides together, line up the raw edge of the waistband along the upper raw edge of the skirt and pin.


Sew along the crease of the opened fold to attach the waistband to the skirt. Keep removing the pins as you sew.


Turn the waistband over to the wrong side of the skirt, along the center crease and pin, keeping the fold along the other edge intact.


Sew along the edge of the fold, removing the pins as you go.
We move on to the skirt back. Here we need to sew a casing for the elastic.


Take the skirt back, open one of the folds of the back waistband and align it along the upper edge of the skirt back, with the right sides together and pin. Sew along the crease at the edge, removing the pins as you go.


Turn the waistband over to the wrong side of the skirt, along the center crease and pin, keeping the fold along the other edge intact.


Sew along the edge of the fold, removing the pins as you sew.
The casing for the elastic is ready.


Take the back elastic and insert it through the elastic casing, using a safety pin. Secure the ends of the elastic by sewing back and forth a few times.


Your skirt back should look similar to this.
Next, we attach the finished bib to the skirt front. We need to mark the center of the lower edge of the bib and the upper edge of the skirt front.


Fold the bib in half aligning the edges and mark the center of the lower edge, as shown above.
Similarly, fold the skirt front in half and mark the center of the upper edge.


Place the bib above the skirt front, with the right side of the bib, facing the wrong side of the skirt and the marked points in line. Pin the bib to the waistband, with its lower edge extending the waistband by 1/8-inch.


Topstitch on the right side of the waistband, along its upper and lower edge to secure the bib to the skirt.
Next, we need to do the back straps.


Take the strap pieces, fold the two longer and shorter edges by ½ -inch towards the wrong side and press to set.


Fold it again in half lengthwise and press once more.


Sew the strap shut along the open edges.
We need to attach the straps to the pinafore. Let’s mark the points on the back skirt of the pinafore, where the straps are to be attached.


Using a measuring tape, find out the center of the elasticized back and mark the point. Measure 2-inches from the point, on either side, keeping the elastic stretched and mark once again. This is where the straps are to be attached.


Take the straps and keep its shorter edge below the waist elastic, by 3/8-inch, at the marked point and pin. Sew the straps to the pinafore at the top and base of the waist elastic. Make sure to reinforce the stitches, by sewing back and forth a few times.
Next, we’ll sew the buttonholes.


Following the instructions in your sewing machine manual, sew two buttonholes, ½ -inch down from the top and at the center of the two petals of the heart-shaped pinafore bib.


Sew the buttons, ½- inch from the ends of the back straps.
Let’s sew the skirt front and back together.


With the right sides together, place the skirt back over the skirt front. Align raw edges and sew each side seam.
Let’s hem the lower edge of the dress.


Fold the lower edge by 1/2 inch towards the wrong side. Fold again, press and sew.


Your dress is done!
*The strap should be crossed at the back while wearing the pinafore.
Find the webstory for the post here, Doll Pinafore with Heart Bib Sewing Pattern
Pin it for later here,
If you would love to see more of my doll patterns, click here.
For hundreds of free patterns and DIYs, visit allfreesewing.com.
Sandy Rodriguez
Tuesday 31st of March 2020
This looks like it's going to be fun to make. thank you.
Carol
Saturday 17th of August 2019
Cute, thanks 4 pattern