


Midi/ Maxi Dress Sewing Pattern for AG Dolls
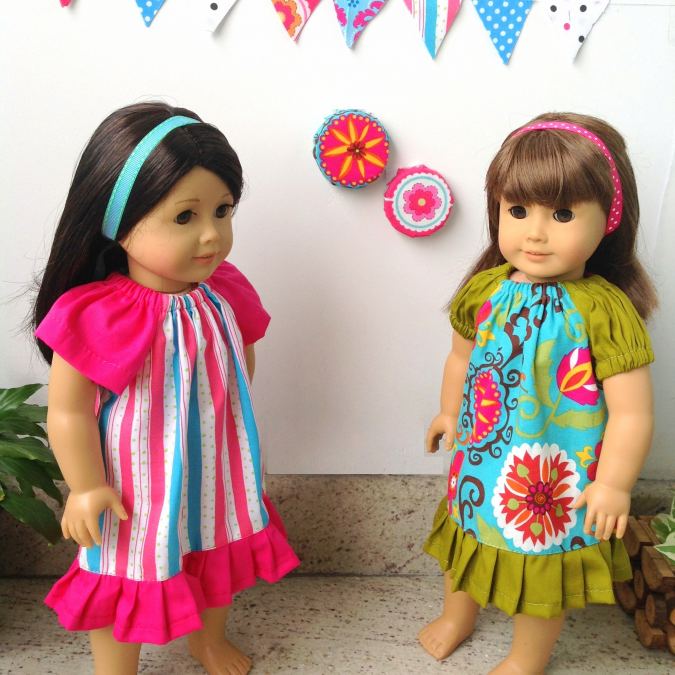
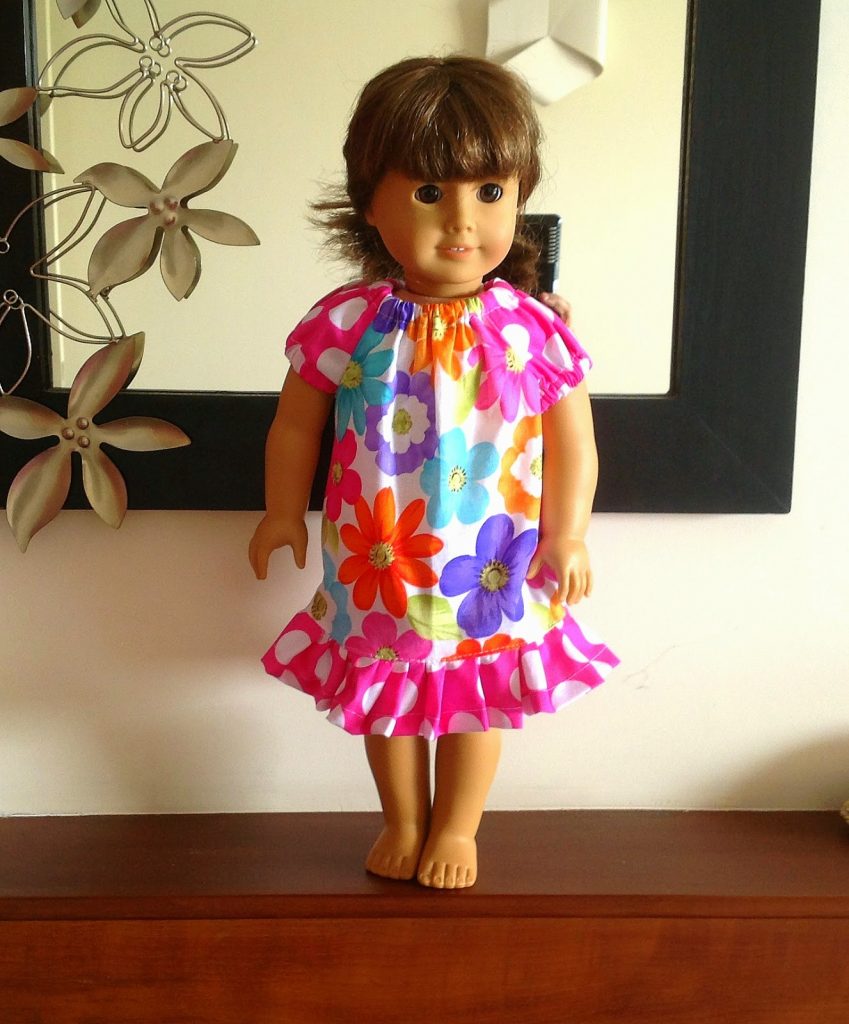
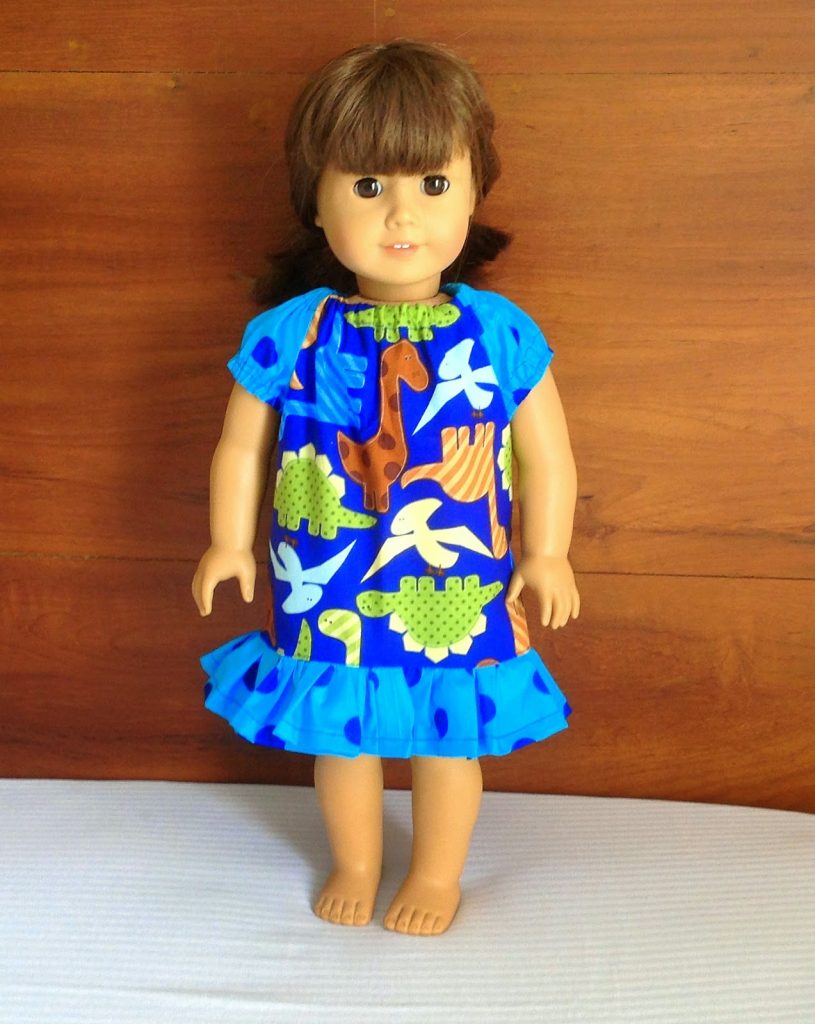
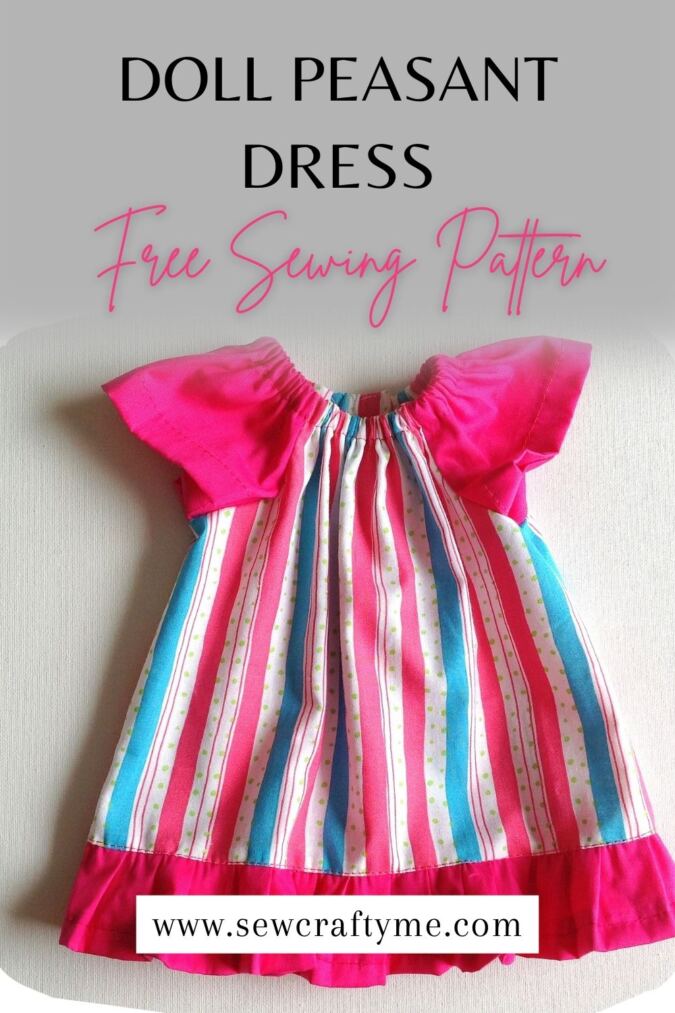
Doll Peasant Dress Pattern
You can follow the written pattern below or purchase an Ad-free PDF for just $2.99, Add to Cart here. The pattern will be e-mailed to you.
- The tutorial has been edited with new templates and two sleeve types.
Materials Required:
- Cotton fabric scraps for the dress body, sleeves, and ruffles.
- 3/8-inch elastic- 8.75 inches for the neck and 5.5 inches for each sleeve (optional).
- Velcro for closure.
- Sewing Notions.
- Enter your e-mail address to download the template below.
The seam allowance is 3/8 -inch unless otherwise specified.
I suggest you read the entire pattern once before starting to get a general idea.
All seams are to be pressed flat
All seams are to be finished by zig zag or serger
Sewing
Take the required materials.


Print and cut the template for the bodice. Take two pieces for the front and back bodice and layer them, aligning the edges. Fold lengthwise and keep the template on the fold. Mark around the template and cut to get the front and back bodice pieces.


Your front and back bodice pieces will look like this.


This is an open back dress and the back opening comes along the middle of the back piece. So, we fold the back piece lengthwise and cut it into equal halves.
Let’s cut the sleeve.


Cut the sleeve template at the end of this PDF. Take two contrasting fabric pieces for the sleeve and layer them aligning the edges. Fold lengthwise and keep the template along the fold. Mark around it and cut to get the sleeve pieces.


You will get your sleeve pieces like this.


Also cut one long strip of fabric, 32-inches long and 2 & 7/8-inches wide for the ruffle.
Sewing


Take one sleeve piece and keep it over the bodice piece (let this be the front bodice) with the right sides together and aligning the edges and armholes. Sew along the armhole as marked in the picture above.


Next, take the second sleeve and keep it above the same bodice piece, with the right sides together and armholes aligning. Sew the sleeve to the bodice.


Take one of the back bodice pieces and place it above one of the sleeves, with the right sides together and aligning the armholes (take care to choose the piece such that the back opening comes in the middle). Sew the sleeve and back bodice together as marked.
*few pictures below are for illustration purposes and as such may vary from the original.


Take the next back bodice piece and place it on top of the second sleeve, aligning the armholes and with the right sides together. Again sew the sleeve to the bodice as marked.


Your dress will now look like this, with both the sleeves attached to the bodice pieces.


Next, we need to do the elastic casing along the entire neckline as marked above.


Fold the entire neckline by ¼-inch and press. Fold again by ½-inch and press once more.


Sew the casing shut, as close to the edge as possible.


Take the required length of the elastic for the neckline and insert it through the casing using a safety pin.


You need to secure both the ends of the elastic one-inch away from the back opening. Sew back and forth a few times to secure it.


Fold the back opening on both sides by ½-inch twice towards the wrong side and press. Sew it down.
Let’s finish the sleeves. Here again, we have to do the elastic casing at the lower edge of the sleeve.


Fold the lower edge of the sleeve by ¼ -inch and press. Fold again by ½-inch and press once more.


Sew the casing shut, close to the edge.


Take the required length of the elastic and insert the elastic through the casing. Secure the ends by sewing back and forth a few times. Repeat the steps with the other sleeve. * You may skip this step if you wish to sew the sleeve without the elastic.
Let’s do the side seams.


Keep the side seams aligned together and the edges of the sleeve aligned together. Sew it shut starting from the lower hem of the sleeve to the lower edge of the dress.
We move on to the ruffles.


Take the strip of fabric required for the ruffle. To do its lower hem, fold one long edge towards the wrong side by ½ -inch twice and press. Press the two shorter edges also in a similar way.
Sew down the folded edges.
Let’s gather the ruffle. Turn the upper thread tension of your machine to zero and the stitch length to the longest to get a basting stitch.


Next, do a basting stitch along the raw edge of the ruffle, leaving a long tail of thread, 6 to 7 inches long to pull and gather the ruffle.
Pull the thread from the bobbin gently and gather the ruffle. Adjust the gathering to match the length of the ruffle to the lower edge of the bodice.
Next, we attach the ruffle to the bodice.


Keep the raw edge of the ruffle along the lower edge of the bodice, with the right sides together. Pin the ruffle to the bodice.
Change your machine settings back to normal.


Sew the ruffle and the bodice together, removing the pins as you go.
Turn the ruffle over to the right side and topstitch along the seam line of the ruffle and bodice to give it a neater look.
Let’s sew the Velcro for closure.


Mark three equidistant points on the wrong side of one of the back pieces and corresponding three points on the right side of the other.


Sew the Velcro pieces at these points and our dress is done!
To view more of my doll patterns, click here.
To get more free patterns, visit allfreesewing.com
Pin it for later here,
Shirley
Tuesday 22nd of October 2024
I don't see a printable pattern. Where would that be? I have checked a whole bunch of places and it all goes back to the written directions.
Surayya
Thursday 16th of April 2026
To download the printable template, please enter your email address in the blue box, under the materials needed section. You may read the written directions online.
Beau
Wednesday 21st of June 2023
where do you download the template
Surayya
Thursday 29th of June 2023
To download the template, you need to enter your e-mail address and click on the download button provided on the pattern page.
Liz
Monday 12th of July 2021
I have used many different peasant dress patterns, all of which do not need to use a velcro closure.. would it be possible to close this dress in a similar manner? I love the ruffle at the edge and was thinking I could extend it to floor length and use flannel and create a nightgown.
Surayya
Tuesday 13th of July 2021
The velcro closure is designed for easy on and off. If you find it okay without the closure, you may opt without it as the elasticized neckline would still make it easy for on and off. And, you can of course try lengthening the ruffle to make a nightgown.
Diane Broderick
Friday 5th of March 2021
I love this little dress but I just can't find where to get the pattern templets. Could you please tell me how to get them. Thank you!
Surayya
Saturday 6th of March 2021
To download the template, please enter your email address in the blue box, under the materials needed section.
Diane Broderick
Thursday 4th of March 2021
Please send me the link to get the templets for the Peasant Dress. I know 3 girls who would love this. Thank you!