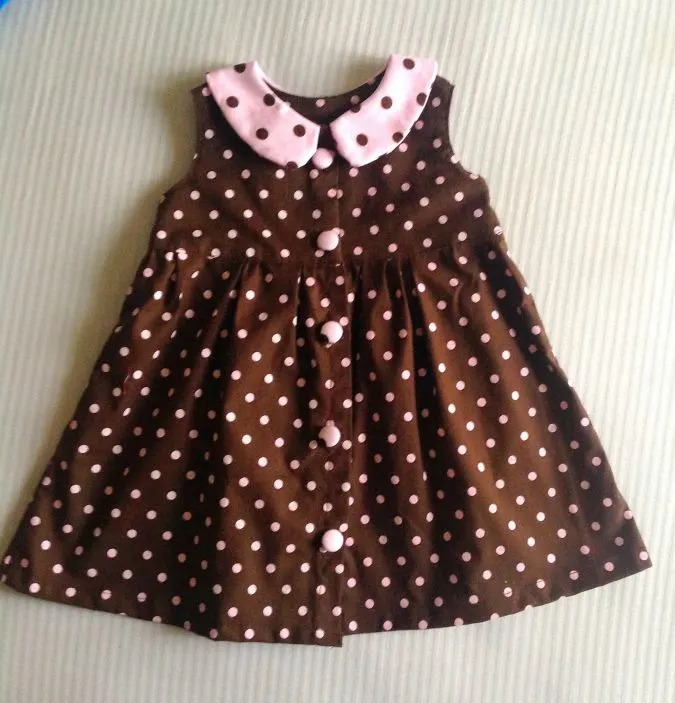
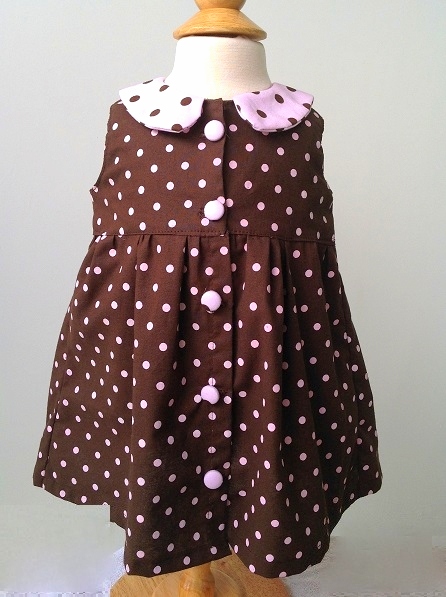
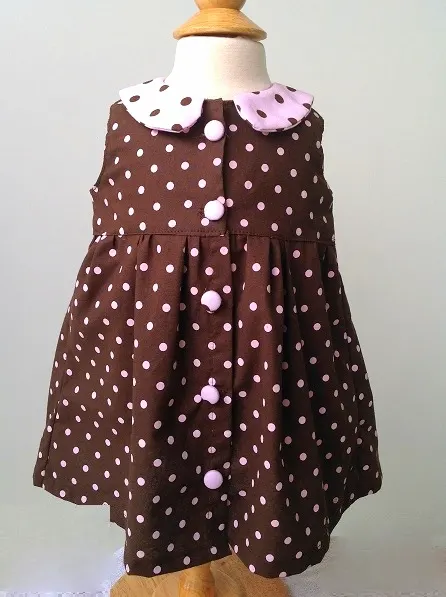
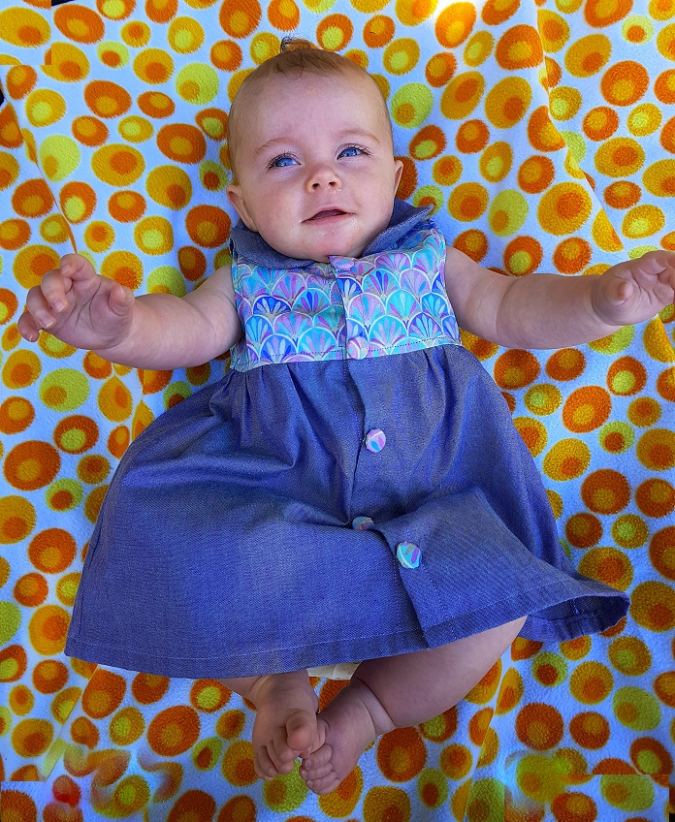
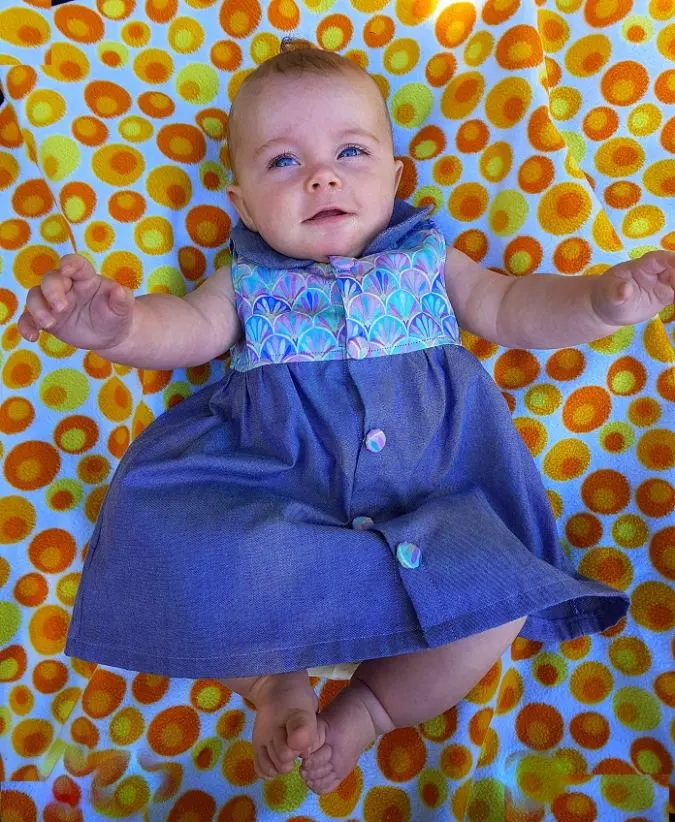
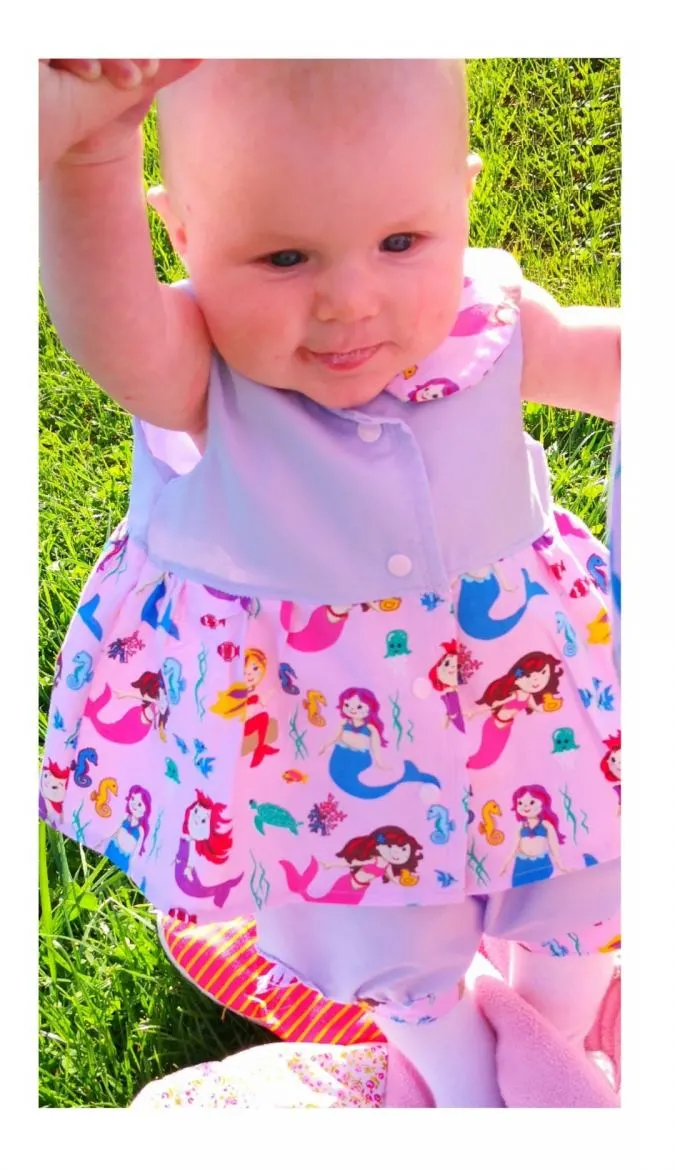
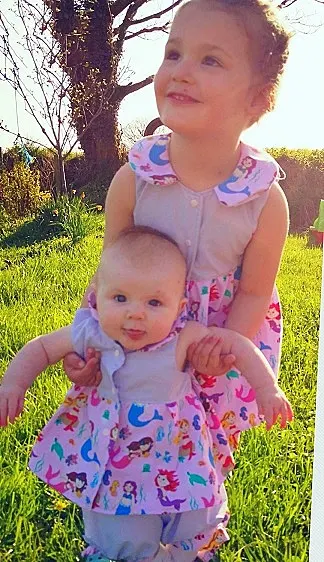
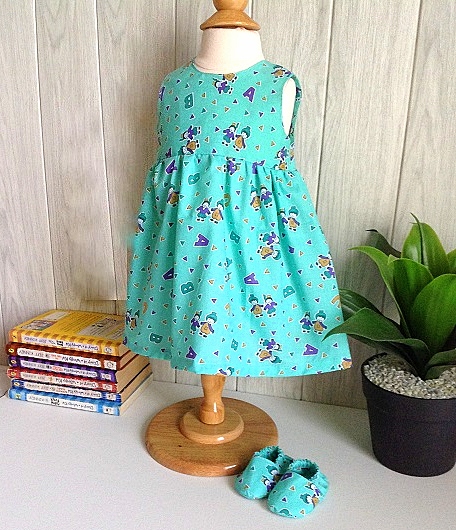
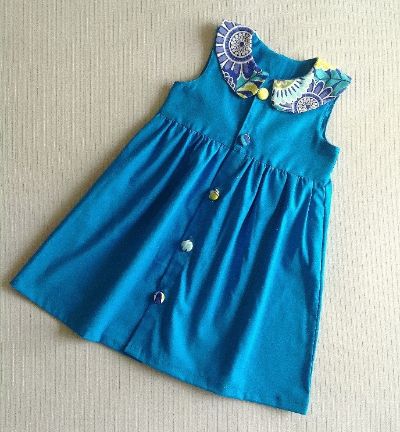
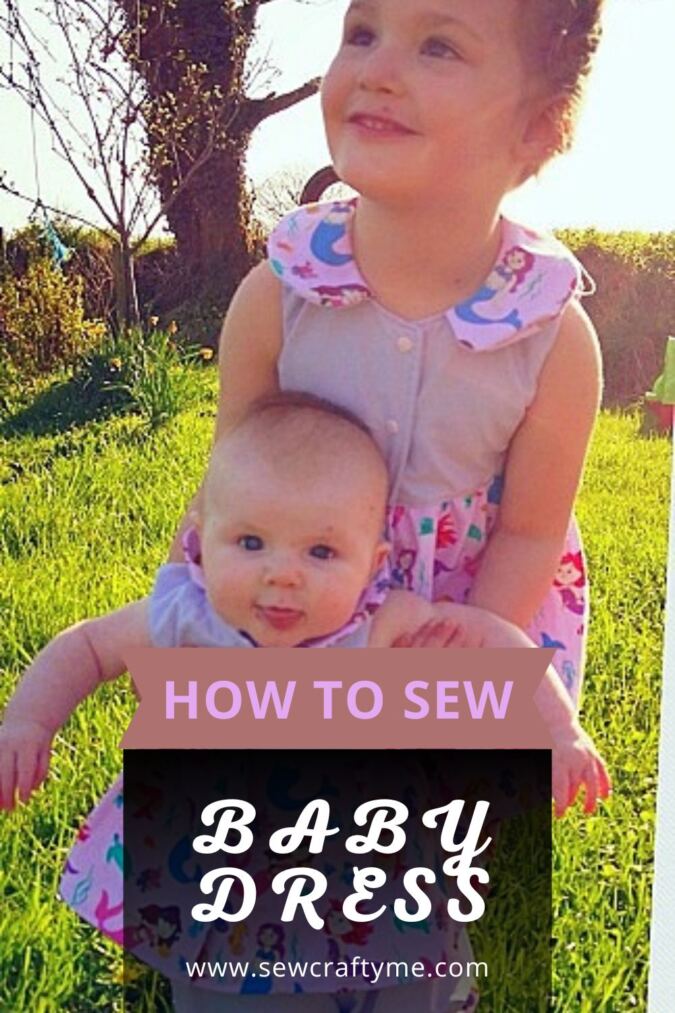
This baby dress with peter pan collar is again inspired by one of my daughter’s baby outfits.

I still remember the striped top that she used to wear with puffy bubble bloomers. There was a cute flower embroidered on the collar, that made the top prettier.
It was a bit oversize for her but I still used to make her wear it as it looked good on her. It was a collared baby top and a bubble bloomer set, I bought from the stores.
Due to the front- open design, I used to feel so comfortable making her wear the outfit. It was so easy for on and off that I quickly drafted a pattern from the top and whipped up a few for her to wear it all week long (of course I was not into pattern designing then! ).
When my daughter grew up, I kept sewing the pattern as tops and dresses and gave them as handmade gifts to friends and family.

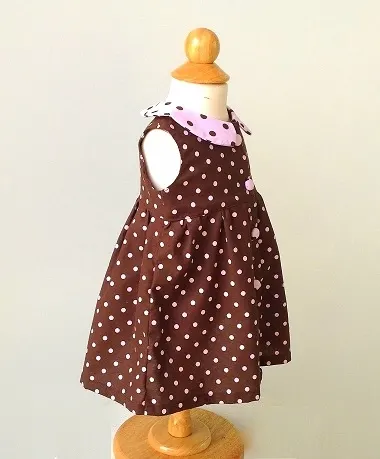
After sewing for my loved ones, here I am with the templates and the instructions to sew the baby outfit with peter pan collar in a jiffy! Add a small applique or embroidery on the collar, sew a trim like a rick- rack or lace along the edge to make it a boutique-style one! I bet you will be delighted to see the result!


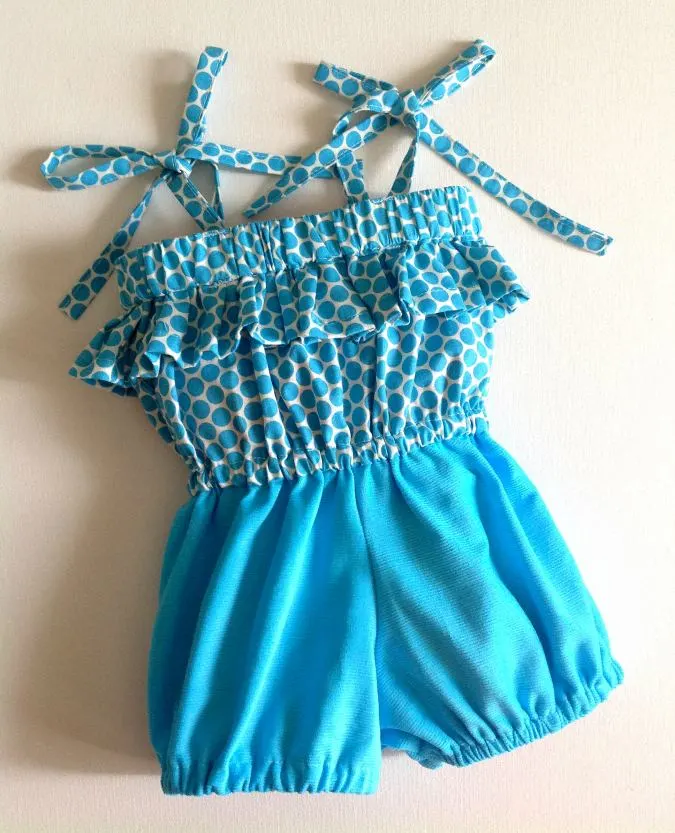
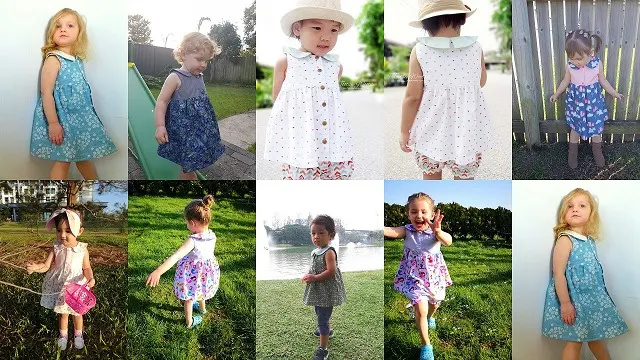
This sewing project will take you through easy and explicit instructions to sew the pattern as a top or dress. You can pair it with my baby bloomer pattern or my diaper cover pattern to get a cute ensemble!

If you wish to sew a an easy baby dress with yoke, click here.

If you wish to sew a baby romper, click here.
How to Sew Baby Dress with Collar
Materials Required
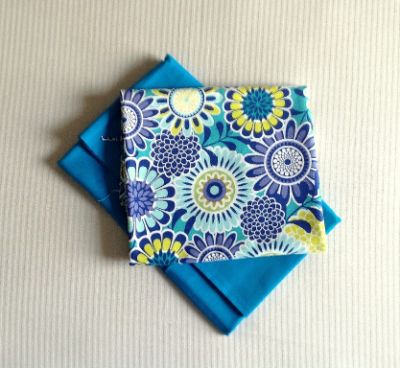
1. Medium- weight cotton fabric for the dress body- requirements specified in the table-2 below.
2. Medium- weight cotton fabric for the collar- requirements specified in the table-2 below.
3. Sewing Notions.
4. Fabric Marking Pen.
5. Snap Buttons or ordinary buttons (optional).
6.
Pattern Notes
1. All the fabrics used here are of 44/ 45 inches width.
2. The fabrics shown here are only for illustration purposes and as such may vary from the original.
3. The seam allowance is 3/8-inch unless otherwise specified.
4. I suggest you read the entire pattern once before starting to get a general idea.
5. All seams are to be finished by zigzag or serger.
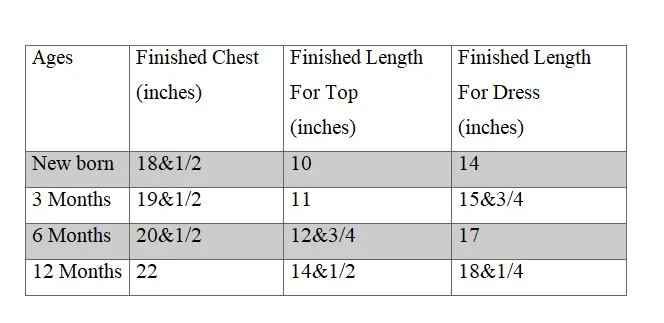
Size Chart
Table-1

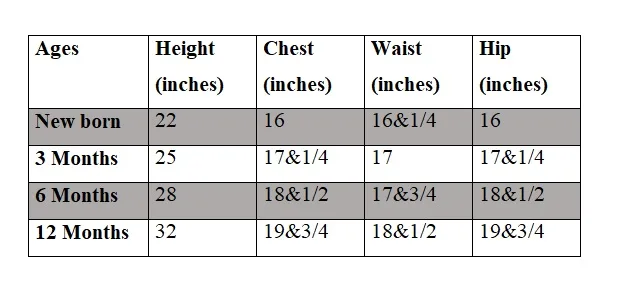
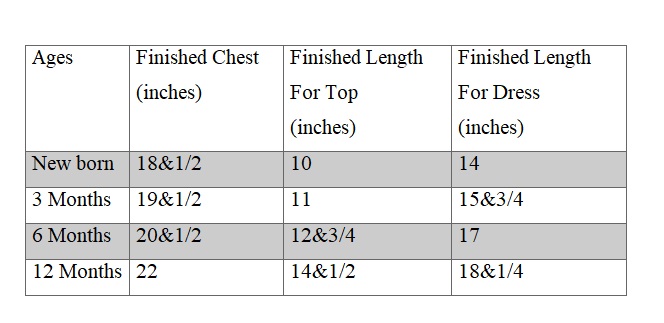
Approximate Finished Measurements
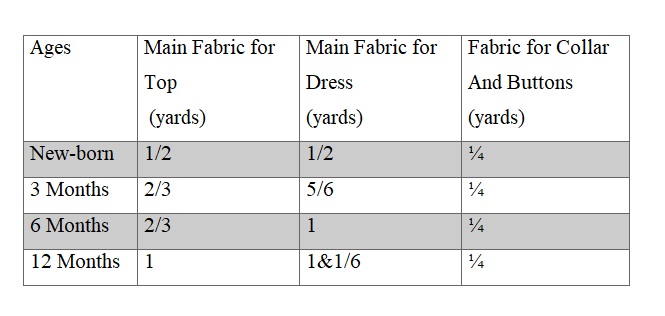
Table-2
Fabric Requirements
Table-3

Take the fabric required for the dress and collar.
Cut the templates for the bodice front, bodice back, skirt front, skirt back, and peter pan collar, from the attached PDF.


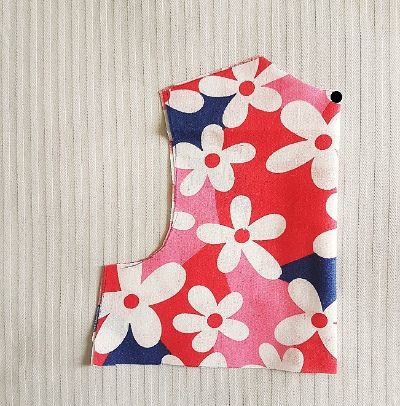
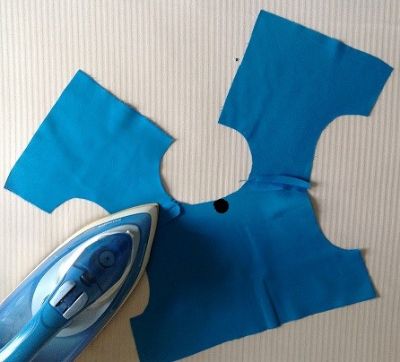
Take the dress fabric and the template for the front bodice. Fold the fabric to fit the width of the template and place the template on the edge. Mark around it and cut to get the two front bodice pieces. (the front part of the dress is done in two pieces, for button opening). Repeat the steps to get the front lining pieces.
To cut the back bodice, fold the fabric and place the template for the back bodice, along the fold of the fabric. Mark around it and cut to get the back-bodice piece Repeat the steps to get the back-lining piece.

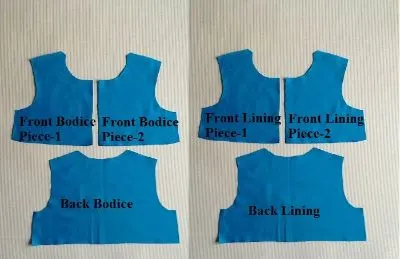
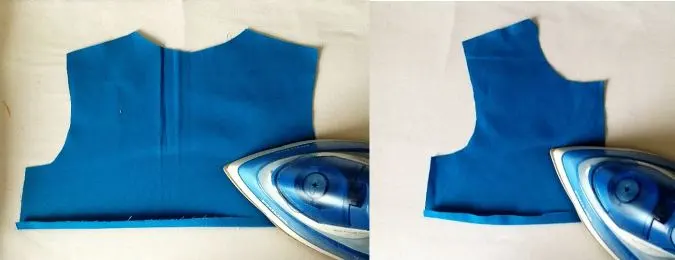
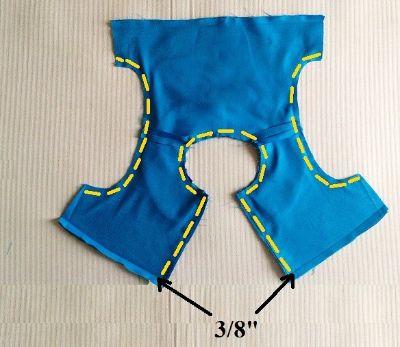
Your bodice-front, bodice–back and lining pieces will look like the picture above.


Take the front skirt template, fold the fabric, and place the template on the edge of the fabric. Cut around the template to get the two front skirt pieces.
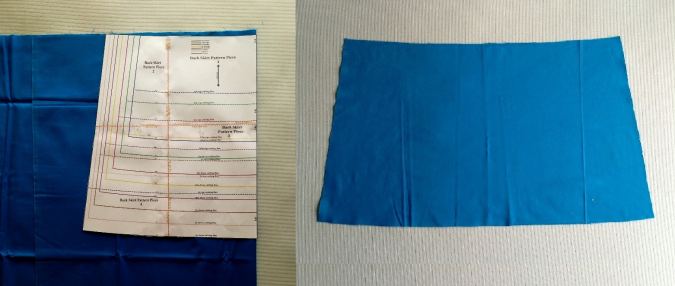

Next, take the template for the skirt back, fold the fabric to fit the width of the template and place it on the fold. Cut around the template to get the back-skirt piece.
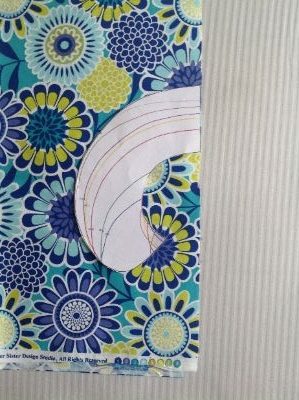
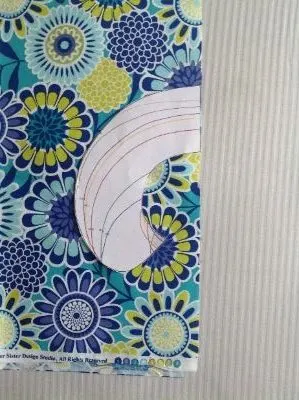
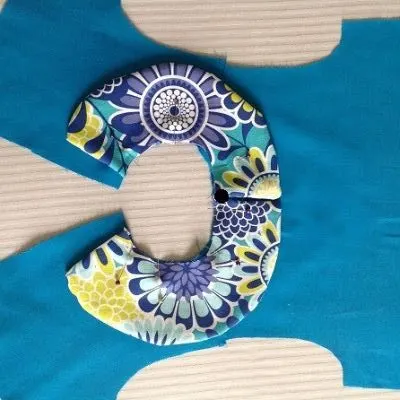
Fold the collar fabric and place the template for the collar on it. Mark around it and cut to get two collar pieces, facing opposite directions. Repeat the steps to get two more of the same.
Sewing
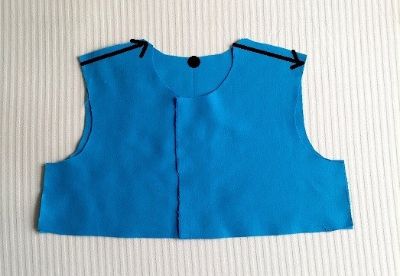
Before putting the bodice pieces together, let’s mark the point on the back neckline, where the straight edge of the collar is placed later.

Fold the back bodice in half, aligning the edges and mark the upper edge of the fold along the neckline (picture for illustration purposes).
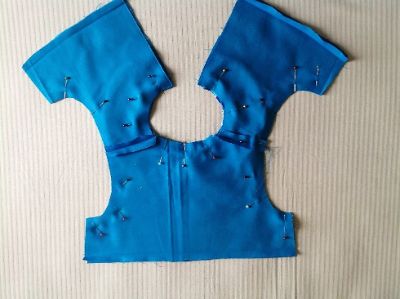
Take the two front bodice pieces and place them over the back-bodice piece, with the right sides together, aligning the shoulders and side seams and sew the shoulders shut.

Press the seams open.

Next, take the lining pieces, fold the lower edges towards the wrong side by 3/8-inch, and press to set.
Sew the front and back lining pieces together, just as the bodice pieces.
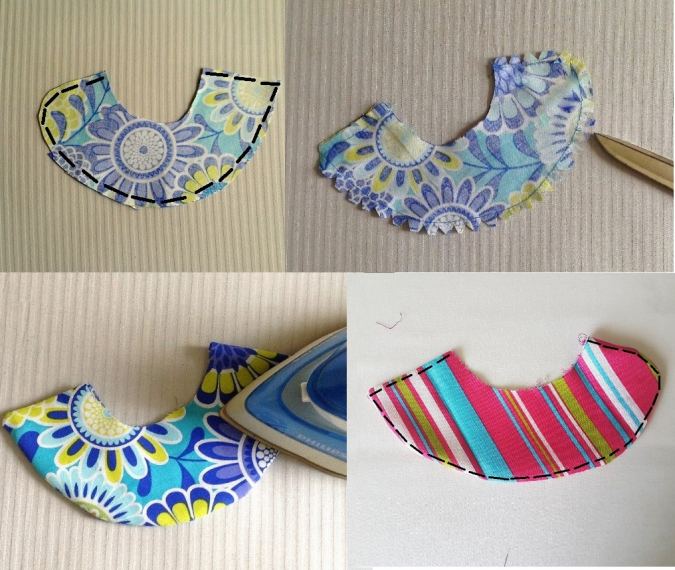

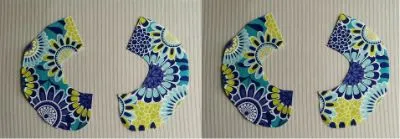
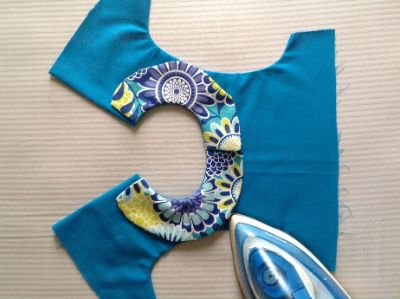
Take two of the collar pieces, layer them with the right sides together, and aligning the edges. Sew along the outer curve and the short straight edge to join. Cut few notches along the seam to reduce the bulk. Turn over to the right side and press flat. Topstitch along the outer curve and the shorter edges to make it neat and crisp (last picture for illustration purpose).
Repeat the steps with the other two collar pieces to get the other collar ready.
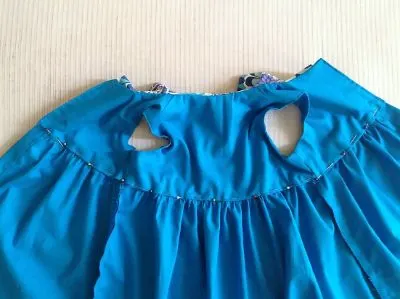
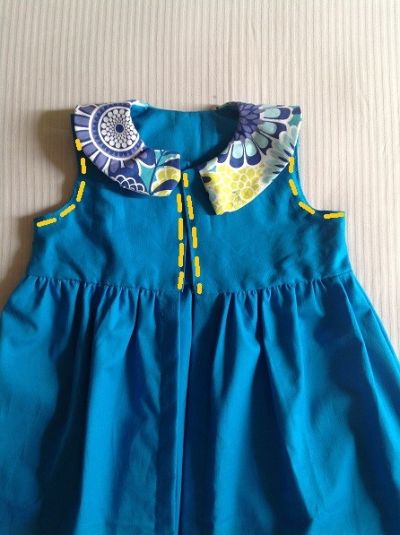
Let’s attach the collars to the yoke.
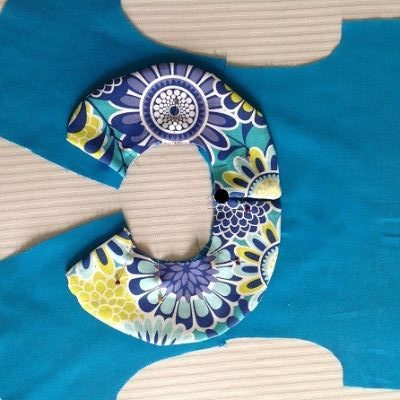
Place the collar on the right side of the done yoke, aligning the center- mark along the back neckline with the straight edge of the collar. Pin the collar along the neckline, starting from the center-back. Keep pinning towards either side, till the whole collar is pinned. Sew the collar to the yoke, removing the pins as you go.

Place the bodice lining over the main bodice, with the right sides together, aligning the center front, neck and armholes, and pin. Note that the collar is now sandwiched between the bodice and lining.

Sew along the neck and center front, and also along the two armholes. *Note that you need to leave 3/8-inch along the lower edges of the bodices for skirt attachment.
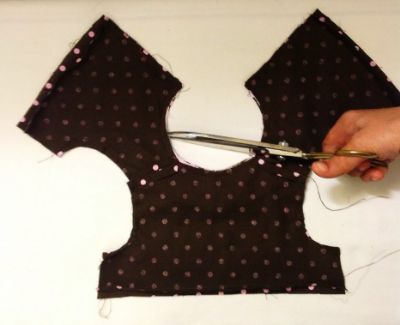
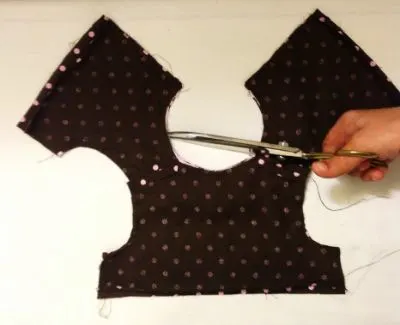
Clip the edges and cut the corners (picture for illustration purpose).


Pull the right side of the front bodice out, through the shoulders. Keep pulling the front bodice on either side, till the whole bodice is turned inside- out.

Poke the edges sharp, with the help of your scissors and press taut ( take care not to tear the seam).
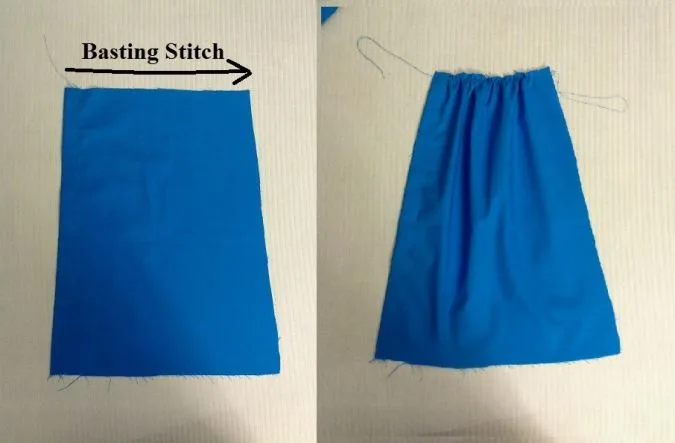
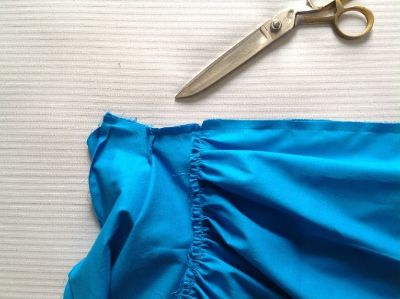
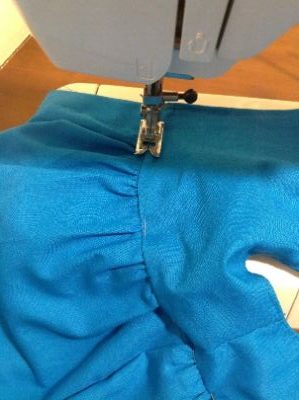
We move on to the skirt. We need to gather the skirt pieces. For that, we turn the upper thread tension of the machine to zero and the stitch length to the longest to get a basting stitch.

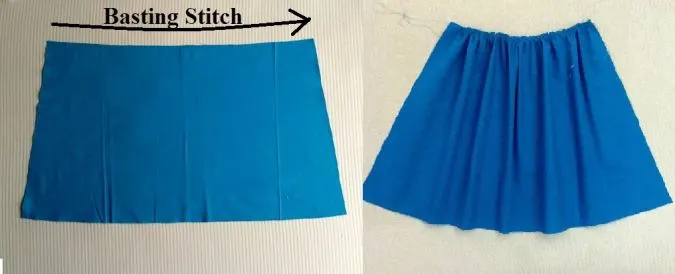
Sew a basting stitch along the upper edge of the back skirt piece. Pull the thread from the bobbin gently and gather it. Adjust the gathering to make it uniform and to fit the lower edge of the back yoke.
Let’s gather the front skirt pieces. We need to finish the center-front of the skirt for the button opening.

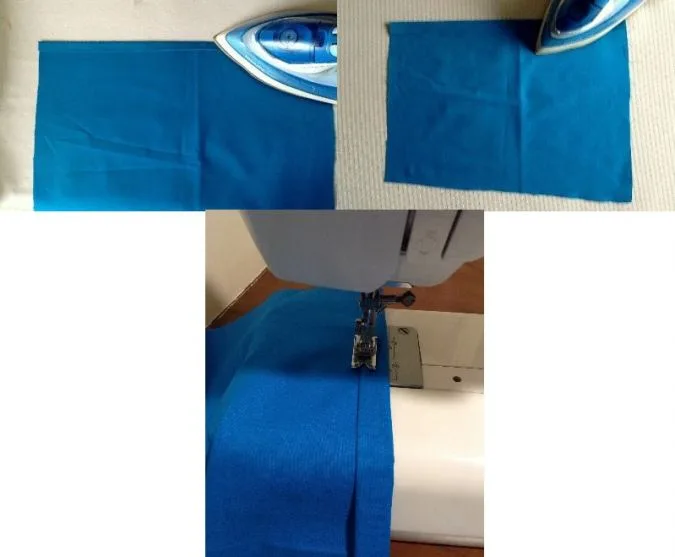
Fold the straight edge, (center- front) of one of the front skirt pieces by 3/8-inch towards the wrong side and press. Fold again by 3/4-inch and press once more.
Turn the machine settings back to normal.
Sew the fold down along the edge. Repeat the steps with the other front skirt piece.
Next, we need to gather the pieces.

Once again. adjust the machine settings and sew a basting stitch along the upper edge of the front skirt pieces and gather them by pulling the thread from the bobbin. Adjust the gathering to fit the lower edge of the front yoke.
Let’s attach the skirt pieces to the back and front bodices.
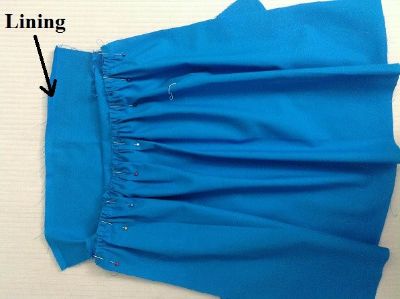

Align the ruffled edge of the back skirt along the lower edge of the back bodice, with the right sides together and pin all along. *Note: take care to keep the lining away while pinning,
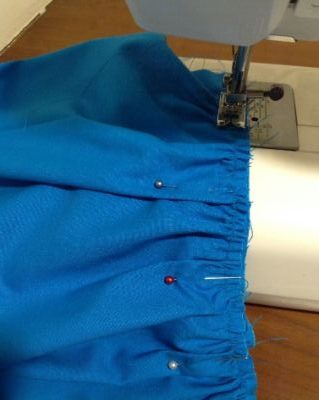
Turn the machine settings back to normal and sew the skirt to the bodice, removing the pins as you go.

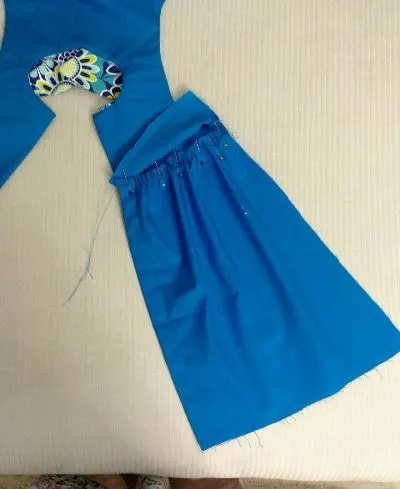
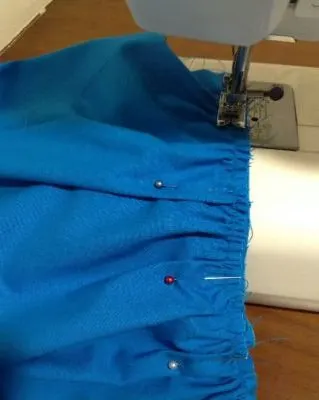
Next, take the done front skirt pieces and pin it along the lower edge of the front bodice pieces, such that the folded edges come along the center front (button edge). Here again, avoid pinning the lining. Sew the skirt pieces to the bodices.
Let’s sew the side seams.
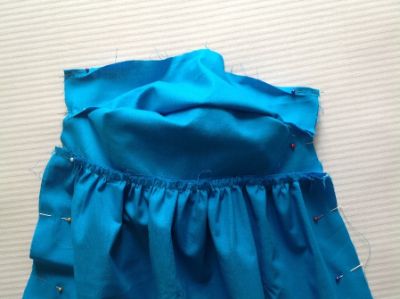

Flip the lining upwards. Align the side seams of the back and front bodices together and the side seams of the front and back lining together, with the right sides touching and pin (please note that the folds along the lower edges of the lining are to be kept intact while pinning and sewing). Sew along the pinned edges.

Clip the bulk at the seam of the skirt and bodice and also along the armholes.
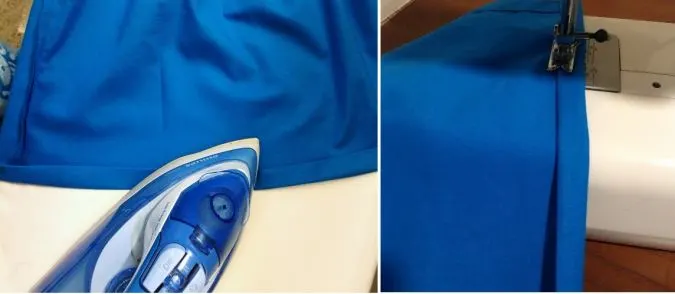
Next, we need to cover the seam along the waistline by sewing the lining shut.

Turn the waist seam up, towards the bodice. Place the folded edge of the lining over the seam and pin all along.

Turn over to the right side and topstitch along the seam line carefully to sew the lining shut, covering the waist seam. You may optionally hand-sew the folded edge of the lining onto the waist seam, using invisible stitches.

Topstitch along the armholes and buttonhole edges of the bodice.
Let’s hem the lower edge of the dress.

Fold the lower edge of the dress by ½-inch twice and press. Sew down the hem along the edge of the fold.
Next, we need to hand-sew the buttons.

A quarter-inch down from the top edge, make markings equidistant from each other on the left front piece for the buttonholes. Make complementary markings on the other (right) front piece also for the buttons. Sew the buttonholes following the instructions on your sewing machine.
If you wish to add fabric buttons, click here.

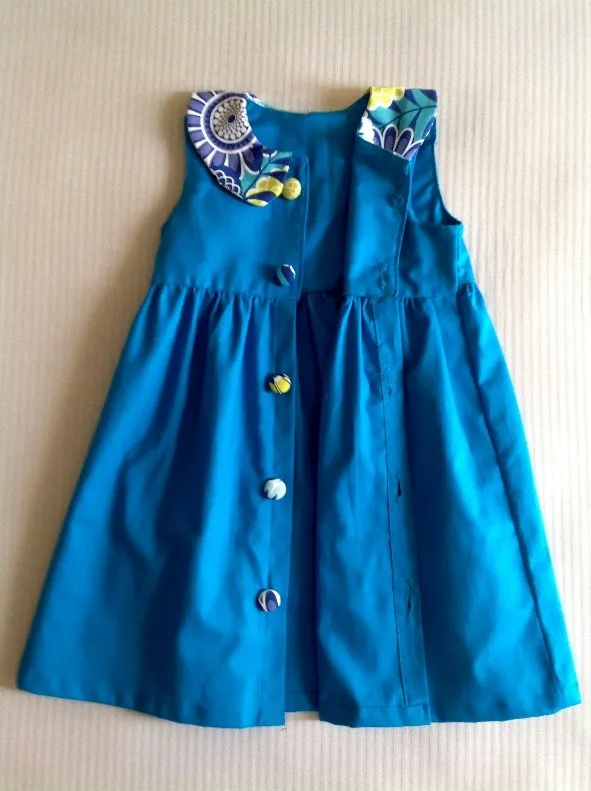
Cut off the hanging thread and our baby dress with collar is done!

Find the webstory for the post DIY Baby Dress with Collar: Full Sewing Tutorial for Beginners
Pin it for later here,
Mandy
Saturday 19th of February 2022
I made this dress for my 3 month old granddaughter. I added a contrasting sash around the waist (to match the collar) with long “tails” to the back to tie into a bow and added a false under skirt in the contrast color. I also put in a hidden zipper instead of the buttons. I had found some beautiful medium plum colored poly-rayon fabric that had been used for bridesmaid dresses and contrasted it with an ivory/plum tiny floral. I’m getting ready to make a matching head band/bow. I can’t wait to try it on her. Thank you so much for the pattern and well written instructions.
Tamara Peters
Sunday 13th of June 2021
Hi Surayya, I just made the baby dress with collar and it turned out beautiful. The instructions are some of the best I have seen. Thank you for being so clear and concise. I purchased the larger sizes but have not received a way to download them. If you can help me with this I would appreciate it. Thank you and have a blessed day, Tamara Peters
Surayya
Monday 14th of June 2021
Thank you! The pattern has been e-mailed!
Carolien
Tuesday 1st of June 2021
hello, do you think this pattern would work for making a baptism gown, lengthening the skirt part.
I want to make one for my grand daughter from my wedding dress.
Thank you
Surayya
Tuesday 1st of June 2021
Yes, you can make a baptism gown with the pattern by lengthening the skirt part. Maybe you can make a matching bonnet too, https://sewcraftyme.com/free-baby-bonnet-sewing-pattern.html
Nathaly
Friday 29th of January 2021
Hello, I would like to make a little dress from your pattern,...the one with the collar... But I connot find the bleu box, where I should put my E - mail adress. Could you please help me,
bye Nathaly
Surayya
Friday 29th of January 2021
Hello, You may find the blue box in the middle of the page. Enter your e-mail address and click on the download button to download the pattern piece smoothly.
Jackie
Wednesday 20th of January 2021
I am making this little dress for the third time. It is lovely and easy to understand. Love it.🙂🙂
Surayya
Wednesday 20th of January 2021
Thank you, I am glad you liked it!