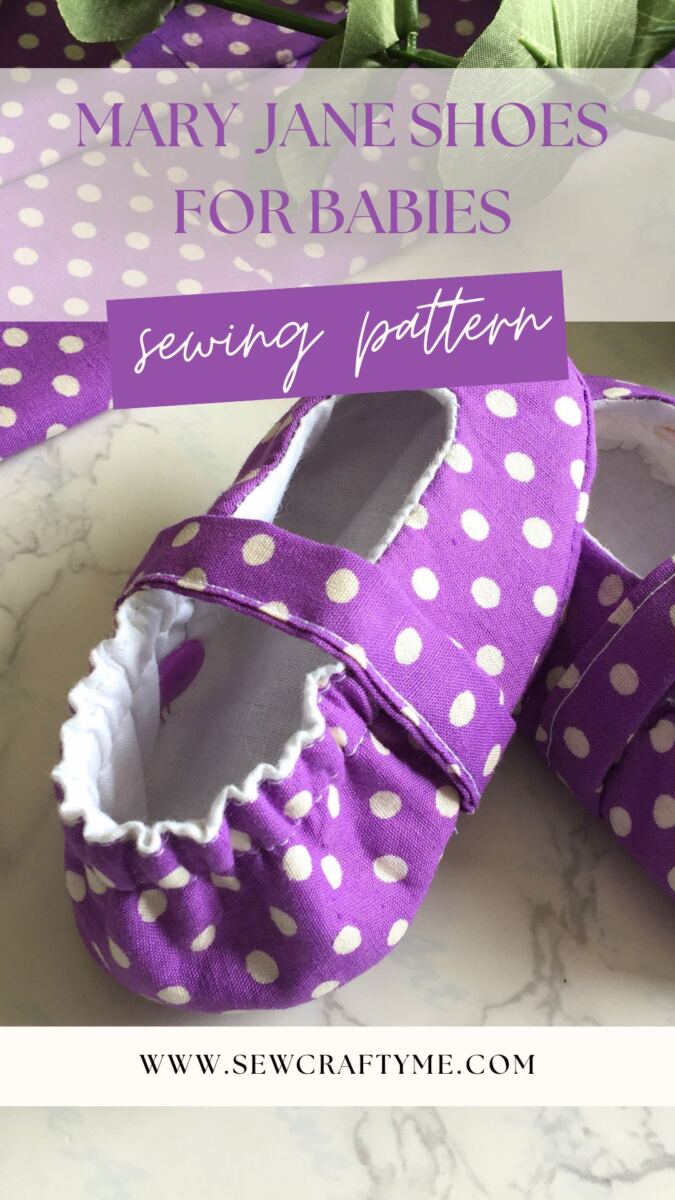
Looking for the perfect pair of baby shoes to sew? Here’s an adorable DIY sewing pattern for cute and comfy Mary Jane shoes—the perfect little accessory to match your baby’s outfits and add a touch of charm!


Designed for the perfect fit, comfort, and style, these baby shoes are made with soft cotton fabric for the outer and lining, while fusible fleece gives them just the right amount of sturdiness. They are lightweight, cozy, and gentle on your baby’s delicate feet.


This easy DIY sewing pattern is perfect for beginners! If you’ve tried my easy baby bootie pattern before, you’ll find these just as simple to make. With detailed step-by-step instructions, you can quickly sew a pair of these adorable Mary Jane shoes and create a cute little addition to your baby’s wardrobe.
So, grab your fabrics and let’s start sewing these adorable baby shoes today!
If you would like to pair it with my best selling easy baby dress sewing pattern, click on the picture below:


Mary Jane Shoes Sewing Pattern for Babies
Materials Required:
- Cotton fabric scraps in a preferred color and print for the outer sole, heel, upper and straps.
- Cotton fabric scraps in a coordinating (or contrasting) color and print for the sole, heel and upper lining.
- Small pieces of fusible fleece for the sole, upper and heel.
- 3/8-inch elastic- Requirements specified in the table-2 below.
- KAM snaps in a matching color- 2 sets
- Sewing Notions.
- Pattern Template. **Enter your email address and click the subscribe button in the blue box below to download the template
I suggest you read the entire pattern before starting to get a general idea.
The seam allowance is 3/8 -inch throughout, unless otherwise specified.
Finished Lengths
Table-1


Elastic Requirements
Table-2


Gather the supplies.
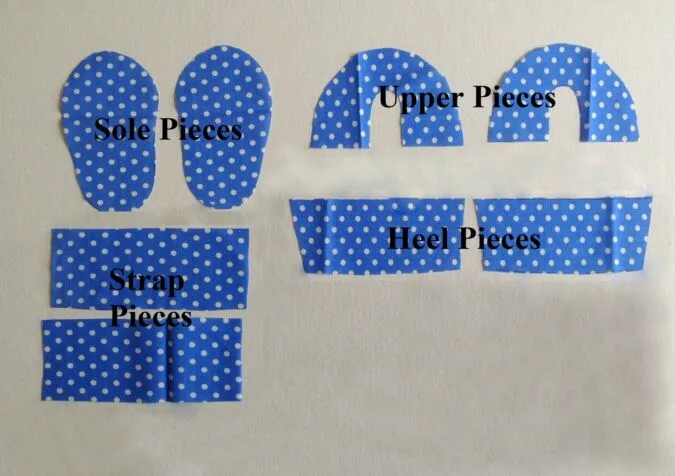
Cut the pattern templates for the upper, sole, heel and strap at the end of this PDF.

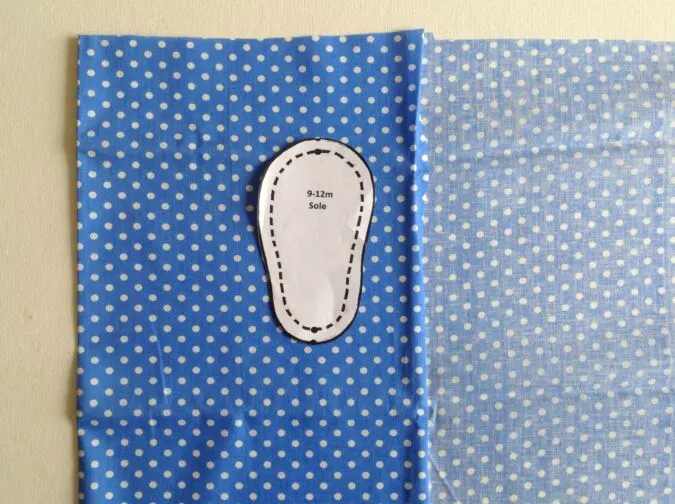
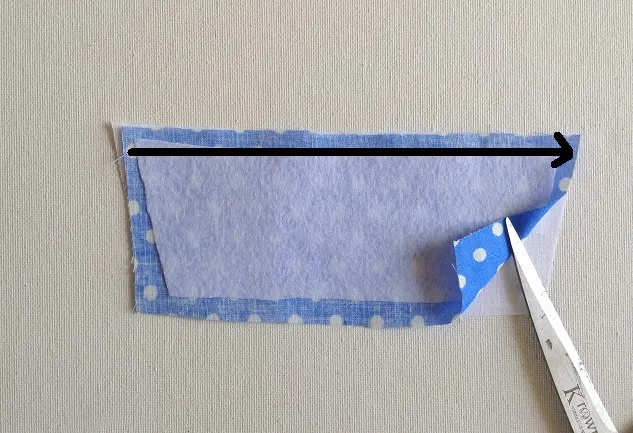
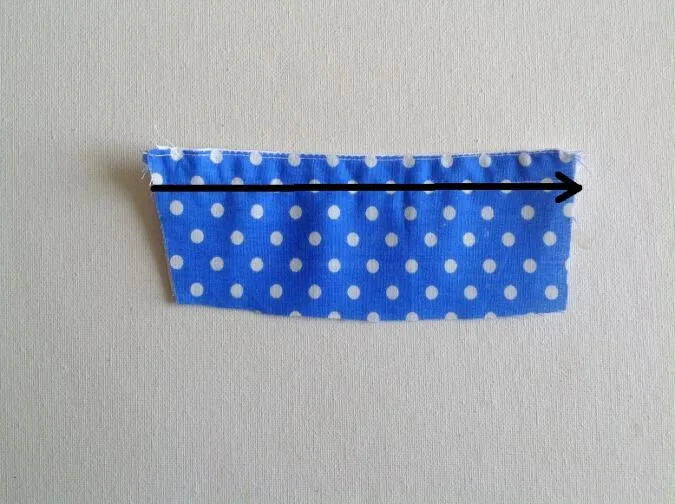
Fold the fabric and place the sole template over it. Mark and cut to get two sole pieces that are mirror images.
Repeat the steps to get:
2 upper pieces
2 heel pieces
2 strap pieces

You will have your pieces like these. You will need the same set of pieces from the lining fabric, except for the strap pieces. **Make sure to transfer the center markings from the template to the pieces.

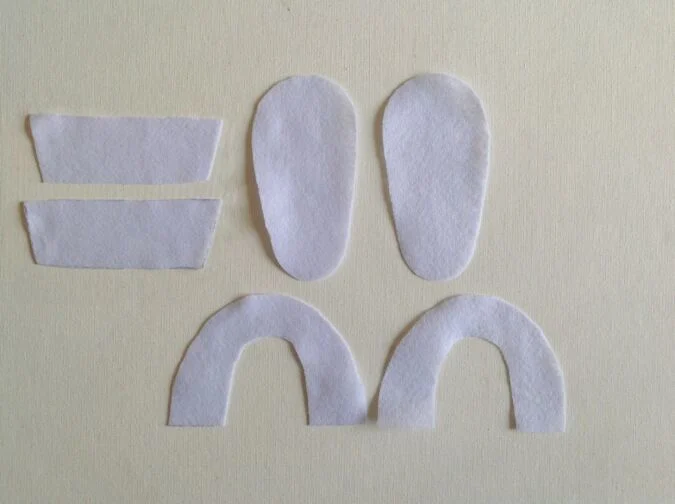
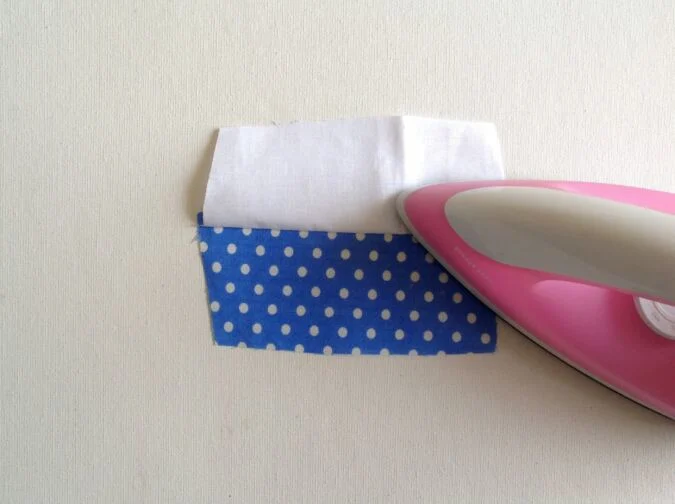
Cut along the dashed lines in the pattern pieces to get the templates for the fusible interfacing. Cut two sole, upper and heel pieces from the fusible fleece using the templates.
Sewing

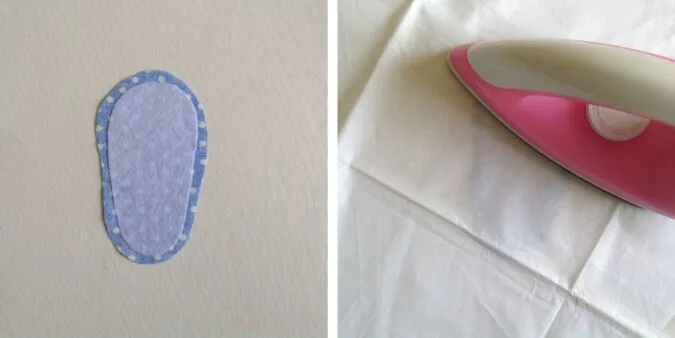
Take one of the sole pieces and place the coordinating fusible fleece above it, leaving equal space all around. Place a cotton fabric covering the layer and using a warm iron, press to fuse.


Repeat the same with the other sole piece, heel pieces and the upper pieces.
Next, we prepare the straps.

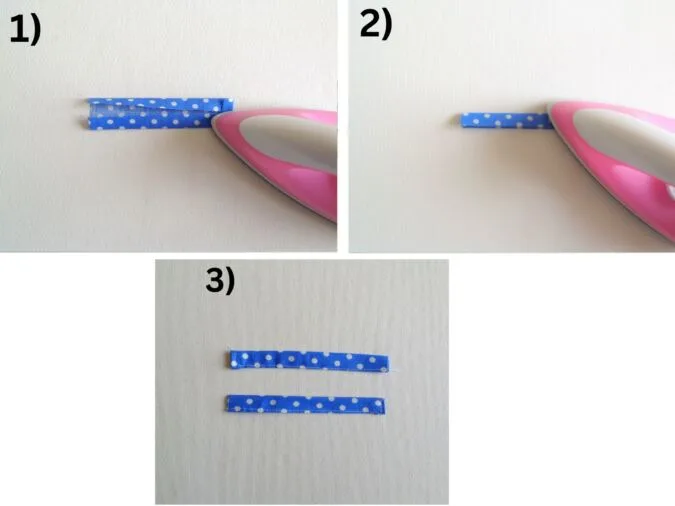
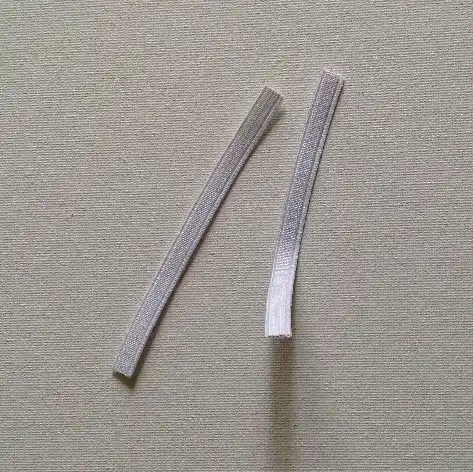
Take one strap piece, fold the two long edges and one short edge towards the wrong side by ½-inch and press.
Fold again in half and press to set.
Sew it shut along the edge of the folds. Repeat to get the other strap ready.

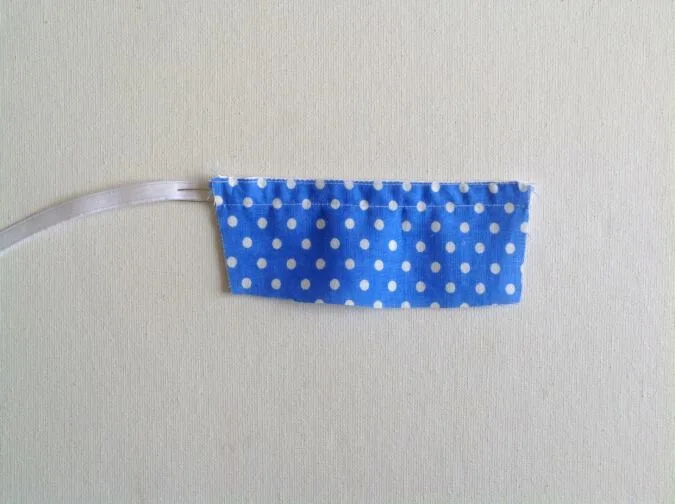
Take the heel piece and lining and layer them with the right sides together, aligning the edges. Sew them together along the straight upper edge to join.

Open and press along the seamline. Fold it back, with the right side out and again press taut.

Topstitch along the upper edge and sew a straight line, ½-inch below the upper edge. This is to make a casing for the elastic.

Take the required length of elastic, referring to the table-2 above and cut it into two equal halves.

Take one of the elastic pieces and insert it through the casing using a safety pin.


Secure the ends of the elastic on both sides by sewing back and forth a few times.
Repeat the steps on the other heel piece, lining and elastic.

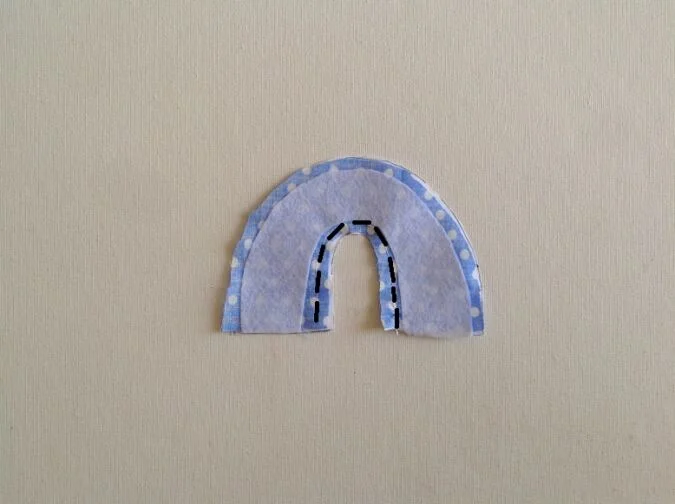
Keep the upper piece and lining layered, with the right sides together, lining up the edges. Sew along the inner curve to join.
Next we attach the heel piece to the main upper piece.

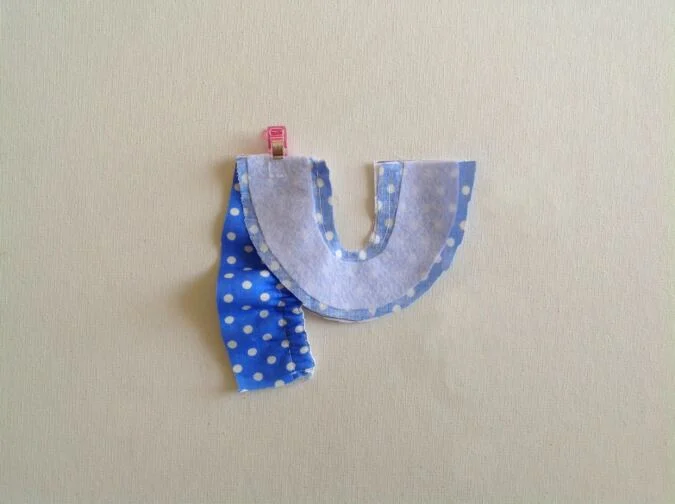
Lift the upper and keep the straight short edge of the heel piece, aligned with the straight edge of the main upper piece, with the right sides touching and clip them together. Note that the elasticized edge faces the center and the heel piece is now sandwiched between the upper and lining.

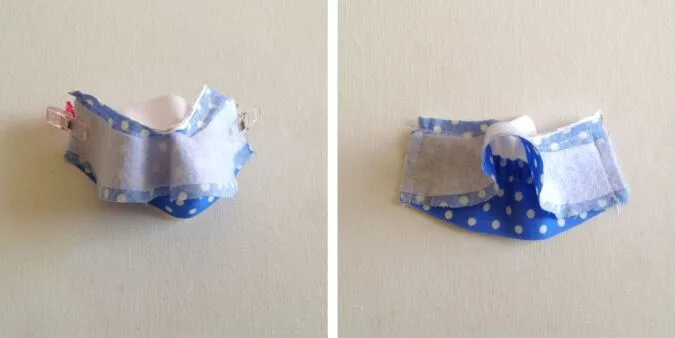
Do the same with the other short edge of the heel piece and pin. Sew the two pieces together along the pinned edges.

Flip the pieces over to the right side and you will notice that your shoe has started taking shape.

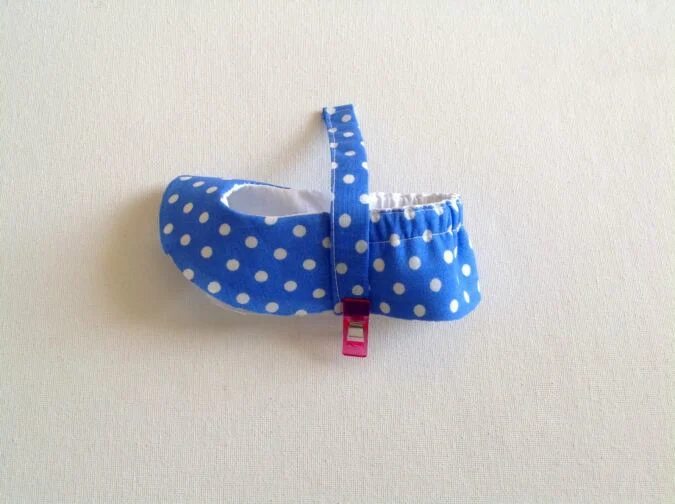
Take one of the straps and place it over the seam line of the upper and heel, lining up the short raw edge of the strap along the raw edge of the shoe and place clip to hold. Sew the strap to the shoe, along the raw edges.
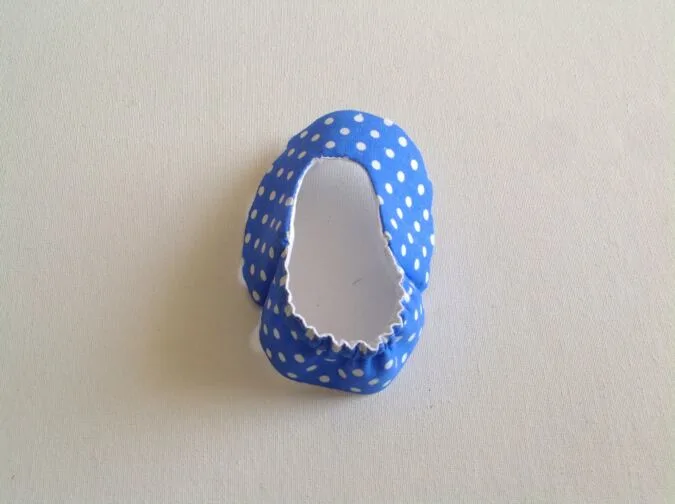
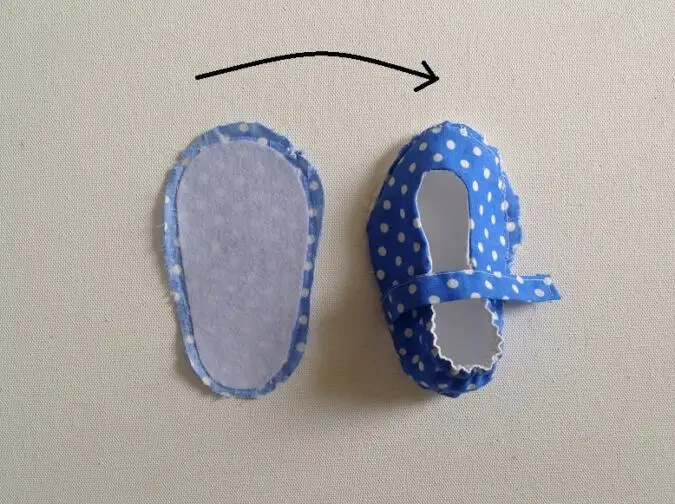
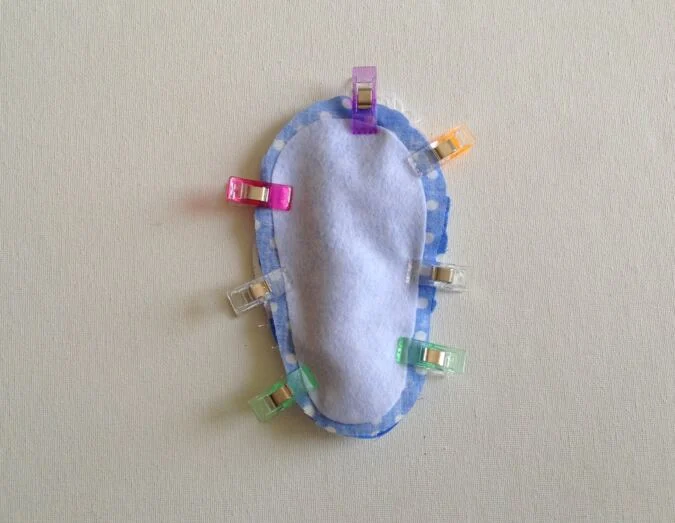
Next we attach the sole lining to the finished upper.

Place the corresponding sole lining with the right side facing up and keep the finished upper over it matching the center markings.

Pin (or place clips) all around, aligning the edges.

Sew around the edge, removing the pins or clips as you go.
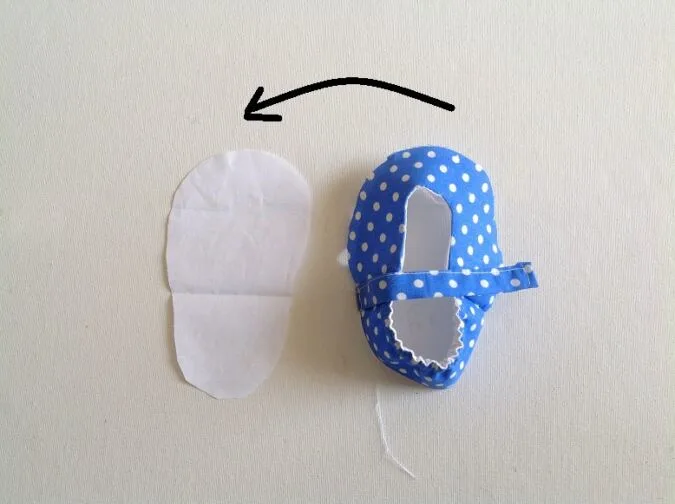
Let’s now attach the outer sole piece to the shoe.

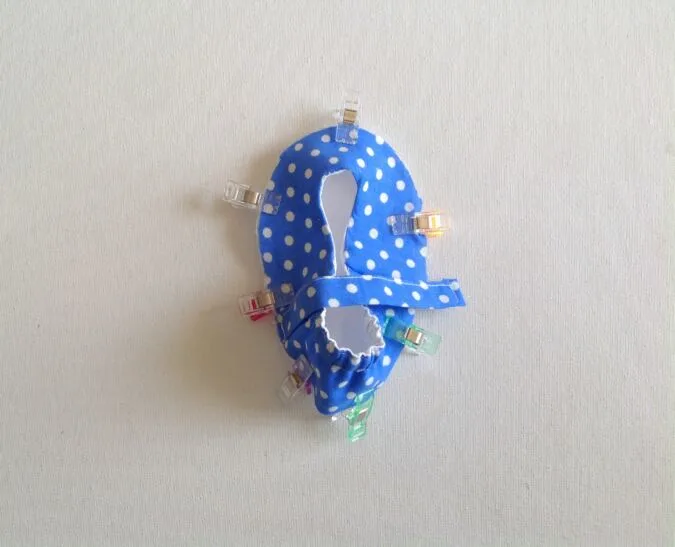
Take the corresponding outer sole piece and keep it over the finished upper piece, with the right sides together, lining up the edges and matching the center markings.

Place clips all around to hold the edges together.


Sew around the edge, leaving a small gap of about 2-inches to pull the right side out.

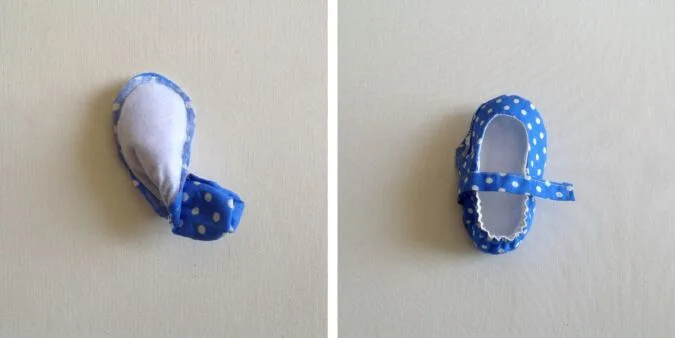
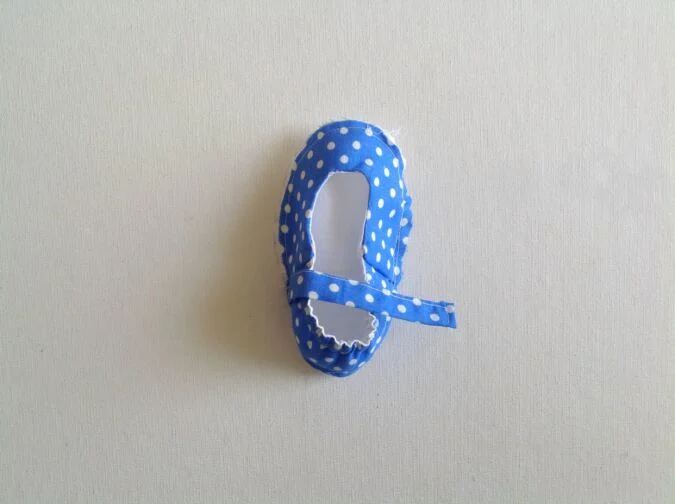
Pull the right side out through the opening.
Next we need to sew the opening closed


Hand-sew the opening closed using slip-stitch, tucking the raw edges neatly in.


Attach the KAM snaps following the maufacturer’s instructions. Repeat the steps to get the other shoe ready and your Mary Jane Baby Shoes are ready for wear!
find the webstory for the post here, Sewing Pattern for Classic Baby Mary Jane Shoes
Pin it for later here,
Icee Brown
Sunday 6th of April 2025
I cant wait to make them.
Kathy
Friday 4th of April 2025
I'm sorry, but the little blue box for downloading templates never works for me. I've tried other browsers to see if that would help to no avail. Thought I would try again for these cute baby shoes and it didn't work again. Am I the only one with this problem?
Surayya
Friday 4th of April 2025
Kindly enter your email address and click the subscribe button in the blue box to download the tmplate.