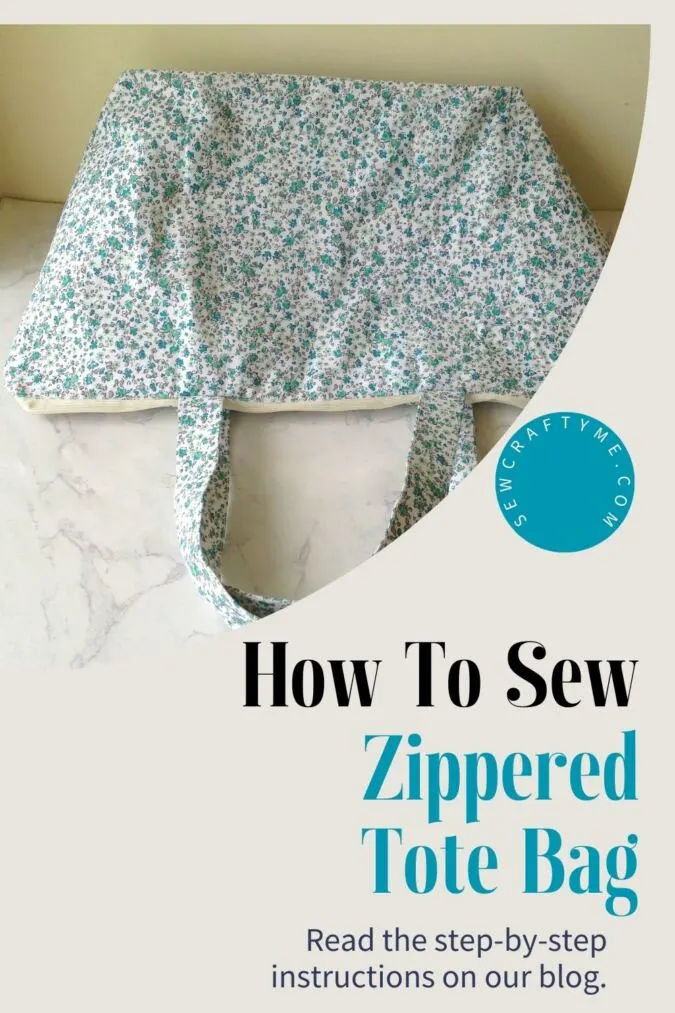
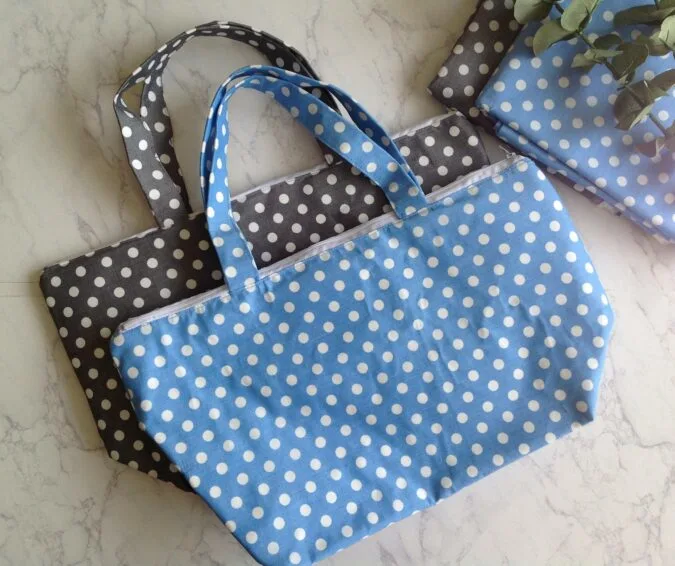
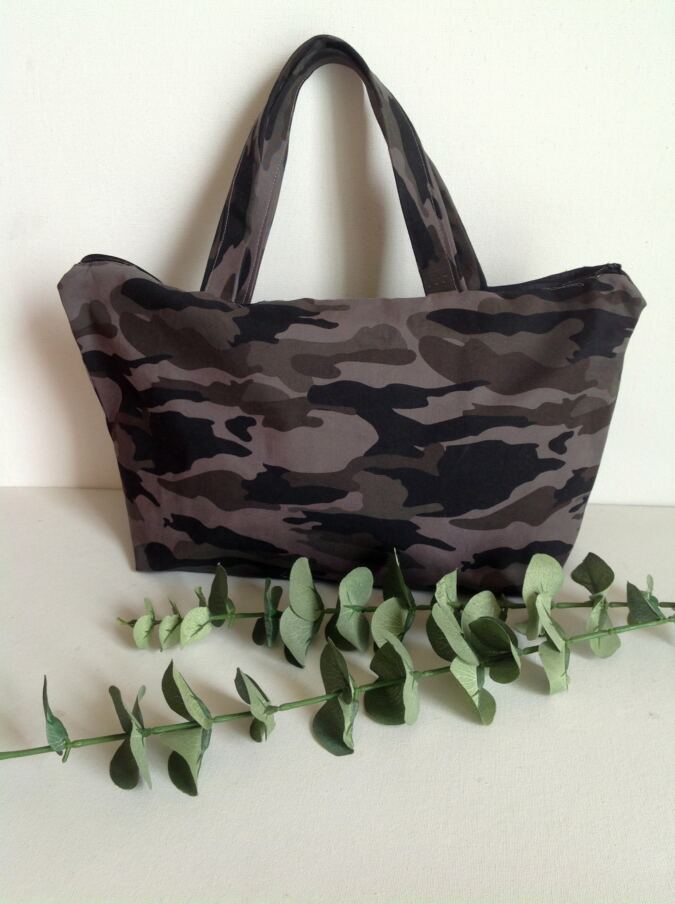
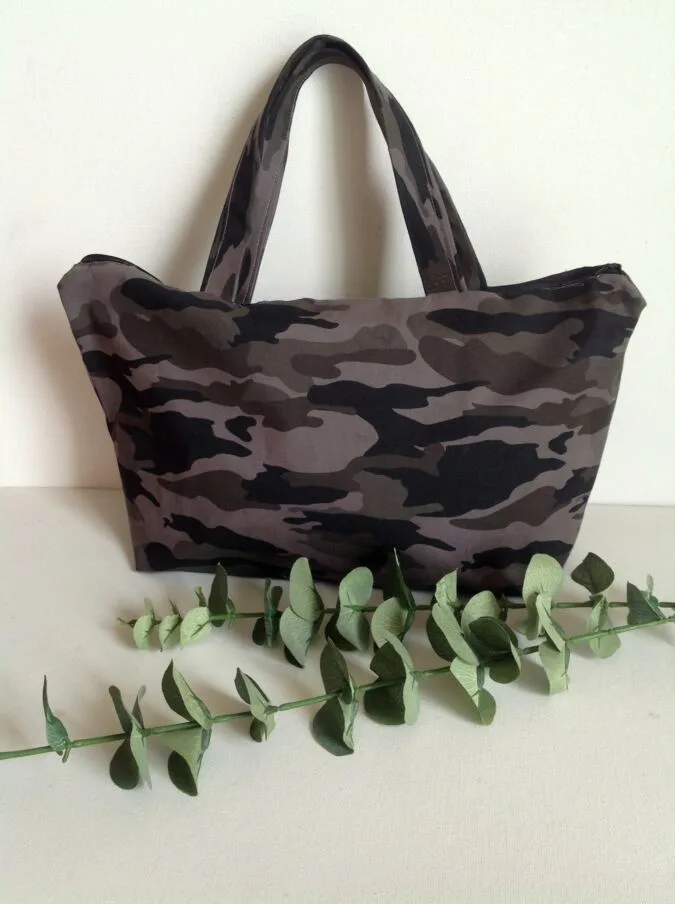
Learn how to sew a stylish and durable “Boat Tote” that’s perfect for carrying all your essentials, whether you’re heading to the beach or running errands.


This is the most professional tote bag pattern I have made. For designing my initial bags, I had tried to avoid zippers to make the process of sewing simple and quick. As I took my subsequent steps in bag designing, taking my readers along, I started adding pockets and compartments on the inside and outside.

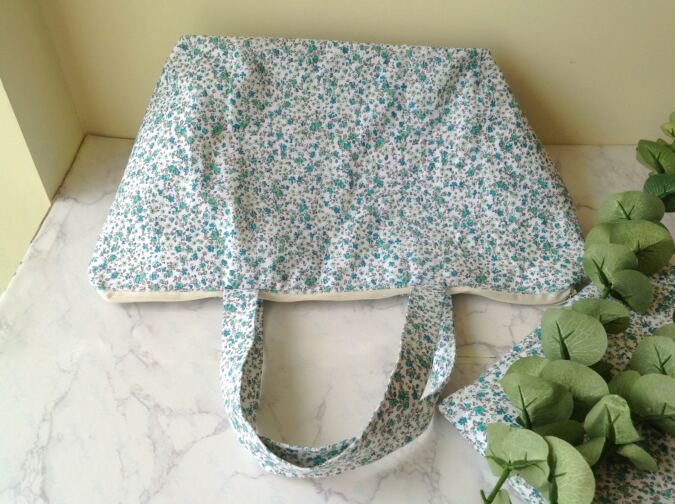

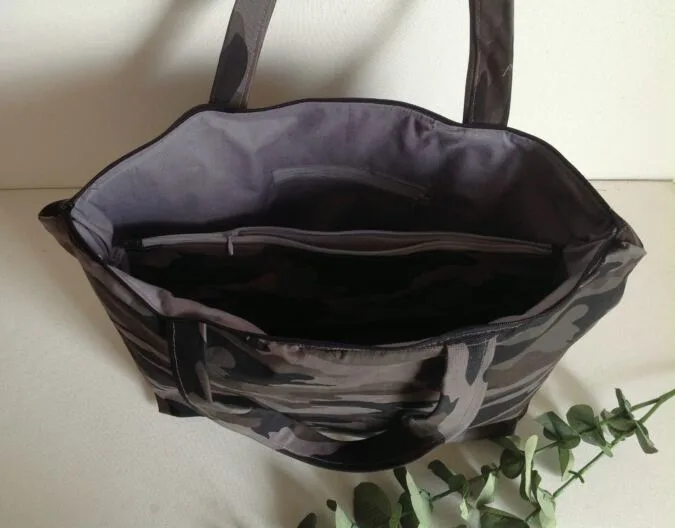
And this time, I have come up with a bag design with zippered pockets and compartments. The “Boat Tote” is a unique shape that combines style and functionality, offering a perfect balance between elegance and practicality.

If you’re looking for tutorials on how to sew tote bag with a modern twist, this pattern is perfect. It requires an intermediate level of expertise, a lot of time, and patience. But I can assure you that the end product will be both satisfying and amazing!

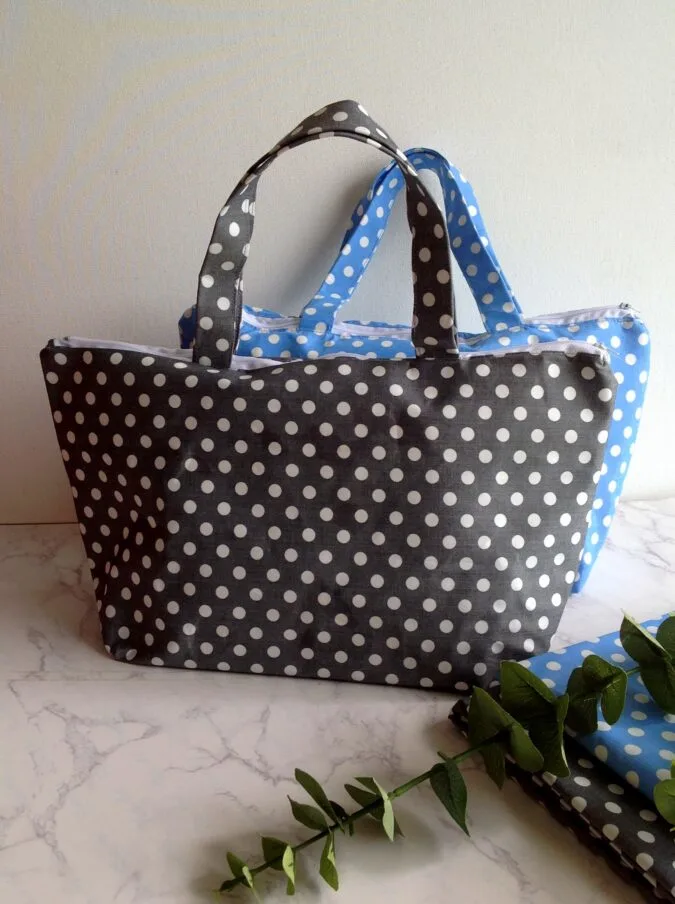
The bag has a zippered compartment and pocket inside. For those interested in learning how to sew tote bag designs like this, it’s a great way to challenge your sewing skills and create something truly special.
How to Sew the Boat Tote: A Zippered Tote Bag Pattern
Supplies Needed:
Medium-weight cotton fabric in a desired print and color for the bag main, straps and compartment- 1/2 yard.
** Here I have used medium- weight cotton to make the sewing process easier. You may use canvas, denim or heavy-weight cotton fabric if you have a heavy duty machine. This would give you a sturdier bag with more body and shape.
Medium- weight fabric in a coordinating color for the bag lining, pocket and compartment- 1/2 yard.
Heavy- weight fusible interfacing- 1/2 yard.
Zipper in a matching color (you will need 3 as given below):
18” zipper for the bag main
12” zipper for the inside compartment
10” Zipper for the inner pocket.
Sewing Notions.


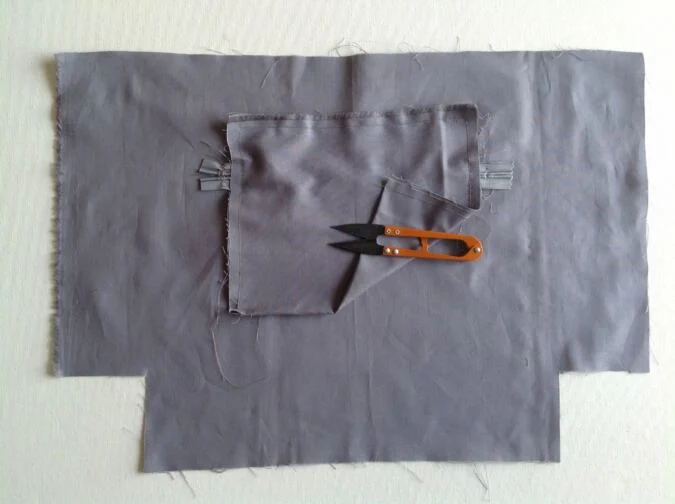
Gather your supplies.
For the bag, you will need to cut fabric pieces in the following dimensions:
Main Fabric
Bag main- 19”W x 13.5”L (cut 2).
Inside Zippered Compartment- 13”Wx 8”L (cut 2)
Bag strap- 3”W x 18”L (cut 2).
Zipper tabs- 1.25”W x 1.25L (cut 8)
Lining Fabric:
Bag lining- 19”W x 13.5”L (cut2).
Zippered compartment lining- 13”W x 8”L (cut 2)
Zippered Inner Pocket Piece- 10”W x 13.5”L
Interfacing:
Interfacing for the bag main pieces- 18.25”W x 12.75”L (cut 2).
Interfacing for the strap- 2.25W x 17.25”L (cut 2).
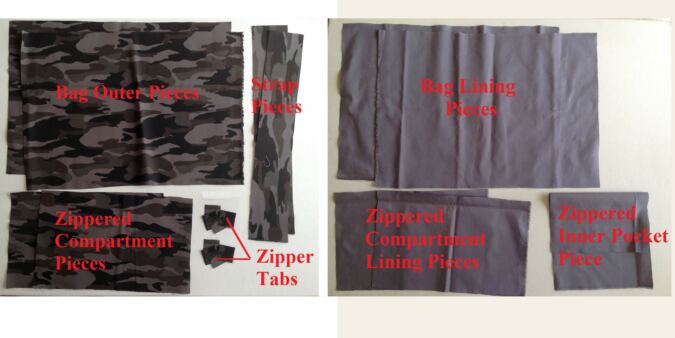

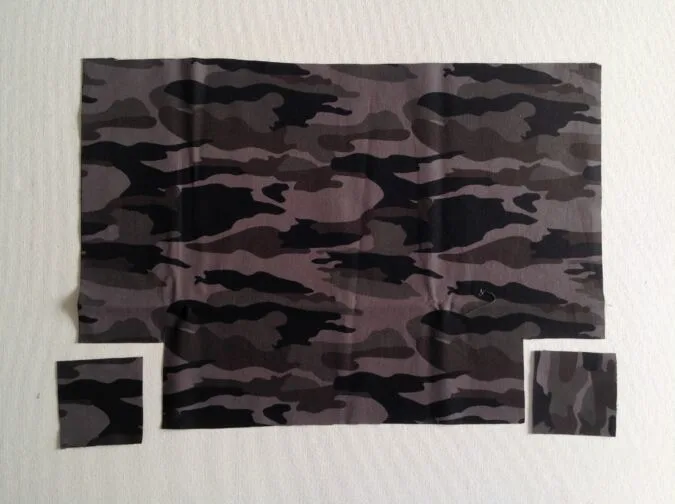
You will get your main and lining pieces like this.
And interfacing pieces like this.

To box the bottom of the bag. We cut off 3” squares from the lower edge, on both sides of both the bag main pieces.
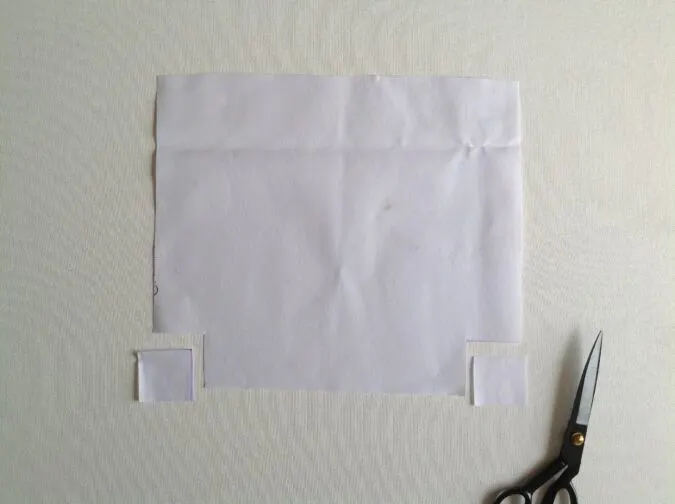
Repeat the same with the bag lining and interfacing pieces (picture for illustration purposes).
Sewing:
We first prepare the inside pocket with zipper.
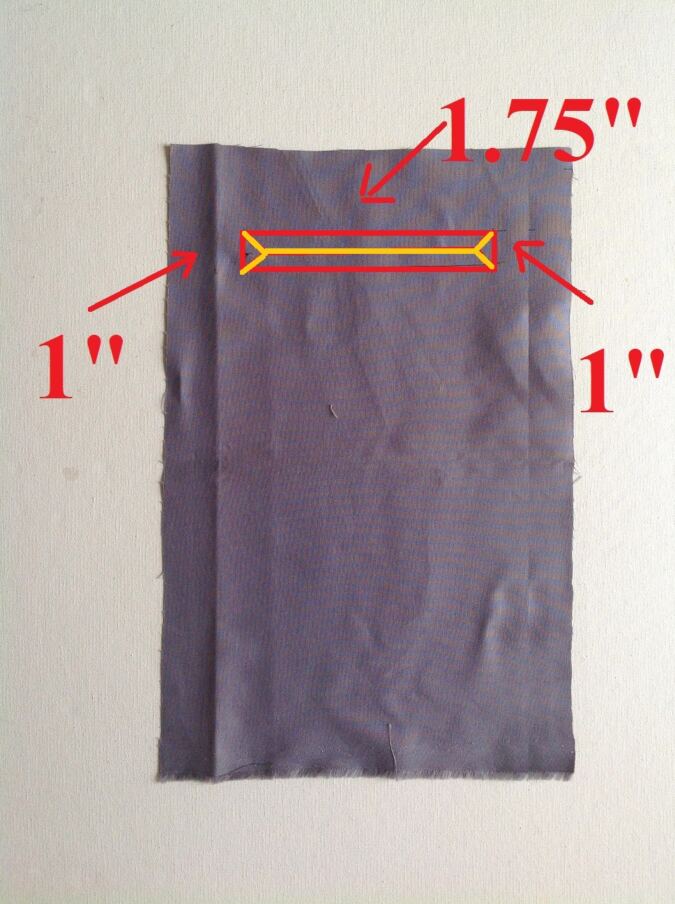

Take the pocket piece (10” W x 13.5”L) and draw a rectangle (red line) 0.75- inches wide, about 1.75- inches from the top edge and 1- inch from both the side edges. Draw the cutting lines, marked by the yellow lines in the picture.
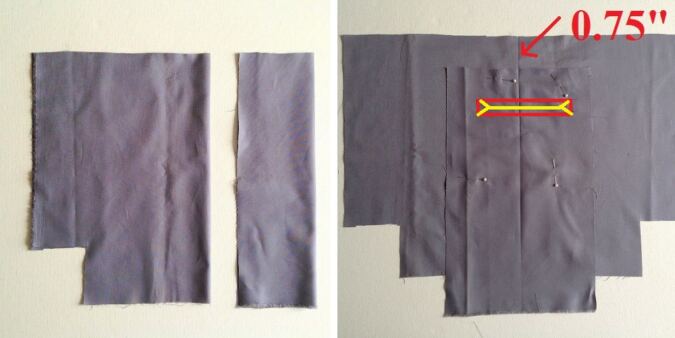

Fold one of the bag lining pieces and the pocket piece in half and handpress to form a crease along the center.
Place the pocket piece, 0.75- inch from the top, lining up the center creases and pin the pocket to the lining.
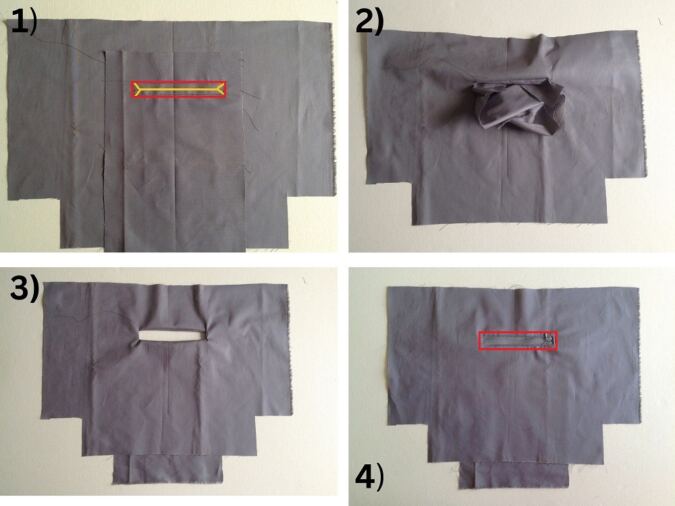

1) Sew around the rectangular marking (red) and cut along the yellow lines (you will get a rectangular hole).
2) Push the entire pocket piece to the other side through the rectangular hole.
3) Pull the pocket piece taut on the back of the lining and press to make it clean and crisp.
4) Place the 10” zipper under the hole, with the right side up and sew around the rectangle to secure.
Let’s sew the pocket shut.
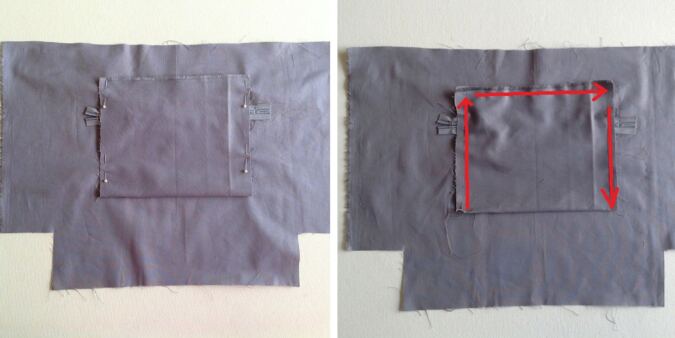

Fold the pocket in half and pin to secure. Sew it shut around the top and side edges. **Note that you sew only around the edges of the pocket, keeping the bag lining away.

It would look like this once done (with the pocket, separate from the lining).
Next, we prepare the inside compartment with zipper.
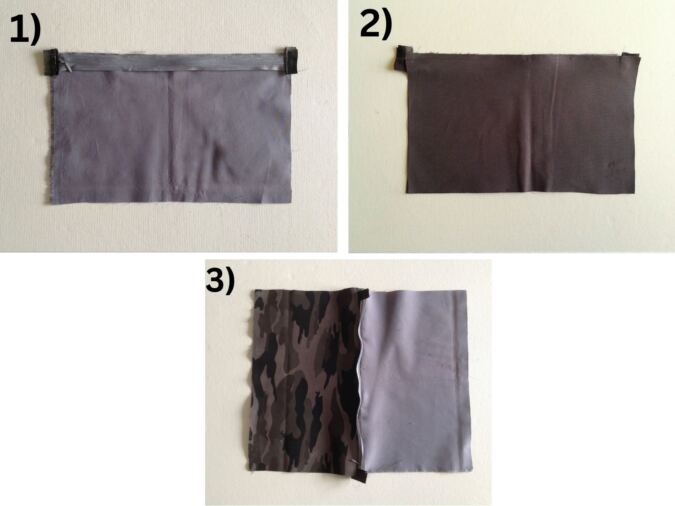
Let’s sew the zipper tabs first.


1) Take the 12” zipper. Take 2 zipper tab pieces, sandwich one of the ends of the zipper in between the right sides of the pieces and place a clip to hold.
2) Sew along the edge to attach the tabs.
3) Flip the tabs over the right side and topstitch just next to the seamline to make it clean and crisp. Repeat with two more zipper tab pieces along the other edge of the zipper.

1) Lay the inner compartment lining piece, with the right side facing up. Lay your zipper with the right side up, lining up the edge with the upper edge of the lining.
2) Place one of the compartment outer pieces, right side facing down, on top of the above lining piece. Align the top edge of the zipper with the raw edge of the outer (the zipper is now sandwiched between the outer and lining pieces). Pin the three pieces along the aligned edges. Using a straight stitch, sew the pieces and the zipper together.
3) It would look like this once spread out, fold it back.

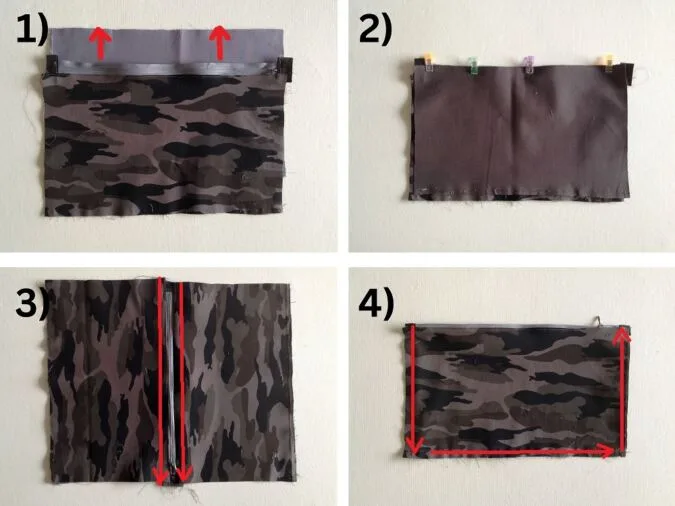
1) Lay the remaining lining piece flat. With the right side facing up, lay the pieces with zipper attached, above it, lining up the free edge of the zipper with the upper edge of the lining.
2) Place the remaining outer piece above the layer, again lining up with the free edge of the zipper. Sew the pieces together to join.
3) Open the pieces, with the outer pieces facing up and the respective lining pieces beneath it. Press and topstitch under the zipper.
4) Fold the pieces back with the outer pieces facing out and sew it shut around the raw edges.


Take the lining piece (without pocket), line up the lower edge of the compartment with the lower edge of the lining and sew to join, leaving about 0.5- inch on either side.
Let’s move on to the bag main pieces.

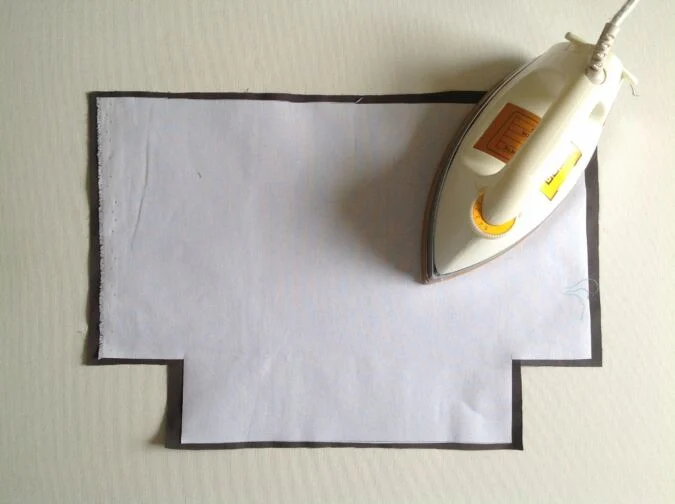
Fuse the interfacing to the wrong side of the bag main pieces, following the manufacturer’s instructions. Make sure leave equal space all around the interfacing while fusing.
Next, we prepare the straps.
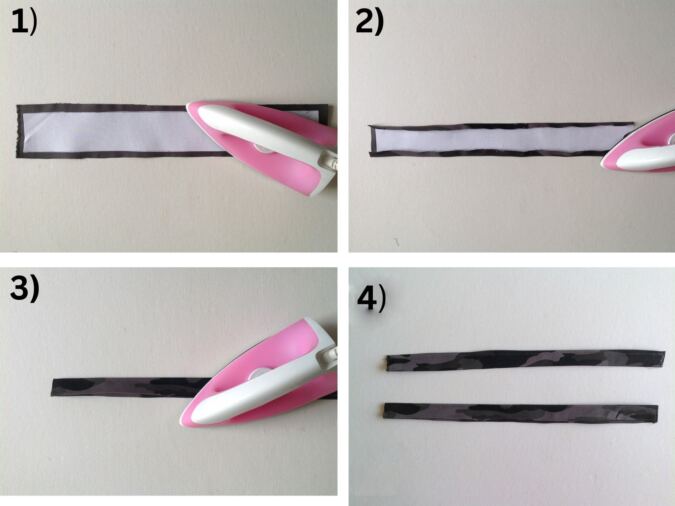

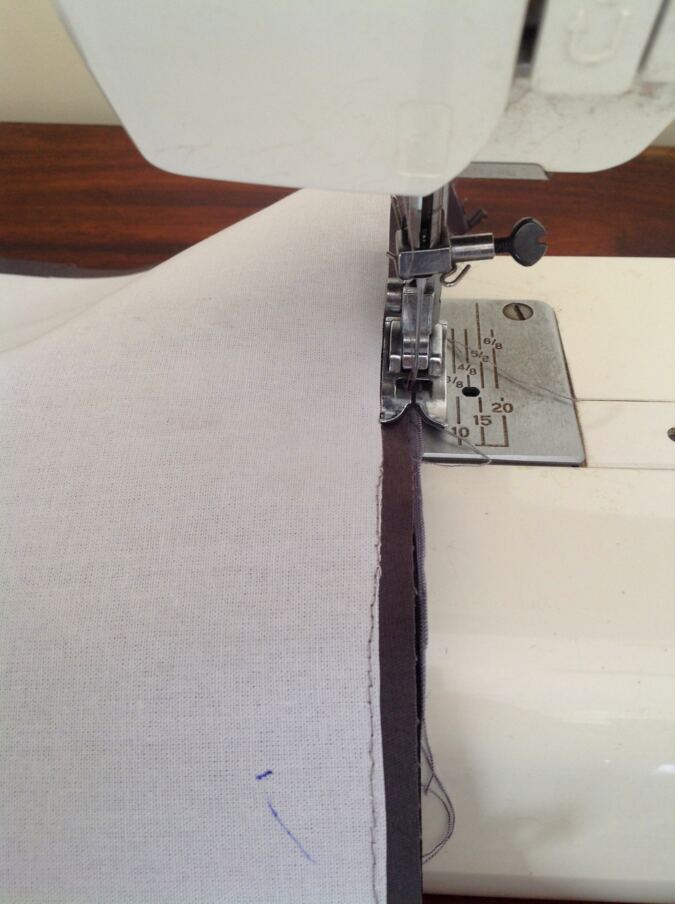
1) Take the strap piece and fuse the interfacing to the wrong side, leaving equal space all around and following the manufacturer’s instructions.
2) Fold the two long edges towards the wrong side by 3/8- inch and press.
3) Fold it in half again lengthwise and press once more.
4)) Sew the strap shut along the edge of the folds. Repeat to get the other strap ready.
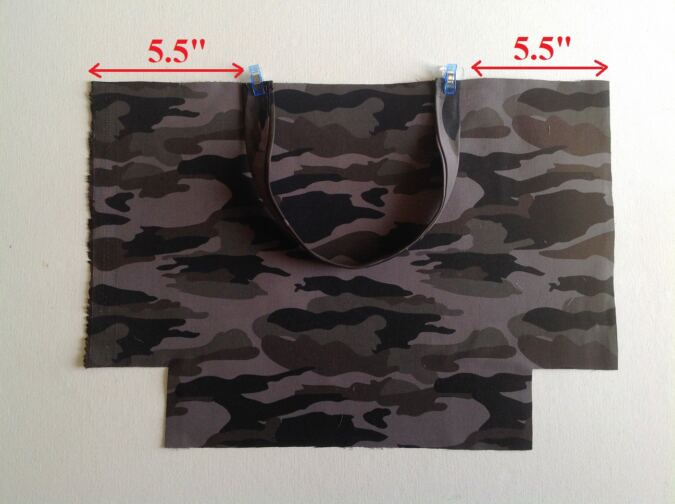

Take one of the bag main pieces, place the short edges of the strap 5.5-inches from the side edges and pin. Sew the strap to the piece. Repeat with the other strap on the other bag main piece
Let’s attach the zipper. Attach the zipper tabs as described earlier.
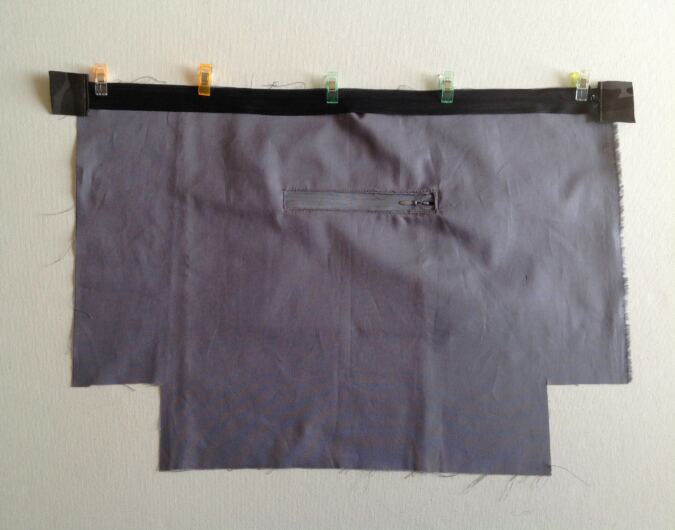
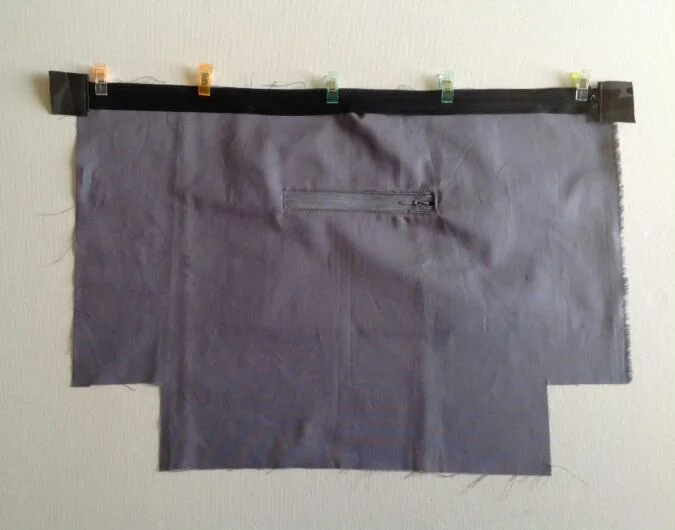
Lay the bag lining with pocket, the right side facing up. Lay your zipper with the right side up, lining up the edge with the upper edge of the lining and place clips to hold.

Place one of the bag main pieces, right side facing down, on top of the above lining piece. Align the top edge of the zipper with the raw edge of the bag main (the zipper is now sandwiched between the bag main and lining pieces). Pin the three pieces along the aligned edges.

Using a straight stitch, sew the zipper/pieces in place.
Next, we join the remaining bag main and lining to the free edge of the zipper.
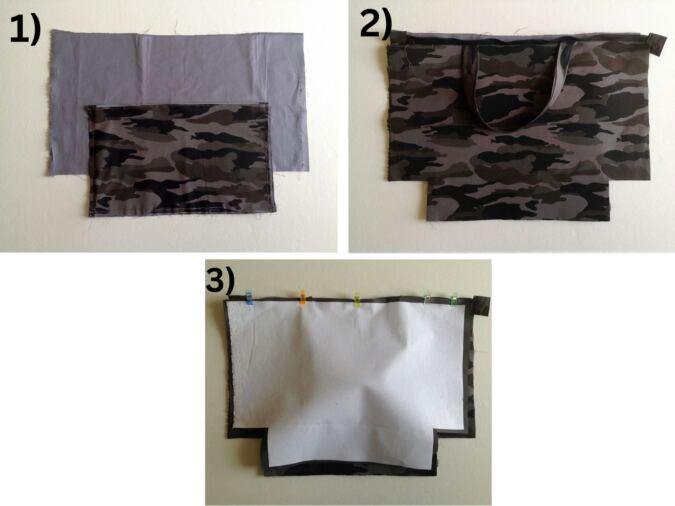
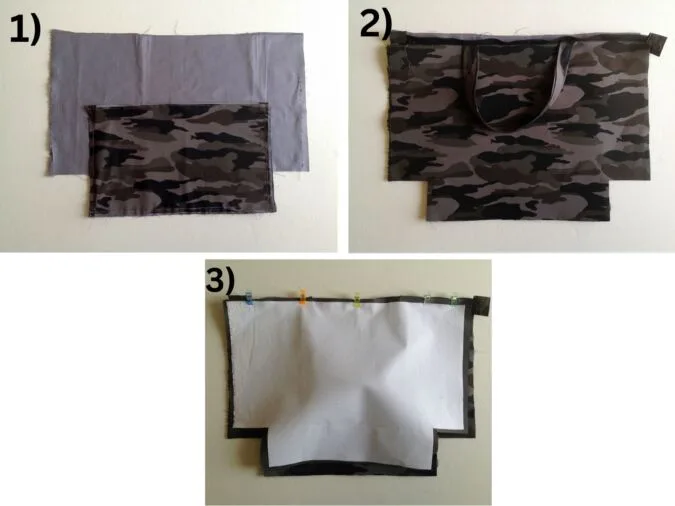
1) Lay the remaining lining piece flat, with the right side up.
2) Lay the pieces with zipper attached above it, lining up the free edge of the zipper with the upper edge of the lining.
3) Place the remaining bag main piece above the layer with the right side facing down and lining up with the free edge of the zipper. Sew the pieces together to join.
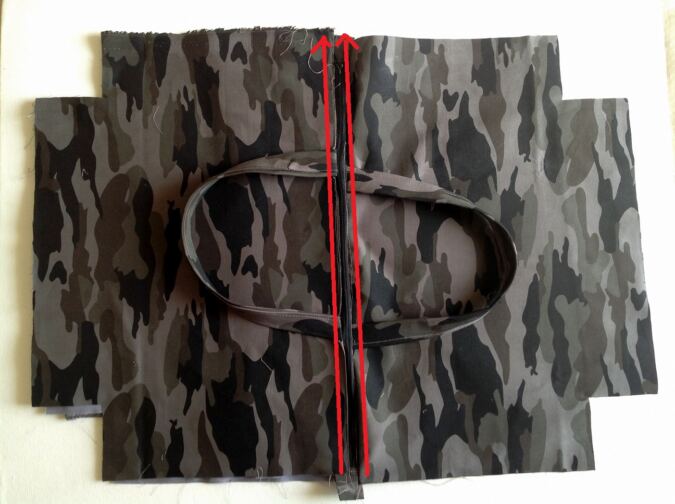

Open and flip the fabric so the right side of the pieces and the zipper are facing up (zipper should be in the middle). Line up the edges and press. *Here you may trim any uneven edges, if there are any.
Topstitch just under the zipper to make it clean and crisp.
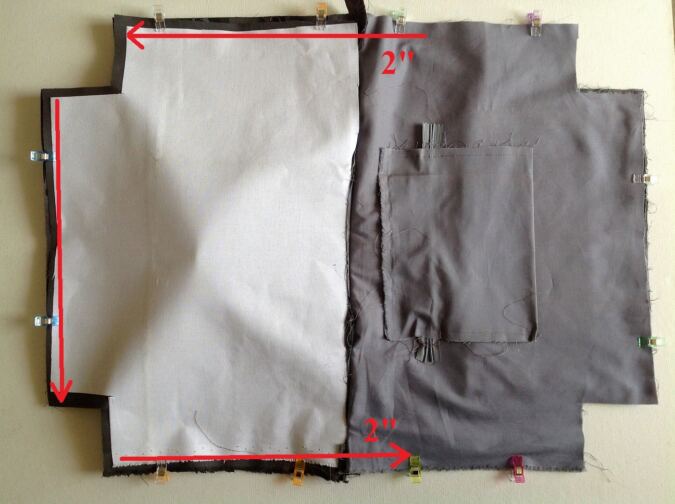

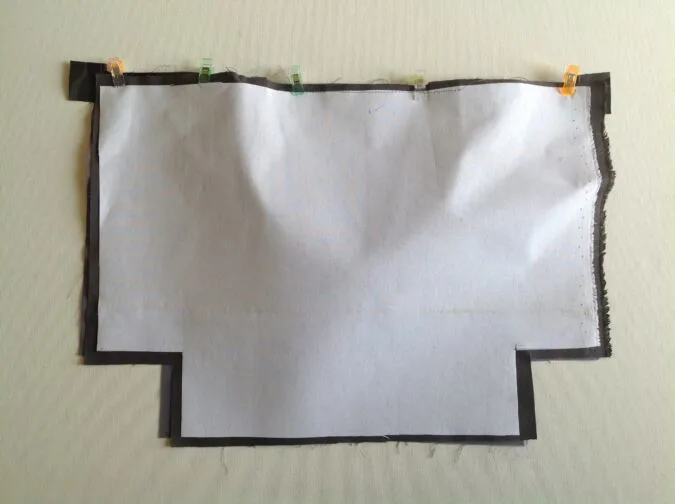
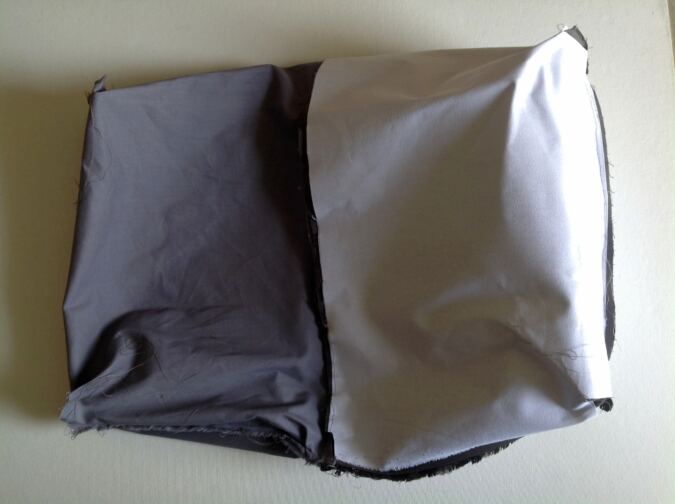
Next flip the bag outer and lining so that the edges of the two bag outer pieces are lined up together and the edges of the two lining pieces are lined up together.
Pin and sew along the lower edge and side edges of the bag main pieces and continue sewing about 2” into the side edges of the lining on both sides. **The remaining part of the lining is sewn shut after attaching the inside compartment. And, the corners are left open to be boxed later.

**Please note that you should keep the zipper ends turned towards the lining while pinning (picture for illustration purposes).


Flip one of the lining pieces over. Line up the side edge of the compartment to the side edge of the lining piece, starting from the lower edge and place clips to hold. Repeat on the other edge. Sew along both the lined up edges to join.
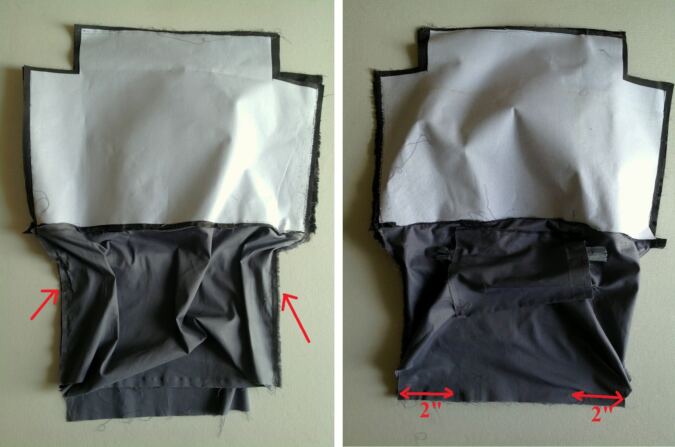

Flip back the folded lining piece, lining up the lower and side edges. Sew shut along the side edges and along 2” of the lower edge on either side. ** The middle part of the lower edge of the lining is left open to pull the right side out. Again, the corners are left open to be boxed later.
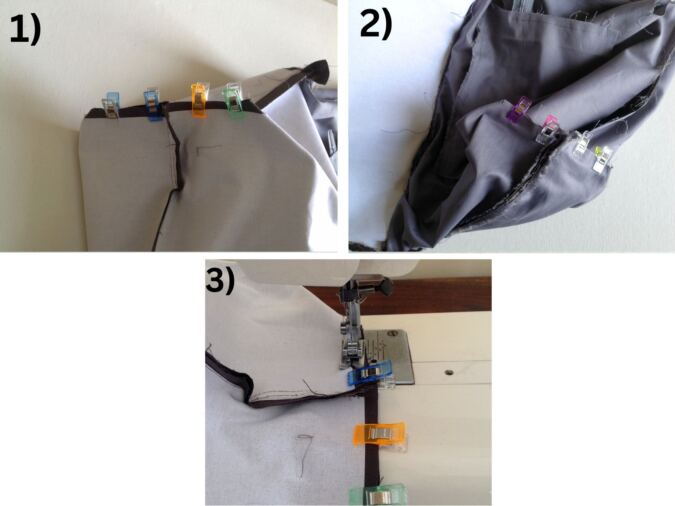

1) Next, pull open the corner at the bottom of the bag, align the side seam with the bottom seam and put clips to hold them together. Now you have boxed the corner.
2) Repeat with the lining corners.
3) Sew a line ½ – inch from the edge as shown above. Make sure to reinforce the stitches at the start and finish.

It would look like this when all the four corners are boxed.


Pull the right side out through the opening.

Tuck the raw edges in the lining and place clips to hold.
Sew the opening shut.


Push the lining to the inside of the bag.


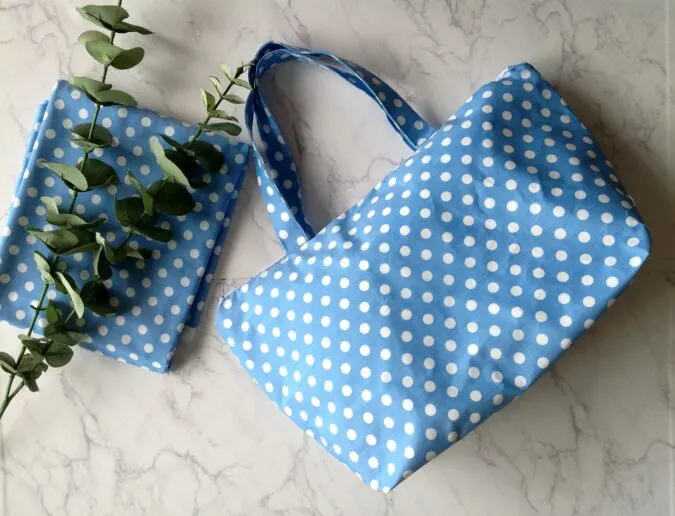
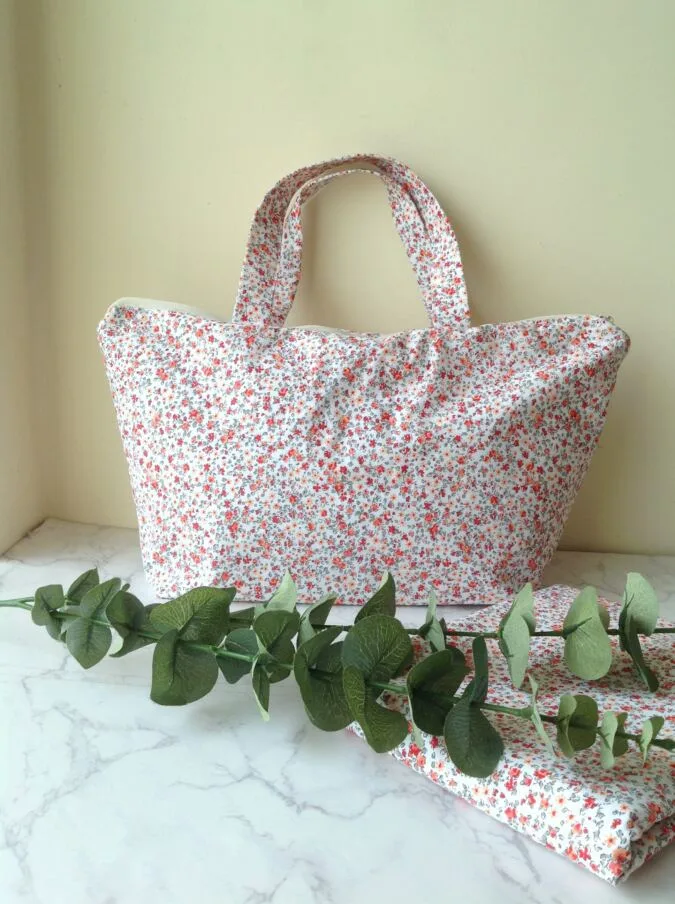
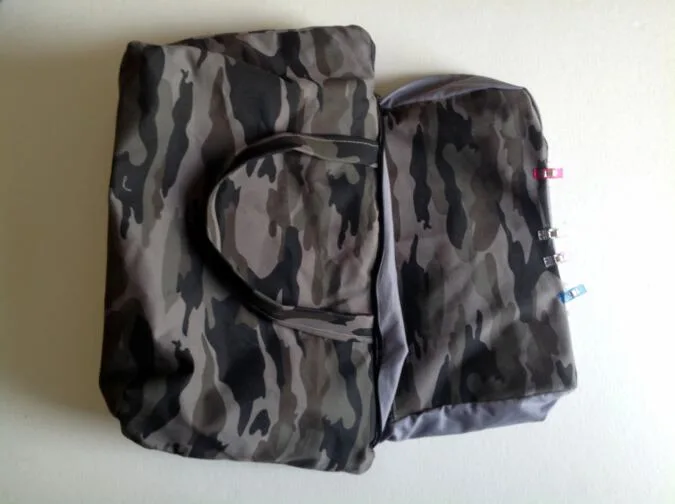
Our bag with zippered compartment and pocket is ready!
Look at the web story for the post here, A Step-by-Step Guide: Sewing the Zippered Boat Tote
Pin it for later here,