I’m so excited to share the Harper Top – my very first summer pattern for babies and toddlers this year!

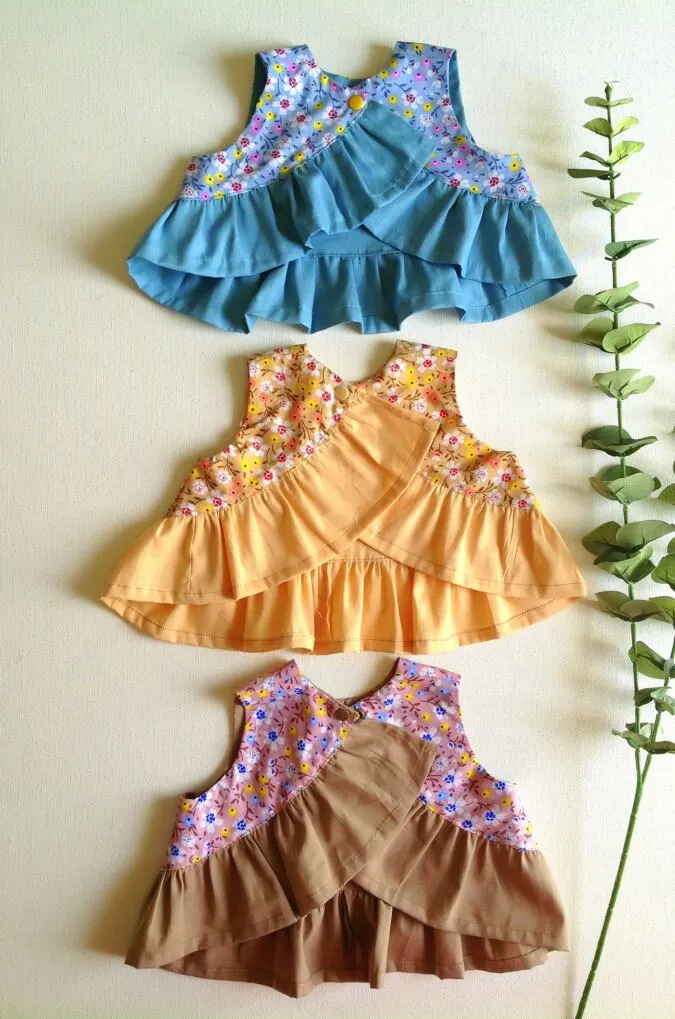
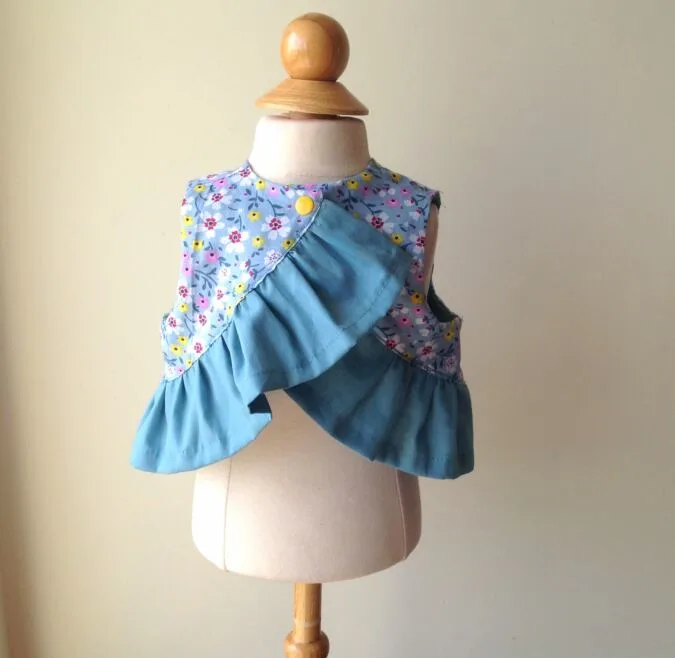
This free pattern features an adorable open-back design with sweet cascading ruffles along the lower front and back, giving it that playful touch every little one needs.


You can mix and match fabrics to create something totally unique and personalized, making each top feel like a one-of-a-kind piece.

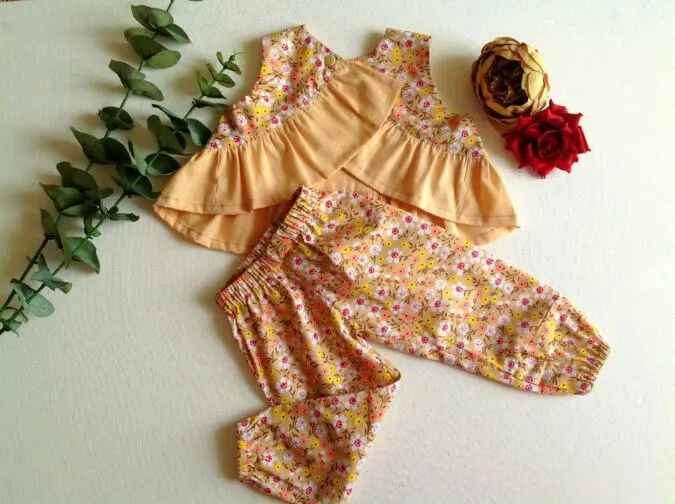

It looks super cute paired with my easy baby bloomers, tie-hem shorts, or comfy elasticized hem pants.
Let’s get sewing and make something fun together!
Girl’s Back Ruffle Top Sewing Pattern- The Harper Top
Materials Required
- Medium- weight cotton fabric for the top outer- requirements specified in the table-2 below.
- Medium- weight cotton fabric for the top lining.
- Medium-weight cotton fabric for the ruffles.
- Sewing Notions.
- Fabric Marking Pen.
- KAM Snaps in a matching color- One Pair.
- Pattern template. *Enter your e-mail address and click the subscribe button in the box below to download the template.
All the fabrics used here are of 44/ 45 inches width.
The seam allowance is 3/8-inch unless otherwise specified.
I suggest you read the entire pattern once before starting to get a general idea.
All seams are to be finished by zigzag or serger.
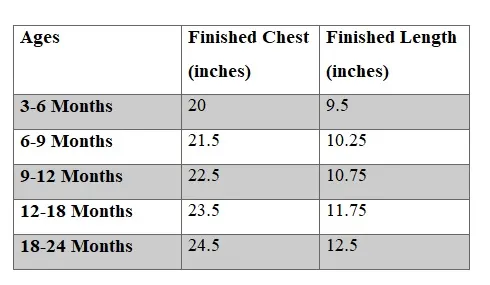
Size Chart

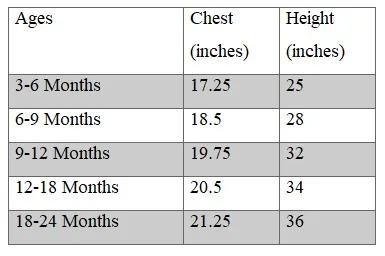
Approximate Finished Measurements.
- Note: The Finished length included the ruffles.
Table-1.

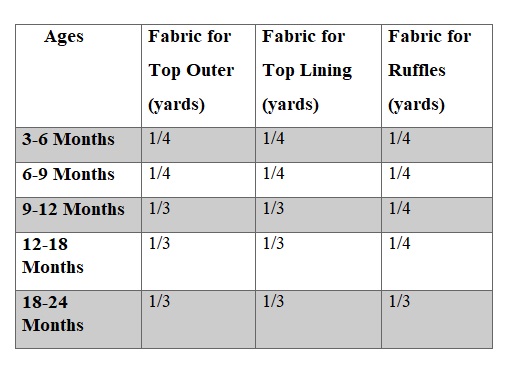
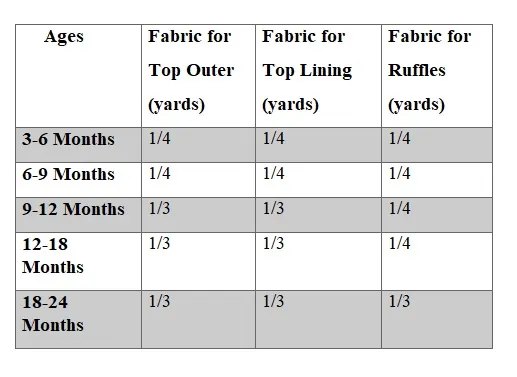
Fabric Requirements.
Table-2
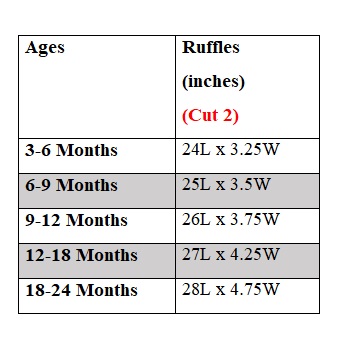
Measurements
In the table below, “L” stands for the length and “W” stands for the width of the fabric piece to be cut.
Table-3


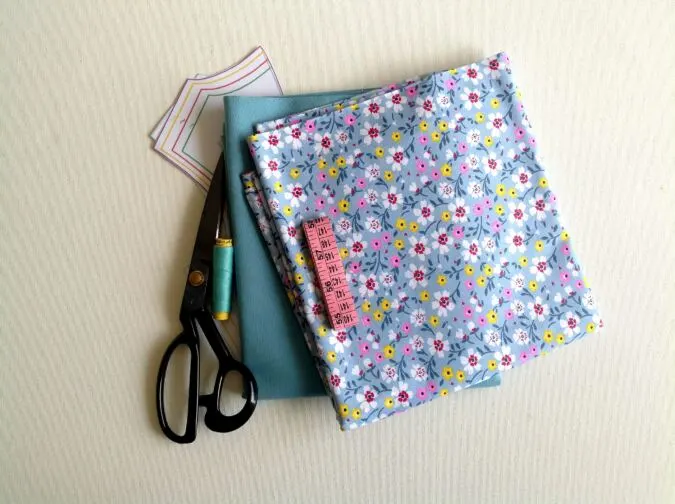
Gather your supplies. Here I have used the blue printed fabric for the top outer and and solid blue fabric for the lining. The same fabrics has been used for the ruffles.
Cut the templates for the top front and top back from the attached PDF.

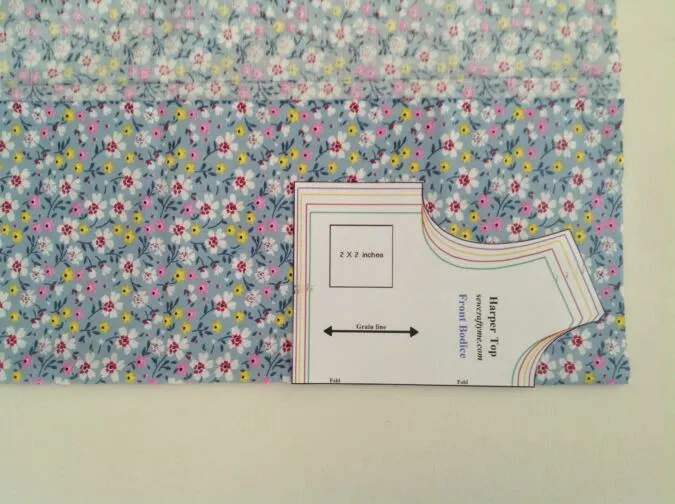
Take the top outer fabric and the template for the top front. Fold the fabric to fit the width of the template and place the template on the fold. Mark around it and cut to get the outer front piece. Repeat the steps on the lining fabric to get the front lining.

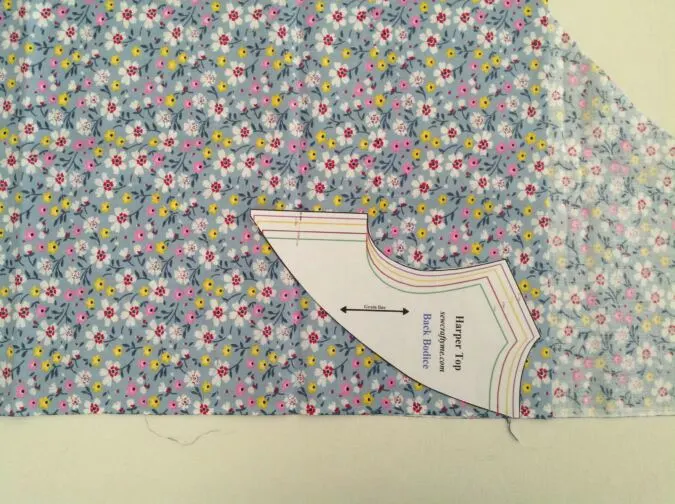
Let’s cut the back pieces. Here again, fold the fabric, but this time, place the template for the back, along the edge of the fabric. Mark around it and cut to get two pieces for the back (the back part of the top is done in two pieces, for opening). Repeat the steps on the lining fabric to get the back lining pieces.


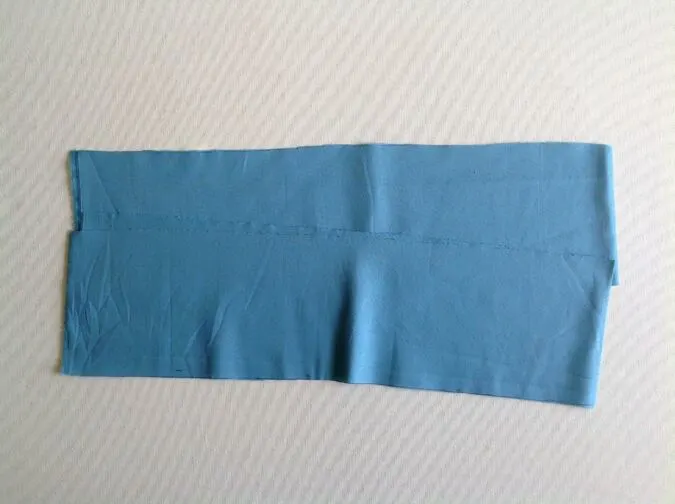
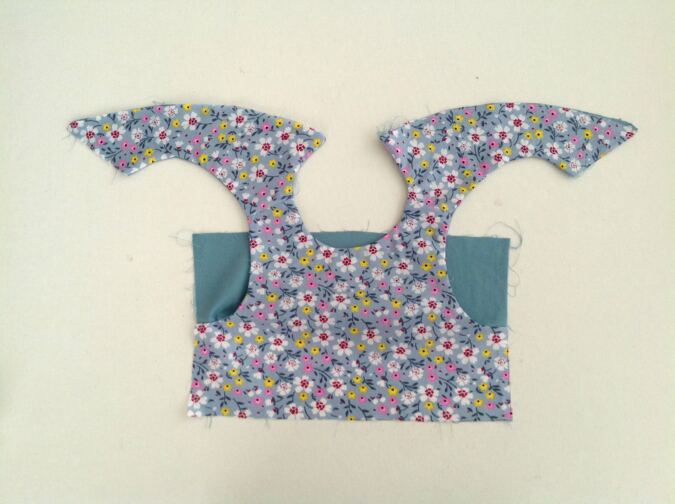
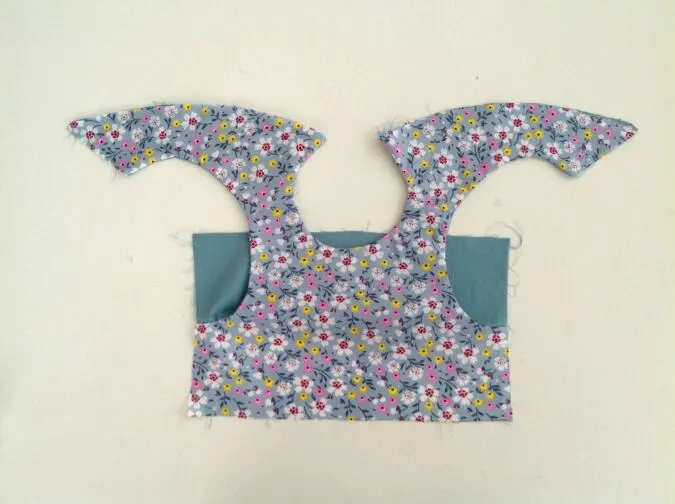
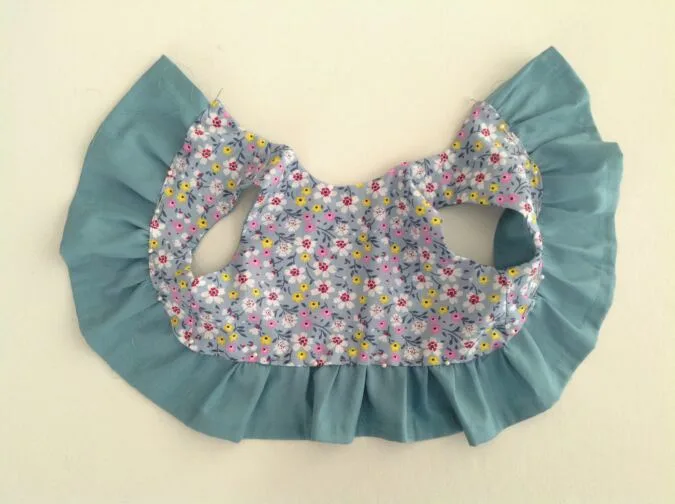
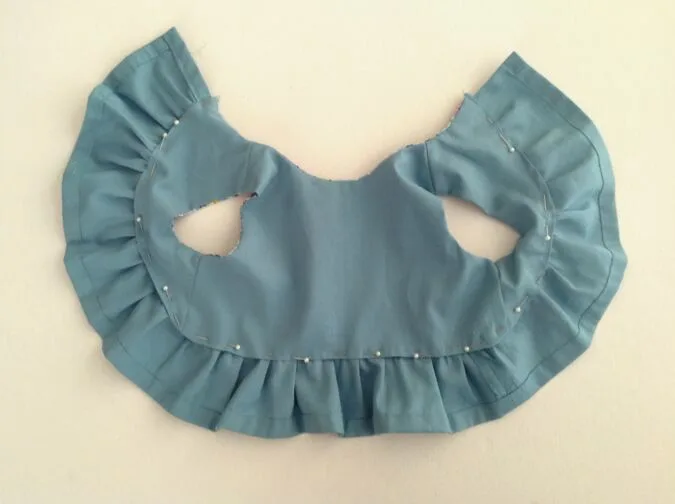
Your top front, top back and lining pieces will look like the picture above.

Cut the ruffle pieces, referring to the table-3 above.
Sewing

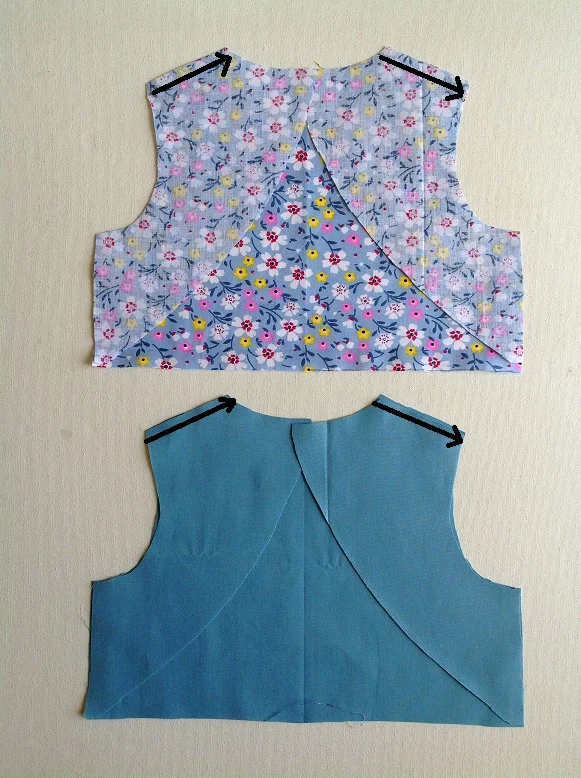
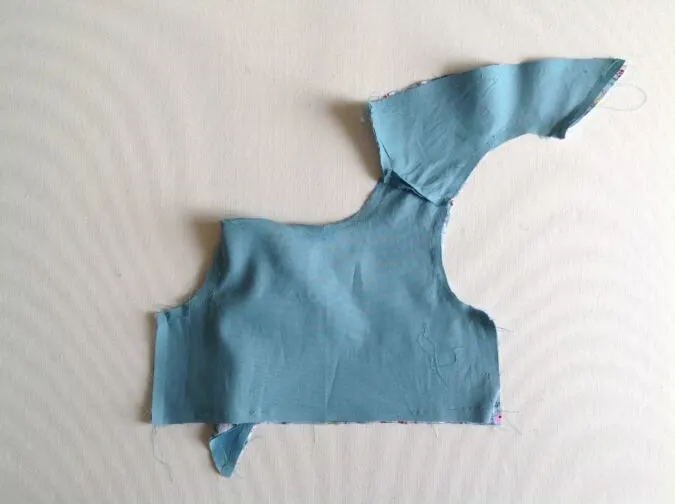
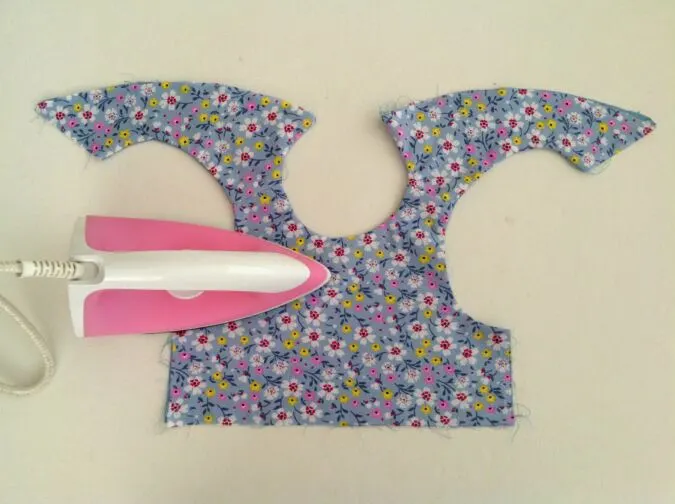
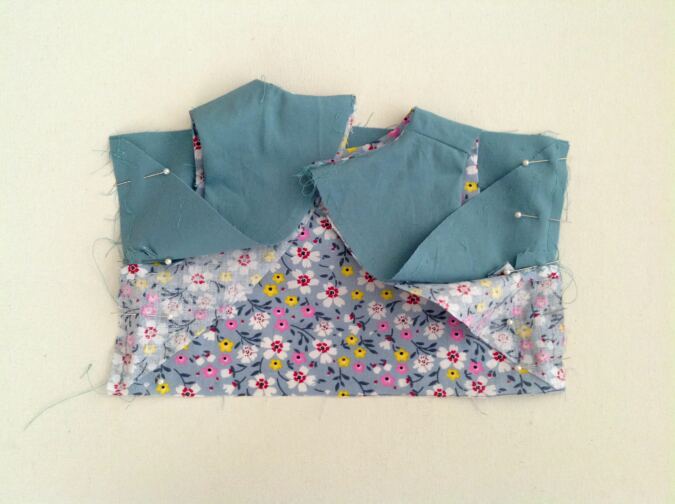
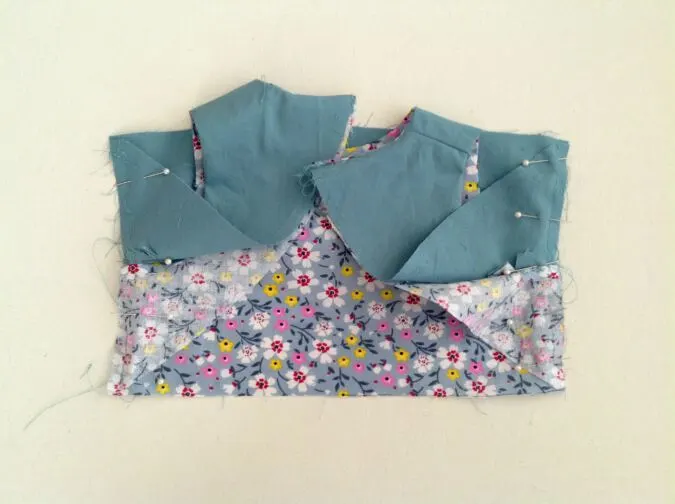
Take the two back pieces of the top outer and place them over the top front piece, with the right sides together, aligning the shoulders and side seams and sew the shoulders shut. Sew the front and back lining pieces together, just as the top outer pieces.
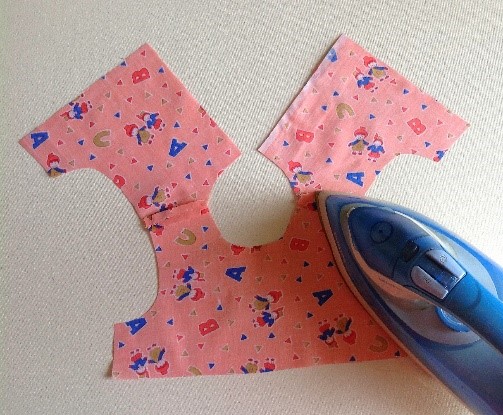

Press the seams flat (picture for illustration purpose).
Next we sew the top outer and top lining together.
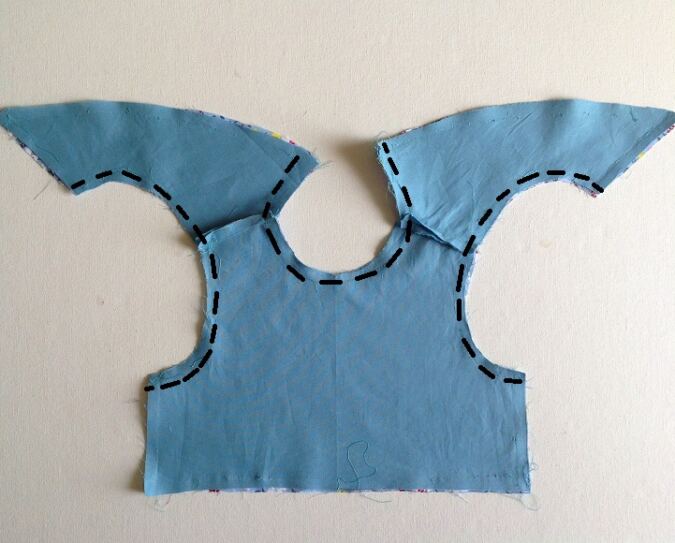

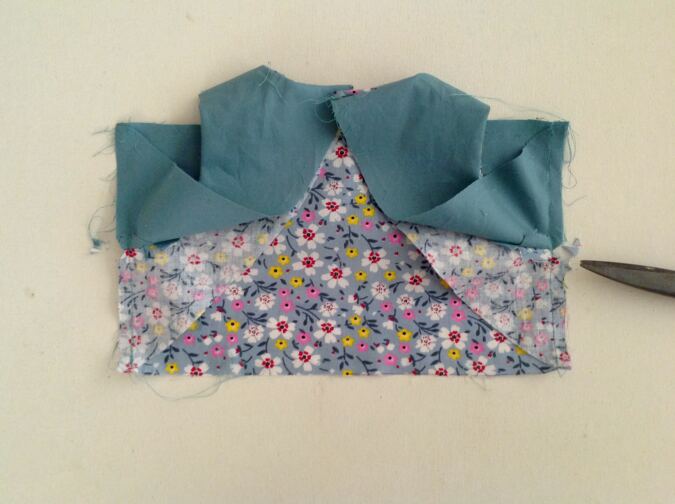
Place the top lining over the top outer. With the right sides together, lining up the center back, neck and armholes. Pin and sew along the neck and along the two armholes.

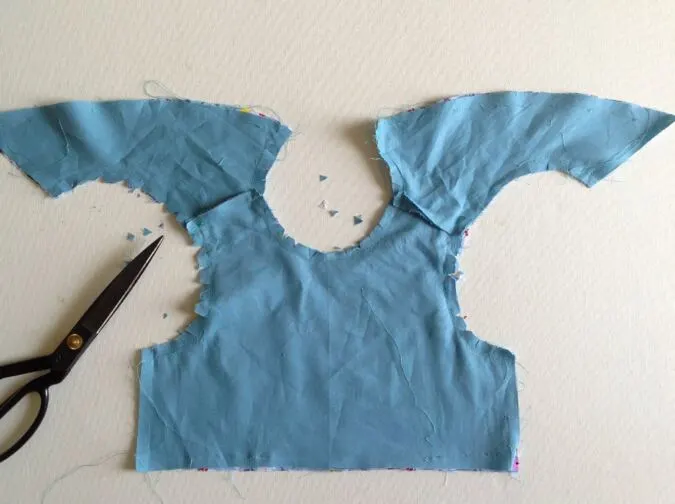
Clip the edges and cut the corners.

Slide your hand in between the top outer and lining and pull the right side of the top back out, through the shoulders. Keep pulling the top back on either side, till the whole of it is turned inside- out.

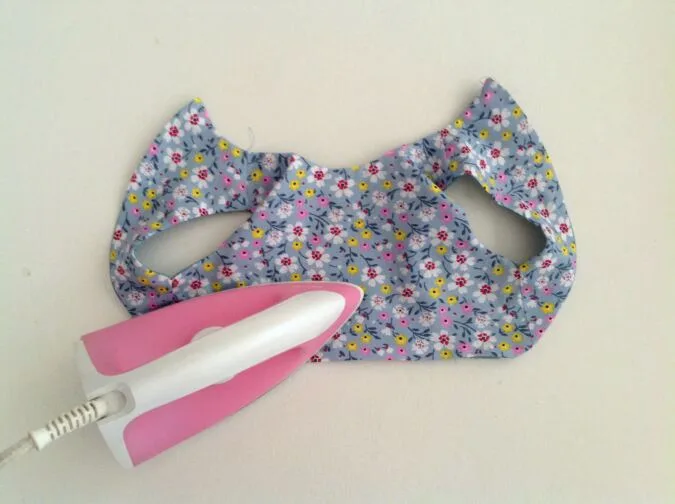
Poke the edges sharp, with the help of a wooden dowel and press taut.
Let’s sew the side seams of the top shut.
Pull the front outer and lining apart to open the side seams as shown above. Repeat with the back outer and lining pieces.
With the right sides touching, align the side seams of the front and back outer together and the side seams of the front and back lining together. Pin the aligned edges (side seams) together and sew along the pinned edges.

Clip the bulk in the seam and flip back the front and the back of the top outer to the right side.

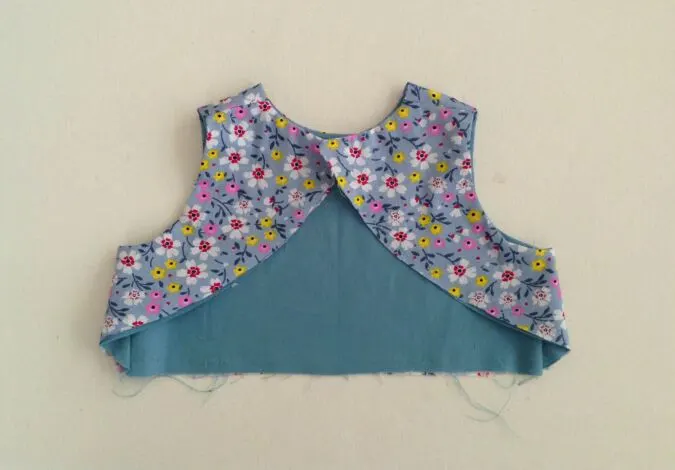
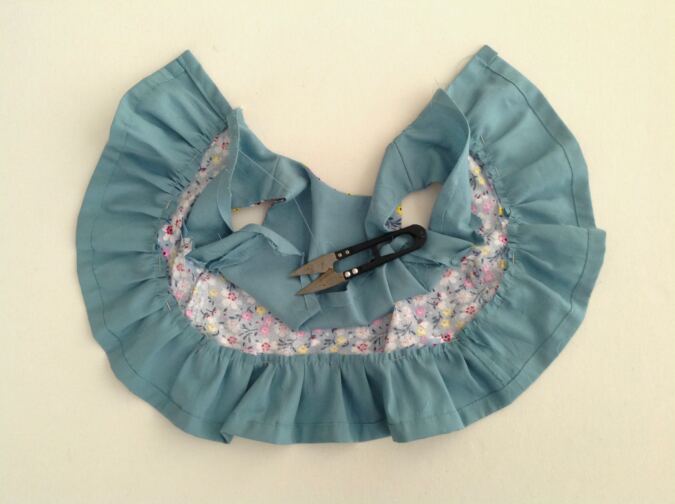
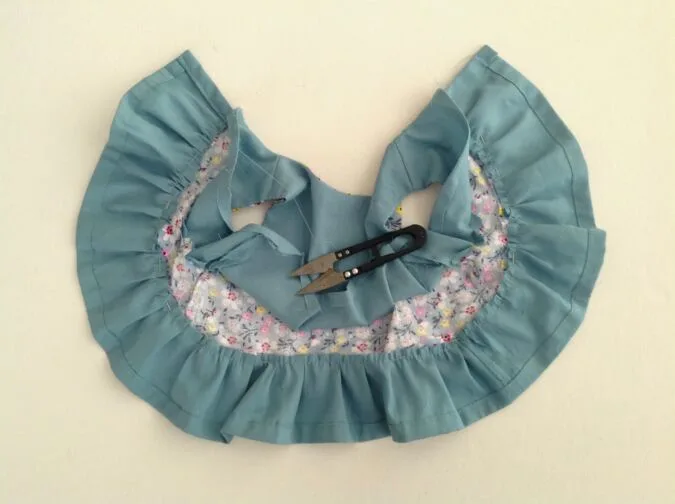
It will look like this.
Next, we move on to the ruffle.

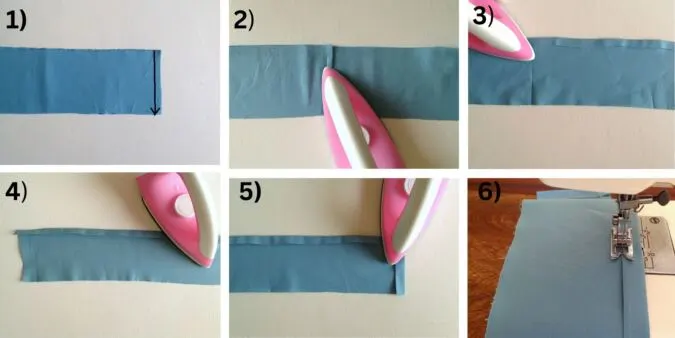
1) Join the ruffle pieces along the shorter edges.
2) Press the seam flat.
3) Fold one of the longer edges by ½- inch and press.
4) Fold again by ½- inch and repeat pressing.
5) Press the two shorter edges in a similar manner.
6) Sew down the folds along the edge.
Next, we need to gather the ruffle. Turn the upper thread tension of your machine to zero and stitch length to the longest to get a basting stitch.

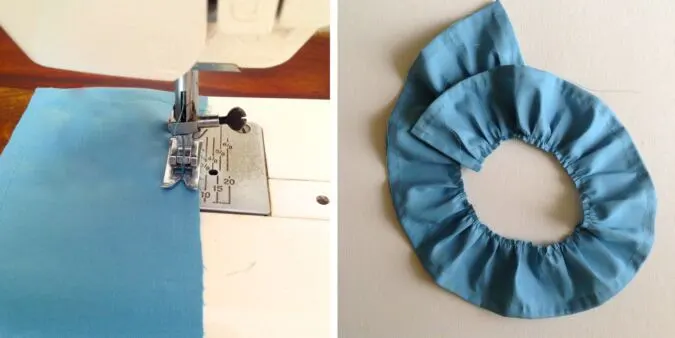
Sew a basting stitch along the raw edge of the ruffle, leaving a long tail of thread 5-6- inches long to gather it. Pull the thread from the bobbin gently and gather the ruffle. Adjust the gathering to make it uniform and to fit the lower edge of the top.
Let’s attach the ruffle to the top.

Fold the raw lower edges of the top outer and lining by 1/2- inch towards the wrong side and press all around.
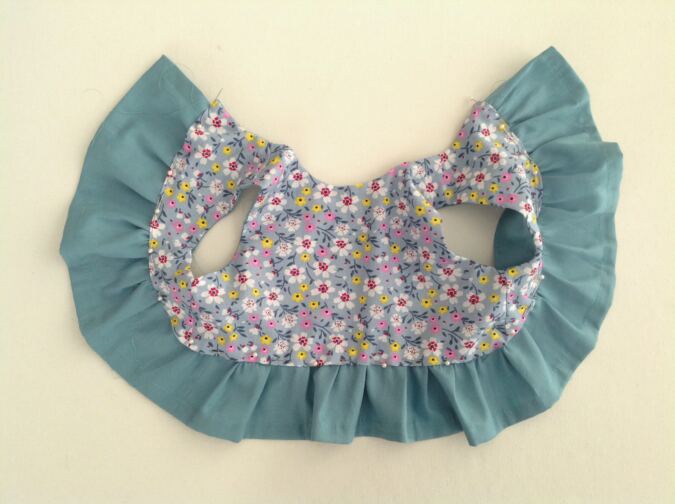
Starting from the top edge of one of the back pieces, line up the gathered edge of the ruffle under the folded edge of the top outer (covering the gathering stitches) and pin all along. *Note: take care to keep the lining away while pinning.
The back should look like this with the lining flipped upwards.
Turn the machine settings back to normal.

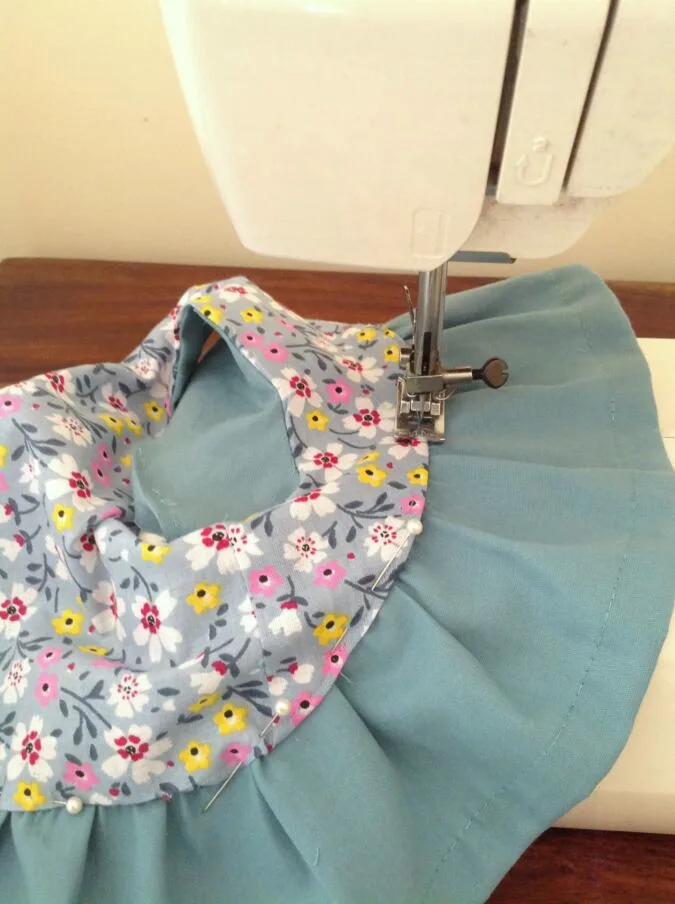
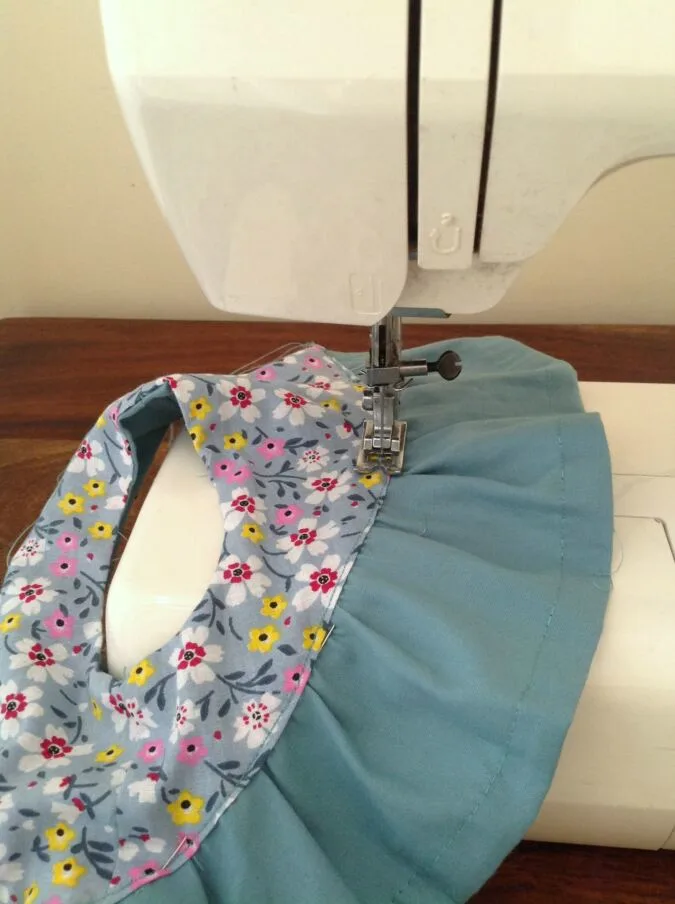
Sew the ruffle to the top outer, removing the pins as you go (you may baste the ruffle and outer piece by hand or by machine and remove the stitches later once the lining is sewn shut).

Place the folded edge of the lining over the ruffle all around. Pin the lining to the outer, covering the earlier stitches.

Topstitch along the seam line carefully to sew the lining shut, sandwiching the ruffle in between.


Cut off the hanging thread, attach the KAM snaps, following the instructions manual and our top is done!
Find the webstory for the post here; The Harper Top Sewing Pattern: Girl’s Back Ruffle Shirt
Pin it for later here,

Judy Line
Wednesday 7th of May 2025
Lovely
Debbie
Monday 31st of March 2025
Love it