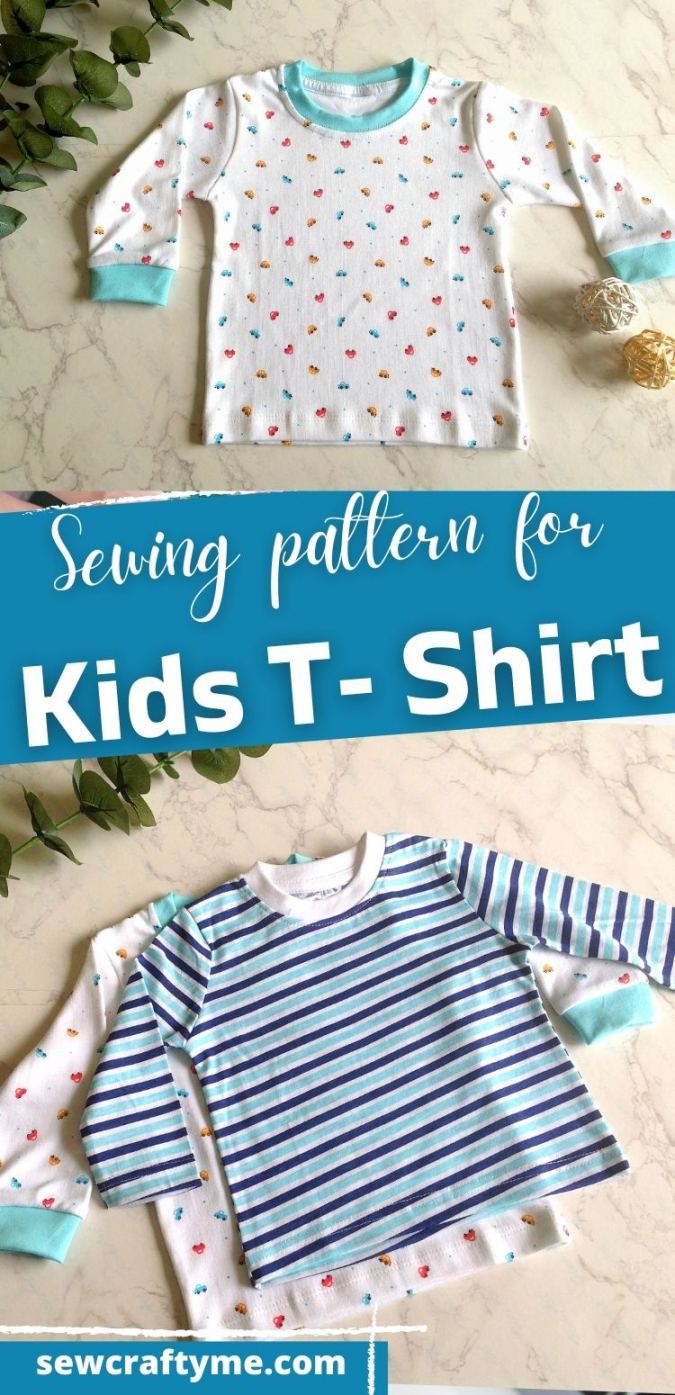
Learn how to sew t-shirts for boys and girls with this free kid’s t-shirt sewing pattern. This is a step-by-step sewing project with free downloadable templates for sizes 12 months to 5 years.
Isn’t it hight time I gave you a kids t-shirt pattern? I have designed almost all common outfits for little ones and this free t-shirt sewing pattern is something I have been working on for quite some time. I had kept this pattern ready for the holiday sewing so that my readers can sew a matching T-shirt with pajamas to be worn during Christmas eve.


T-shirts are available in plenty in stores but we being ardent seamstresses, we would always love to make everything handmade for ourselves and our kids right? We always have our creative juices flowing to mix and match different fabrics and prints to create a “me designed” outfit for our little ones.

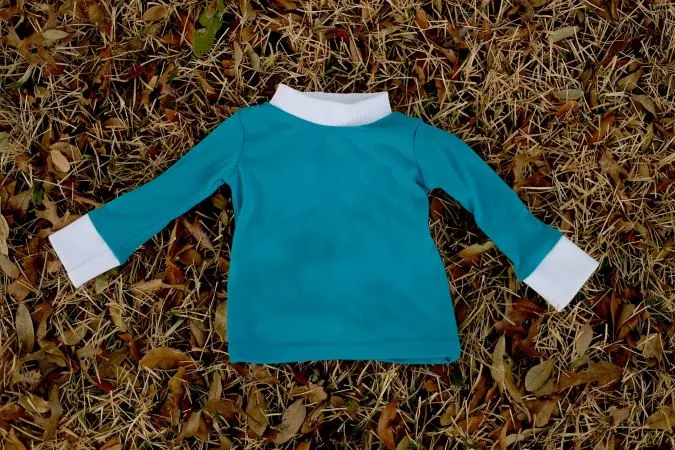
So, look no further, here is a lovely versatile kids t-shirt sewing pattern, that is sure to keep you glued to your sewing machine. This is a t-shirt pattern for boys and girls. There are options to sew it with short, 3/4th, or long sleeves. You can also sew them with or without the cuffs.
This new t-shirt pattern comes from 12 months to 5 years and involves just a few steps to sew.
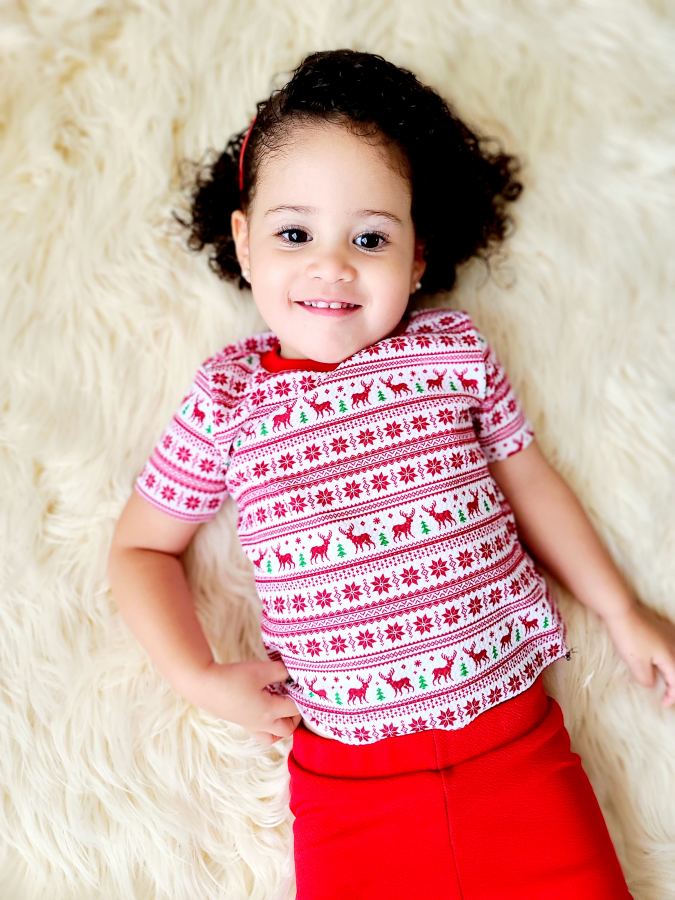

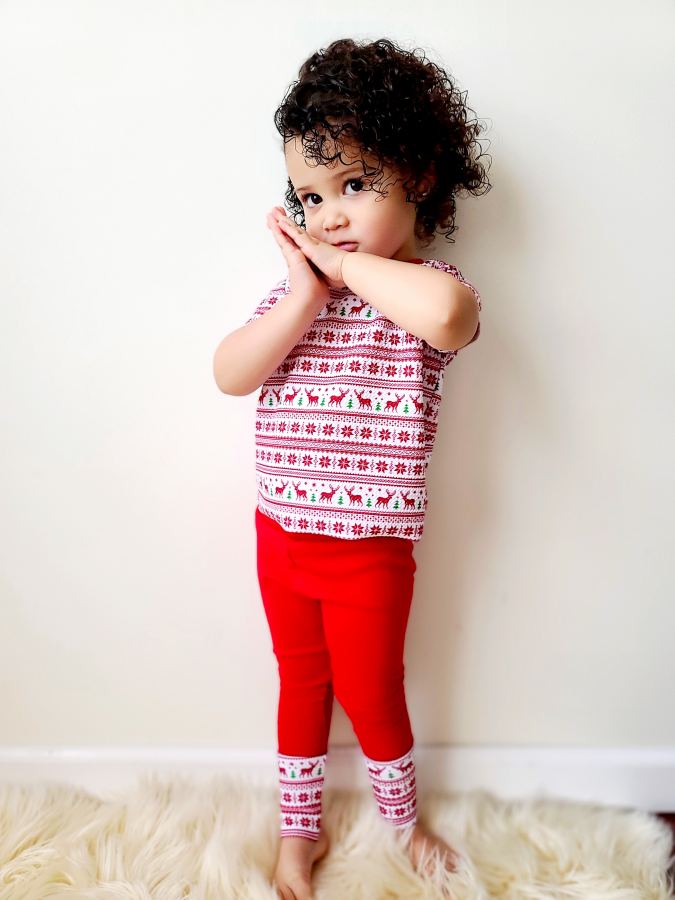

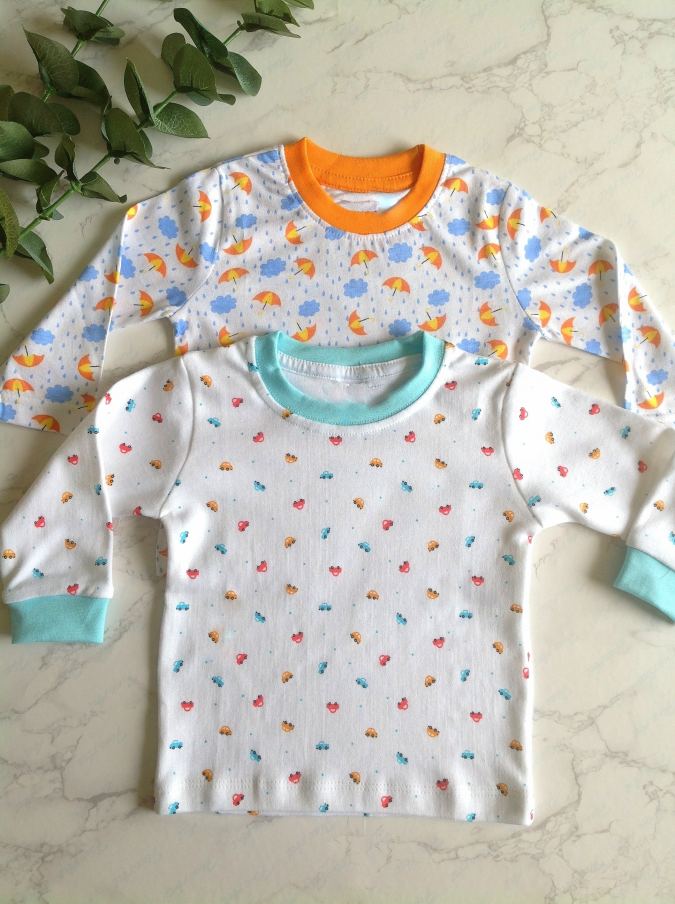
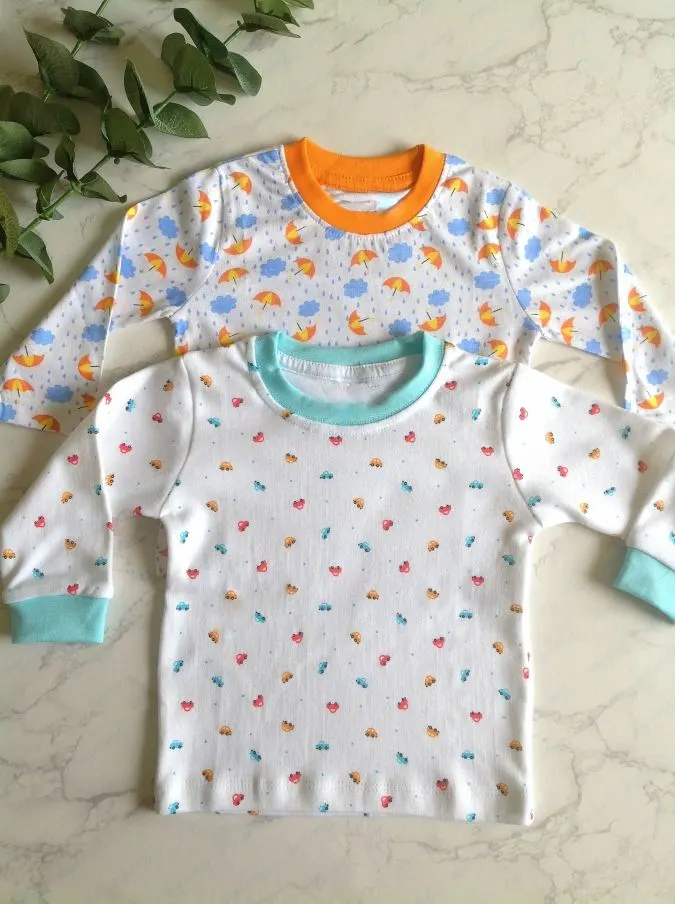
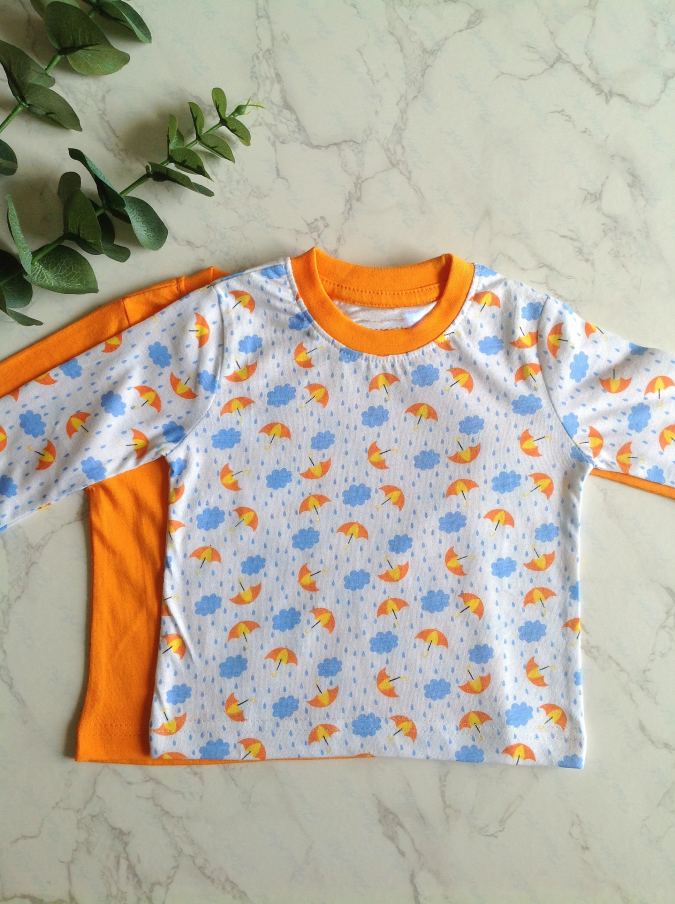
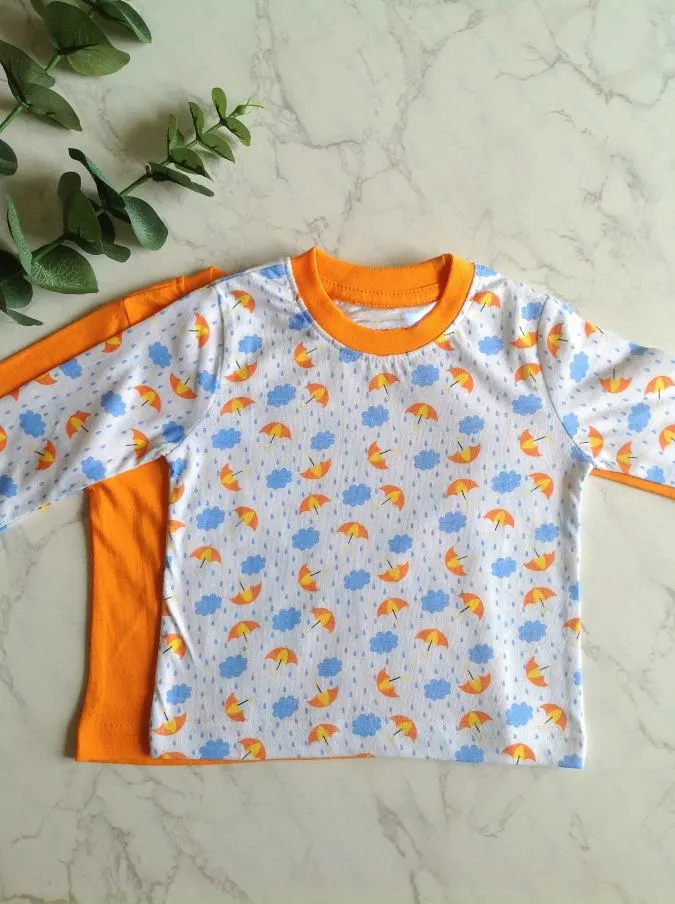
Here have a look at some of my tester pictures in Christmassy fabrics as well!
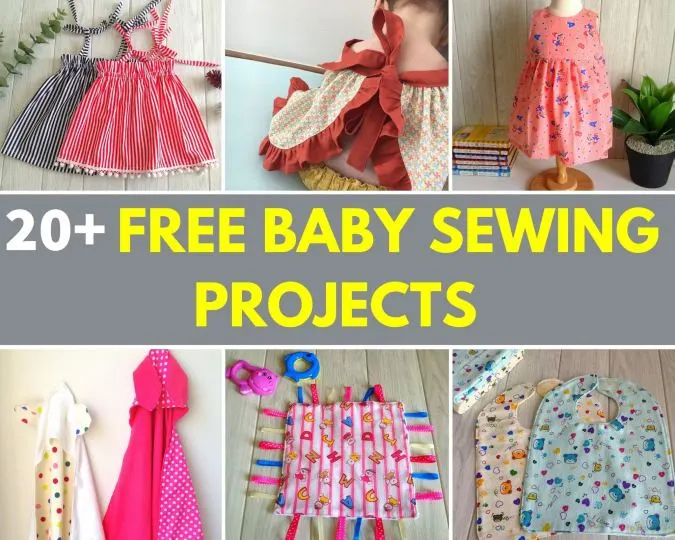
If you would like to see 20+ free sewing projects for babies, click on the picture below:

If you would like to purchase the t- shirt pattern as an ad-free PDF, for just $4.99, Add to cart here. The pattern will be emailed to you in 24 hours of payment.
Free Kid’s T-Shirt Sewing Pattern
Materials Required:
- Interlock knit, cotton knit, or jersey knit in a desired print and color for the tee (a medium-weight knit like interlock knit is the best for a beginner seamstress to handle) – requirement specified in the table-3 below
- Rib-knit (optional) with 75% or more stretch for the neck binding and cuffs- ¼ yard.
- Ballpoint needle for your machine.
- Other sewing Notions.
- T-shirt template. * Enter your e-mail address and click the subscribe button to download the pattern pieces.
Guidelines for Sewing with Knits.
- Spread out your knit fabric on a large flat surface for cutting. This prevents it from getting stretched and distorted.
- Secure the pattern pieces by using ballpoint pins or pattern weights. This would keep the knit fabric underneath from moving and would keep it in place.
- Use polyester thread or a cotton-polyester thread to allow for stretch.
- A ball-point needle is a must while sewing with knits.
- Use a narrow zigzag stitch or a stretch stitch for necklines, armholes, and hems. You may use a straight stitch for the side seams.
- The thread tension of your machine should be looser than normal. Try stitching on a double layer of scrap before sewing on your actual fabric.
- Take care not to stretch the fabric while sewing. Hold the fabric up to keep it flat near the machine.
- I suggest using a walking foot to prevent stretching and to facilitate free movement of the fabric. If you have an option in your machine to reduce the pressure of the presser foot, that would work fine too.
- Since knit fabrics do not ravel, you don’t need a serger. But if you need a professional finish and you have just an ordinary machine, you may go ahead and use the zigzag for finish.
*All the knit fabrics used here are of 58- inches.
*The fabrics shown here are only for illustration purposes and as such may vary from the original.
*The seam allowance is 3/8-inch unless otherwise specified.
*I suggest you read the entire pattern once before starting to get a general idea
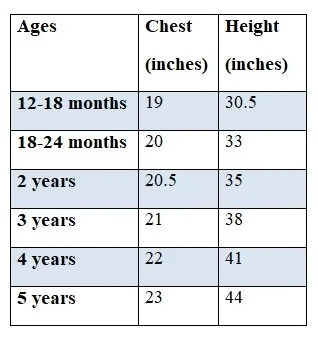
Size Chart
Table-1
*Note: If you wish to sew a slim fit tee for girls, move a size down, keeping the tee length and the sleeve length the same.

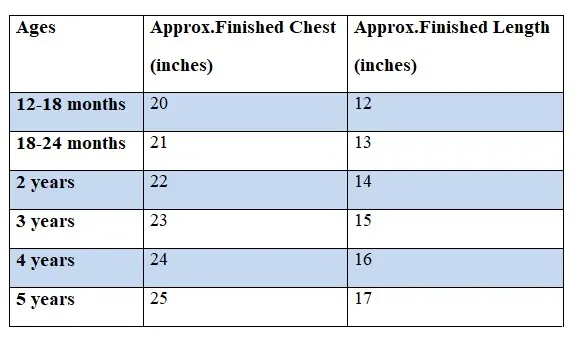
Finished Measurements
Table-2

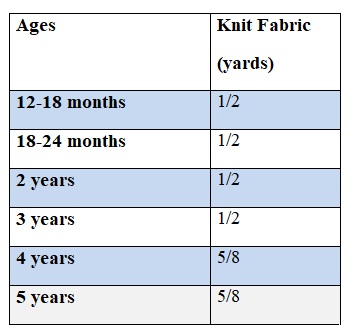
Fabric Requirements
Table-3
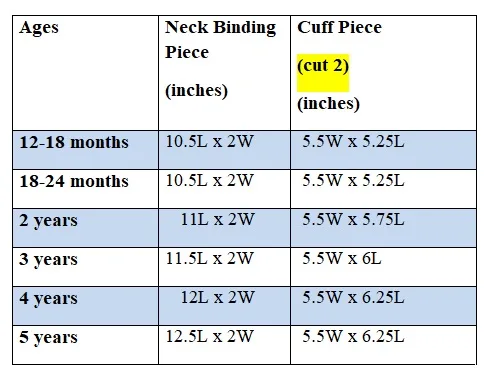
Measurements
Table-4
In the table below, “L” stands for the length of the fabric and “W” stands for the width.
Notes
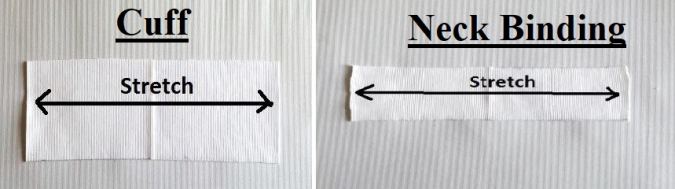
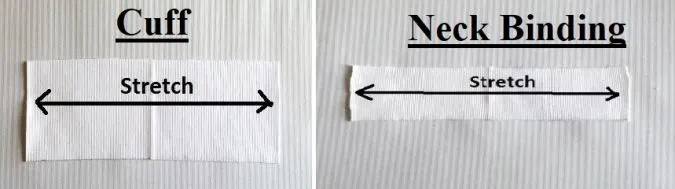
- While cutting the strips, the stretch should go across the length.
- The length of the neck binding given below is for the rib-knit. If you are using any other knit material with 50-75% stretch, add 1” more to the length.
- The neck binding width can be changed to suit your preference.

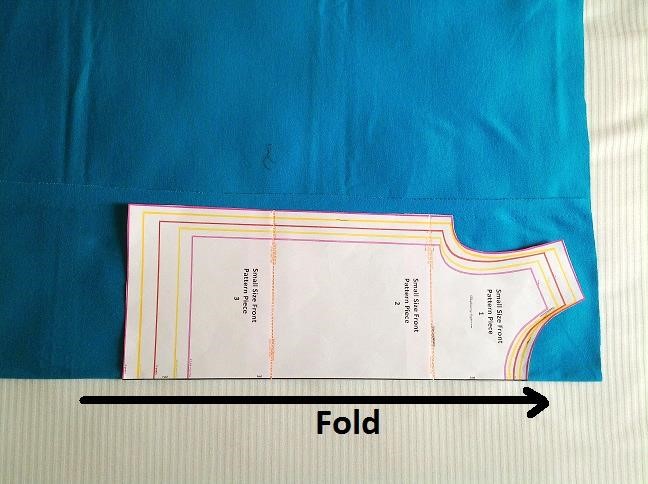

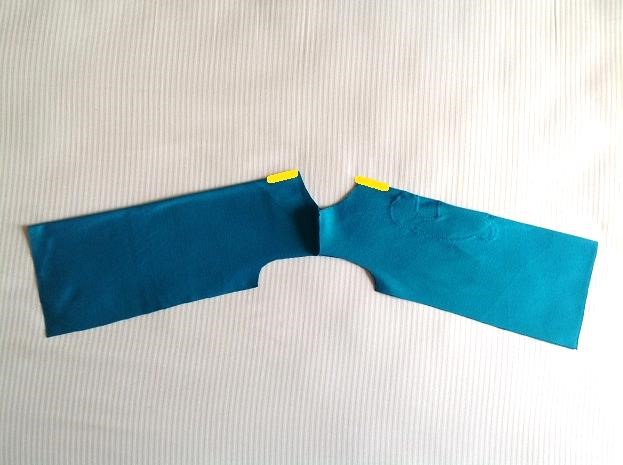
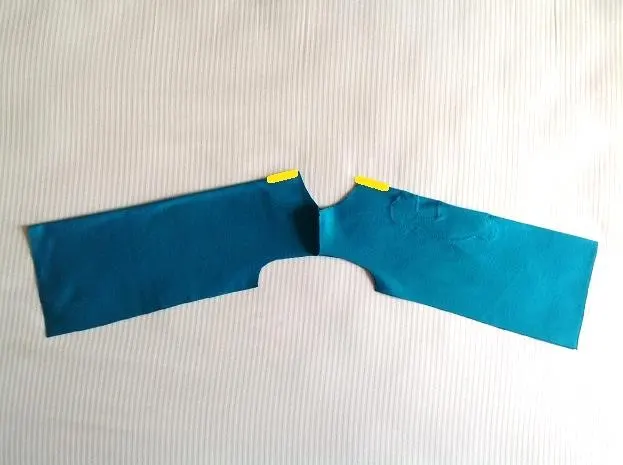
Cut the template for the tee shirt front. Fold the fabric to fit the width of the template and keep the template on the fold. Mark around it and cut to get the front piece of the tee.
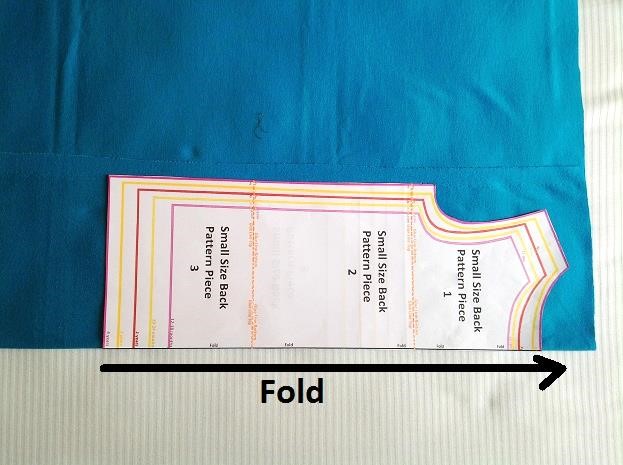

Next cut the back piece of the tee in the same way as the above.

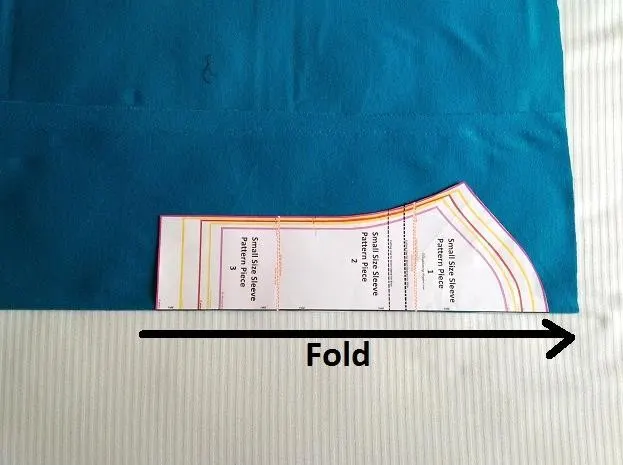
Cut the two sleeves, also on the fold.
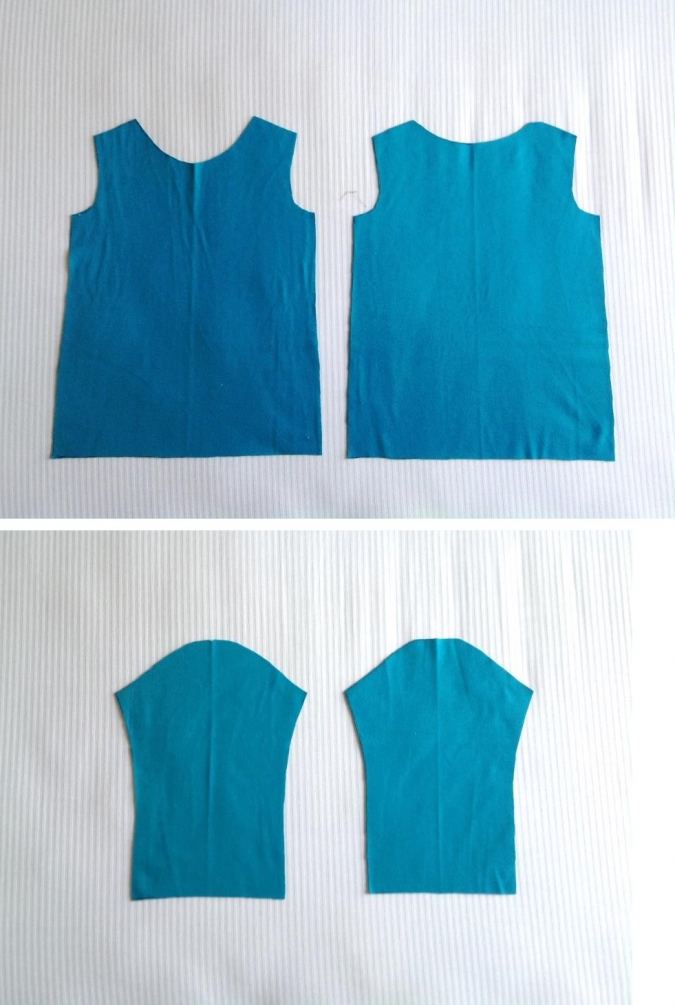
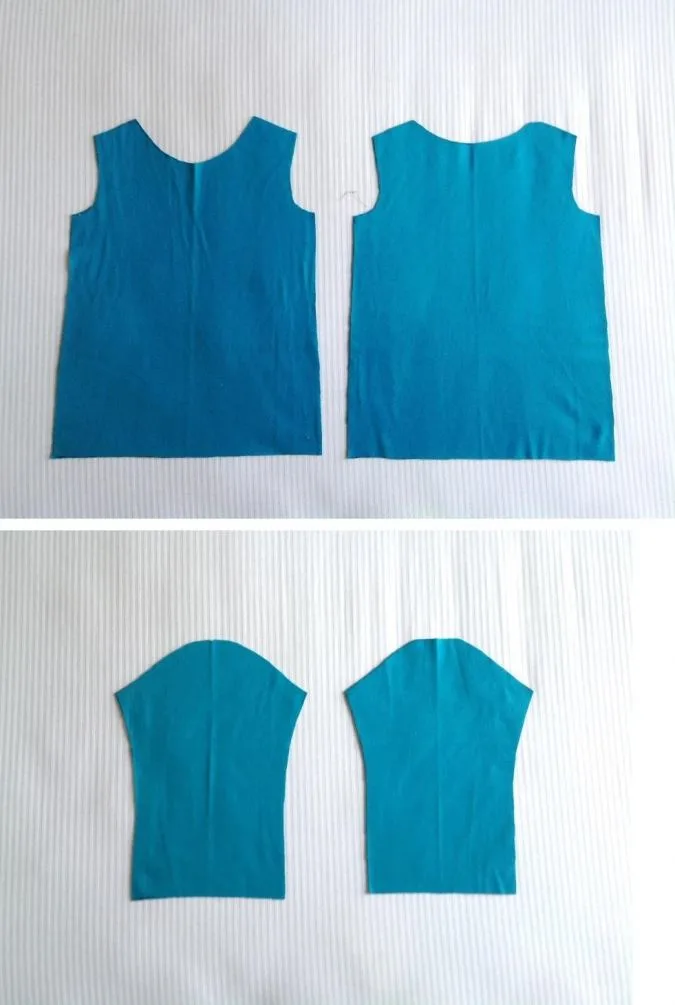
Your sleeve pieces and bodice pieces would look like this.
Cut the cuff pieces and the neck binding piece, referring to table-4 above.
Next, we sew the front and back pieces of the tee together.

Keep the front and the back pieces layered, with the right sides together and aligning the shoulders and side seams. Sew the shoulders shut.
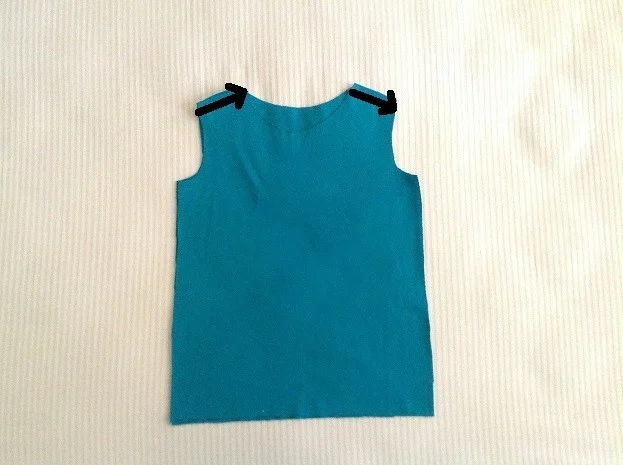
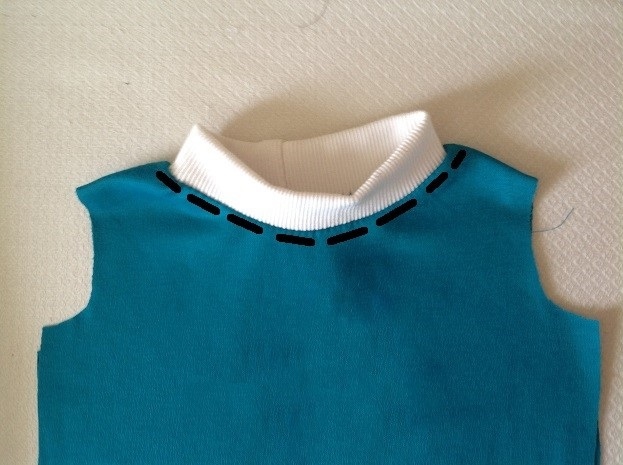
Next, we attach the neck binding.

1) Take the neck binding piece, fold it in half width-wise and sew it shut along the shorter edge to form a loop.2) Next fold the loop in half lengthwise, with the wrong sides together, lining up the raw edges. 3) press.
Let’s attach the binding to the neck. For that, we need to quarter mark the binding and the neckline.
Keeping the seamline of the binding on one side, fold the binding loop in half and quarter mark at the folds.
To quarter mark the neckline, we fold the tee in half lengthwise, lining up the shoulder seams and side edges. The shoulder seams would be the two quarter marks. Mark the remaining two at the folds, along the neckline as shown above.
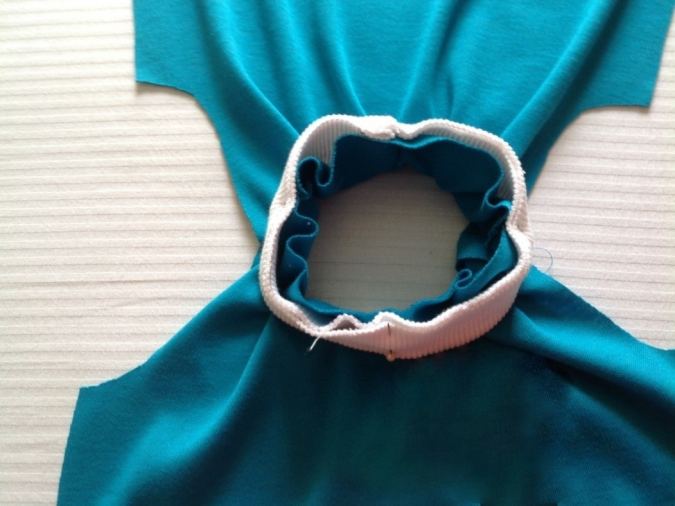
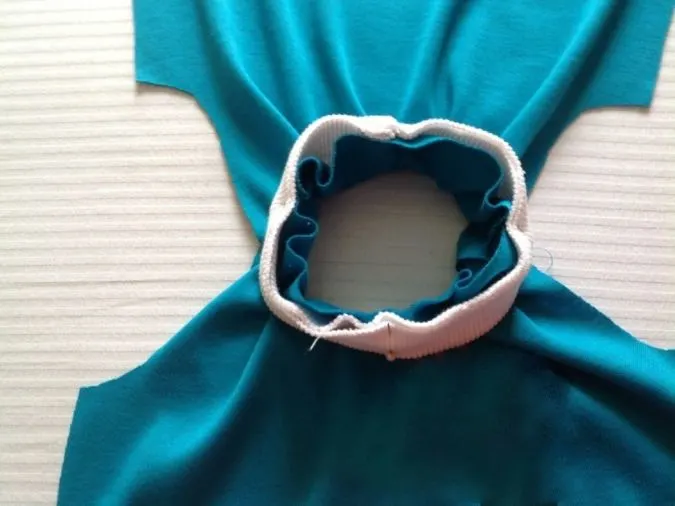
Line up the raw edges of the binding and the neckline, on the right side of the bodice and pin the binding to the neckline, matching the quarter marks. Note: while pinning the binding, make sure that the seam of the binding comes along the center-back of the neckline.


Sew the binding to the neckline, using a stretch stitch or a narrow zig-zag stitch. You will need to stretch the binding slightly while sewing to match the quarter marks. You may zig-zag the raw edge for a better finish.
Your neckline may look a little wrinkled once done. You may use steam press to get it back in shape.

Flip the binding over to the right side and topstitch about 1/8-inch away from the seam line, on the right side of the bodice, to make the binding stay in place. You may use a zigzag stitch or a stretch stitch for a better finish. Note: Make sure that you catch the seam underneath while you topstitch.
Next, we attach the sleeve to the tee.
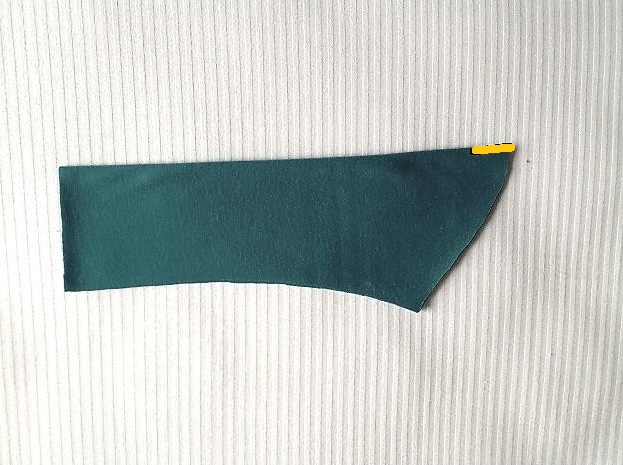
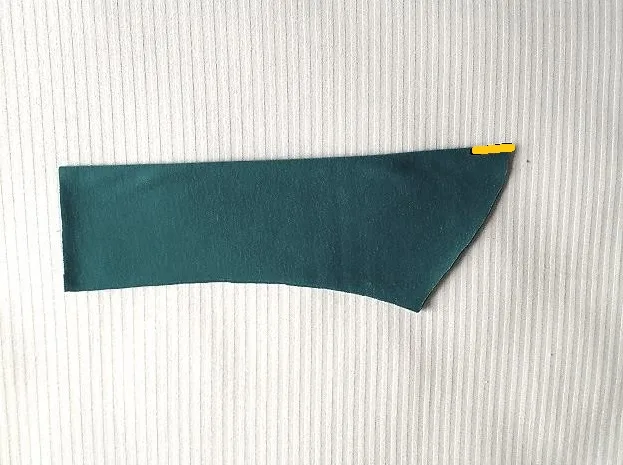
Take one sleeve piece and fold it in half, lining up the edges.
Take one sleeve piece and fold it in half, lining up the edges. Make a marking at the top of the fold as shown above. This point is to be aligned with the shoulder seam later.
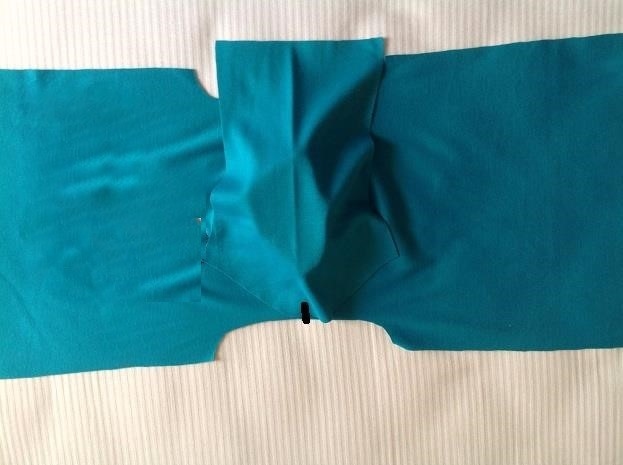

Keep the sleeve over the bodice, with the right sides together, and lining up the center mark with the shoulder seam.
Let’s pin the sleeve along the armhole.

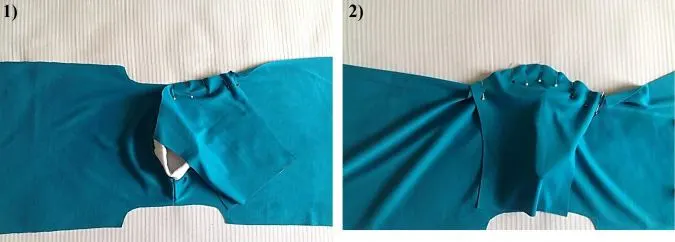
Pin the sleeve to the armhole, starting from the center towards the sides. Keep pinning the sleeve neatly along the entire armhole (here you can see that the remaining portion of the tee gets wrinkled once the pinning is done. It will all get leveled out once the sewing is done and the sleeve is flipped over).

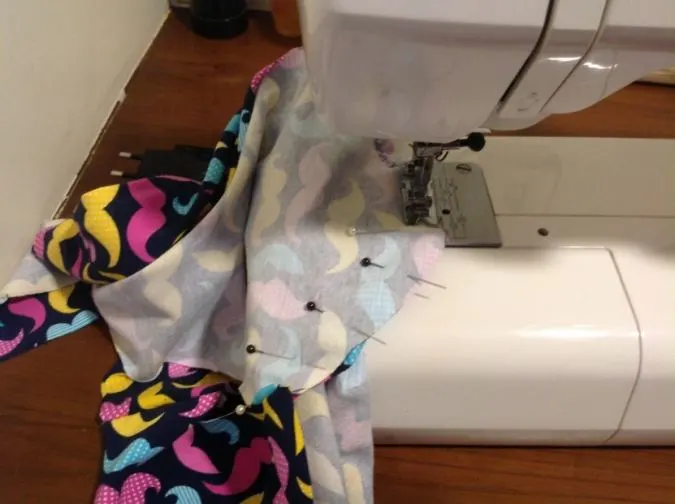
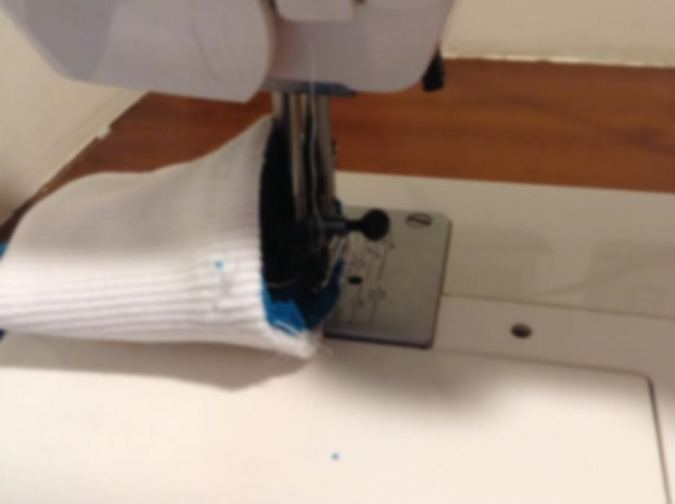
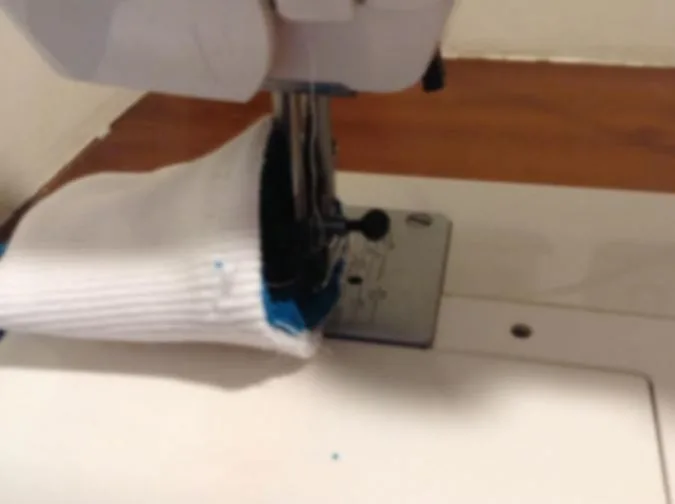
Sew the sleeve to the armhole, removing the pins as you go. Repeat the steps with the other sleeve on the other armhole (picture for illustration purpose).
*If you are adding cuffs and not hemming the sleeve, you may skip the two steps below and sew the side seams. The cuffs are attached once the side seams are done.
If you opt to hem the lower edge of the sleeves, refer the two steps below.
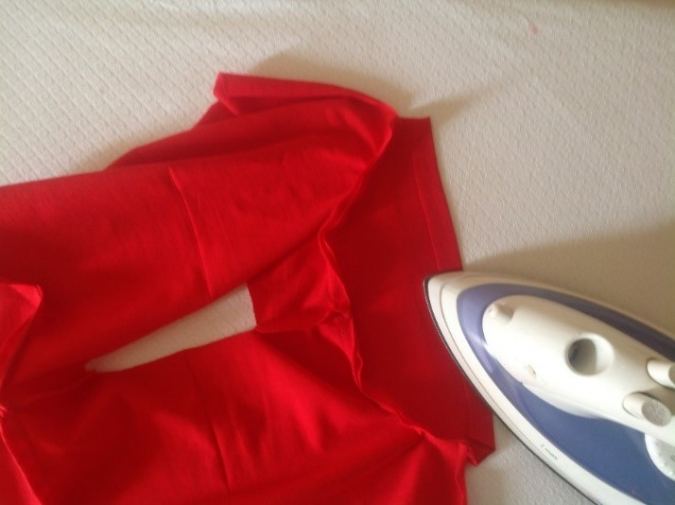

Fold the lower edge of one of the sleeves by ½-inch and press.
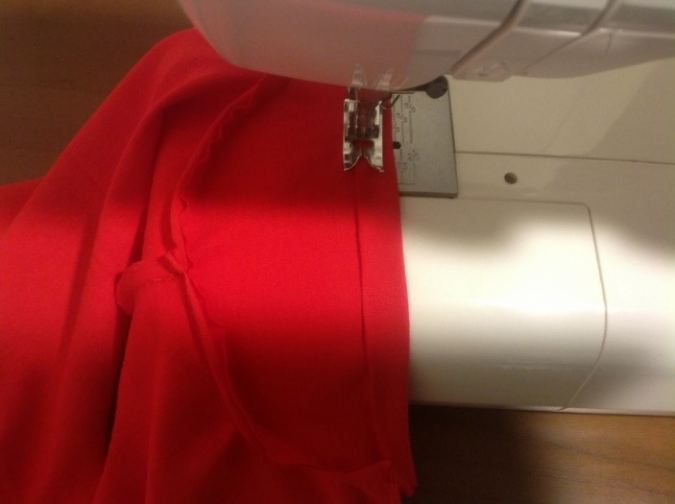

Sew down the hem using a narrow zig-zag stitch, a stretch stitch, or by using a double ballpoint needle. Repeat with the other sleeve.
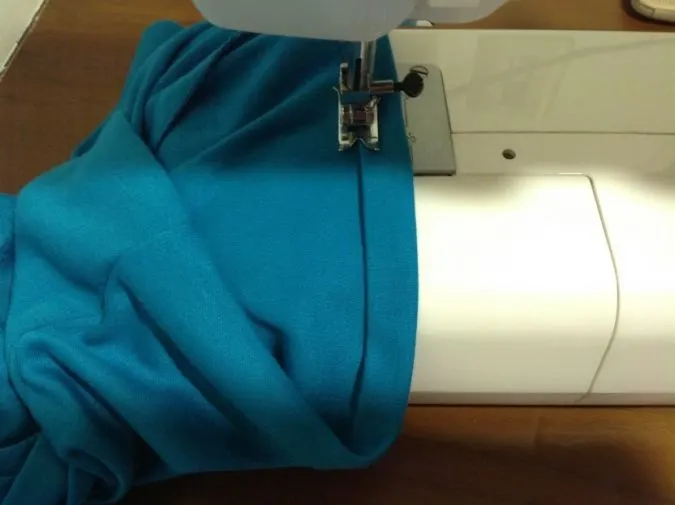
Next, we do the side seams.
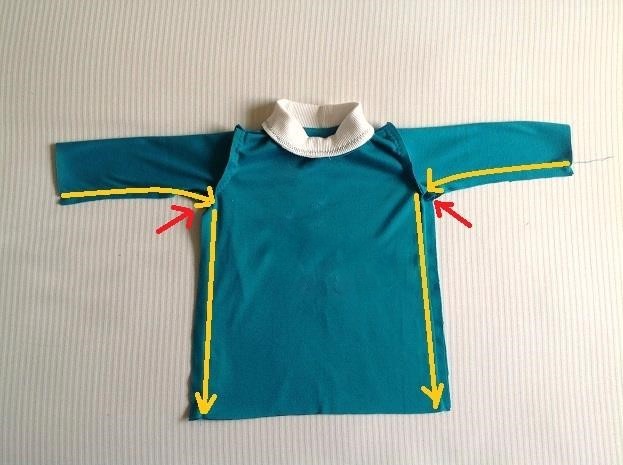

Keep the tee on its wrong side, lining up the edges and the side seams. Start sewing it shut from the lower edge of the sleeve. Continue sewing up the sleeve and down the side seams of the tee as marked above. Note: while sewing, make sure to align the underarm seams together (as pointed by the red arrows).
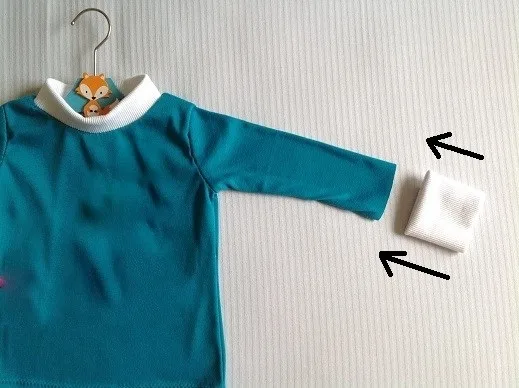
Adding The Cuff
if the lower edge of the sleeve is not hemmed and you would like to add a cuff, refer to the few steps below.


Cut off about 2-inches from the lower edge of both sleeves.

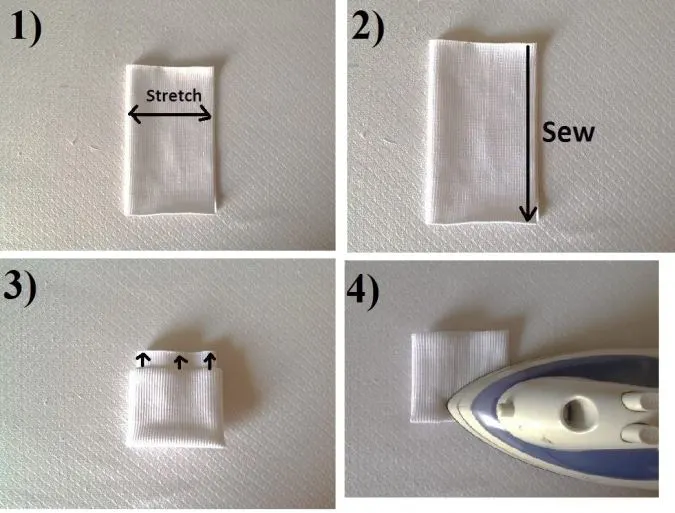
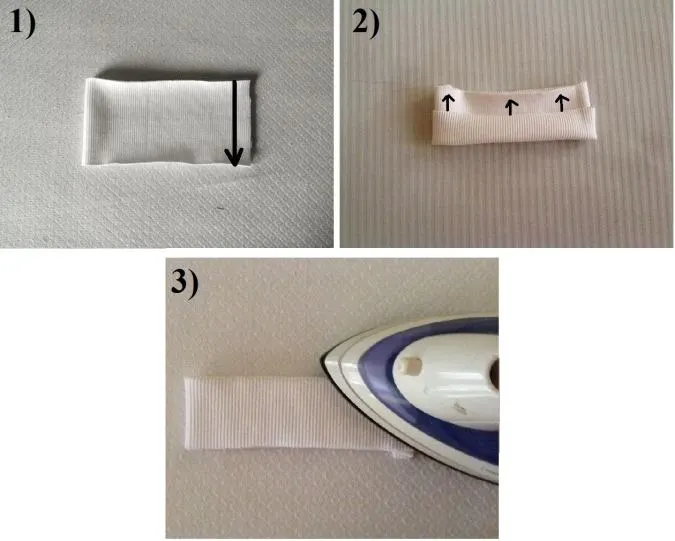
1)Take one cuff piece (referring to table-4 above) and fold it width-wise with the right sides together and matching the edges. 2)Sew along the side to form a tube.
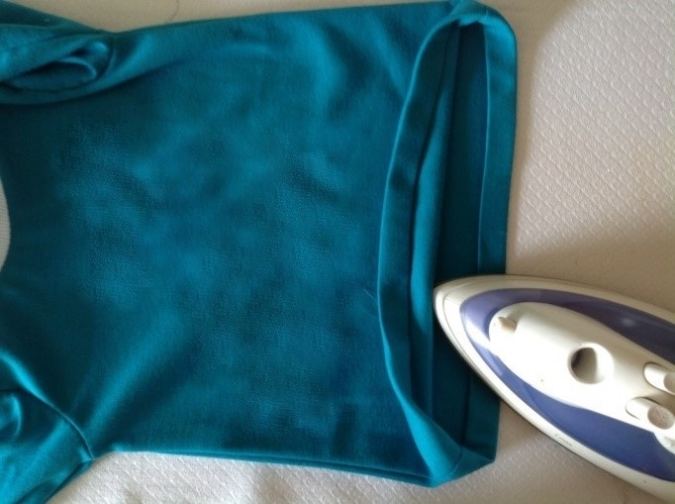
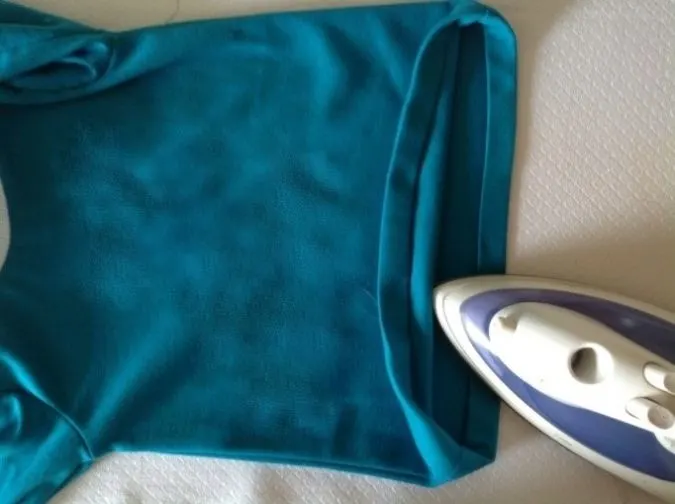
3) Next, fold the tube halfway up, bringing the raw edges together and the right side out.4) Press using a mild iron to set the fold. Repeat the steps on the other cuff piece.
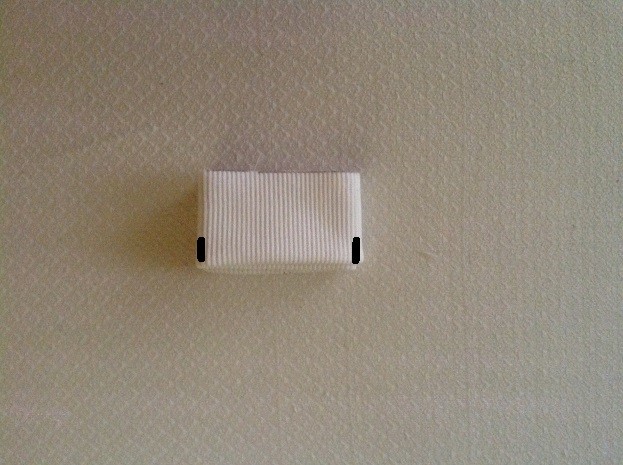
Let’s attach the cuff to the lower edge of the sleeve.

Turn the tee over to the right side. Keep the folded edge of the cuff, facing the lower edge of the sleeve, and slide the cuff over the sleeve.

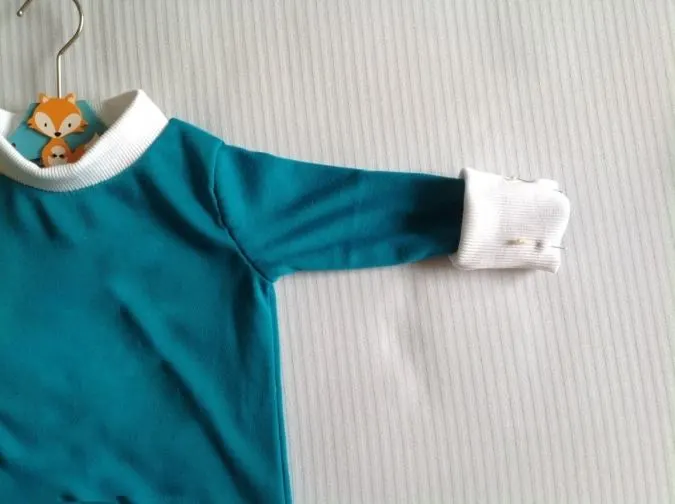
Line up the raw edges of the cuff and the sleeve together and pin all around. You may have to stretch the cuff a little to match the raw edge of the sleeve.
Sew the cuff to the sleeve, removing the pins as you go. Turn the cuff over to the right side. Here again; you can topstitch 1/8-inch away from the seam line for a better finish.
Let’s do the lower hem of the tee.
Fold the lower edge of the tee by ½-inch and press. Fold by another ½-inch and press again.

Sew down the hem.
Our kid’s t-shirt is done.
Find the webstory for the post here, Our Best Free Pattern: Classic Kid’s Tee
Pin it for later,

My kid’s t-shirt sewing pattern is done! Hope it inspires you to sew awesome t-shirts for your little girls and boys too!
Betty Jo Johnson
Monday 10th of February 2025
I made this in a 12m size for my great nephew out of one of my late brother’s t-shirts. My great nephew would have been my brother’s first grandchild. I wish I made the sleeves a bit wider, they look like they might be tight.
Rebekah
Wednesday 26th of January 2022
Wow , awesome.
Cathy
Sunday 14th of November 2021
How many sleeve pieces should there be in the pattern
Surayya
Sunday 14th of November 2021
There are 3 pattern pieces for the sleeve. The third pattern piece is attached with the t-shirt front pattern piece-3