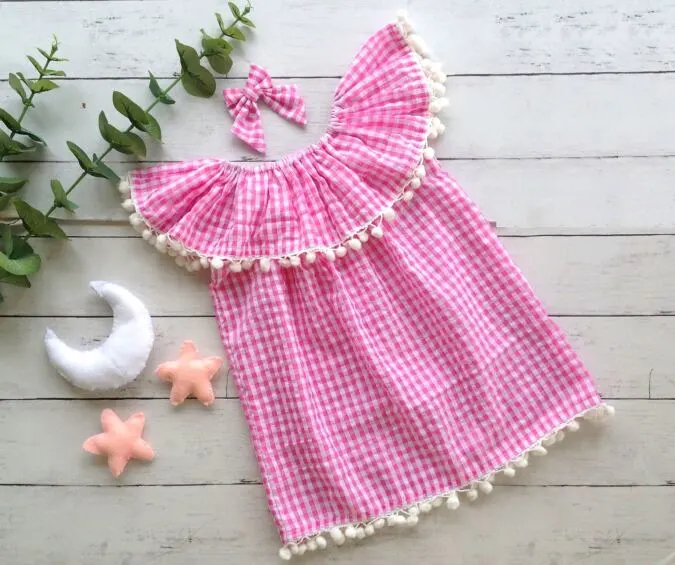
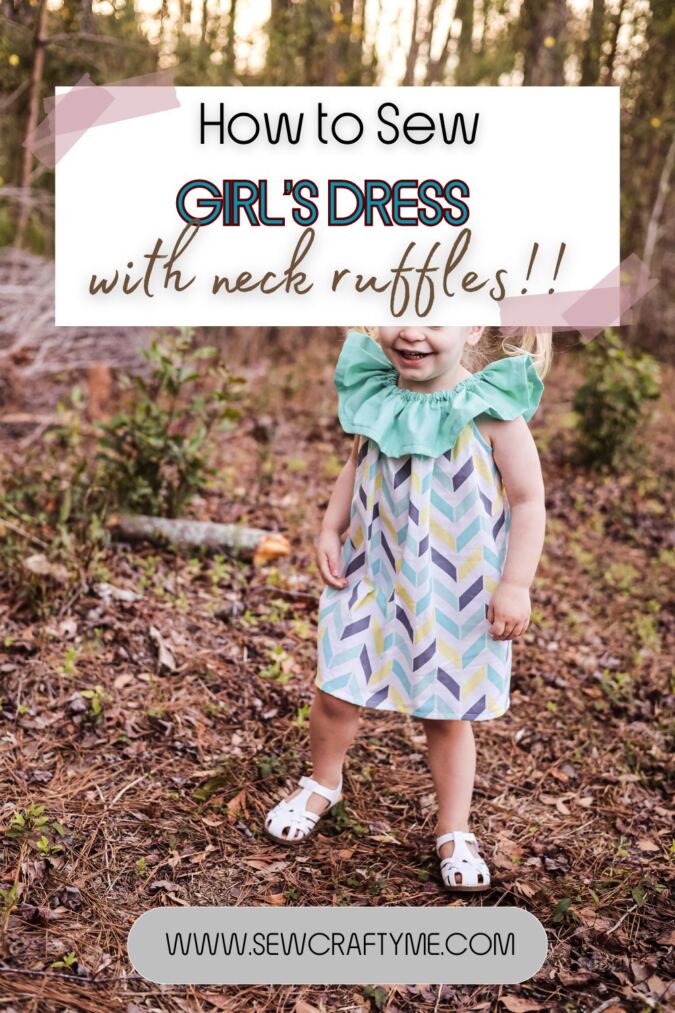
I’m excited to present a new sundress pattern for your little girl this week and I have named it “The Mallory Dress”. This dress pattern may seem intricate, but it’s actually quite simple to make. If you’ve already tried my pillowcase dress or peasant dress pattern, you’ll find this one even easier.
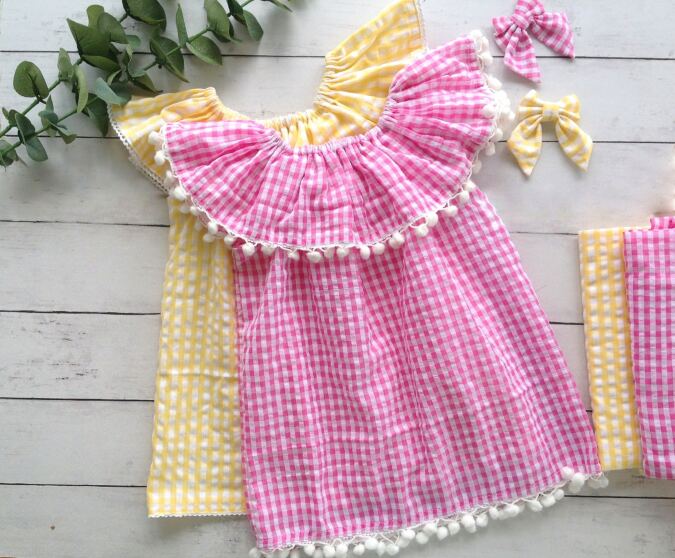


With this design, you won’t need to sew any sleeves. Instead, the neckline ruffle gracefully drapes over the shoulders, creating a sleeve-like appearance. Additionally, there are no zippers or buttons involved, making it a breeze to sew and effortless to put on and take off.


To add a touch of style to the dress, you can experiment with various fabrics for the dress body and ruffle. Get creative and mix and match different patterns and colors.


Enhance the overall look by incorporating complementary trims such as lace, rickrack, or pompoms. This way, you can create a fashionable outfit that your little girl will love!
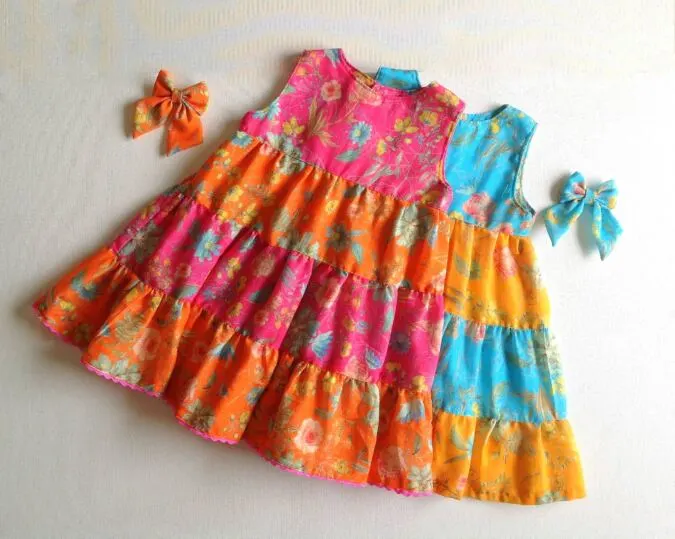
If you would like to sew a tiered dress for your little girl with a classic yoke, click on the picture below to get the free pattern from 2 to 6 years!

The Easiest Pattern for a Girl’s Ruffled Dress- The Mallory Dress
**** The tables in the tutorial have been edited for a better fit.
Supplies Needed:
Medium-weight cotton fabric in any desired print and color for the dress and neckties- requirement specified in the table-2 below.
Single-folded bias tape (optional)- 40 inches.
3/8- inch Elastic- requirement specified in the table-2 below.
Armhole template. *Enter your e-mail address and click the subscribe button to download the template.
Pattern Notes:
All the fabrics used here are 44 inches width.
The fabrics shown here are only for illustration purposes and as such may vary from the original.
The seam allowance is 3/8 -inches unless otherwise specified.
I suggest you read the entire pattern once before starting to get a general idea.
All seams are to be pressed flat
All seams are to be finished by zig zag or serger
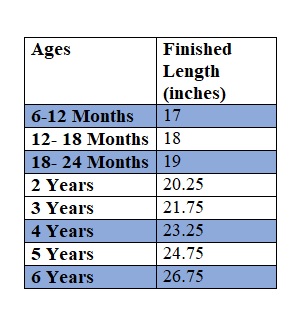
Finished Length:
Table-1
Length is measured from the neck to the hemline. ** If you need a longer or shorter dress, change the lengths of the fabric pieces in the table-3 accordingly.

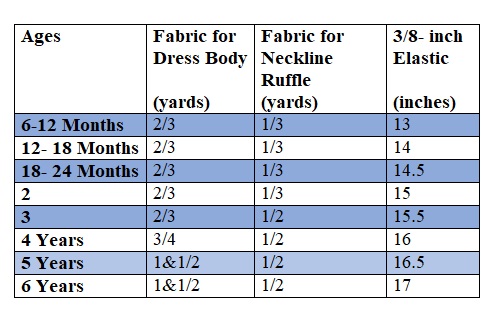
Material Requirements:
Table-2
- You will need a 1/4-yard extra of fabric if you are making your own bias tape. Find the bias tape tutorial here.
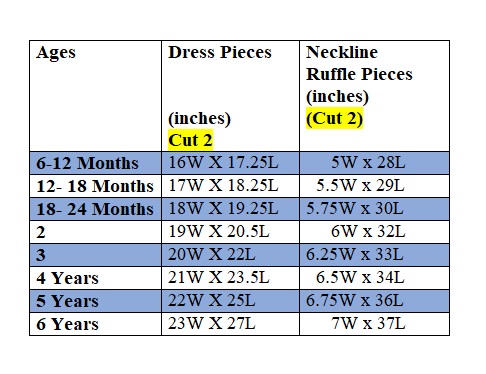
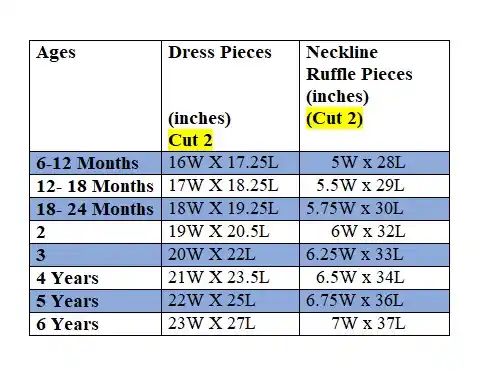
Measurements:
Table-3
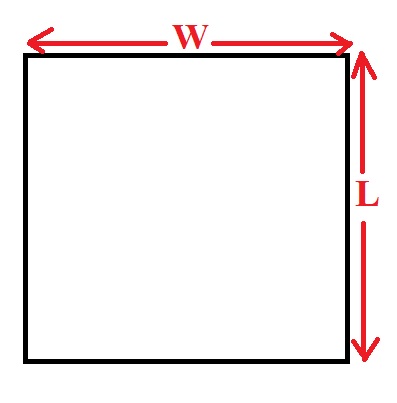
- In the table below, “W” stands for the width and “L” stands for the length of the fabric pieces to be cut.


Gather your supplies.


Cut the dress pieces, referring to the table-3 above. * Mark the top and side edges to avoid messing up.


Cut the ruffle pieces, following table-3.
Cut the armhole template for your required size, following the directions.


Layer the dress pieces, with the right sides together and lining up the edges. Fold the layer in half, lengthwise, and keep the template along the edge. Mark and cut the armhole.


You will get your pieces like this once opened.


Cut the single-folded bias tape into 10-inch pieces. Take one of the tape pieces, place it slightly curved, and press using plenty of steam (this will make it easy to attach along the armhole curve).


Open one of the folds of the bias tape, line up the raw edge along the armhole, with the right sides together, and pin all along.


Sew the tape along the armhole, removing the pins as you go.


Fold the bias tape completely over to the wrong side of the fabric piece, keeping the fold along the edge intact and pin.


Sew along the pinned edge to finish the armhole. Repeat on the remaining three armholes.
Next, we sew the side seams.


Place the front and back pieces of the dress layered, with the right sides together lining up the edges, and sew both the side seams.


Layer the ruffle pieces with the right sides, lining up the edges and sewing along the two short edges to join and get a fabric ring.


Press the seams open.
Let’s hem the ruffle.


Fold one of the long edges by 1/2- inch twice and press. Sew down the hem along the edge of the fold.
Next, we pin the ruffle piece to the dress. For that, we need to mark the top center of both pieces.


Keep the ruffle piece on its right side and fold it widthwise in half and mark the top center as shown above (picture for illustration purposes).


Similarly, fold the dress in half, lengthwise, and mark the top center.


Place the ruffle piece above the dress, with the center marks in line and with the hemline facing the dress. Slide the dress into the ruffle ring.


Line up the top edge of the dress with the top edge of the ruffle and pin all along. *Note that since the ruffle is longer than the neckline, you can see extra lengths of the ruffle on both sides.


Sew along the pinned edge to join.
Zigzag along the entire raw edge of the ruffle and neckline to prevent fraying.
Next, we make the casing for the neckline elastic.


Fold the top edge of the ruffle (and neckline) by 5/8- inch towards the wrong side and press all around. Sew along the edge of the fold, leaving 1/2- inch open, to insert the elastic.


Insert the elastic through the opening, using a safety pin.


Keep the ends of the elastic overlapped and sew back and forth to join.


Sew the opening in the casing shut.
Let’s do the lower hem.


Fold the lower edge of the dress twice by 1/2-inch and press to set. Sew the hem down, along the edge of the fold.


Adjust the gathering in the ruffle to make it uniform and your dress is ready!!
Find the webstory for the post here, Create a Stunning Ruffled Dress for Girls: Free Pattern and Instructions
Pin it for later here,
Ginnie
Tuesday 11th of February 2025
This is such a fun pattern with great instructions!! Thank you so much, our granddaughter really enjoyed her dress and I loved seeing her in it!
Beth Futral
Thursday 29th of August 2024
I also could not find the arm hole template. Please send
Surayya
Sunday 19th of January 2025
Kindly enter your email address in the blue box and click the subscribe button to download the template.
Carol
Friday 12th of April 2024
the dresses are very cute but I would like to see the girls model them.
Laura's Adams
Tuesday 5th of March 2024
So cute...Thanks! I have twin 4-year-old granddaughters that are all about wearing dresses. They will love these. ❤️
Karen Humphrey
Monday 7th of August 2023
Hi!
I am a subscriber, but I added my info to get the armhole template anyway. I can't find it anywhere in my email or on this site, can you please send it to me?
Thanks!
Deborah Apel
Sunday 11th of August 2024
@Karen Humphrey,
Wanda
Tuesday 18th of June 2024
@Surayya, I subscribed but am unable to print the template!! Help please!!
Surayya
Wednesday 9th of August 2023
Hello, Please enter your e-mail address and click the subscribe button, in the blue box provided. You may find the blue box in the "supplies needed" section of the tutorial.