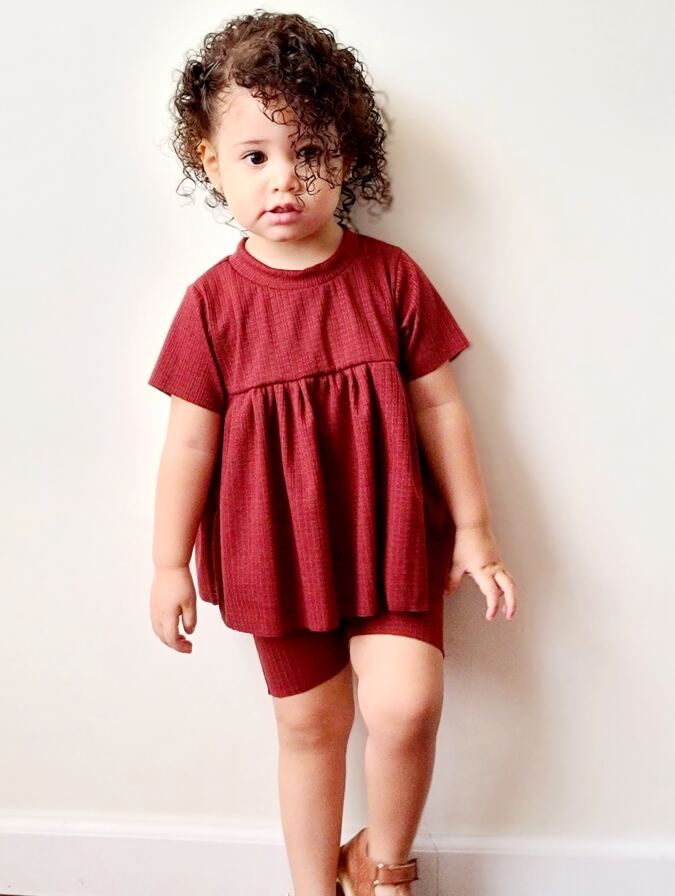
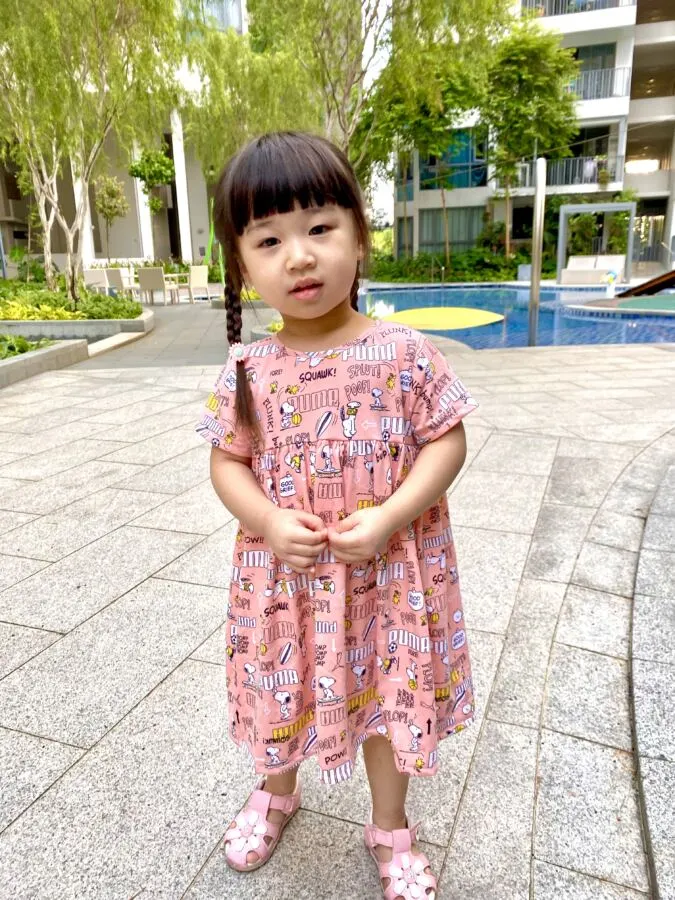
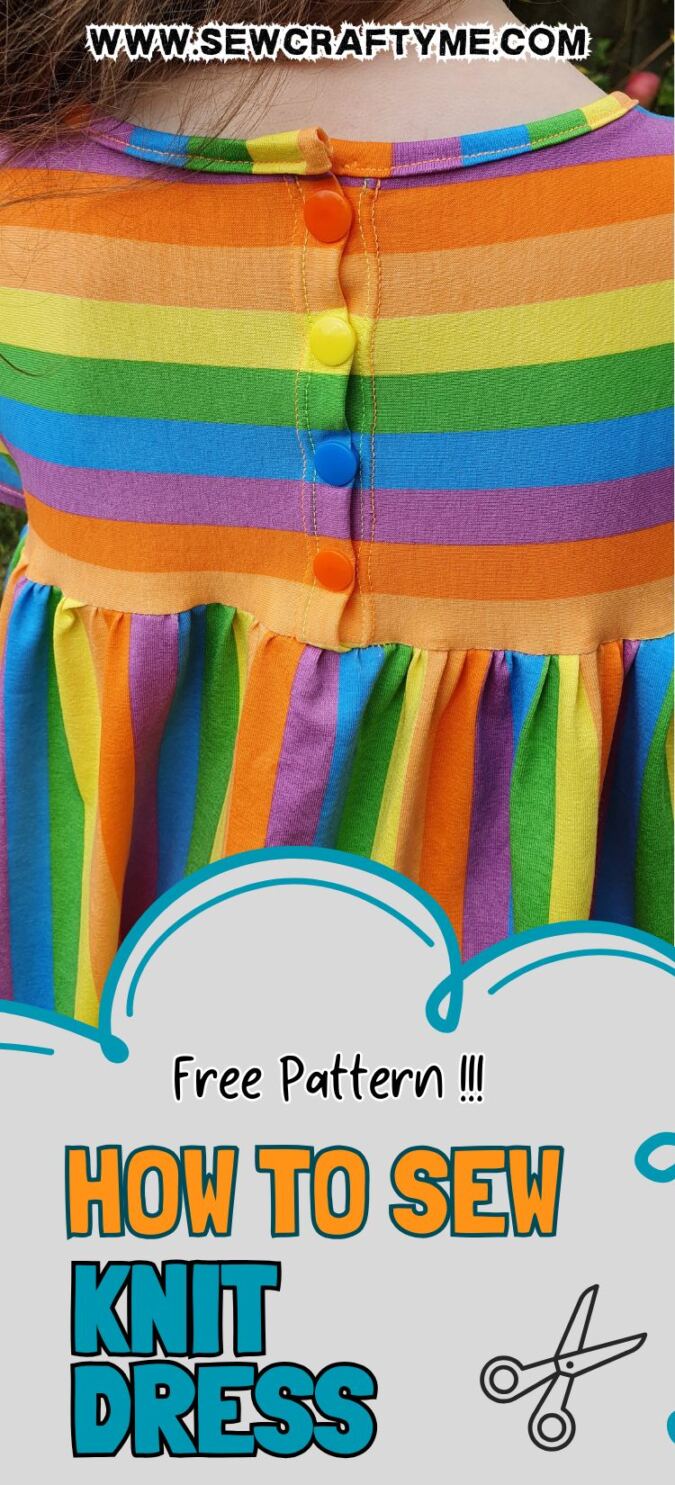
Would you like to learn how to sew a knit dress for your little one? Well, here is a knit dress sewing pattern that comes in four sizes and is adorable on any little girl!

I have had this sewing tutorial on how to sew a knit dress in mind for some time now. I don’t actually have many knit patterns. Wovens are my favorite because there is no limit to the colors and prints you can buy, while sewing with them.


However, I have always been fascinated by knits. While sewing for my girls, I always liked to mix knits and wovens together to sew tunics and dresses for them. I love sewing with knits for their comfort and fit.

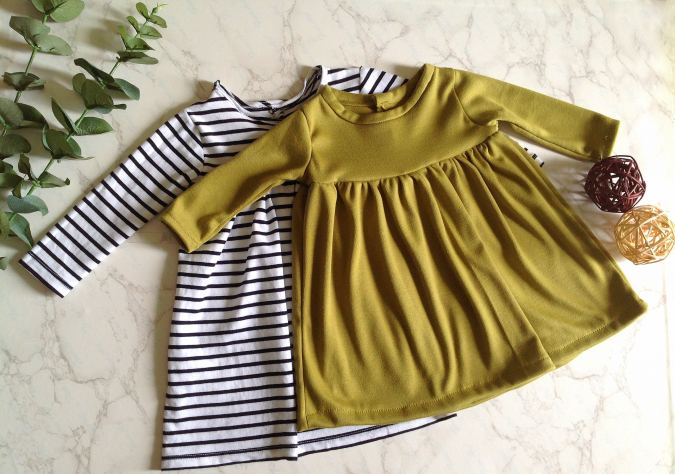
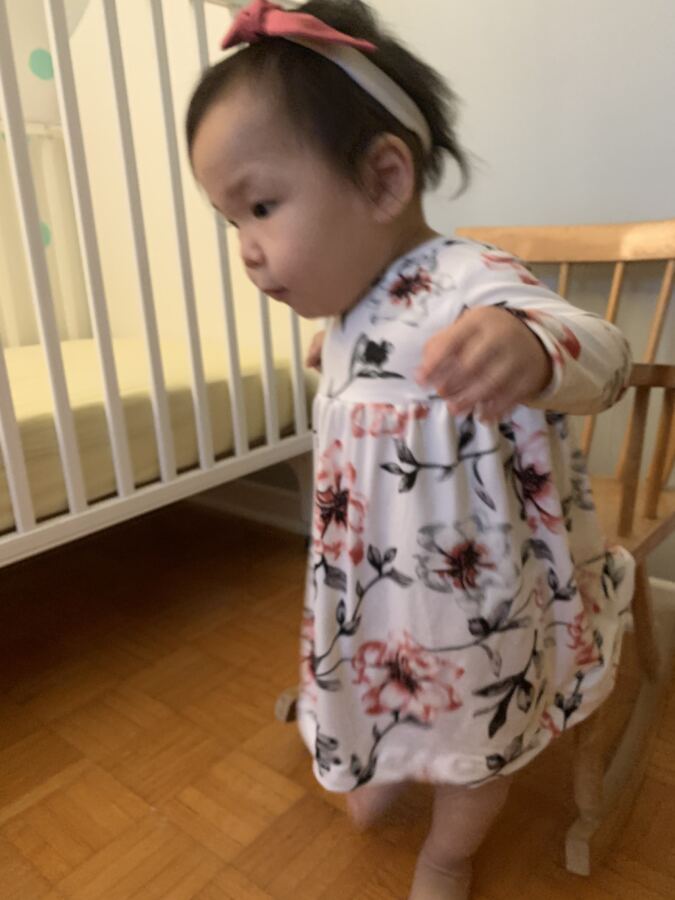
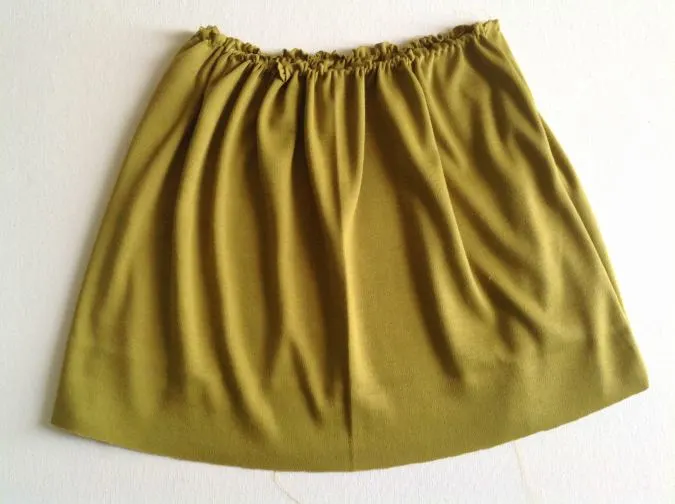
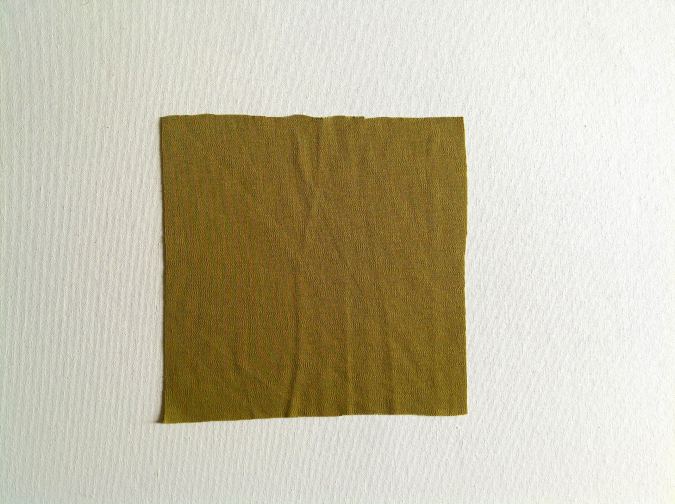
I often recycled mine and my husband’s t-shirts while sewing little knit dresses. Liked the black striped one you see here. It has been made from one of my t-shirts.
I retained the hems of the sleeve and the lower hem, which made it a quick sew. Isn’t the end result awesome? Well, I just fell in love with it!

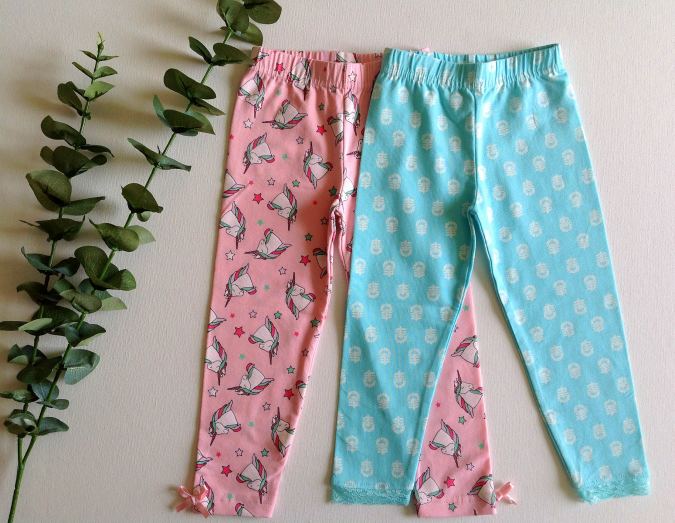
In this DIY tutorial on how to sew a knit dress, I have given the fabric requirements for the bodice, sleeve, and skirt part separately so that if you would like to mix and match prints and colors, you can easily do so. I have also given options to sew it as a dress or top, to be paired with my knit leggings pattern.
Embellish the infant dress pattern with a little bow, fabric flower( tutorial coming up), or applique to make it even more adorable. There are options to choose short, ¾, or long sleeves. You can also sew it as a dress or a top and pair it with my knit leggings pattern to get a cute ensemble!

If you are looking for free baby sewing patterns, I can assure you that this is one of the DIY baby dresses you must definitely try. You’ll adore it thanks to the detailed instructions, multiple options, and free templates.
If you would like to sew a matching pair of knit leggings, click on the picture below:
How to Sew a Knit Dress
Materials Required:
- Medium-weight Interlock knit, jersey knit or cotton knit for the bodice and sleeves (you may use any knit fabric that has a 50% stretch or more)- requirement specified in the table-3 below.
- Medium-weight Interlock knit, jersey knit, or cotton knit for the skirt- (here again you may use any knit fabric that has a 50% stretch or more)- requirement specified in the table-3 below.
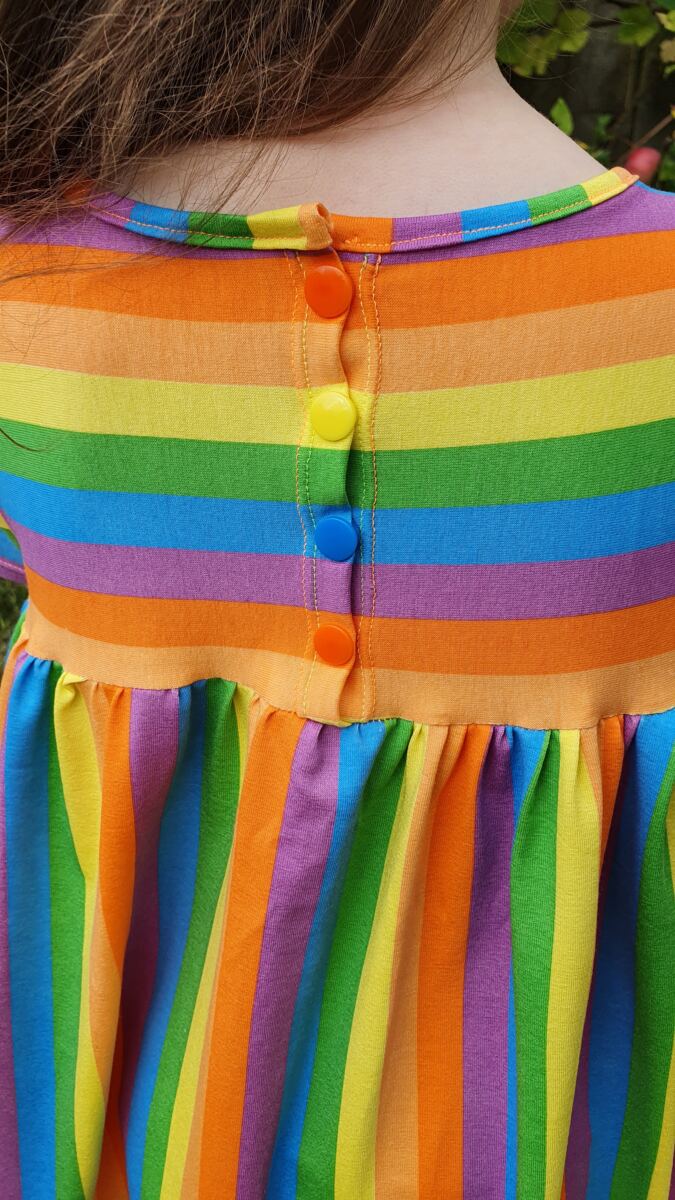
- Kam snaps, sew on snap buttons or ordinary buttons – 2 to 3 nos.
- A small strip of light-weight iron-on fusible interfacing to reinforce the button edges.
- Sewing Notions
- Pattern Pieces. * Enter your e-mail address and click the subscribe button to start downloading the template automatically.
Guidelines for Sewing with Knits.
- Spread out your knit fabric on a large flat surface for cutting. This prevents it from getting stretched and distorted.
- Secure the pattern pieces by using ballpoint pins or pattern weights. This would keep the knit fabric underneath from moving and would keep it in place.
- Use polyester thread or a cotton-polyester thread to allow for stretch.
- A ball-point needle is a must for sewing with knits.
- Use a narrow zigzag stitch for necklines, armholes, and hems. You may use a straight stitch for the side seams. Try stitching on a double layer of scrap before sewing on your actual fabric.
- Take care not to stretch the fabric while sewing. Hold the fabric up to keep it flat near the machine. If you have an option in your machine to reduce the pressure of the presser foot, that would be great too.
- Since knit fabrics do not ravel, you don’t need a serger. But if you need a professional finish and you have just an ordinary machine, you may go ahead and use the zigzag for the finish.
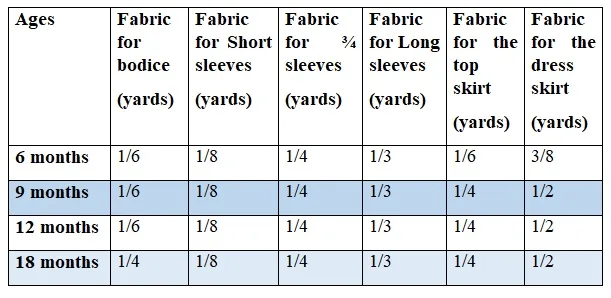
*All the fabrics used here are of 58- inches width. You may require extra if your fabric is not as wide as this.
*The fabrics shown here are only for illustration purposes and as such may vary from the original.
*The seam allowance is 3/8-inch unless otherwise specified.
*I suggest you read the entire pattern once before starting to get a general idea
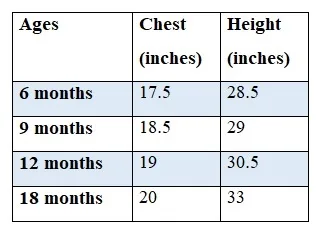
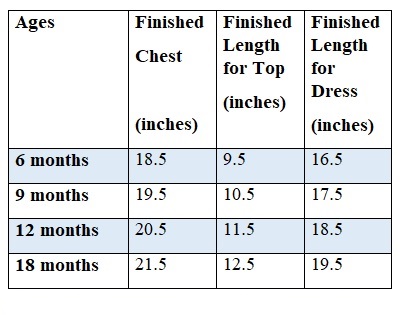
Size Chart
Measure your child’s chest. If your child is in between sizes go up 1 size. Choose the bodice size to fit your child’s chest measurement and then lengthen or shorten the skirt piece for a tall or petite child.
Table-1

Finished Measurements
Table-2
Fabric Requirements
Table-3

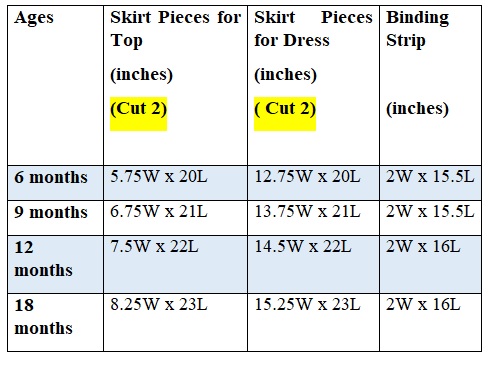
Measurements:
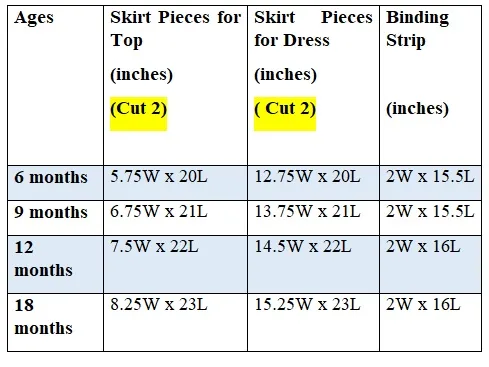
In the table below “L” stands for the length of the fabric and “W” stands for the width.
***Bias tape can be made as narrow as 1- inch or as wide as 3- inches, cut according to your preference.
Table-4
Sewing:

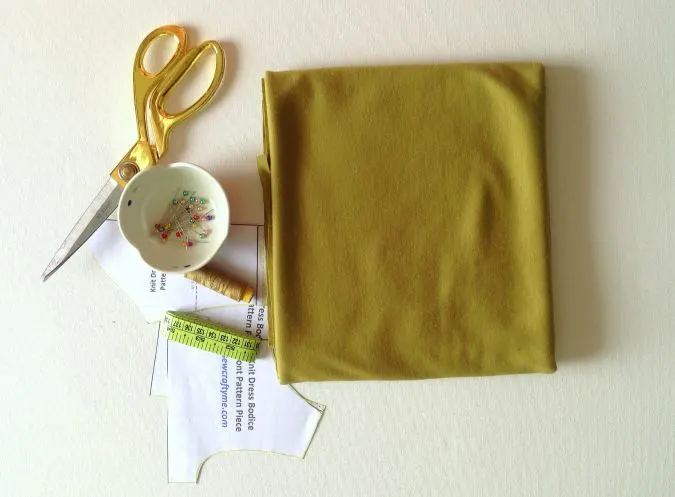
Gather your supplies.

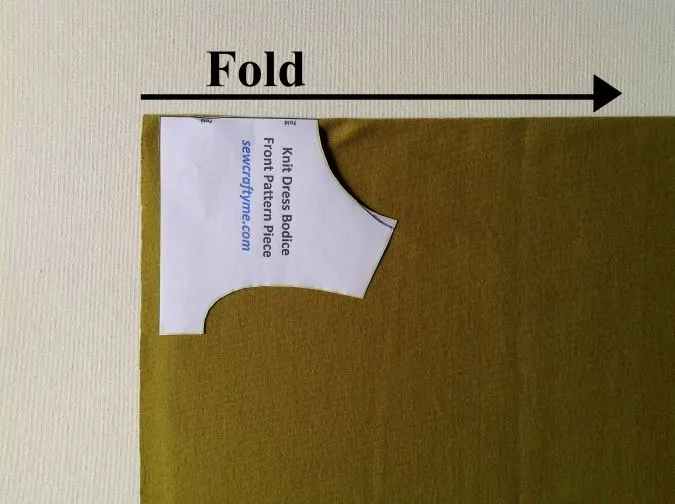
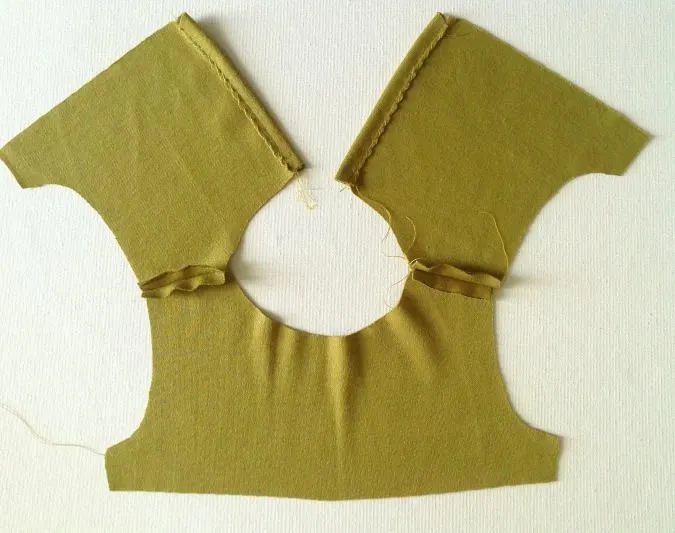
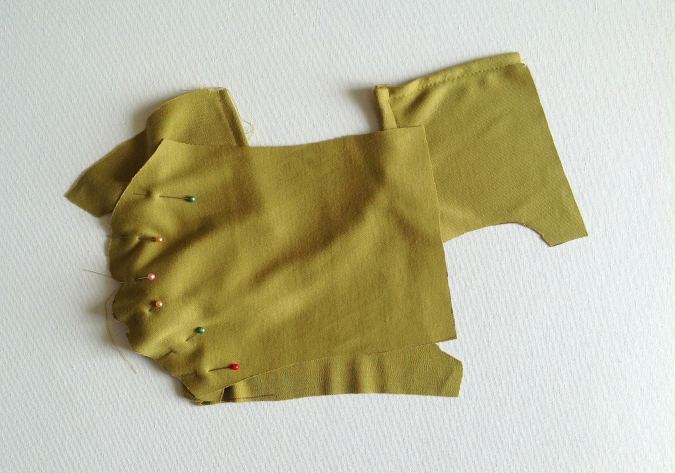
Cut the pattern template for the bodice at the end of this pdf. Take the fabric for the bodice and fold it to fit the width of the template. Keep the template on the fold. Mark around the template and cut to get the front bodice piece
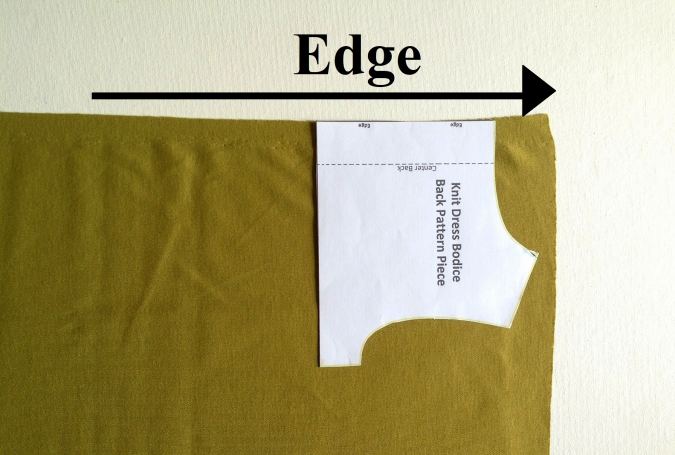

Next, cut take the pattern template for the back bodice, fold it and place the template along the edge of the fabric. Mark and cut to get two back bodice pieces.
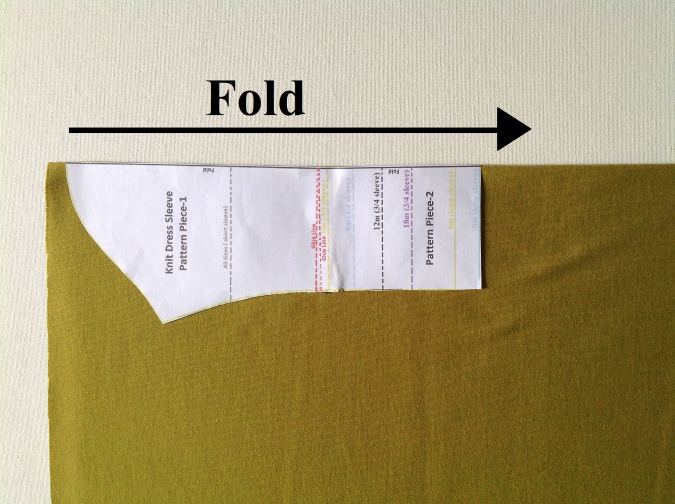

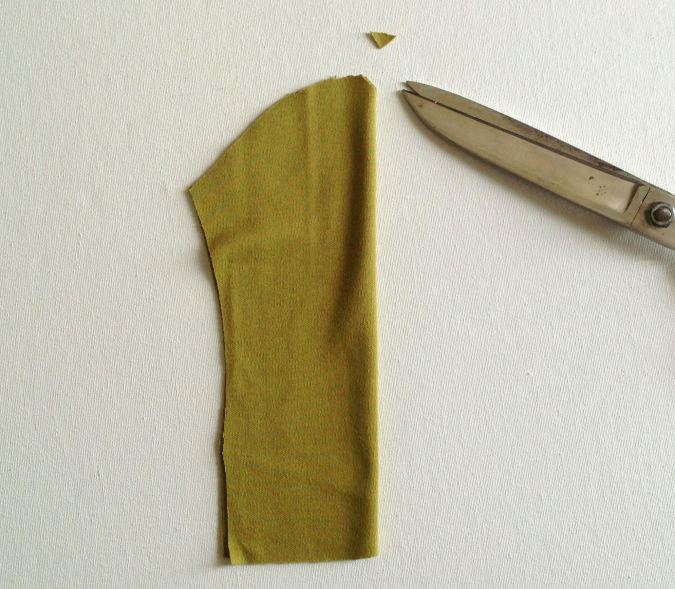
Cut the pattern template for the sleeve, fold the fabric and keep the template on the fold. Mark around the template and cut to get the sleeve piece. Repeat the steps to get one more of the same.
Cut the skirt pieces and binding pieces, referring to table-4 above.
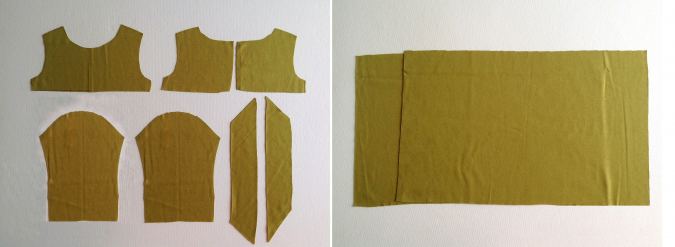
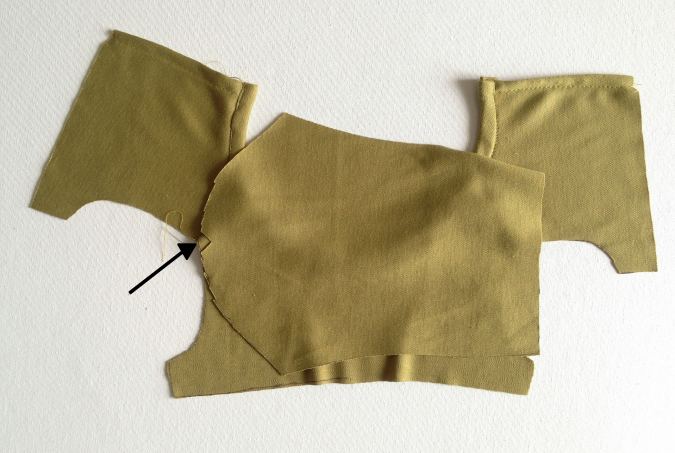
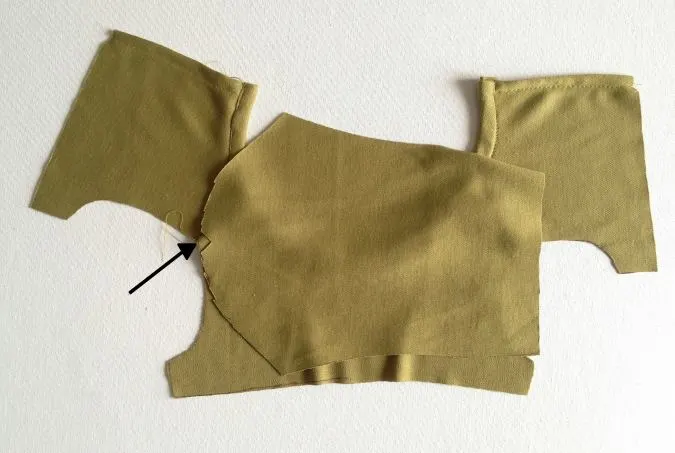
You will get your pieces like this.
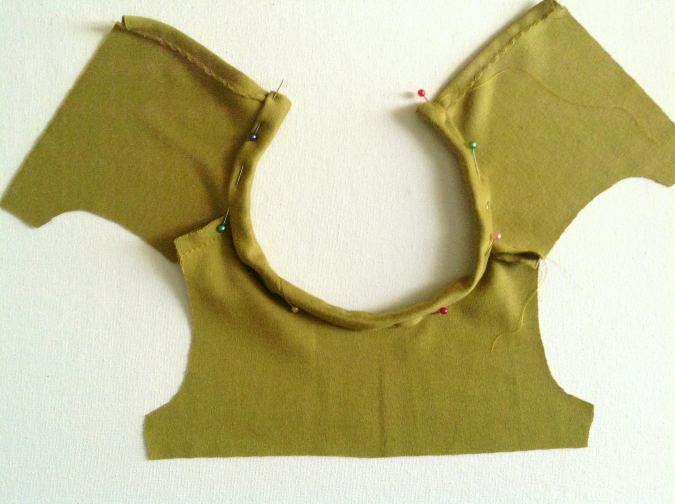
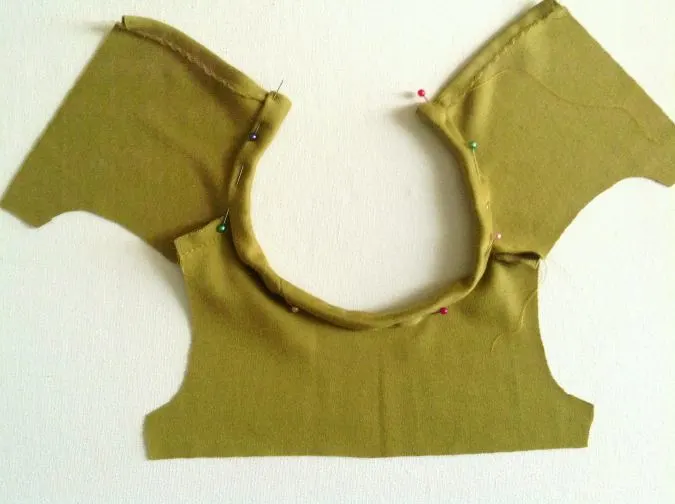
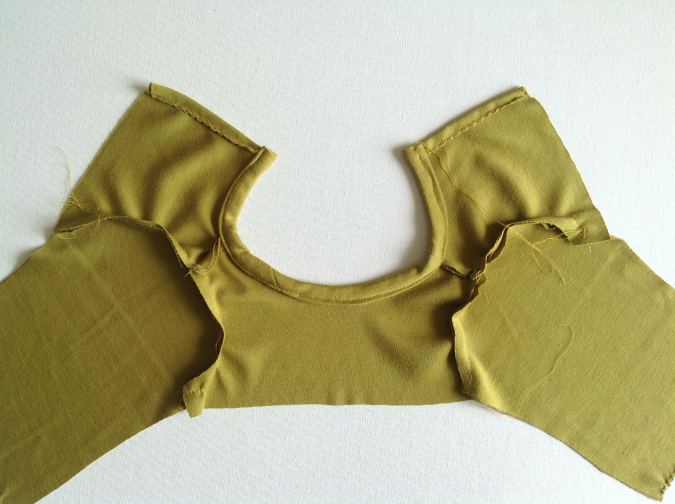
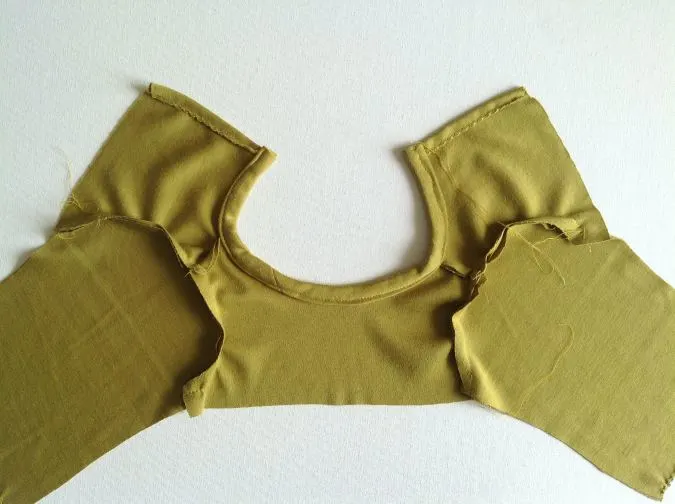
First, we join the front and back bodice pieces together.
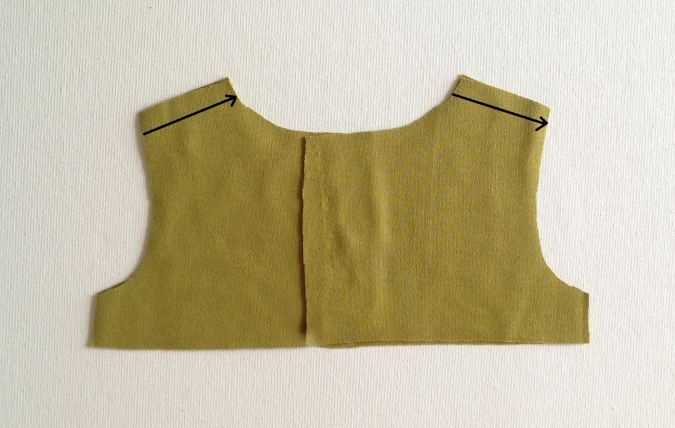
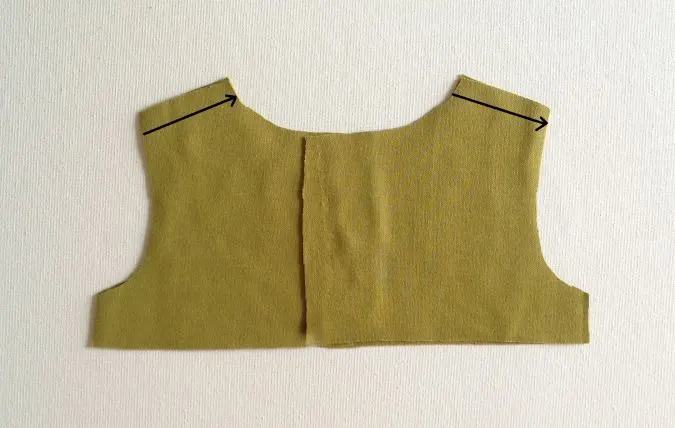
Keep the front and back bodice pieces layered, with the right sides together and aligning the shoulders, armholes, and side edges. Sew the two shoulders shut.

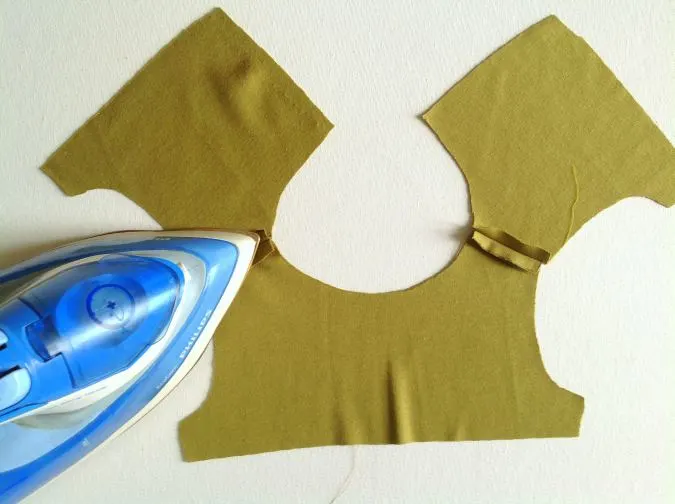
Press the seams open.

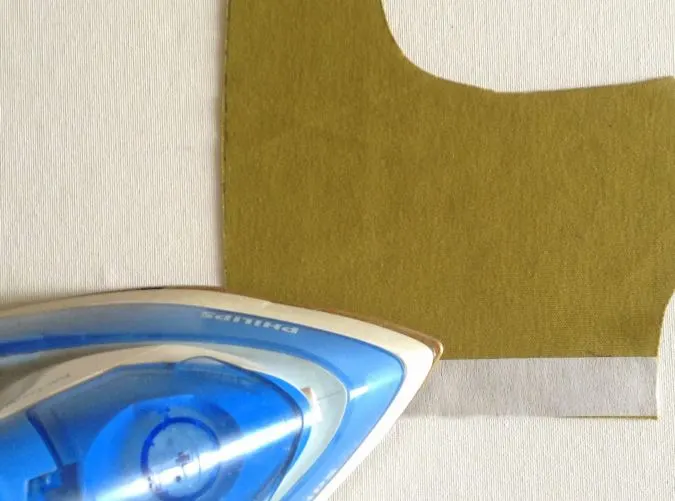
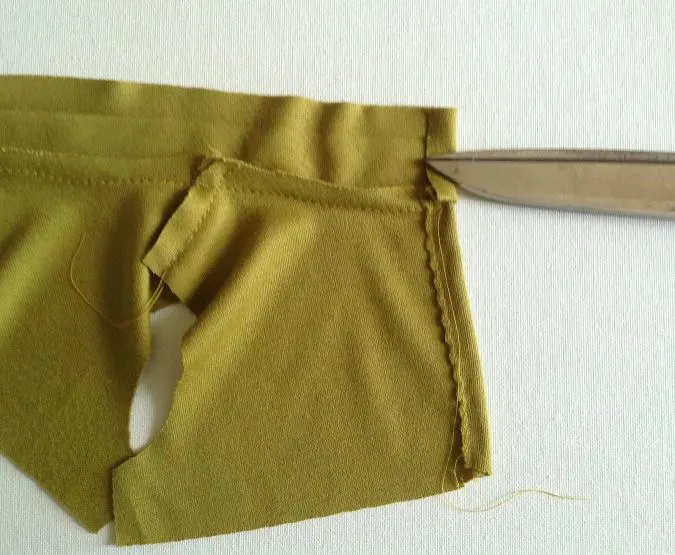
Cut 2 strips of interfacing 1/2- inch wide and fuse it on the center-back edges of the back bodice ( on the wrong side), following the manufacturer’s instructions.
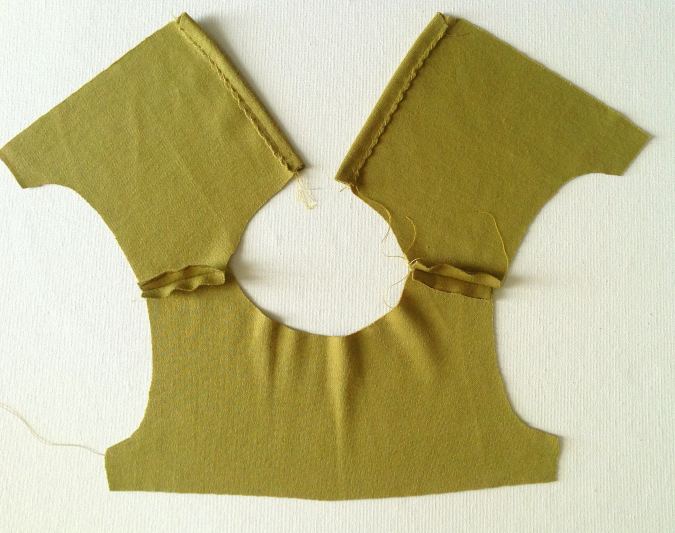
Zigzag the center-back edge of the back bodice. Fold them by ½- inch, press and sew down the folds. This would form the placket for attaching the KAM snaps or sewing the buttons and buttonholes.
Next, we make the bias tape ready to finish the neck. Instructions for cutting and making the bias binding strips can be found at the end of this tutorial.
Let’s attach it to the neckline.
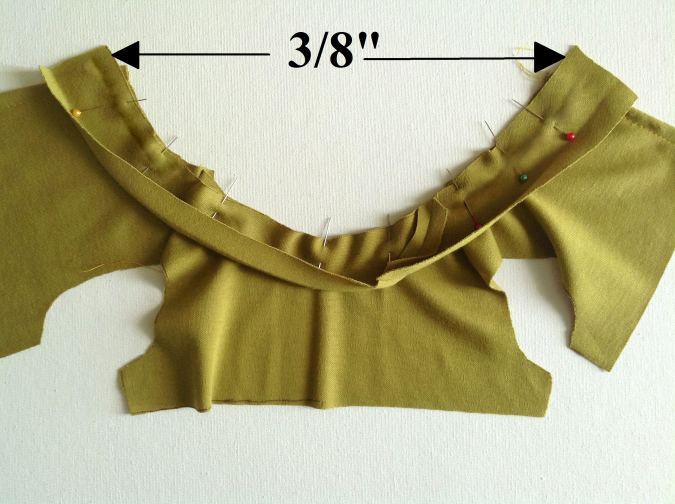
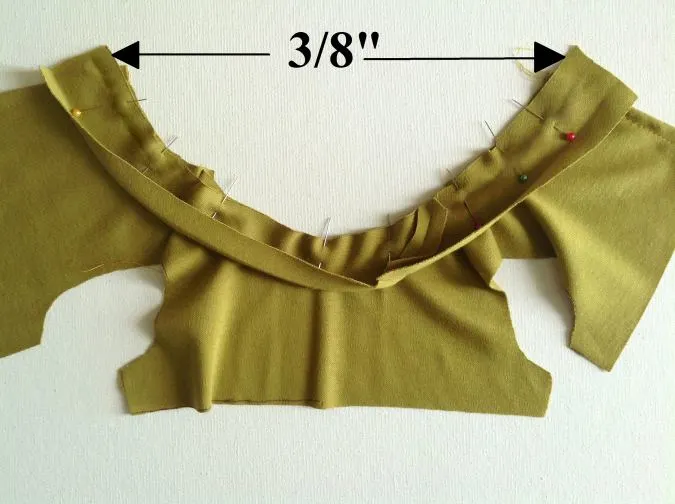
Keep the bodice on its right side and open the bias binding. Leaving 3/8-inch extended at the start, line up one of its longer edges with the neckline and pin all around. Leave an extra of 3/8- inch when you reach the other end of the neckline (you may require to cut off any extra).

Sew the bias binding to the dress, removing the pins as you go (picture for illustration purpose).

Fold the short edge of the bias binding at the end by 3/8- inch to cover the raw edge.
Next, fold the binding over to the wrong side of the bodice, along its center crease, keeping the fold along the edge intact and pin all around. Fold the short edge by 3/8-inch when you reach the other edge.

Turn the bodice over to the right side. Topstitch just next to the earlier stitching line, carefully removing the pins underneath while you sew.
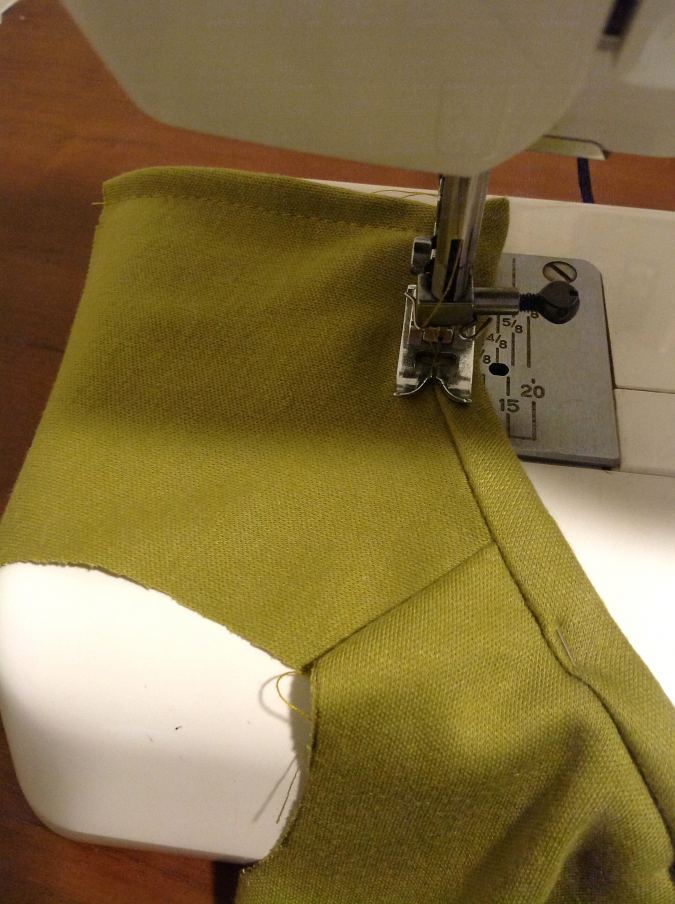
Next, we attach the sleeve to the bodice.

Take the sleeve piece, fold it lengthwise aligning the edges, and cut a small notch along the top center. This notch is to be aligned with the shoulder seam while attaching the sleeve.
Keep the center notch of the sleeve aligned with the shoulder seam.

Start pinning the sleeve to the armhole from the center outwards (picture for illustration purpose).

Keep pinning the sleeve along the entire armhole.
Sew the sleeve to the bodice, removing the pins as you go. Repeat the steps to join the other sleeve with the bodice.
Let’s finish the hem of the sleeve.
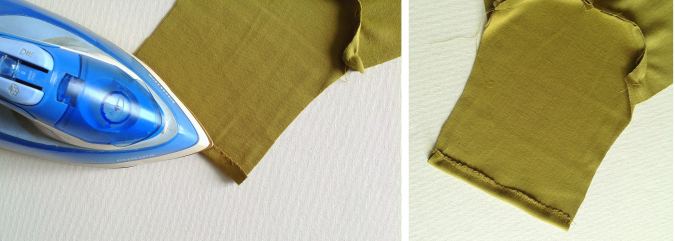
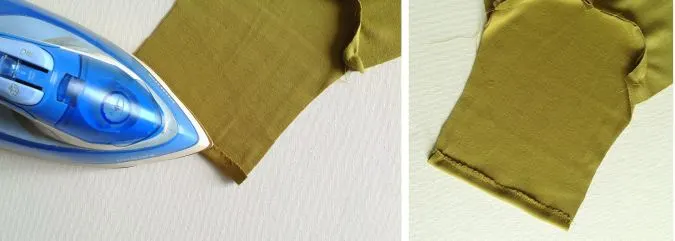
Zig zag the lower edge of the sleeve. Fold it by ½-inch and press. Sew down the hem. Repeat on the other sleeve.
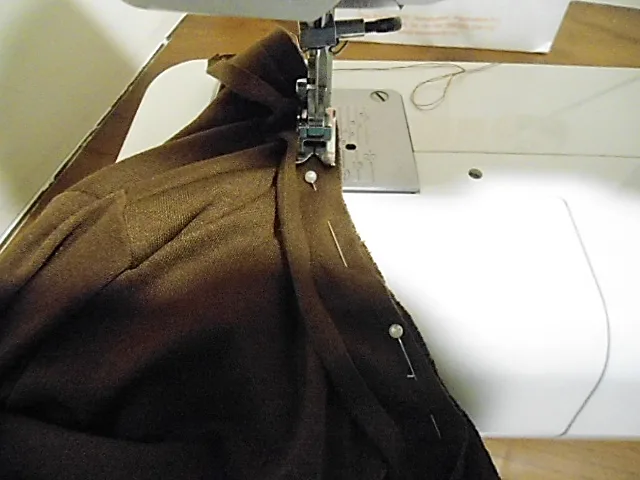
Let’s do the side seams.


With the right sides together, line up the edges of the sleeve and the side seams. Sew the bodice shut starting from the lower hem of the sleeve. Continue sewing up the sleeve and down the side seams of the bodice as marked above (picture for illustration purpose).
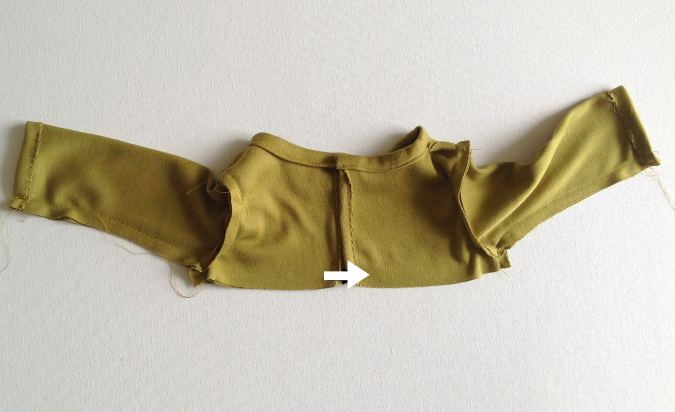
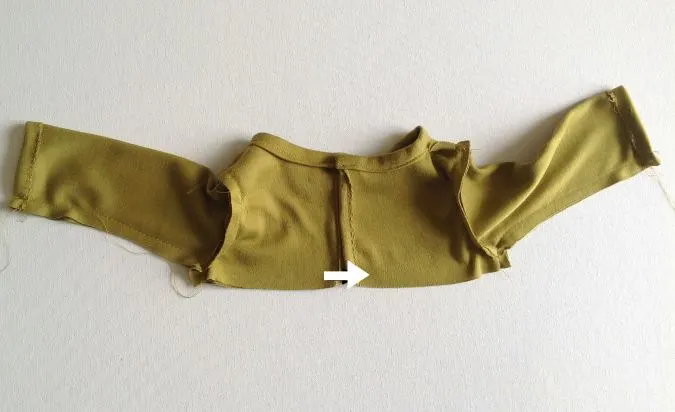
Next, keep the folded part of the center-back overlapped and sew it shut, ¼- inch from the lower edge.
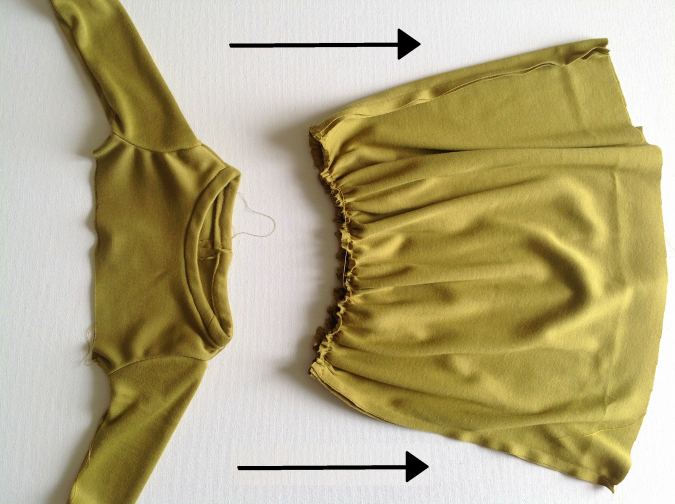
We have completed the bodice. Next, we sew the skirt part.
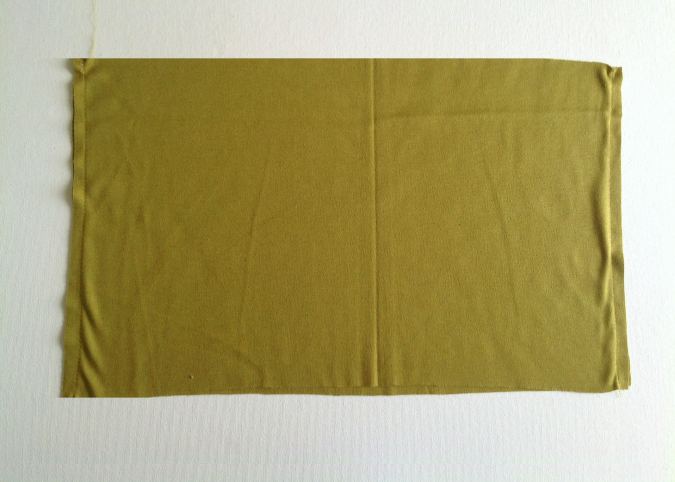
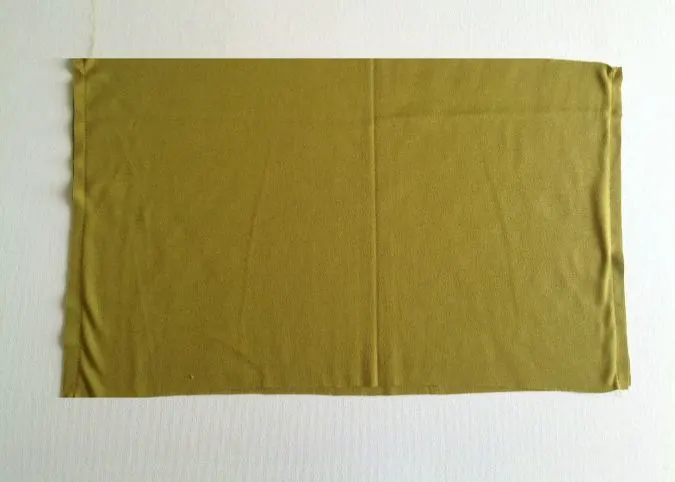
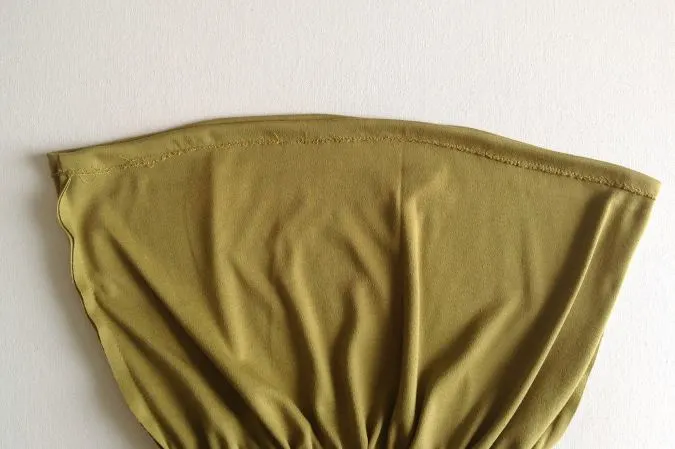
Take the two skirt pieces, keep them layered with the right sides together and lining up the edges. Join them along the two short edges.
Next, we gather it.
Turn the upper thread tension of your machine to zero and the stitch length to the longest to get a basting stitch.
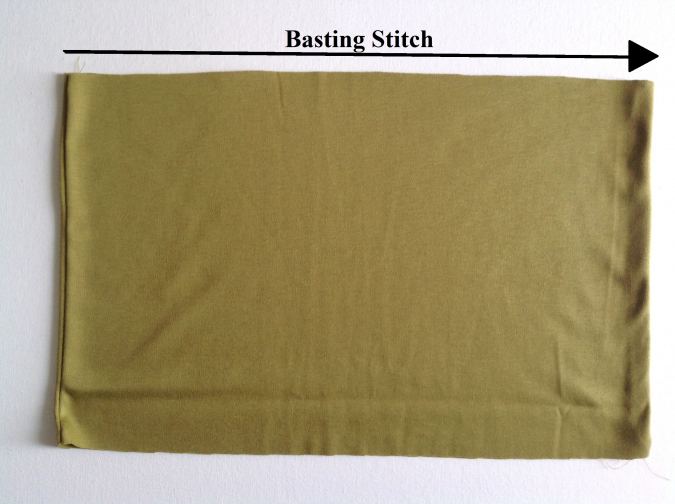
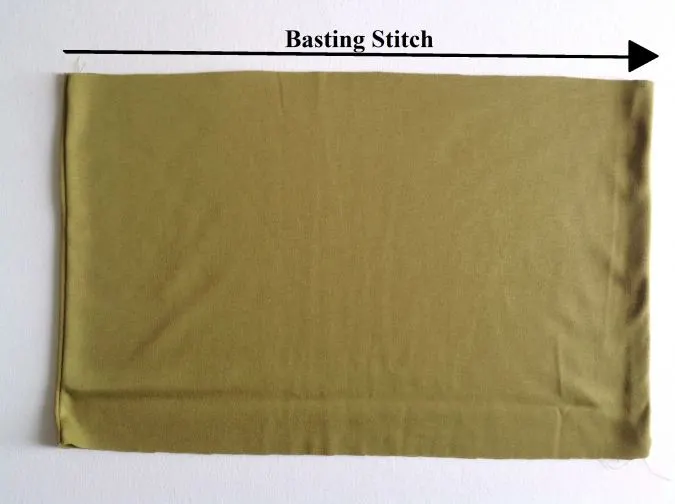
Turn the skirt over to the right side and sew a basting stitch along the upper edge of the skirt. Leave a long tail of thread, 5-6 inches long to pull and gather the skirt.
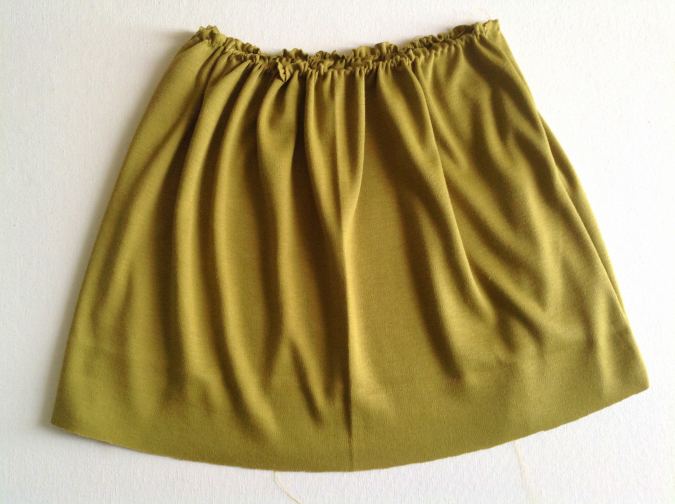
Pull the thread from the bobbin gently and gather it. Adjust the gathering to match the lower edge of the bodice.
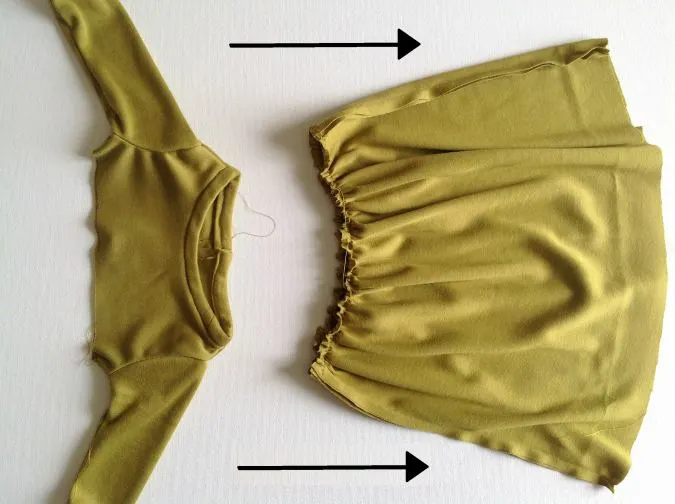
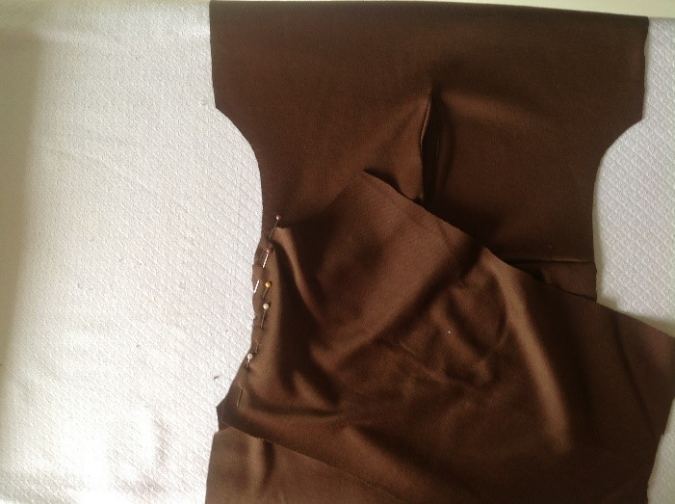
Keep the bodice with the right side out. Next, keep the skirt with the wrong side out and with its upper edge facing the neckline of the bodice. Slide the bodice into the skirt.

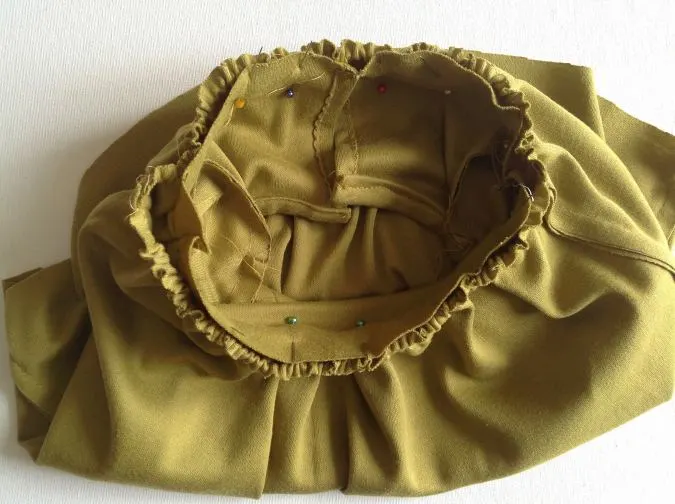
Line up the lower edge of the bodice with the gathered edge of the skirt and pin all around. Keep the seamlines of the bodice and the skirt in line while pinning.
Turn the machine settings back to normal. Sew the bodice to the skirt, removing the pin as you go.

Zigzag the lower edge of the dress. Fold, press, and hem it, just as you hemmed the lower edge of the sleeves.
Next, we need to attach the buttons for closure.

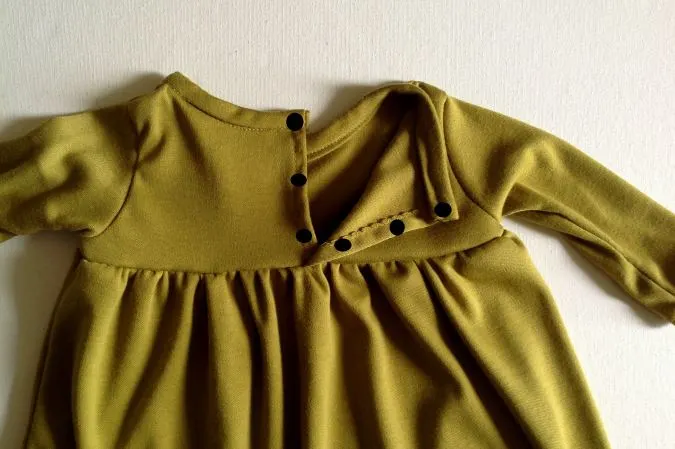
Starting from the top edge, make markings equidistant from each other, on the right side of one of the back pieces to attach the KAM snaps. Make complimentary markings on the wrong side of the other back piece to attach the other piece of the snaps. * If you need help, you can use the tutorial on the KAM website.
If you are comfortable sewing buttons and buttonholes, you can opt for that too.
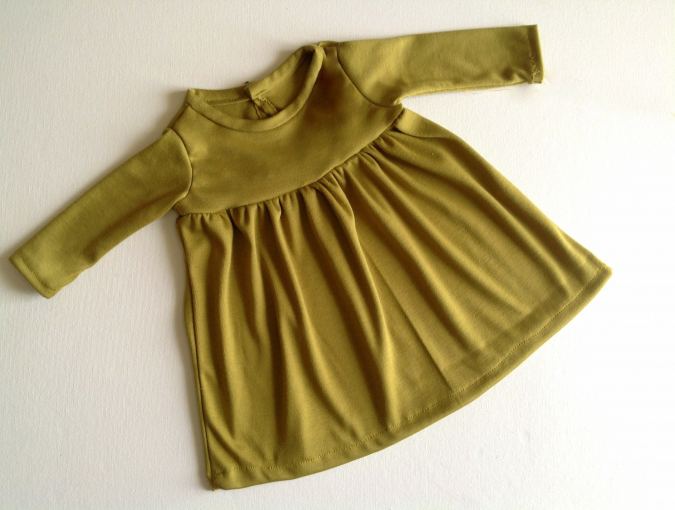
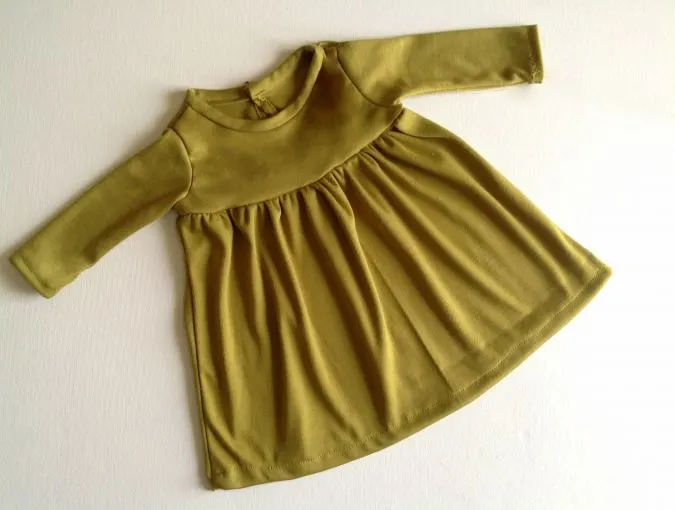
Our knit dress is done!
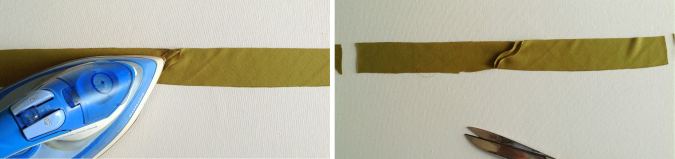
Bias Tape:
Cut a square measuring approximately 10” x 10”, keeping one side parallel to the selvage (selvage is the side of your fabric that does not fray. You sometimes see the manufacture’s name printed on the selvage.
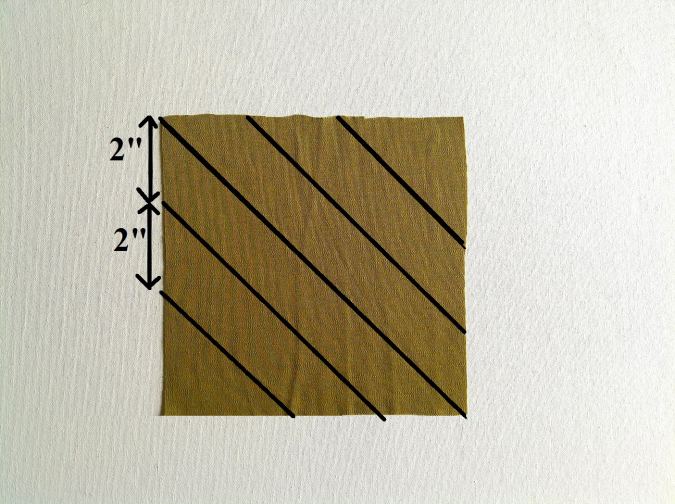

Draw lines parallel to the diagonal side at a width of 2 –inches as seen in the picture (you may reduce the width if desired). Cut along the lines to get 4 pieces of bias tape.
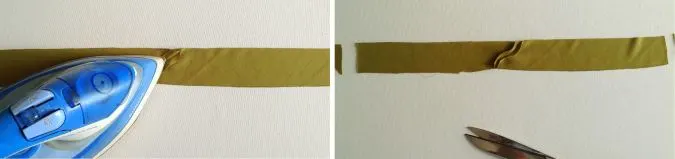
You need to join fabric strips to get the required length of the bias binding, referring to the table-4 above.
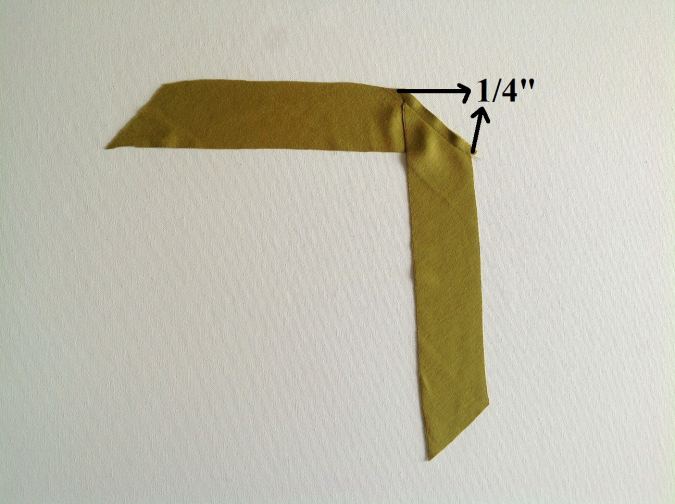

With the right sides together, line up the slanting edges of two pieces, leaving ¼- inch on both sides. Sew along the slanting edges to join.
Press the seams open. Measure the length of the bias binding required for your size and cut off the slanting edges to make them straight.
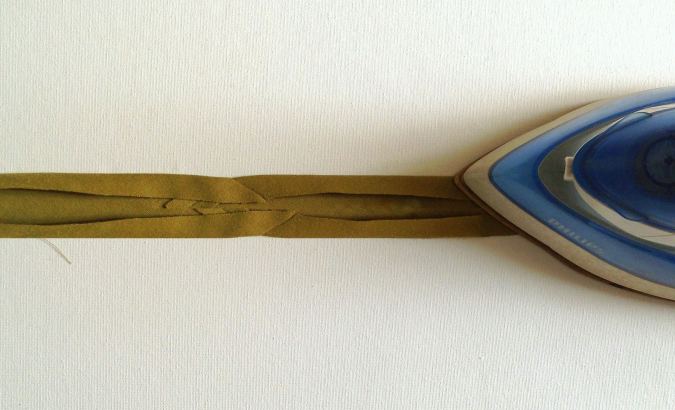
Next, fold the two longer edges towards the wrong side by 3/8-inch and press.
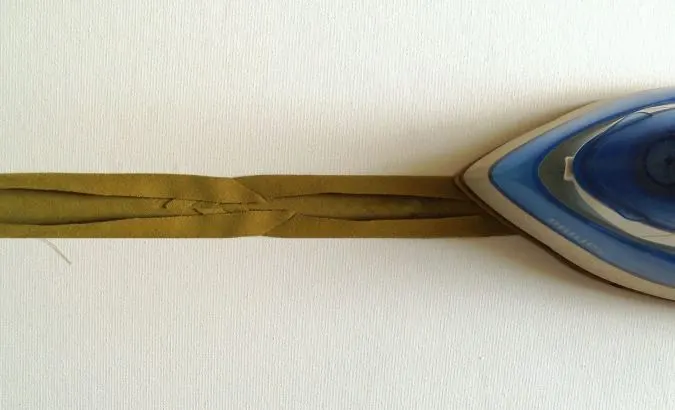
Fold it in half lengthwise and press again. Your double-fold bias tape is ready for attachment (picture for illustration purpose).
Find the webstory for the post here, Learn to Sew a Knit Dress with Our Free Step-by-Step Tutorial
Can you believe you have learned how to make a knit dress and also how to sew stretchy fabric? So, come on sew some more and gift them to all the new moms you know!
Soo Christensen
Sunday 16th of November 2025
I selected the option to buy the pattern with larger sizes, and paid $5.99US through PayPal with my Visa. I received the paid receipt from PayPal, but did not receive anything in return, no link, no email. I have proof of payment to surayya shiraz and have been waiting 30 minutes with no response. How do I receive this pattern?
Surayya
Thursday 20th of November 2025
The pattern is usually emailed withing 24 hours of payment. Your pattern has been emailed already!
Ashlee Mundt
Thursday 31st of March 2022
I entered my email and was able to open the pattern templates however it only has the bodice and sleeves. Am I missing something?
Surayya
Thursday 31st of March 2022
The pattern has templates for the bodice and sleeves only. The measurements for the rectangular skirt pieces are given in the table-4 of the tutorial.
Estelle Wycherley
Sunday 12th of September 2021
I entered my email address and clicked subscribe to be eligible to download the pattern and it just takes me to a new google page...please tell me how to actually get the pattern...I have tried clicking on downloads on the google page and there is nothing there...what else do I need to do to start the download?
Surayya
Monday 13th of September 2021
Try Refreshing the browser, you should be able to download the pattern pieces.