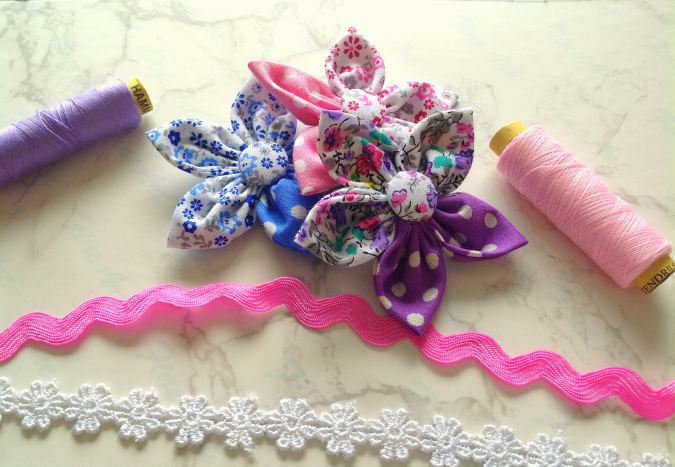
Learn how to make four different fabric flowers with this easy and fun tutorial. This sewing project comes with step-by-step instructions and downloadable templates for making the flowers in three sizes!


All these days, I have been designing outfits and accessories to go with them. But today, I have something to embellish these outfits, a tutorial on how to make fabric flowers! Here I will show you how to make not one but four types of flowers.


When my kids were little and whenever I made dresses for them, hand embroidery was the only option I knew to embellish the outfits. It took long hours and I often found it hard to complete them.
I would see cute fabric flowers on the store-bought dresses but it took time for me to figure out how to make flowers out of fabric.

After long hours of research and by trial and error, I found out the technique to make these flowers and here I am with the fabric flower tutorial! All of these flowers come with templates to make them in small, medium, and large sizes.
You can make these DIY fabric flowers to embellish your dresses, headbands, bags, purses, and even footwear. As these flowers need very little fabric, you can always make them with your leftover scraps of cotton fabric, satin, jute, etc. Flowers like the fluffy flower look extremely pretty if they are made with tulle.
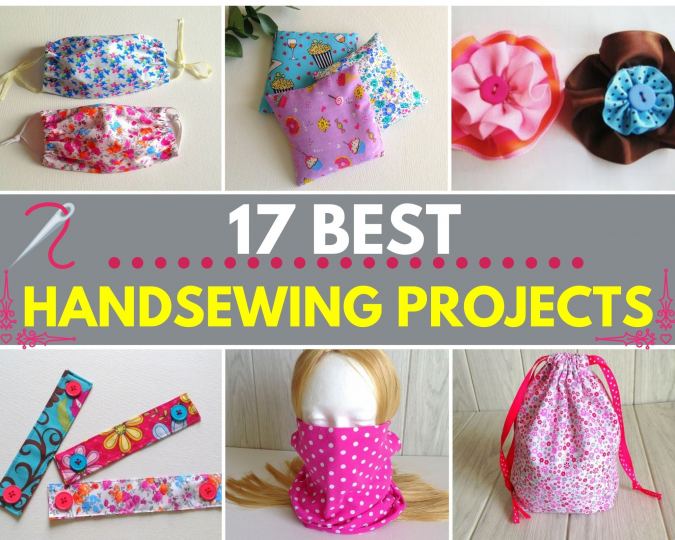
If you would love to see more items that can be hand-sewn, click on the picture below.

How to Make Fabric Flowers ( Four Ways)
- The fabrics shown here are only for illustration purposes and as such may vary from the original.
- I suggest you read the entire pattern once before starting to get a general idea.
- These flowers are hand-sewn and as such, the finished diameters of the flowers given here may vary from the ones you make.
Materials Required
- Cotton fabric scraps.
- Ornamental pearls, buttons, or stones. You can also make fabric-covered buttons, referring to my tutorial here: Fabric Buttons
- Fabric Glue (optional).
- Small piece of felt.
- Needle and Thread. * You will need to thread your needle with two strands of thread and it should be not less than 20- inches long to include all the petals.
- Flower Template. Enter your e-mail address and click the subscribe button to start downloading the template automatically.
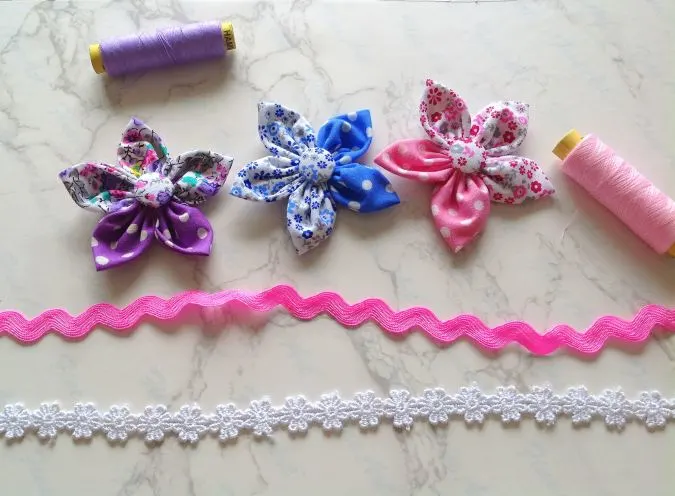
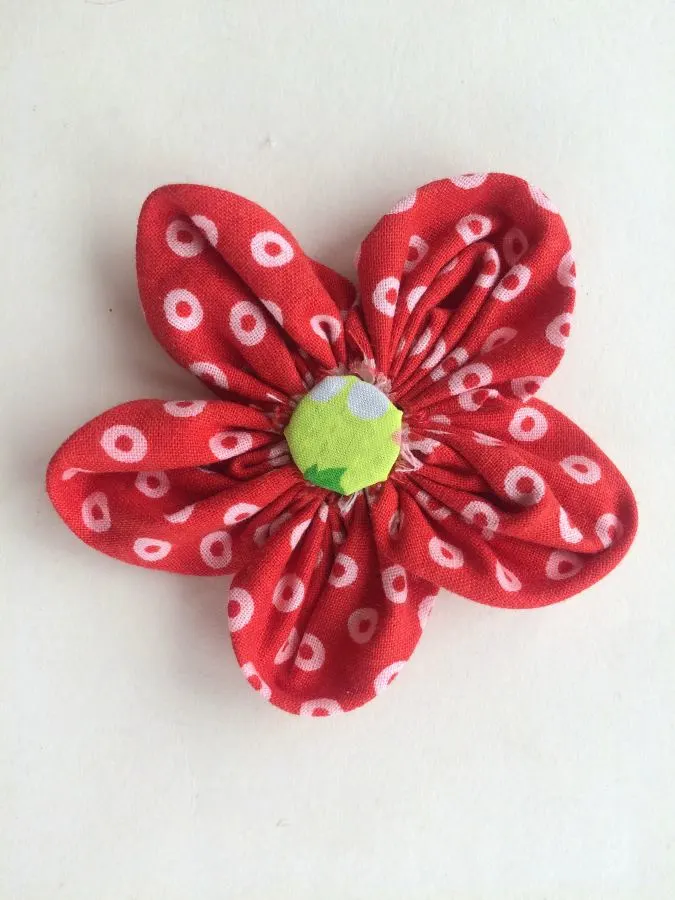
Pointy Flower
You can make the flowers in three different sizes, using the templates provided here.
The Approximate Finished Diameter of The Flower
Small: 2.75- inches
Medium: 3.5- inches
Large: 6- inches
Cut the template for the desired size of the flower.
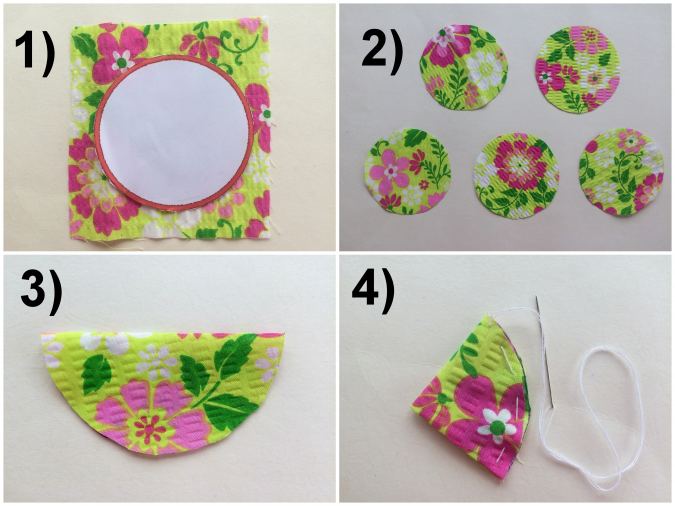

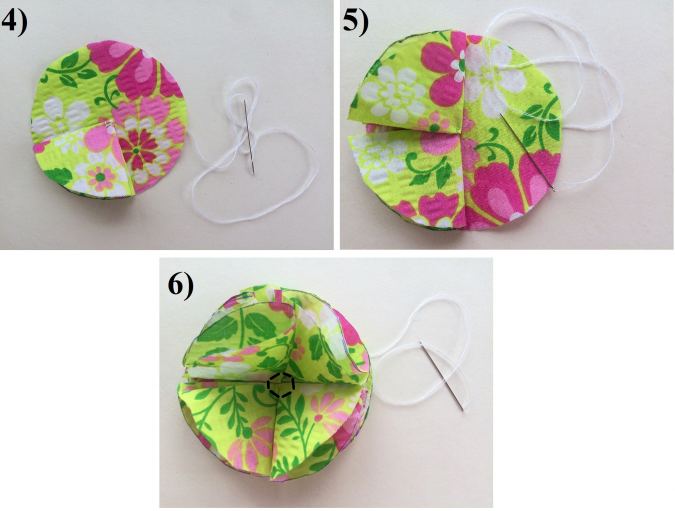
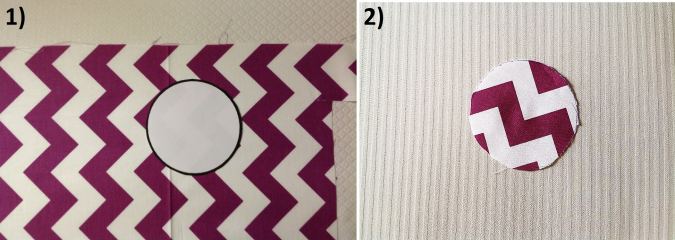
1) Take the fabric scrap required for the flower and place the template on the fabric. Mark around it and cut to get one of the circles. 2) You will need five such circles for a flower. 3) Fold the circle in half, along the diameter. 4) Fold again in half and sew a running stitch along the curved edge, using a needle and thread. * Make sure to catch all the layers.
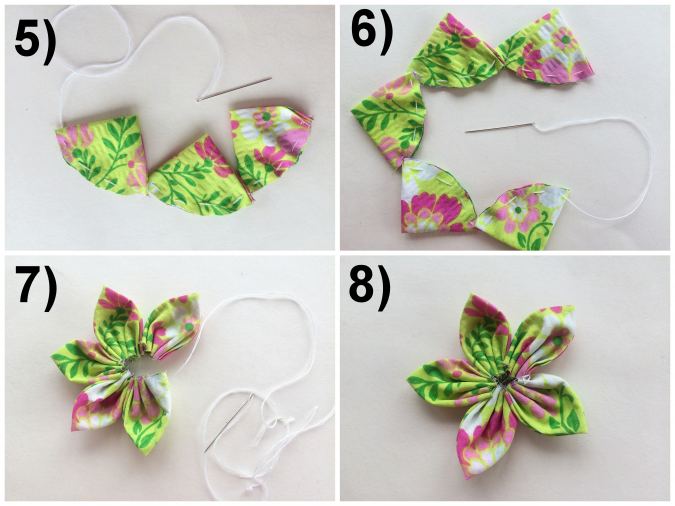
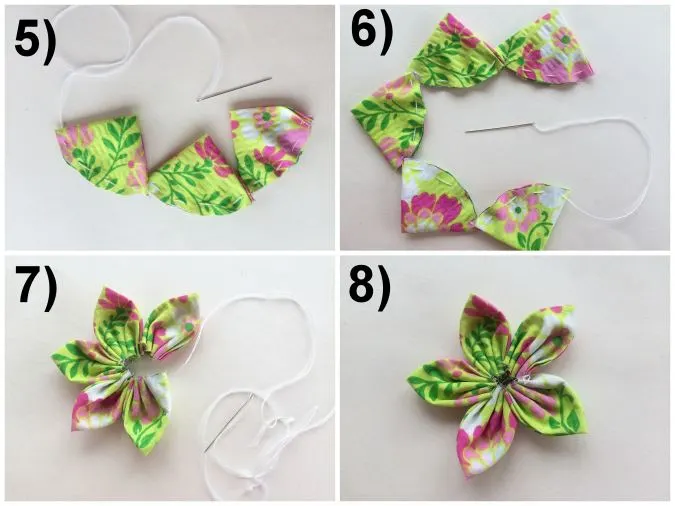
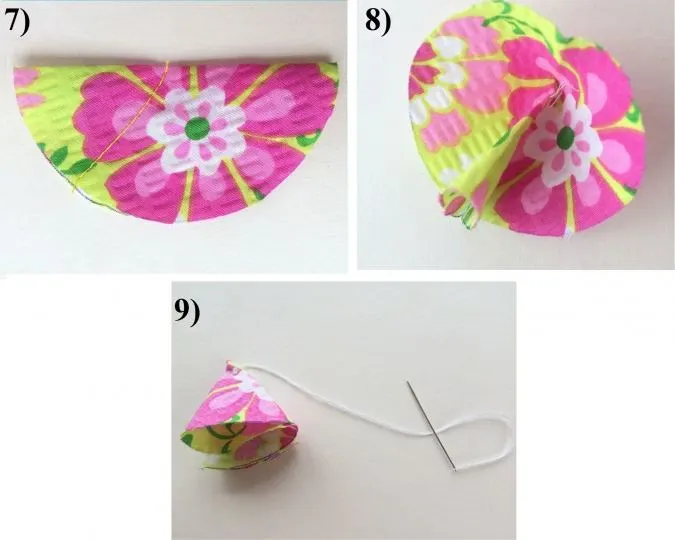
5) Add the next petal with the same running stitch. 6) Keep adding all the five petals and gather them by pulling the thread (picture for illustration purpose). 7) Keep pulling the thread tightly to form the flower and secure it by tying both the ends of the thread in a knot. 8) Your flower is almost done.
Next, we need to add some embellishment at the center. You may add a fabric-covered button or add a stuffed centerpiece, as shown in the few steps below.
Cut the pattern template for the centerpiece of the flower. Cut out the circle from the fabric scrap, using the template.
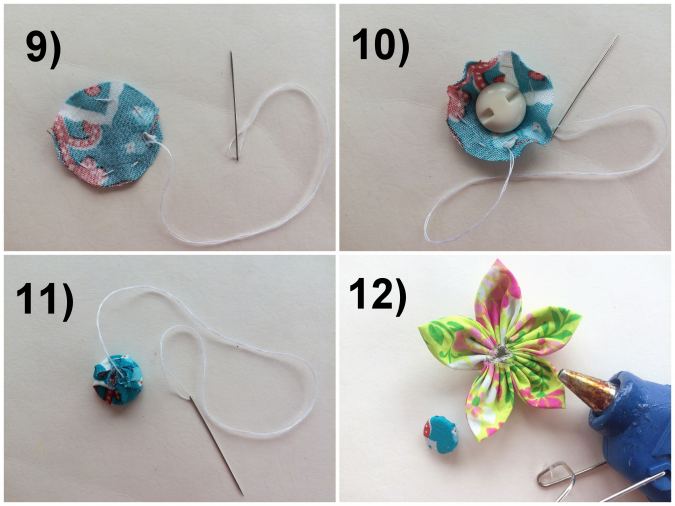
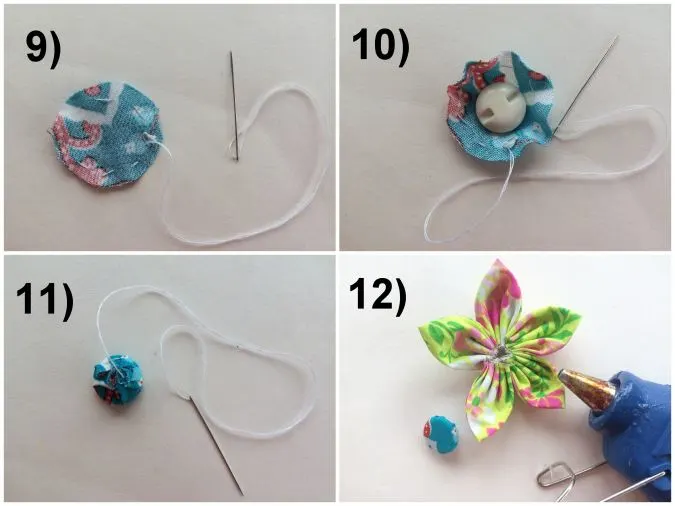
9) Take a needle and thread and sew a running stitch around the edge of the circle. 10) Pull the thread gently to form a pouch and place a button at the center of the pouch. 11) Pull the ends of the thread tightly to close the pouch and secure with a few knots on the underside. Do not trim the extra thread (this is to hand sew it, at the center). 12) Next, sew or hot glue the button onto the center of the flower.
Let’s finish the bottom of the flower.


13) Cut out a small felt circle of roughly ½-inch diameter.
14) Hot glue it to the center back of the flower.

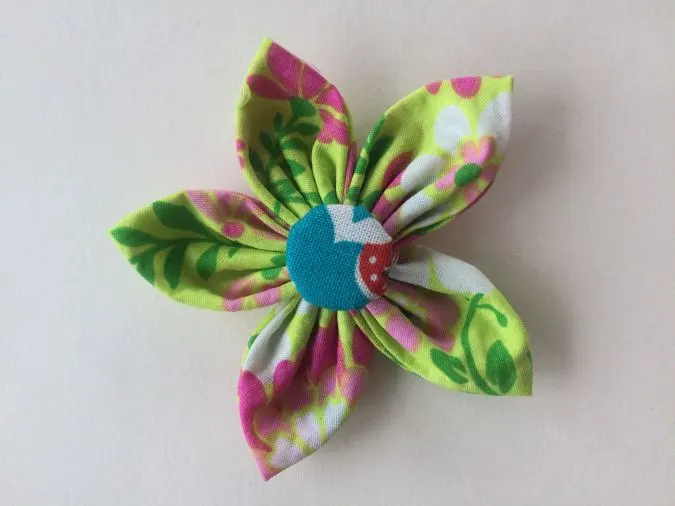
Our flower is done!
You can now attach it to anything like your hairband, bag, or dress. This can be done by hand sewing, hot glue, or removable by attaching it with safety pins!
Fluffy Flower
You can make them in three sizes, using the templates given in this PDF.
Approximate Finished Diameter of The Flower
Small: 2.75- inches
Medium: 3.5- inches
Large: 6- inches


1) Cut the template for the circle, according to the required size of the flower. Use the template to cut ten circles out of the desired fabric.
2) Take one of the circles and fold it in half, along the diameter.
3) Fold it again in half to get a quarter circle as shown above. Secure the closed circle by sewing a few knots at the corner with your needle and thread. You will get your first petal. Repeat the steps to make three more of the same kind of petals.

4) Take another circle, and keep the petal over its right side, with its corner touching the center, lining up the edges, and secure it by a few knots at the center.
5) Secure the other three-quarter circles at the center of the same circle, the edges touching each other as shown in the picture.
6) To make the petals look neater, sew a few knots around the center.
To do the second layer, make four more of the petals using the circle pieces. Take one of them and place it over the first layer of petals, in such a way that it comes over the gap between the two petals. Secure it again by a few knots at the center. Repeat with all the other three. Once more, secure the petals by sewing a few knots around the center as before. You have got your second layer of petals ready.
Let’s do the center petal.
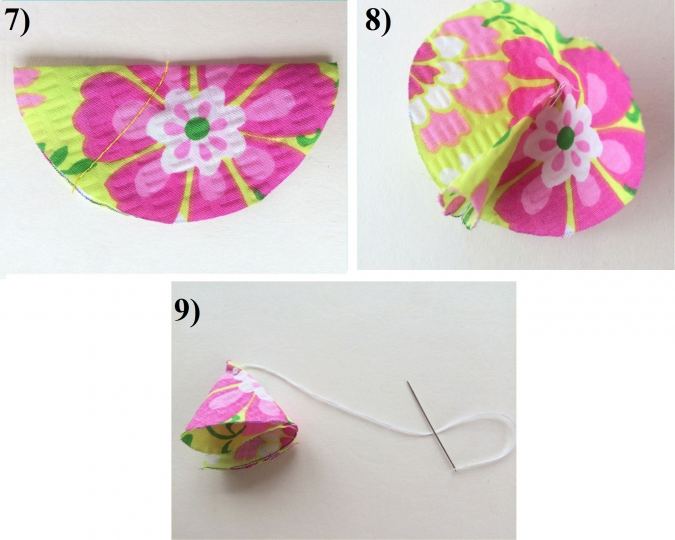
7) Fold the circle in half, with the right sides together, and sew a slanting line from the center as shown above.
8, 9) Turn the circle inside out such that you get two cones; one small one, inside a large one.

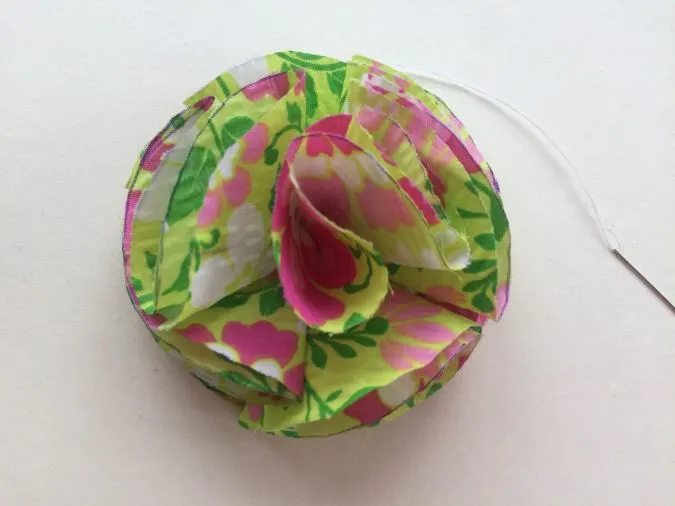
Hand sew it to the center of the flower.
Attach the felt piece to the bottom of the flower as done earlier and fluff the flower up.
Our flower is done!
Here I have made it with cotton fabric. Try the flower with tulle, it will look fluffier and prettier!
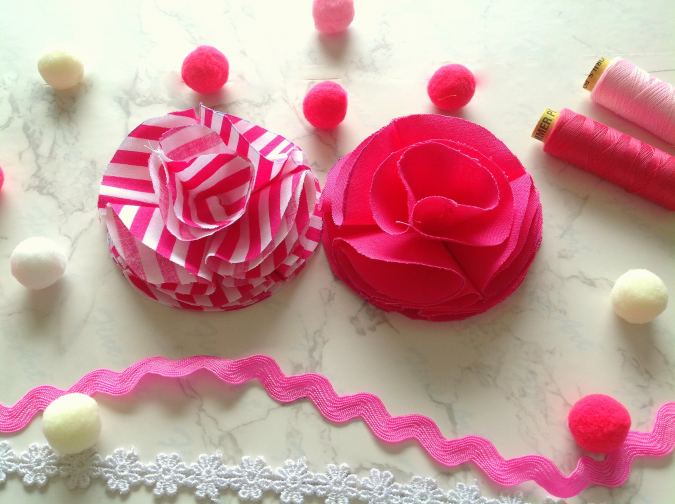
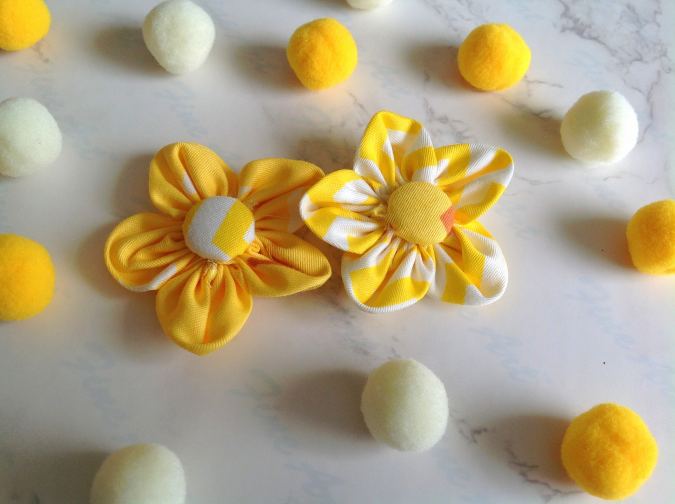
Round Petal Flower
The flower is made from square pieces of fabric. The finished dimensions of the flower and the required measurements of the square pieces are as given below:
Small:
Approximate finished diameter, 2-inches.
Dimensions of the square, 2 x 2-inches.
Medium:
Approximate finished diameter, 4-inches.
Dimensions of the square, 4 x 4-inches.
Large:
Approximate finished diameter, 6-inches.
Dimensions of the square, 6 x 6-inches.
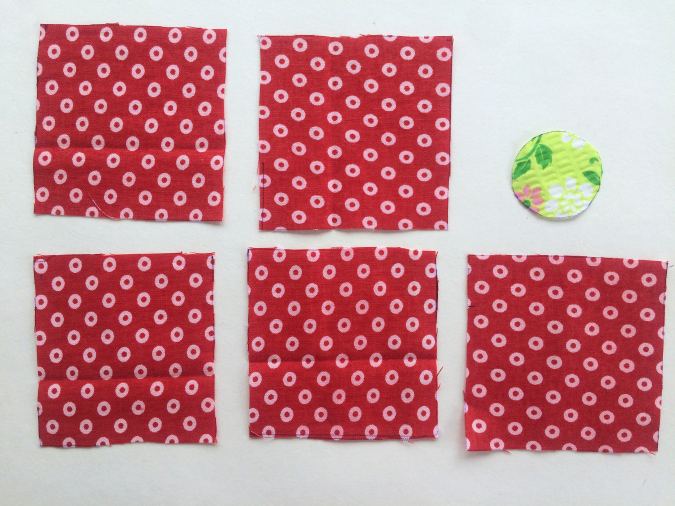

Cut 5 square pieces of fabric with the above dimensions (you will have to cut a circular piece also if you are using a stuffed centerpiece or a fabric-covered button)

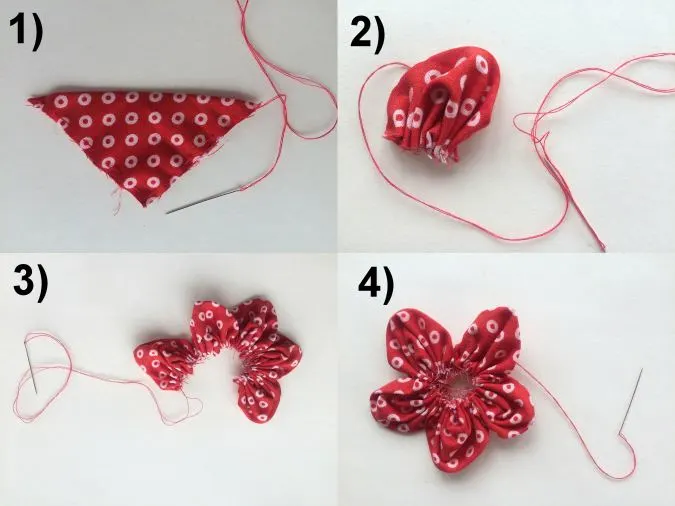
1) Take one of the squares and fold it diagonally, with the wrong sides together, to form a triangle. Sew a loose running stitch along the two open edges of the triangle as shown above.
2) Pull the thread on both sides to gather the triangle and form a round petal.
3) Add the next petal with the same running stitch. Note that while you keep adding the subsequent petal, you keep it slightly overlapping the previous one. Keep adding all the five petals and gather them as shown above by pulling the thread.
4) Pull the thread tightly to form the flower and secure it by tying the thread’s ends in a knot.

You may go on and add a show button, a fabric-covered button, or a stuffed centerpiece, as done earlier to complete the flower.
Add the felt underneath the flower just as you did for the other flowers.
Lo! Your flower is ready.
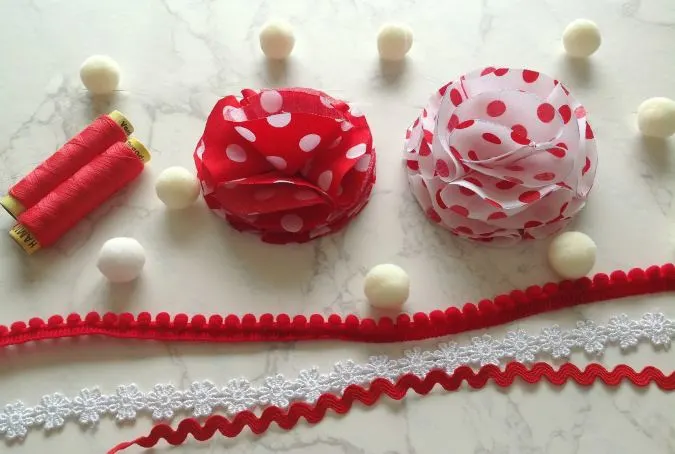
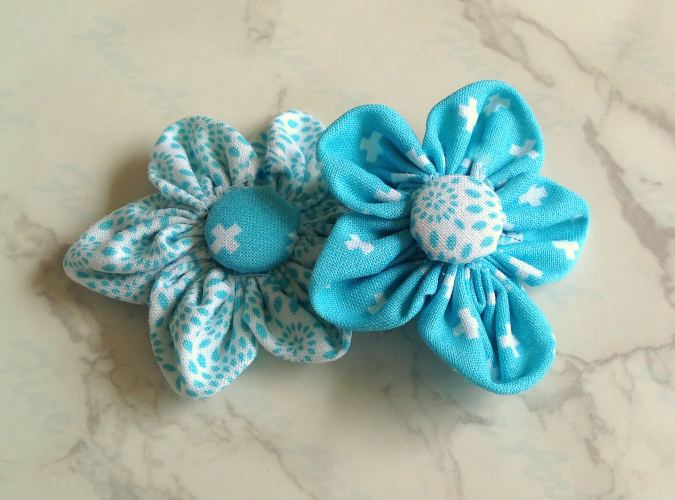
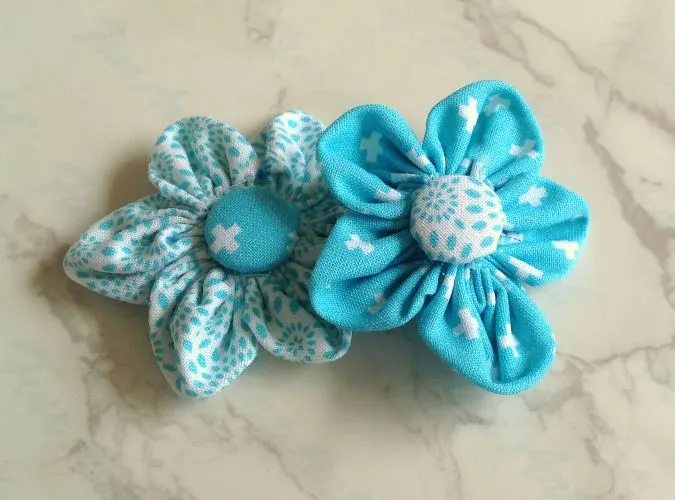
Yoyo Flower
These fabric yoyos can be made in three sizes; small, medium, and large, using the templates provided. They can be used as a single layer or as a few layers, made in different sizes to form a flower. Here again, fabric-covered buttons or other ornamental buttons are added at the center.
The approximate diameter of the finished yoyos are as given below:
Small- 1.75 inches.
Medium- 3 inches.
Large- 4 inches.
According to the desired size, cut the pattern template for the yoyo from the PDF provided.

1) Place the template on the fabric scrap and mark around it.
2) Cut along the line to get the circular piece for the yoyo.


3 Hand-sew a running stitch, about ¼-inch from the edge of the circle.
4) Pull the thread at both ends gently, till the circle forms a cup and then closes to form a yoyo.
5) Secure the edges by sewing around the inner circle with very small stitches.
6) Cut off the hanging threads and our yoyo is ready!
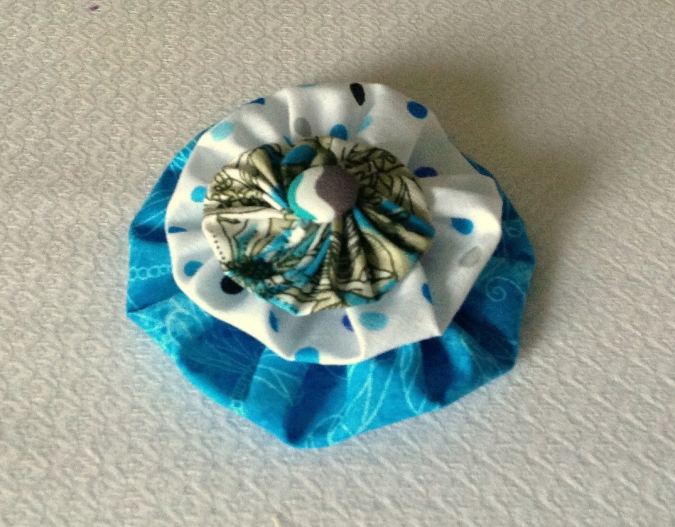

You may make a few more yoyos in different sizes and colors, and layer them to get the yoyo flower. Add the centerpiece and the felt underneath, just as you did for the other flowers and your yoyo flower is done!
Have a look at the webstory for the post here, Step-by-Step: How to Craft Fabric Flowers Four Ways
Pin it for later here,

I hope this makes it super easy for you to make loads of fabric flowers, either for embellishing your dresses, accessories, or even decorating your home. Enjoy!
Monika
Tuesday 2nd of November 2021
Thank you I will be making some of these for Christmas Thank you
monika