Peasant dresses are outfits of the bygone era, that never go out of fashion. There won’t be a single person who hasn’t had a peasant dress from little girls to grown-ups at some point in her life.
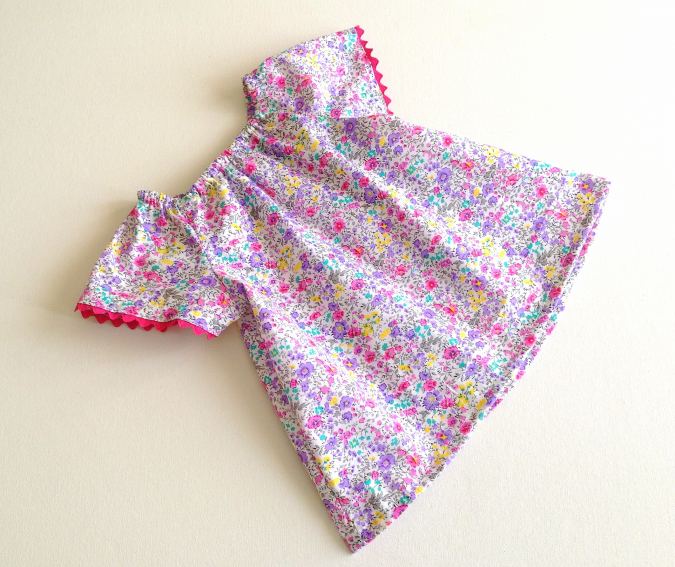

Peasant dresses are loved by all little girls. They are roomy and comfortable to wear. The elastic along the neckline gives the dress the perfect shape it needs. The fact that they are easy for on and off, make it one of the desired outfits for babies too.
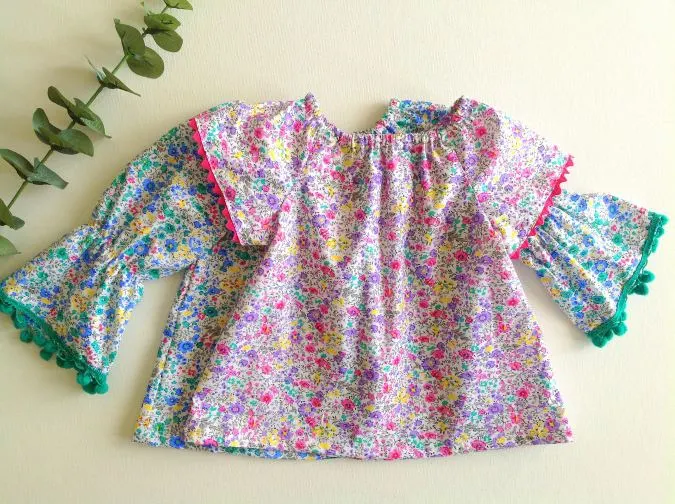
This easy peasant dress pattern does not require extensive sewing, no gathering is required and the lack of zippers or buttons makes it extremely easy to sew.

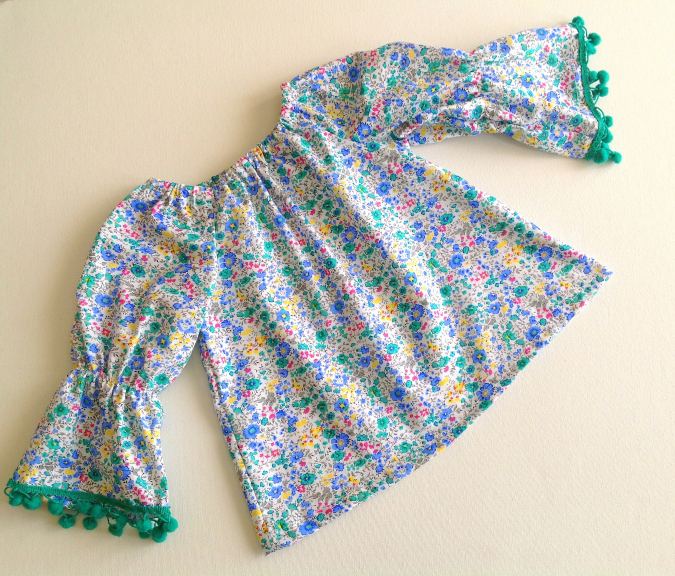
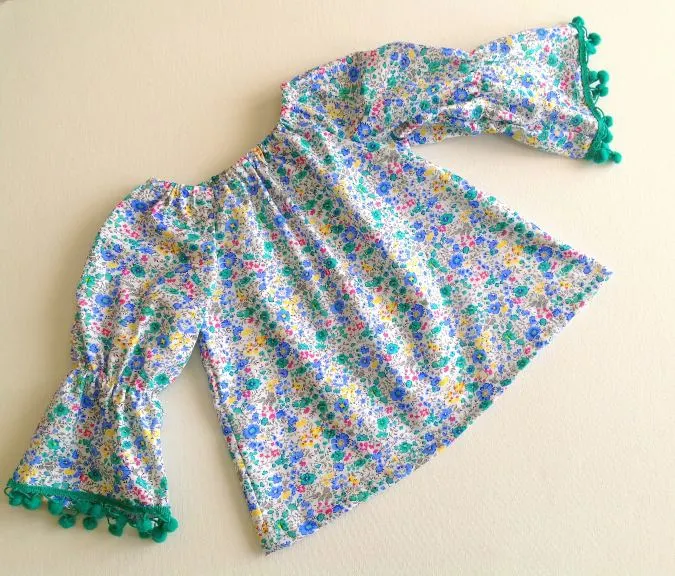
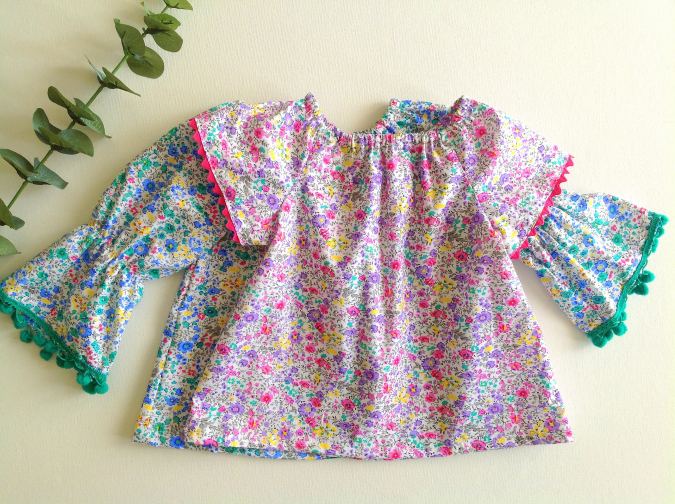
There are options to sew it with short or long sleeves, which makes it all-weather wear.
Here I have simplified the DIY peasant dress sewing project and made it in just 5 steps. There are templates and instructions to sew it from 6 months to 6 years in age.

If you would like to see my popular free patterns, click on the pictures below:
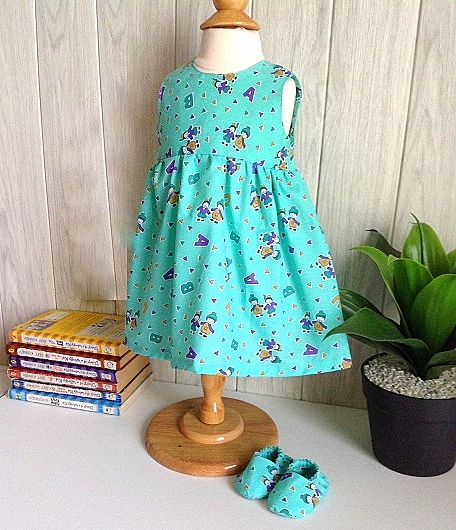

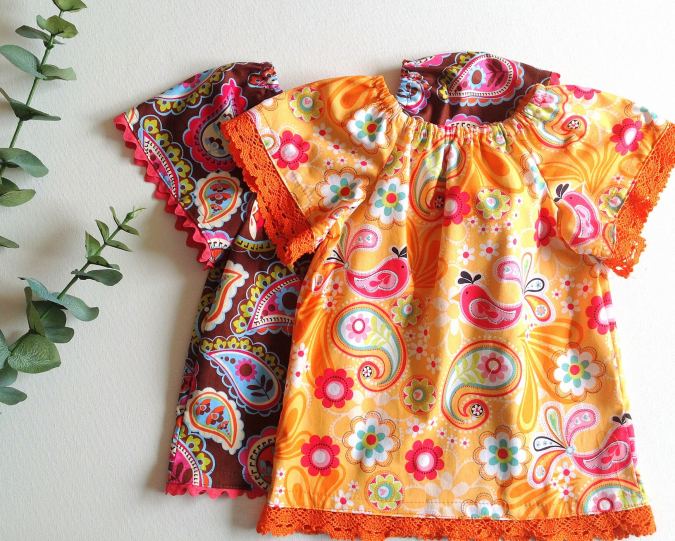
Easy Baby Dress with Yoke
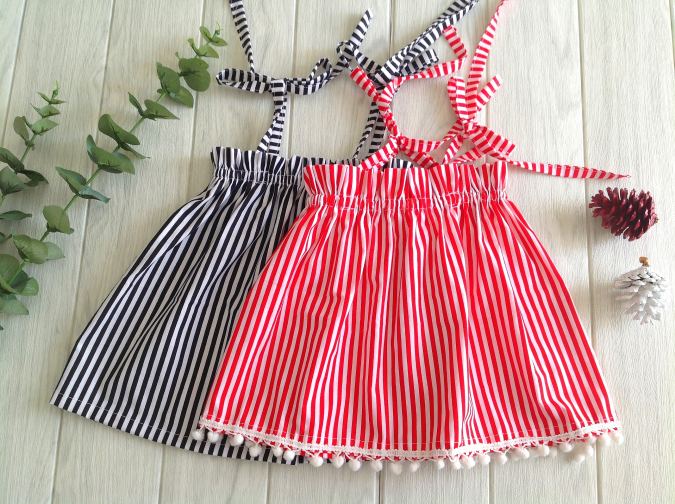
15 Minute Baby Dress
Easy Peasant Dress in 5 Steps
**** The tutorial has been edited to include a full template.*****
Materials Required:
Cotton fabric in a desired print for the bodice- requirement specified in the table below.
Cotton fabric in a coordinating color for the sleeve- requirement specified in the table below ( optionally you may use the same fabric as the dress body).
3/8-inch elastic- requirement specified in the table below.
Sewing Notions.
Trims like ricrac, pompoms, or lace (optional).
Download the pattern template free when you subscribe to our newsletter below.
Pattern Notes:
All the fabrics used here are 44 inches in width.
The fabrics shown here are only for illustration purposes and as such may vary from the original.
The seam allowance is 3/8 -inch unless otherwise specified.
I suggest you read the entire pattern once before starting to get a general idea.
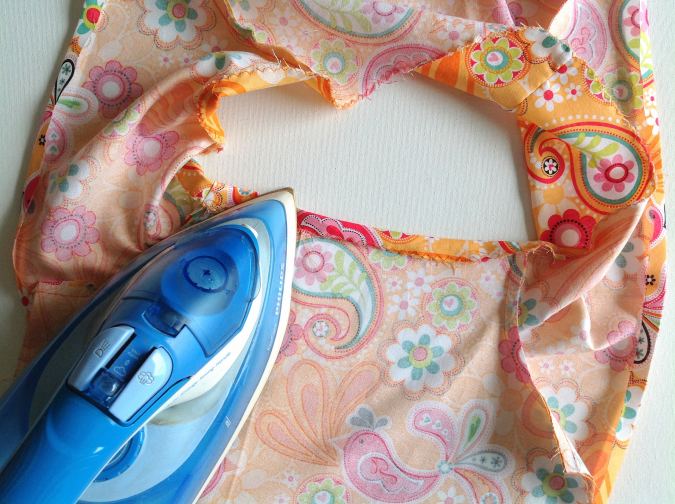
All seams are to be pressed flat
All seams are to be finished by zig-zag or serger
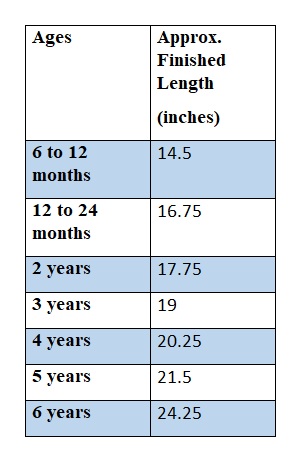
Approximate Finished Lengths
Table-1
*The finished length is from shoulder to hem. Please note that this is a vintage length dress and will hit at the knee. Adjust the length accordingly if needed.
- Pinch to zoom for mobile users.

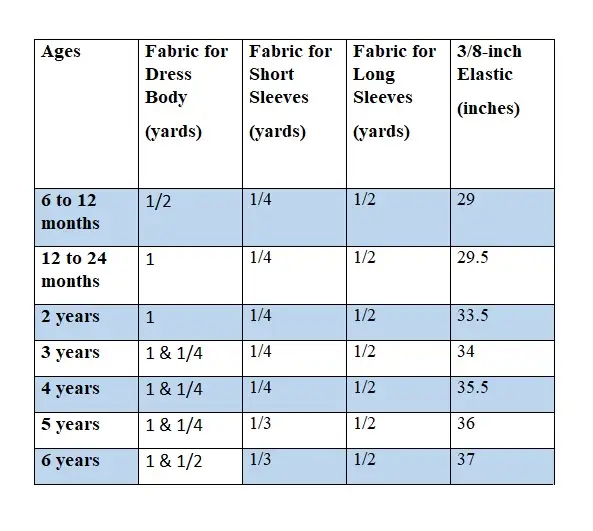
Fabric Requirements:
Table-2

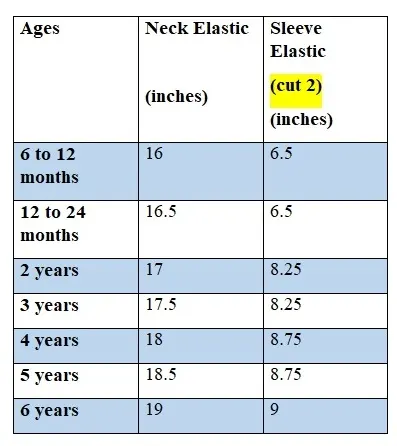
Elastic lengths
Table-3

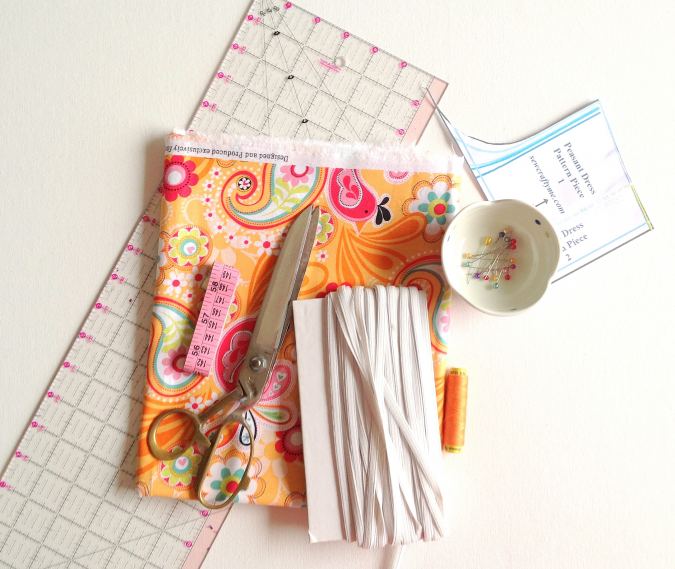

Gather your supplies
Step-1: Cutting the Bodice and Sleeve Pieces.

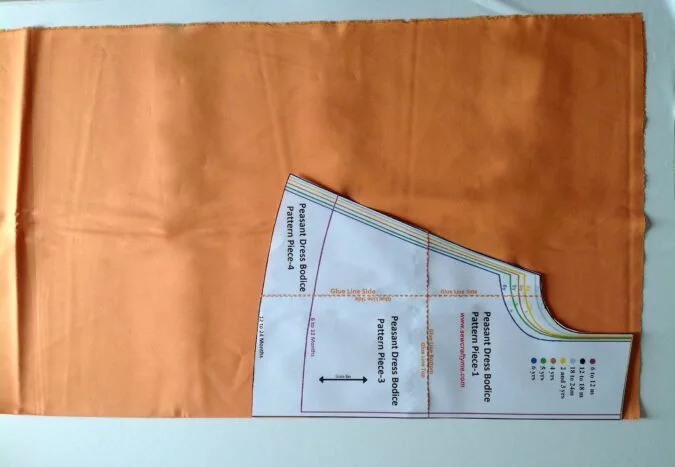
Take the template and the dress fabric. Fold the fabric to fit the width of the template. Place the template on the fold and mark around it (picture for illustration purposes).
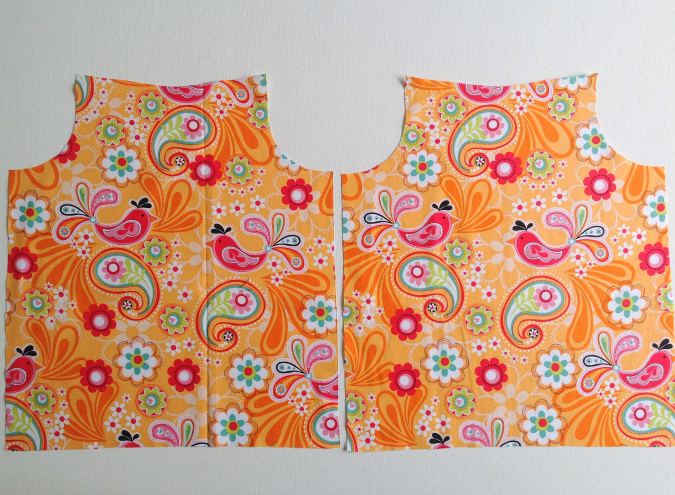

Your bodice pieces will look like the picture above once cut.
* The bodice template has been edited and as such the side edges of the bodice pieces would be slanting and the lower edge curved and not straight like the picture above.
Next, cut your sleeve pieces on the fold.
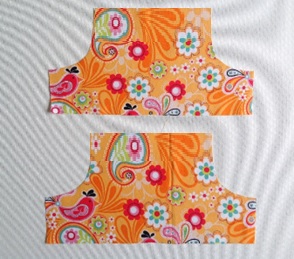

Your sleeve pieces would look like this.
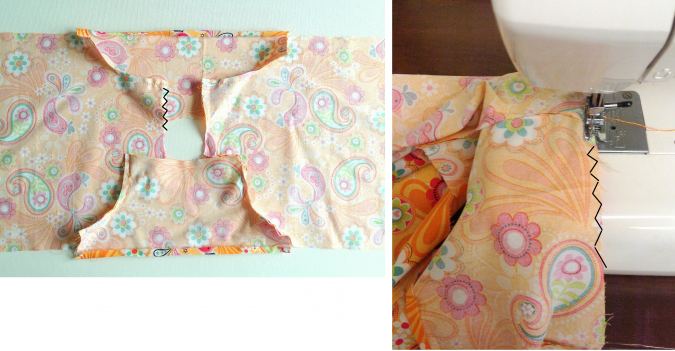
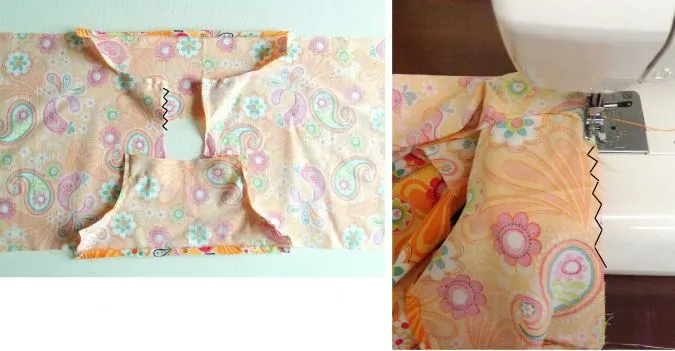
Step- 2: Attaching and Finishing the Sleeves
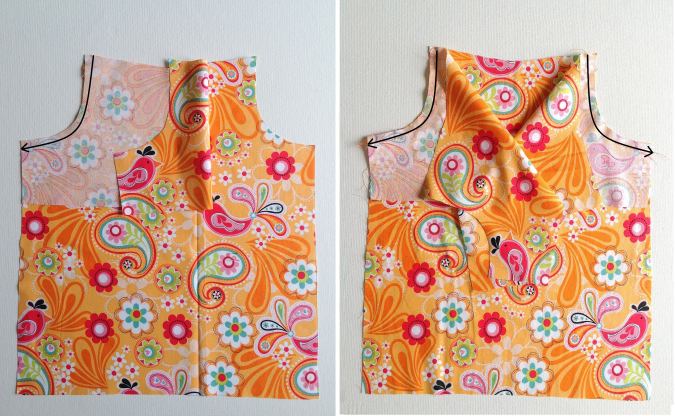

Take one sleeve piece and keep it over the bodice piece (let this be the front bodice) with the right sides together and aligning the edges and armholes. Sew along the armhole to join. Repeat with the other sleeve on the other armhole.

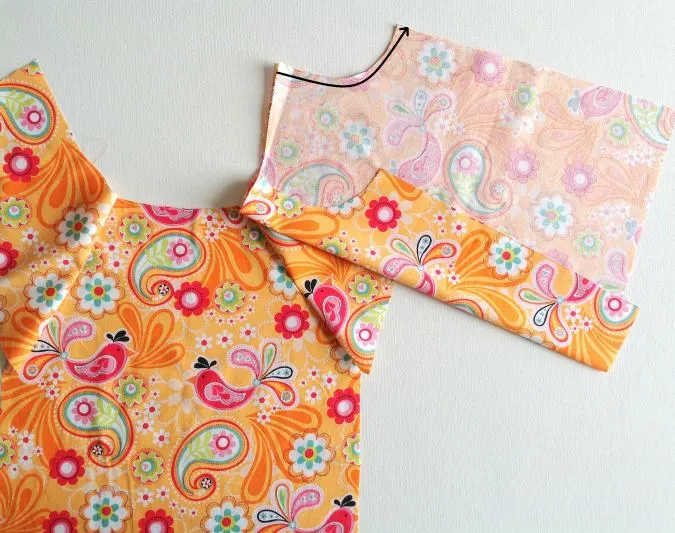
Take the back bodice and place it above one of the sleeves, with the right sides together and aligning the armholes. Sew the sleeve and back bodice together along the armhole, as marked.
Next, bring the back bodice on top of the second sleeve and align the armholes. Sew the sleeve to the bodice as marked.
Let’s finish the sleeve edges.

Fold the lower edge of the sleeve by 1/2- inch twice and press. Sew the hem shut, close to the edge. Repeat on the other sleeve.
You may opt to insert the elastic as directed below or skip over to step-3 if you wish to have a no- elastic sleeve. * Note that few pictures below are for illustration purposes.
Take the required length of elastic, referring to the table-4 above, and insert the elastic through the casing using a safety pin.
Secure the ends by sewing back and forth a few times. Repeat the steps with the other sleeve.
If you prefer a long sleeve, you can attach the elastic in the middle of the sleeve. First, do the lower hem of the sleeve as shown above.


Keep the sleeve folded aligning the edges and find the center of the fold. Mark a point on the fold center and draw a line along the center of the sleeve. Take the required length of elastic, fold it in half, and mark the center.

Sew the elastic along the marked line, keeping it stretched to match the center points. Make sure to reinforce the stitches at the start and finish
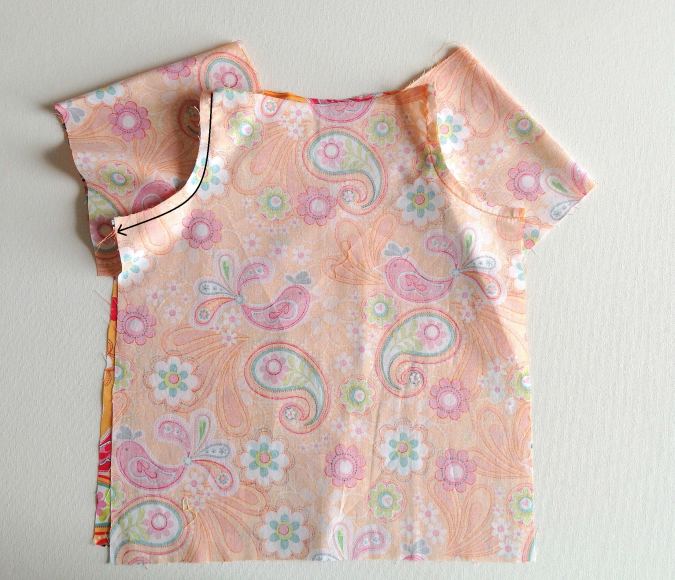
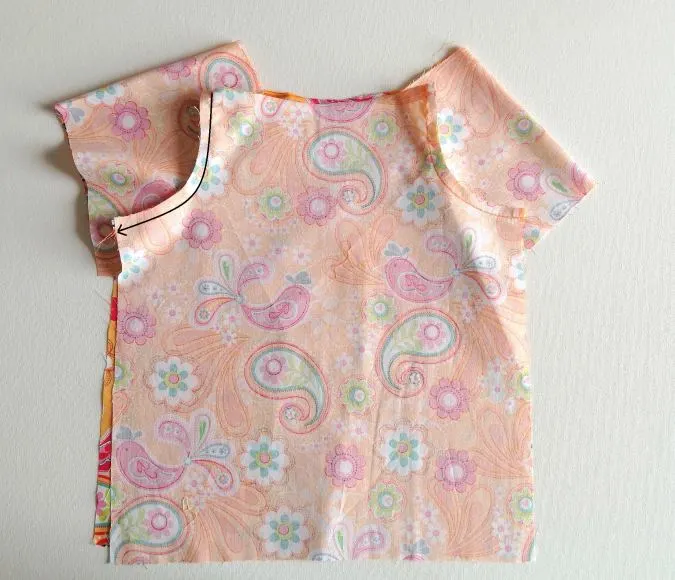
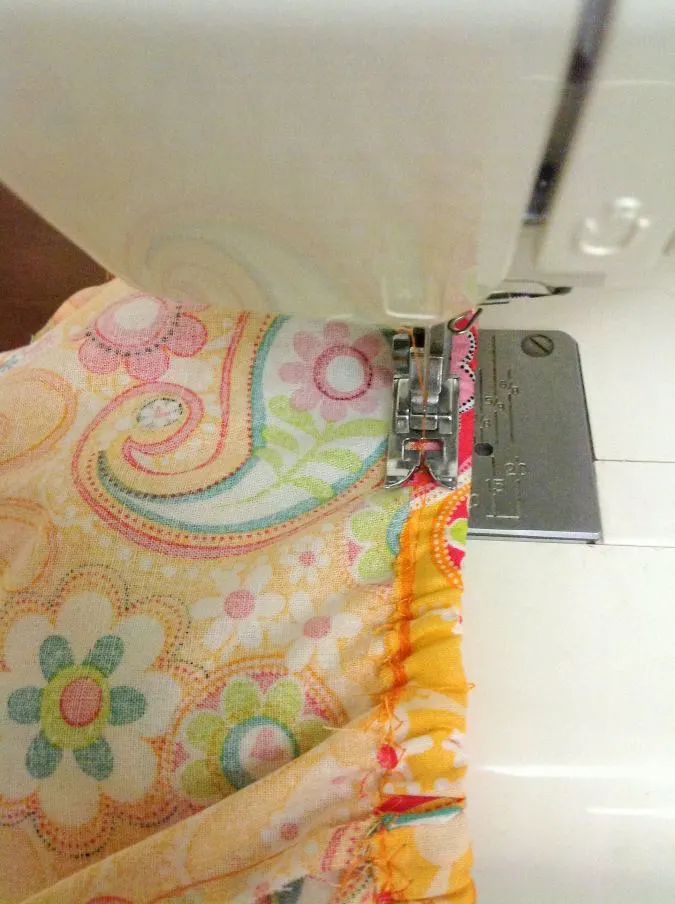
Step- 3: Finishing the Neckline
Zig zag the entire neckline to prevent fraying.
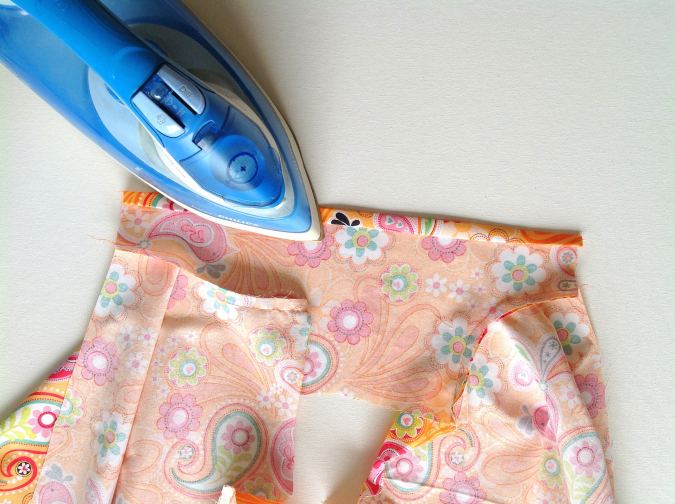
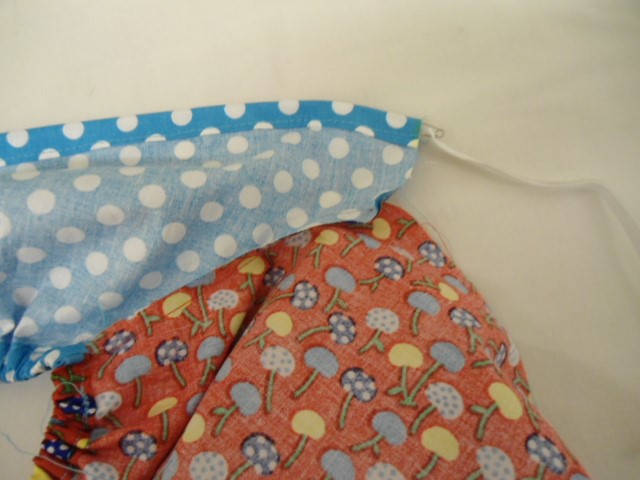
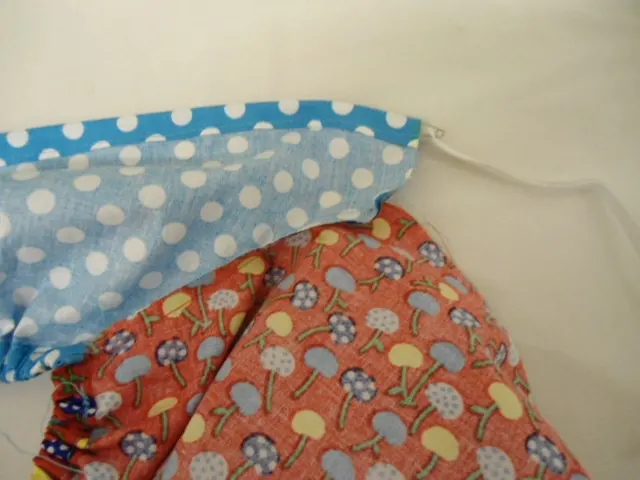
Let’s do the elastic casing along the neckline.

Fold the entire neckline by 5/8-inch and press.
Sew the casing shut, as close to the edge as possible. Make sure to leave a one-inch gap to insert the elastic
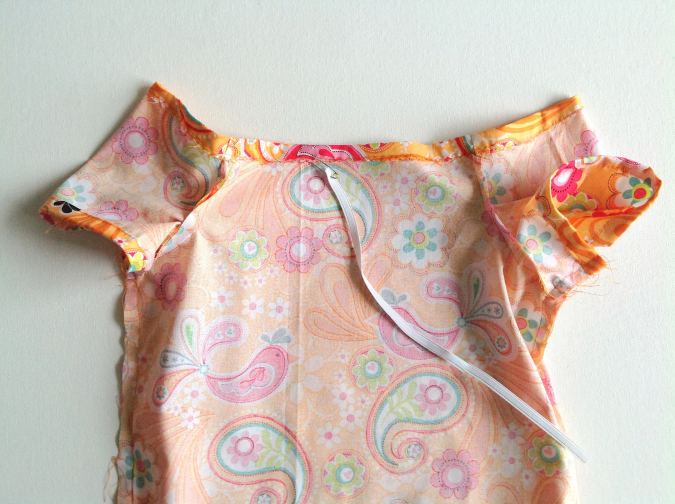

Take the required length of the elastic, referring to the table-4 above, and insert it through the casing using a safety pin.
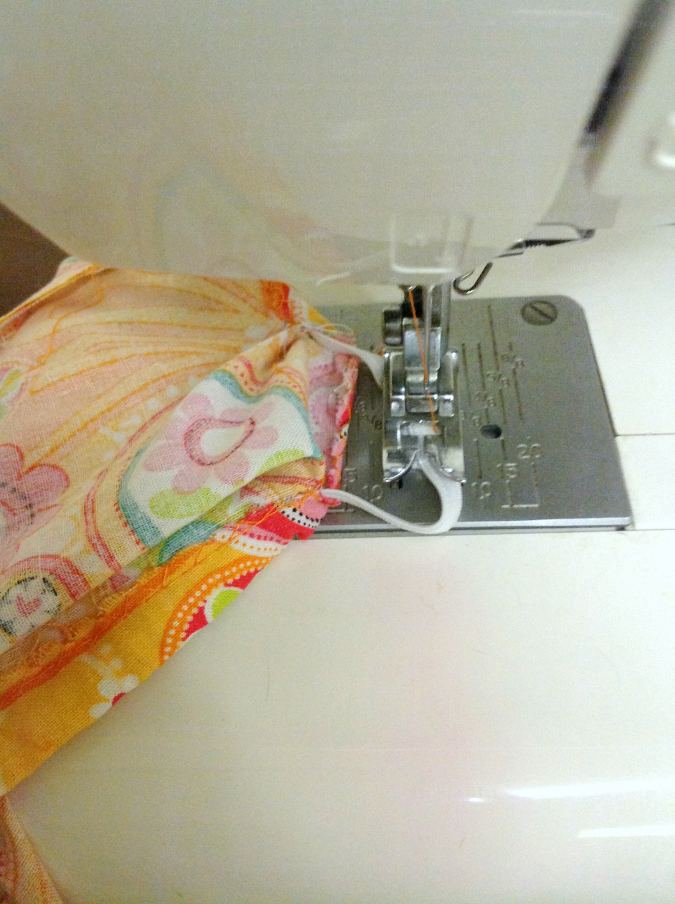

Keep the ends of the elastic overlapping and stitch back and forth a few times to secure.

Sew the opening shut.
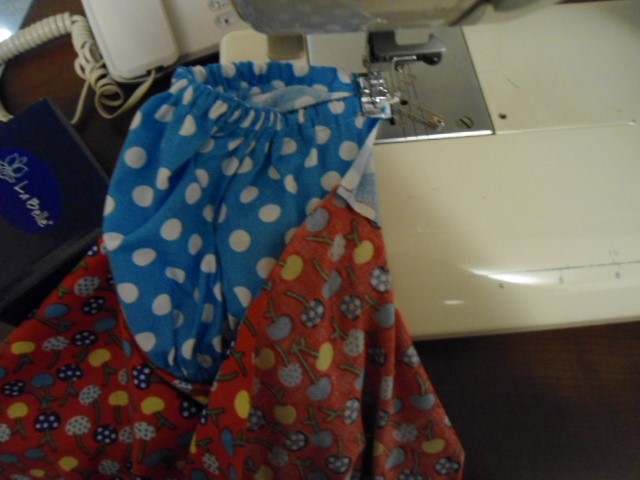
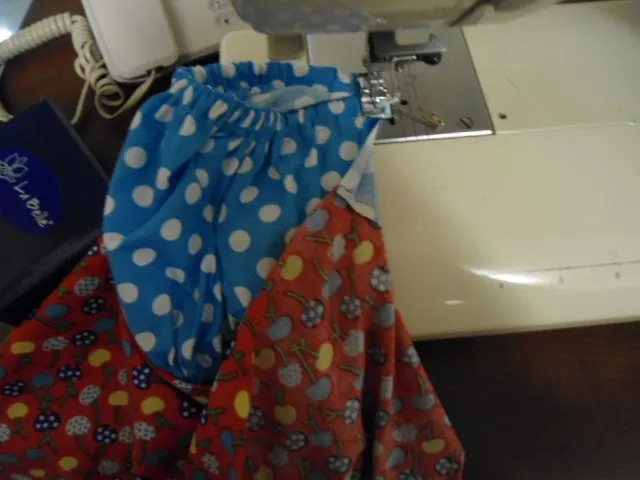
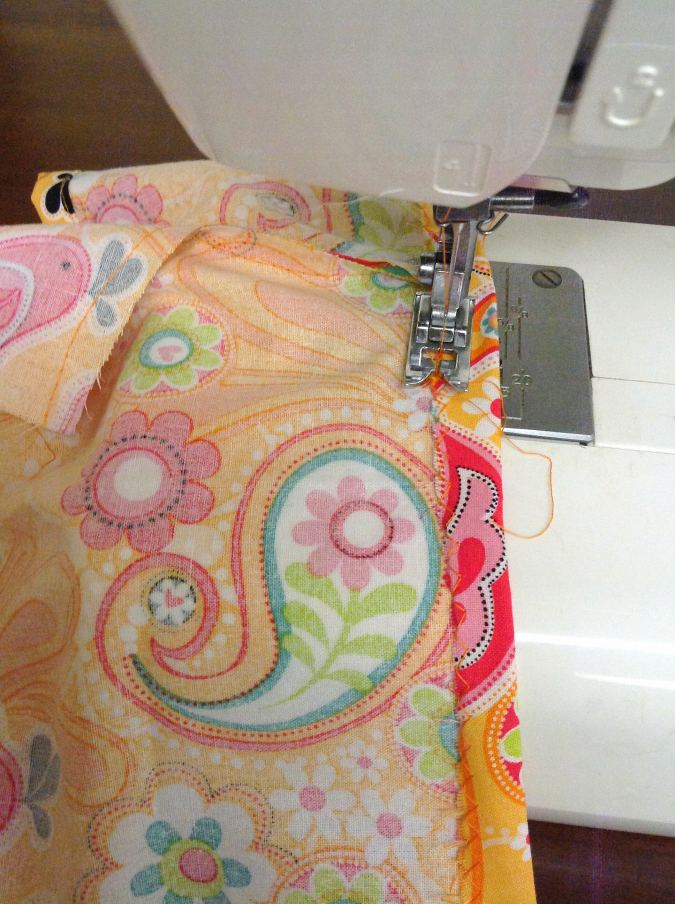
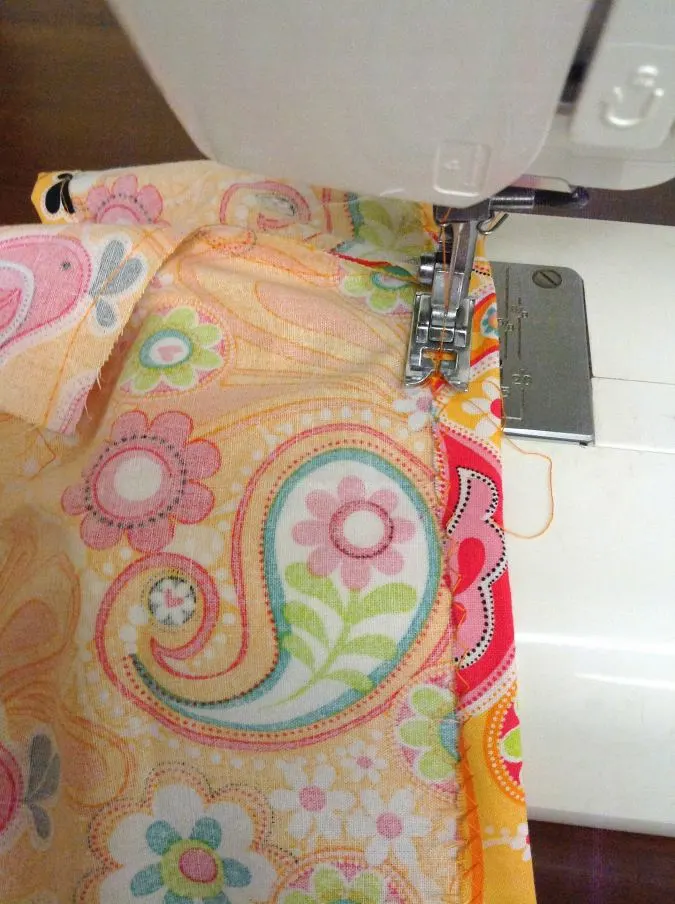
Step-4: Sewing the Side Seams
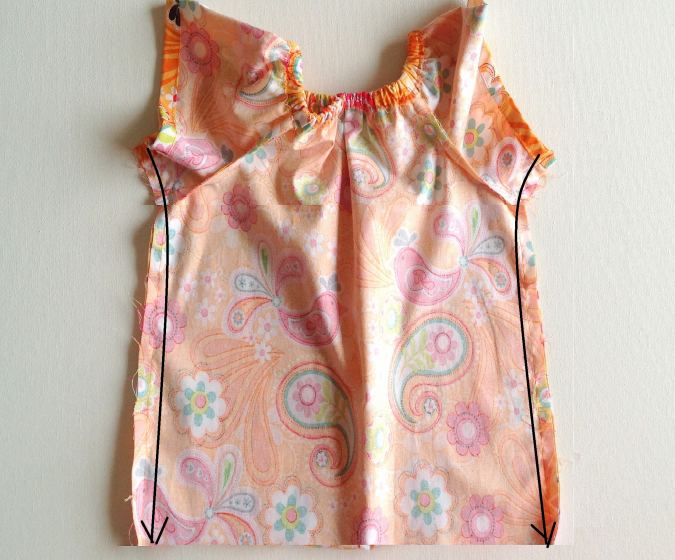
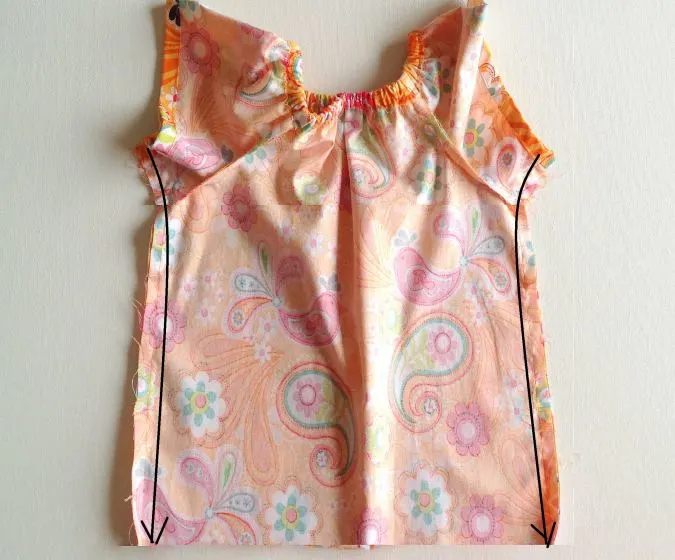
Keep the dress on its wrong side, aligning the side seams and edges. Sew both the side seams shut, from the lower edge of the sleeve to the lower edge of the bodice as marked in the picture.
Step- 5: Finishing the Hemline
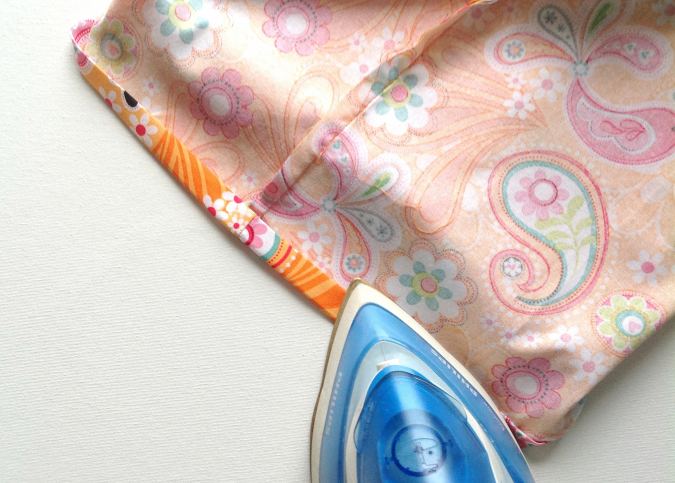

Fold the lower edge of the dress by ½- inch twice and press.

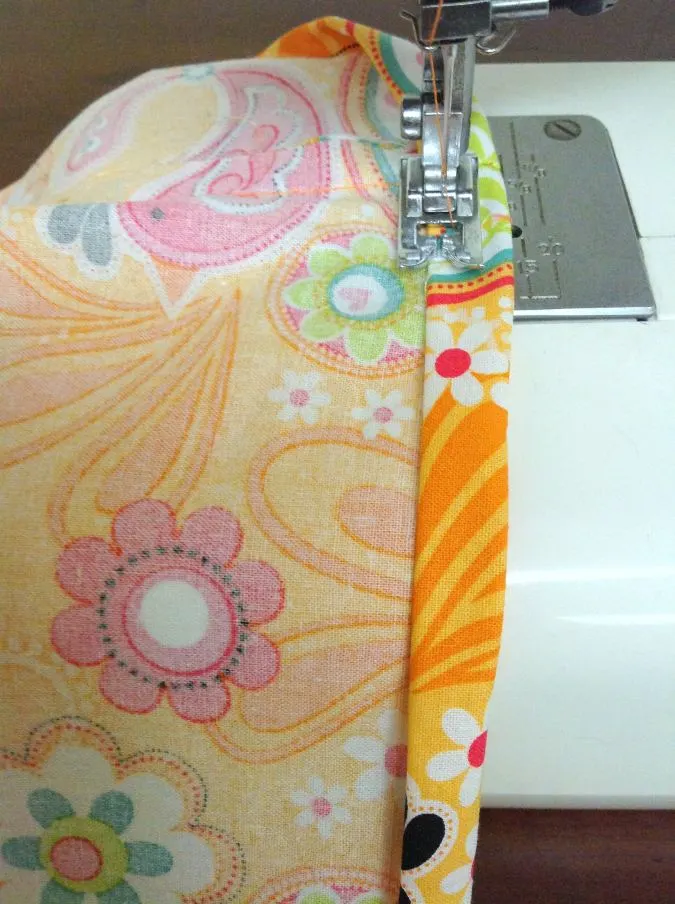
Sew down the hem along the edge of the fold.

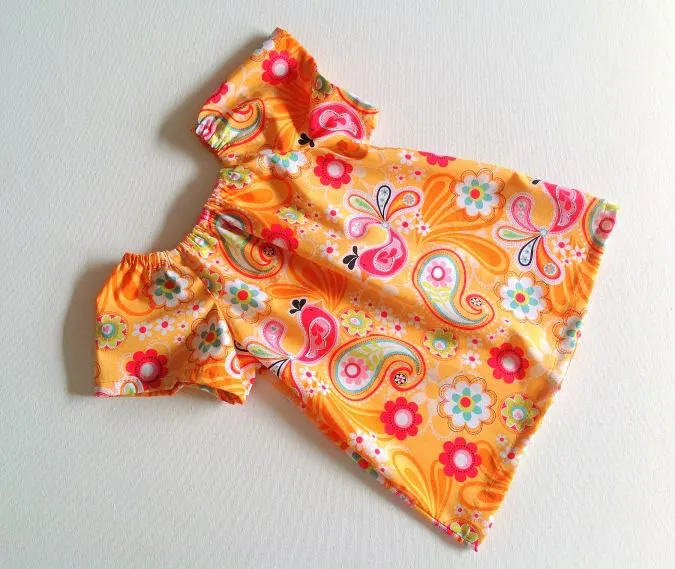
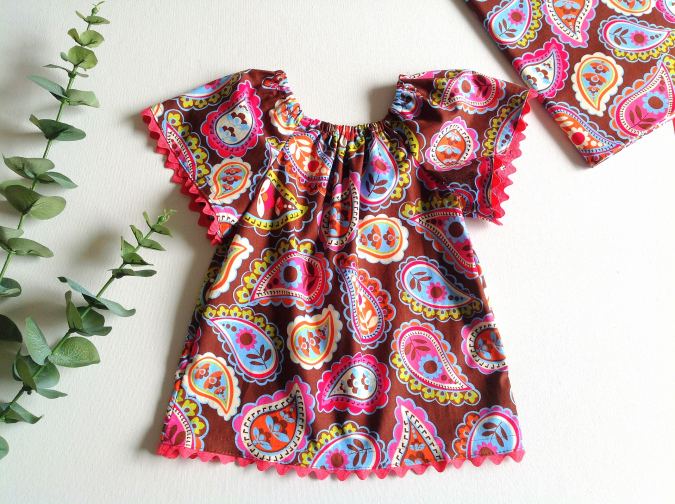
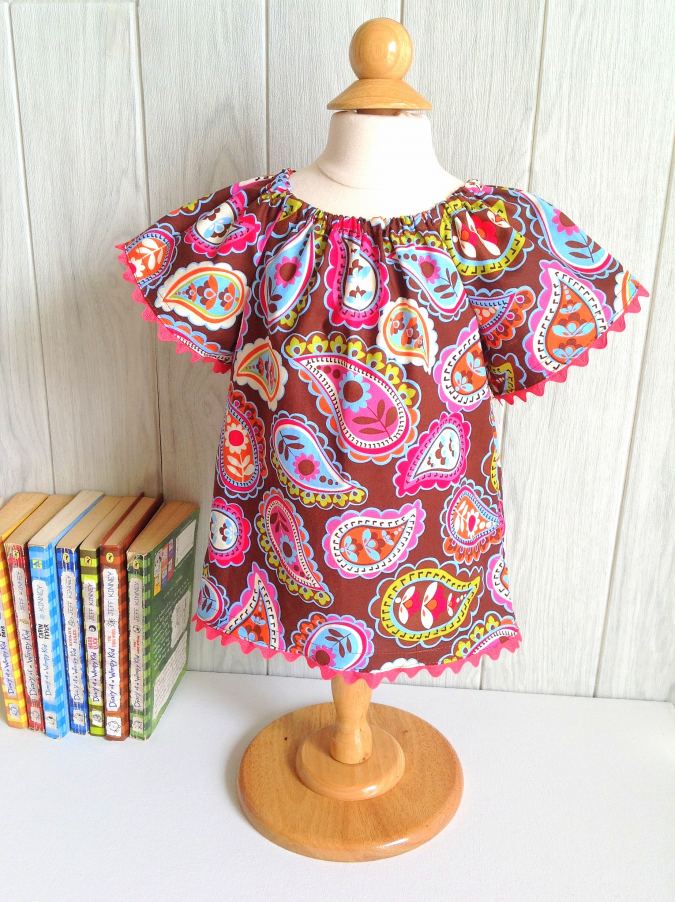
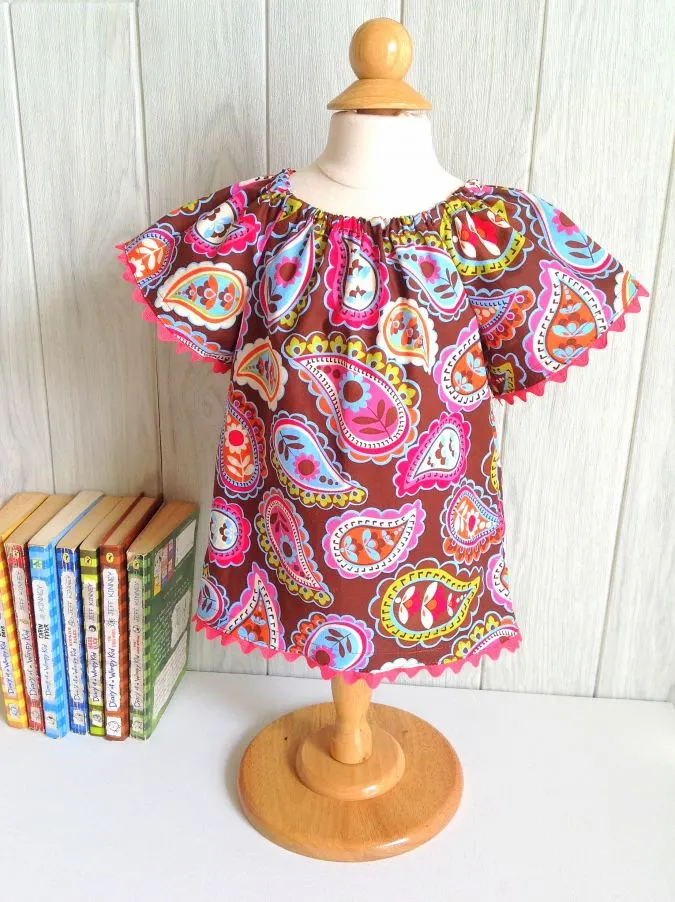
Your easy peasant dress is ready in just 5 steps!

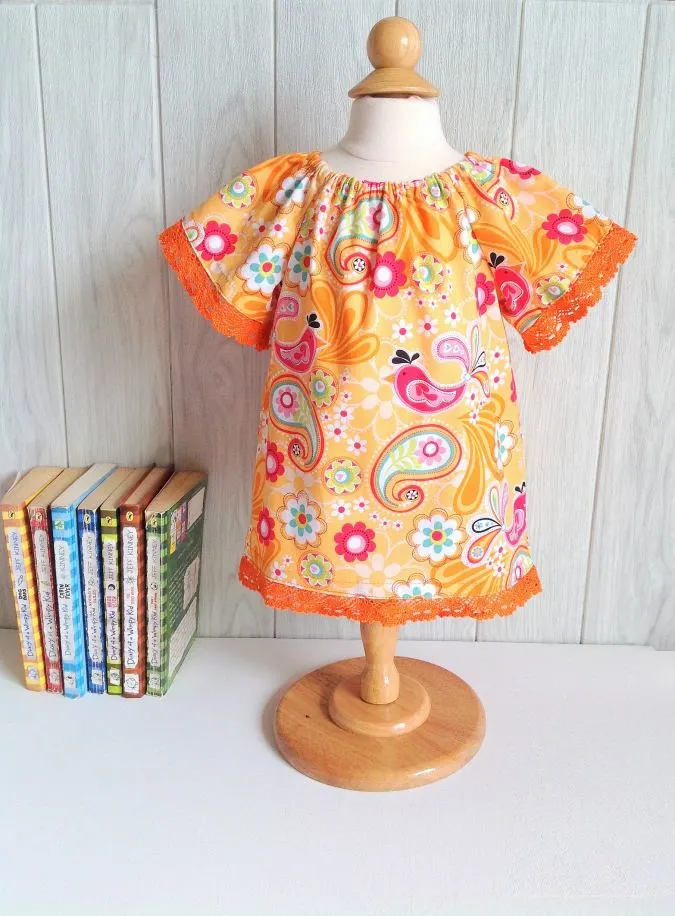
If you would love to make it prettier, add trims along the hemline of the dress and sleeve.
Find the webstory on the post here, 5 Steps to Your New Peasant Dress
Pin it for later here,
Cathy
Wednesday 30th of April 2025
Hi I would like to find out how to use this pattern to make a dress for my 8 year daughter
Elizabeth
Friday 30th of August 2024
So if I wanted to make the longer sleeve, but wanted to put elastic at the bottom of the longer sleeve how would I determine the length of the elastic in that case?
Surayya
Sunday 17th of August 2025
If you would like to add elastic at the bottom of the long sleeve, make it 2 inches shorter.
Cecilia Tiralosi
Thursday 6th of June 2024
I don’t see the pattern pieces for long sleeves
Surayya
Sunday 17th of August 2025
The pattern has been updated with full body templates and sleeves.
Laura
Friday 29th of March 2024
Thanks so much for this cutie!
Claudia
Saturday 26th of August 2023
I just found this and I live the simplicity of the pattern. Can not wait to make it. Making a Little Red Riding Hood costume and this peasant dress should work perfect. Thank you