
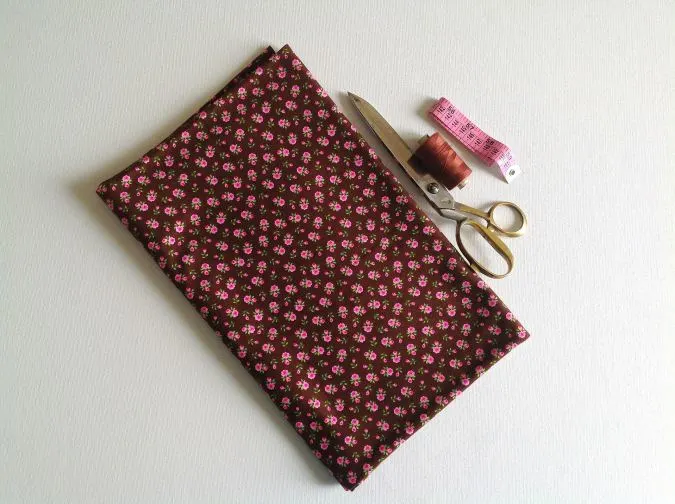
Here is a multi-functional neck gaiter face mask sewing project that any beginner can try. This easy gaiter face mask pattern comes with instructions for a filter pocket and a nose piece insert for maximum filtration efficiency. This neck gaiter face mask would give you all the comfort of a gaiter plus the advantage of a face mask.


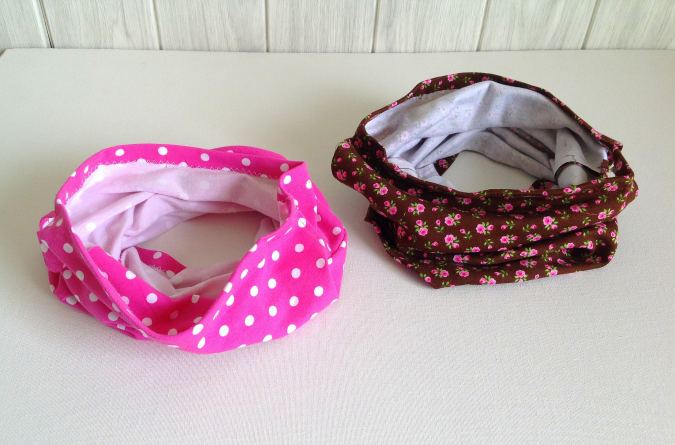
You can use it as a headband, a bandana, or even to hold your ponytail in place! The gaiter face mask is breathable, soft, comfy, and is a perfect option for those who feel uncomfortable wearing a woven face mask with ties or elastic.


There are ear openings on the sides to hold it in place and prevent the facemask from falling off. There are no elastics or ties to be sewn and as such, it protects your ears from getting sore and also save a lot of time in sewing.

This gaiter face mask does not require much time or materials. All you need are some knit pieces and a ballpoint needle. If you are not confident about sewing with knits, this tutorial would give you all the instructions to make sewing the gaiter face mask a breeze.
These masks are designed with filter pockets. You can use a piece of your cotton t-shirt, which according to the CDC, has a high ability to capture particles. In the absence of these materials, you can also use dried antibacterial wet wipes or even toilet paper as a filter.
Guidelines for Sewing with Knits.
1. Spread out your knit fabric on a large flat surface for cutting. This prevents it from getting stretched and distorted.
2. Use polyester thread or a cotton-polyester thread to allow for stretch.
3. A ball-point needle is a must for sewing with knits.
4. Try stitching on a double layer of scrap before sewing on your actual fabric.
5. Take care not to stretch the fabric while sewing. Hold the fabric up to keep it flat near the machine. If you have an option in your machine to reduce the pressure of the presser foot, that would be great too.
6. Since knit fabrics do not ravel, you don’t need a serger. But if you need a professional finish and you have just an ordinary machine, you may go ahead and use the zigzag for the finish.
7. Press with a lot of steam to get the stretched areas back in shape.
If you would like to see my other face mask making tutorials, find them below:


Easy Gaiter Face Mask Pattern
Supplies Needed:
½ yard of knit fabric that has 50 % stretch horizontally and vertically. You can also cut your t-shirt if it is not very old or worn out.* To check the stretch of the fabric, hold it against a ruler, if you can stretch a 4” to 8”, then the fabric is right for your gaiter face mask.
1. Polyester thread.
2. Ballpoint needle.
3. Other sewing notions.
4. Floral wire or pipe cleaner for the nose piece- 5 inches.
5. Vacuum cleaner filter, paper towel, or dried wet wipes, to be used as a filter.
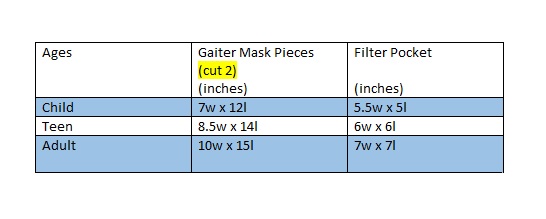
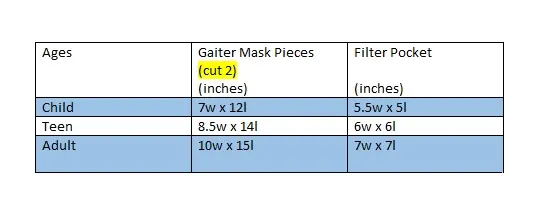
Table
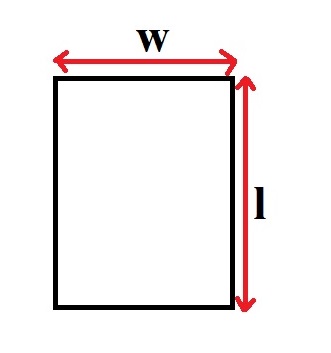
In the table below, “w” stands for the width and “l” stands for the length of the fabric piece to be cut.

- Pinch to zoom for mobile users.
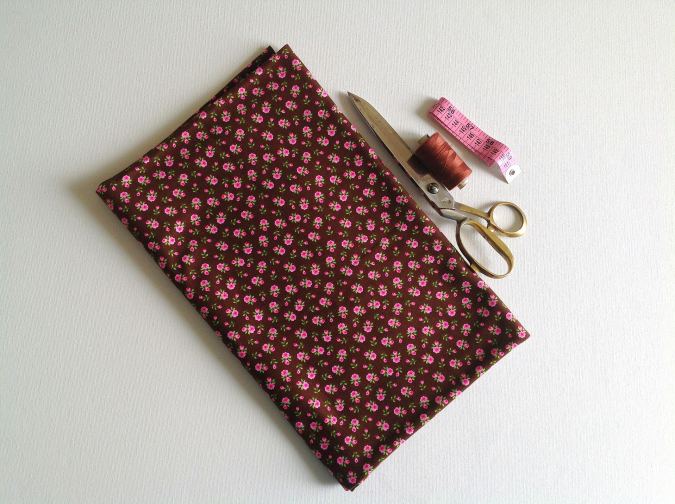
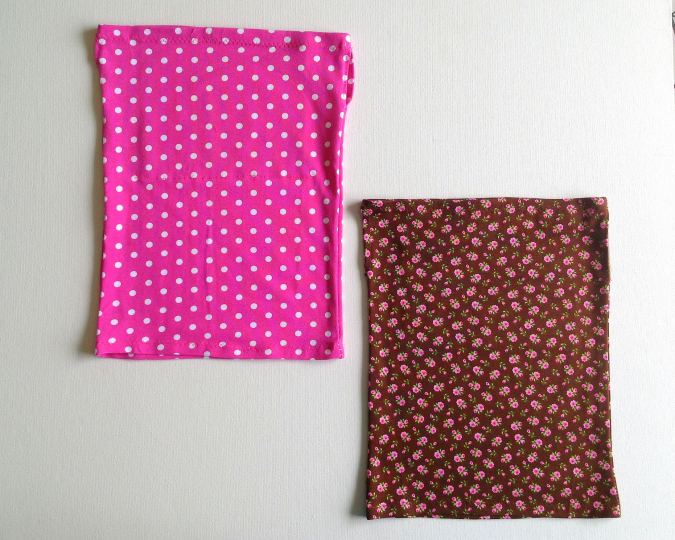
Gather your supplies.

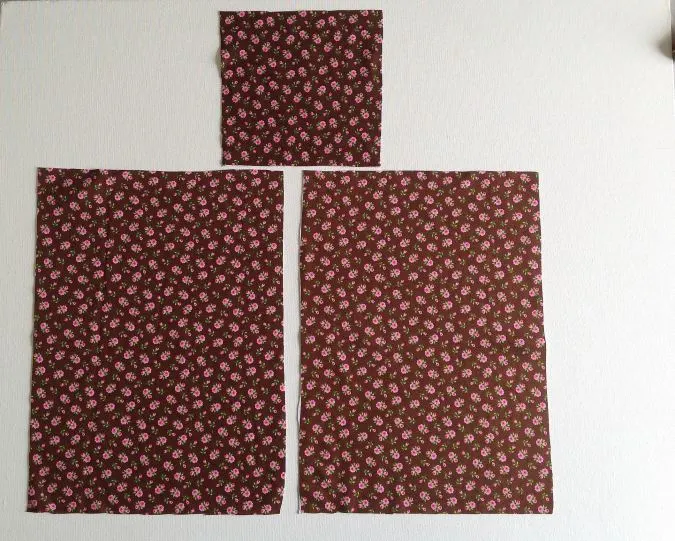
Cut your gaiter face mask pieces and your filter pocket piece, referring to the table above.
Preparing the Ear Openings
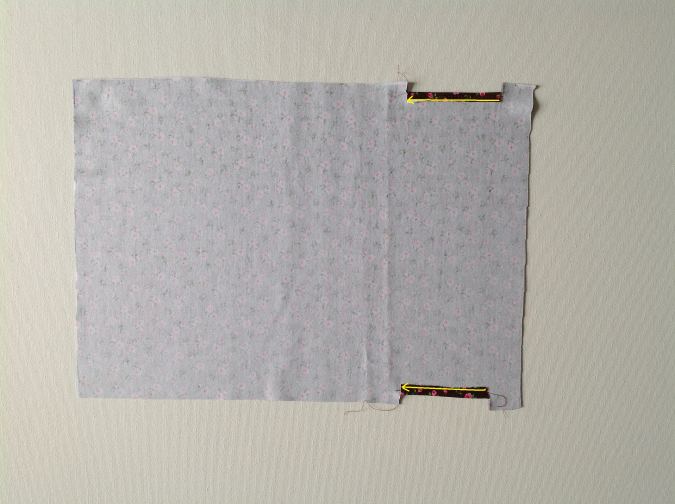
Let’s mark the ear openings.

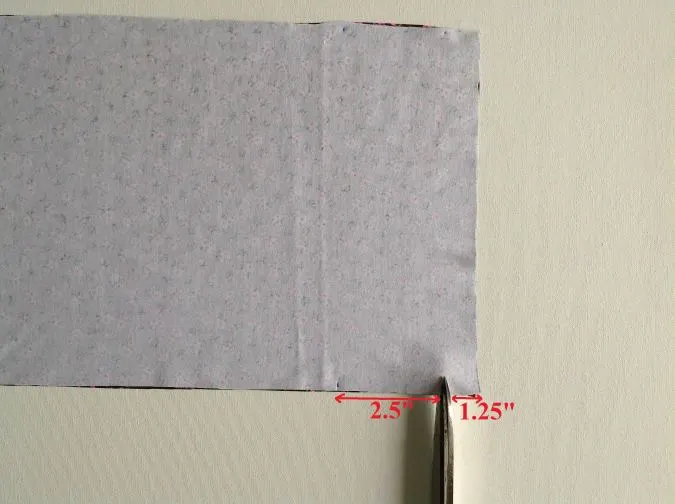
Layer the two gaiter pieces, with the right sides together and edges aligning. Make a small 1/4- inch wide slit, 1. 25- inches from the top edge. Make another slit 2.5- inches from the first. Repeat on the other side.
You will need to fold the fabric in between the slits.

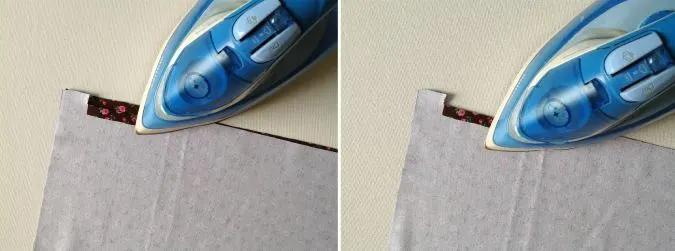
Fold the fabric in between the slits towards the wrong side, on both sides of the gaiter front and press. Repeat on the gaiter back.
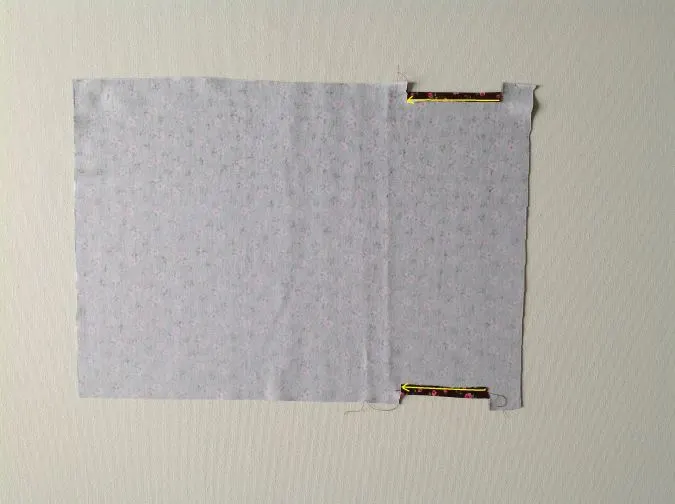
Sew the folds down along the raw edge to secure.
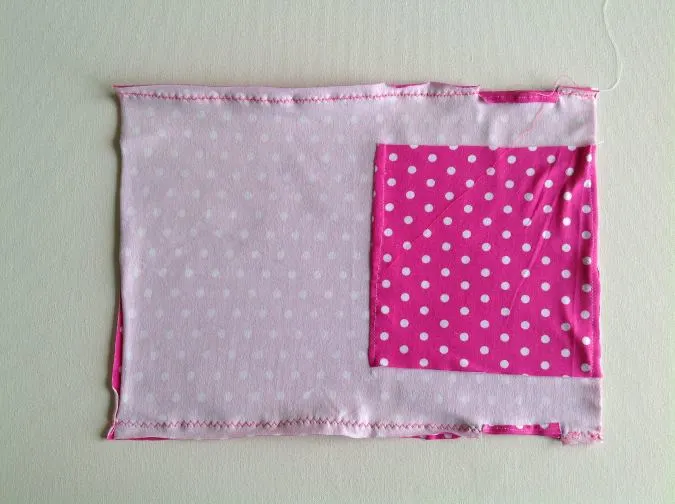
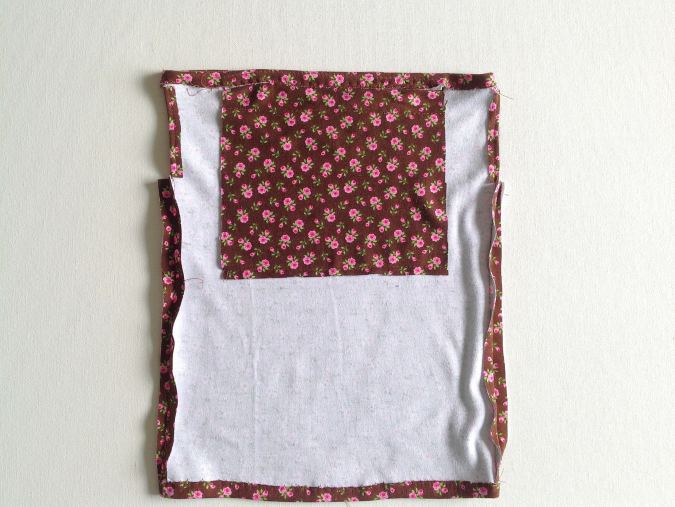
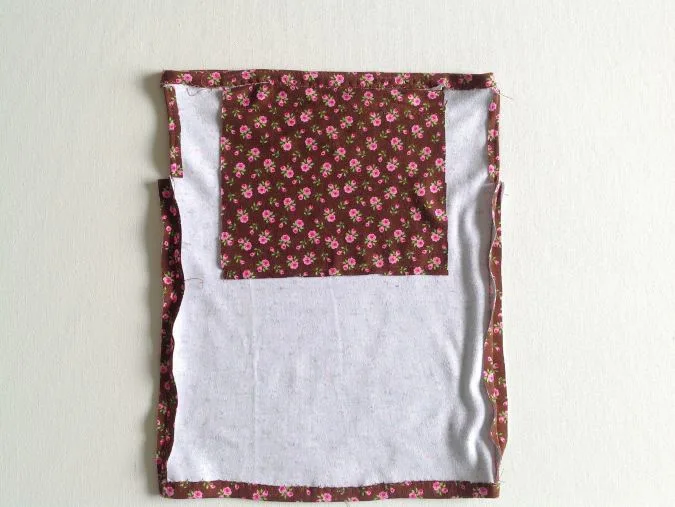
Sewing the Filter Pocket

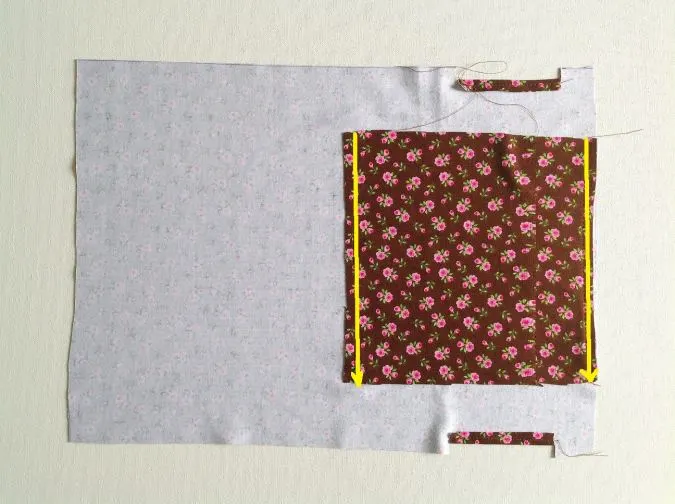
Place the filter pocket centered on one of the gaiter pieces, with the wrong sides together and the top edges aligning. Sew along the aligned edges to join. Next sew another straight line, along the lower edge of the pocket piece to shut the pocket. Two sides of the pocket are left open for filter insertion.
Let’s sew the gaiter front and back together.
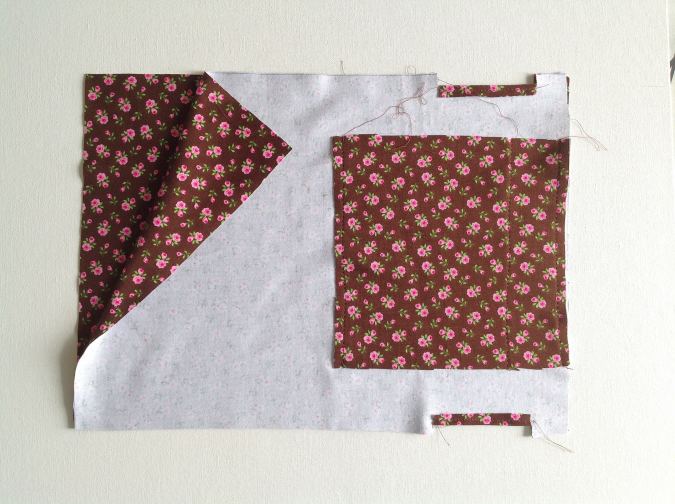

Take the gaiter front and back pieces and layer them with the right sides together, aligning the edges.
- The two pictures below are for illustration purposes.

Sew along the long edges using a zigzag stitch or a stretch stitch, leaving a seam allowance of ½- inch. * Note that the ear openings are not sewn shut.


Clip the four corners with the help of your scissors.


Press the two seams open.
Next, we hem the upper and lower hem. *The upper hem also serves as the nose piece casing.
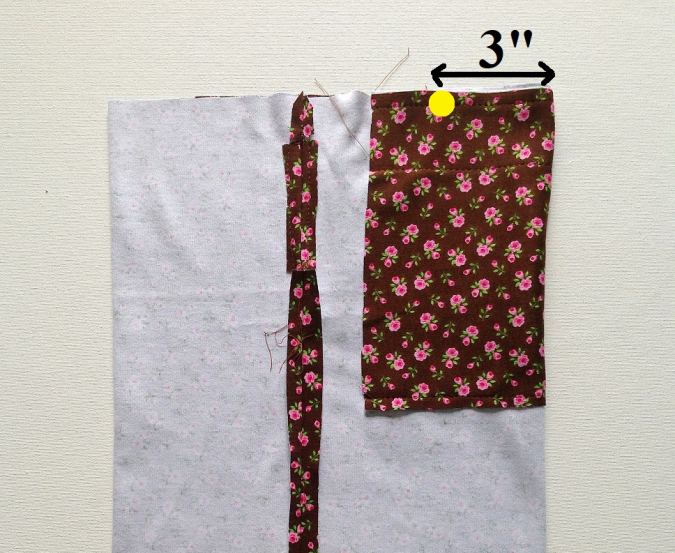

Realign the gaiter such that the front and back seams come in line and mark the center of the gaiter front along the top edge. Mark 3-inches from the center on either side. The pocket for the nose piece comes in between the marked points.

Fold the upper and lower edges of the mask by 5/8- inch and press.
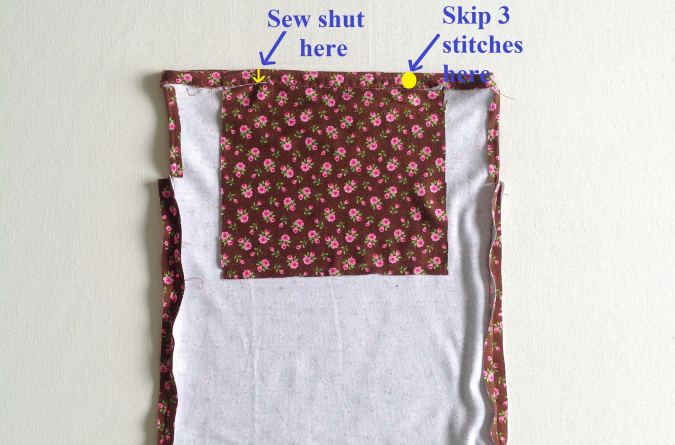

Sew down the hem along the edge of the upper fold. Leave a gap of about 3 stitches at one of the points marked earlier. This is for the nose piece insertion. Also, sew the nose piece pocket shut at the other marked point.
Sew down the lower hem of the gaiter mask.
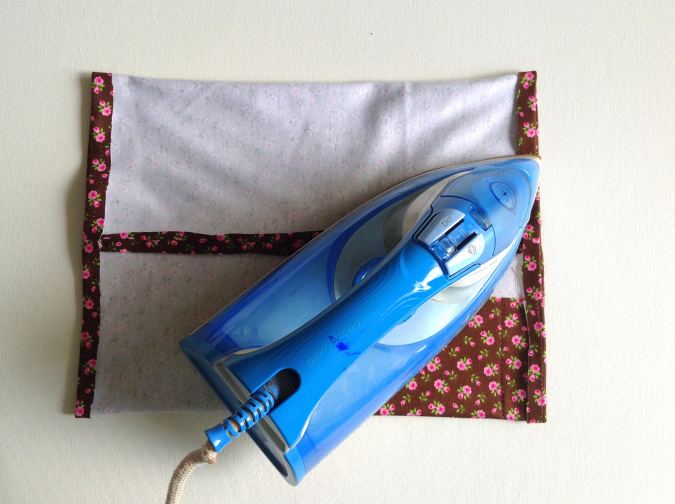
Press the gaiter with a lot of seam on the hem and the side seams to bring any stretched areas back to shape.


Take your nose piece 5-inches long and insert it through the gap in the top hem. The tiny opening in the hem is not sewn shut to make the nose piece removable.
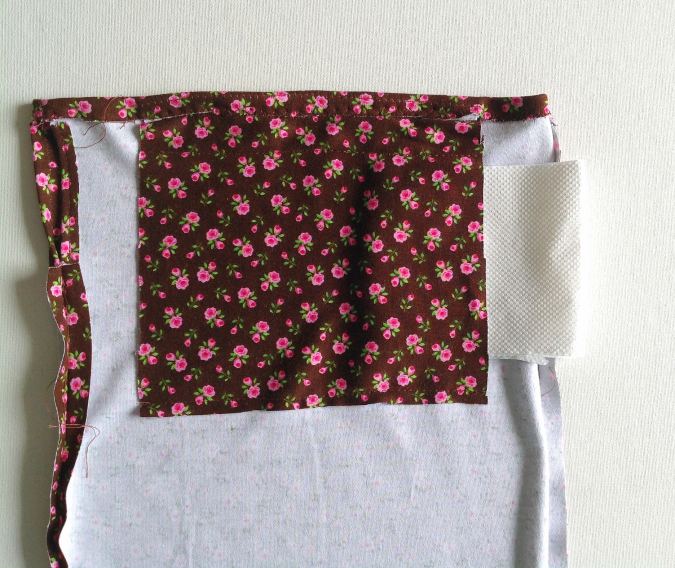

Take your filter and insert it through the side of the filter pocket.
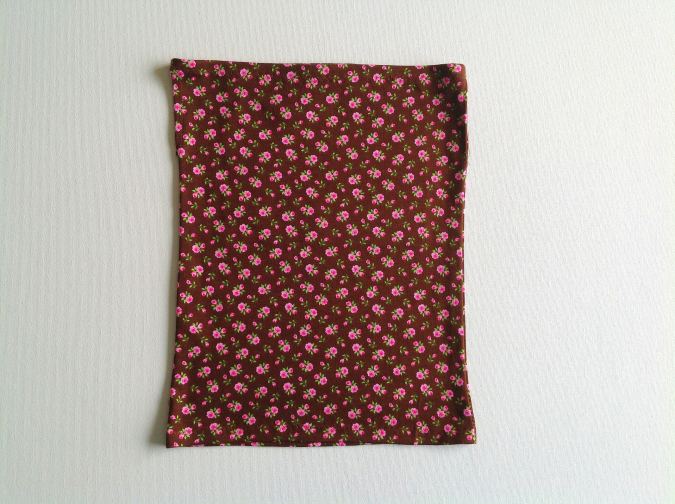

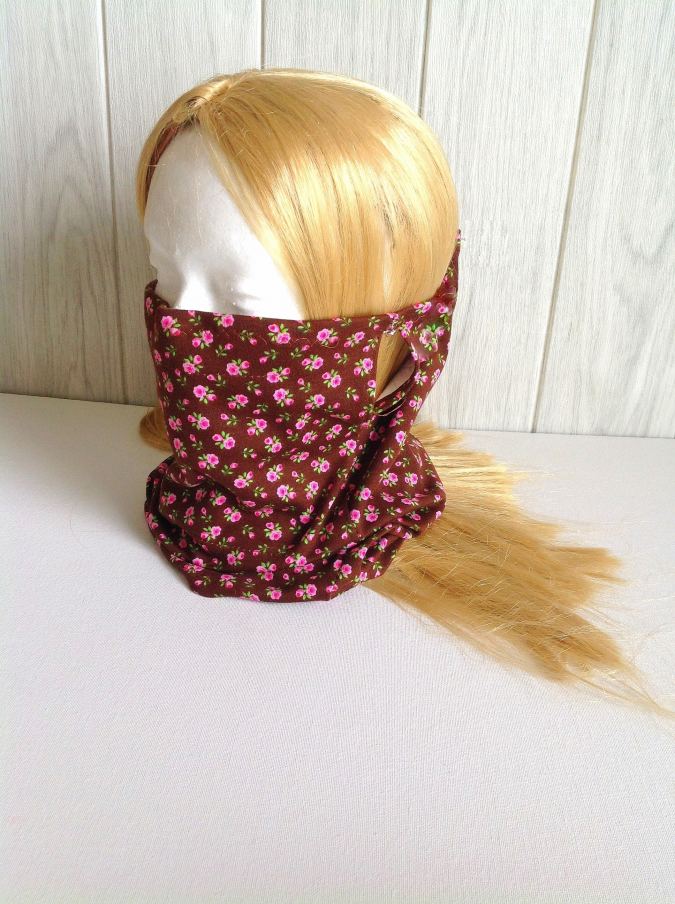
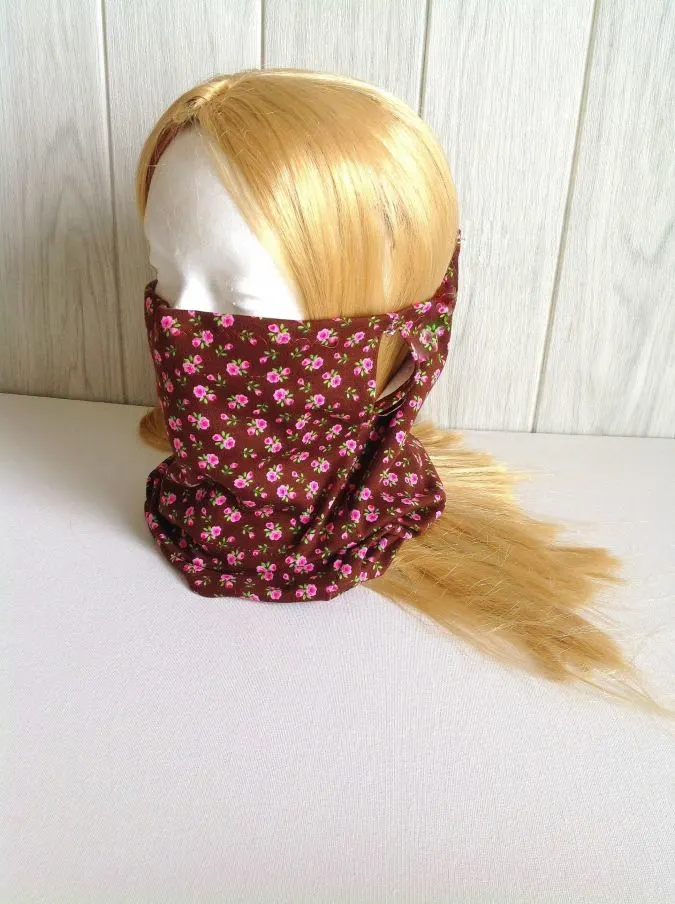
Your gaiter face mask is ready! Have fun making more of these with my easy gaiter face mask pattern!
Have a look at the webstory on Gaiter Mask Sewing Pattern here, Easy Sew Gaiter Face Mask Pattern
Pin it for later here,
Molly
Monday 2nd of November 2020
The vacuum filter tip has since been deemed as harmful because of what's within the the filter itself.
Surayya
Monday 2nd of November 2020
Yes, I read it recently. I have removed the option from all my face mask sewing tutorials.
Talliana
Saturday 25th of July 2020
Thank You been looking for a pattern like this