Have you found yourself frantically searching for your hand sanitizer in your handbag? Well, I found myself doing that all the time. With all the trash I have in my handbag, I find it hard to find the little sanitizer bottles.

During the pandemic that we are experiencing today, we better treat ourselves generously with sanitizers before touching anything inside our bags. Earlier, I had tried putting it inside my trouser pocket but then I realized that I would be touching my trousers without sanitizing my hands! With all this in mind, I had to come with a perfect solution to store my sanitizer outside my bag and here I am with a sanitizer holder sewing project!


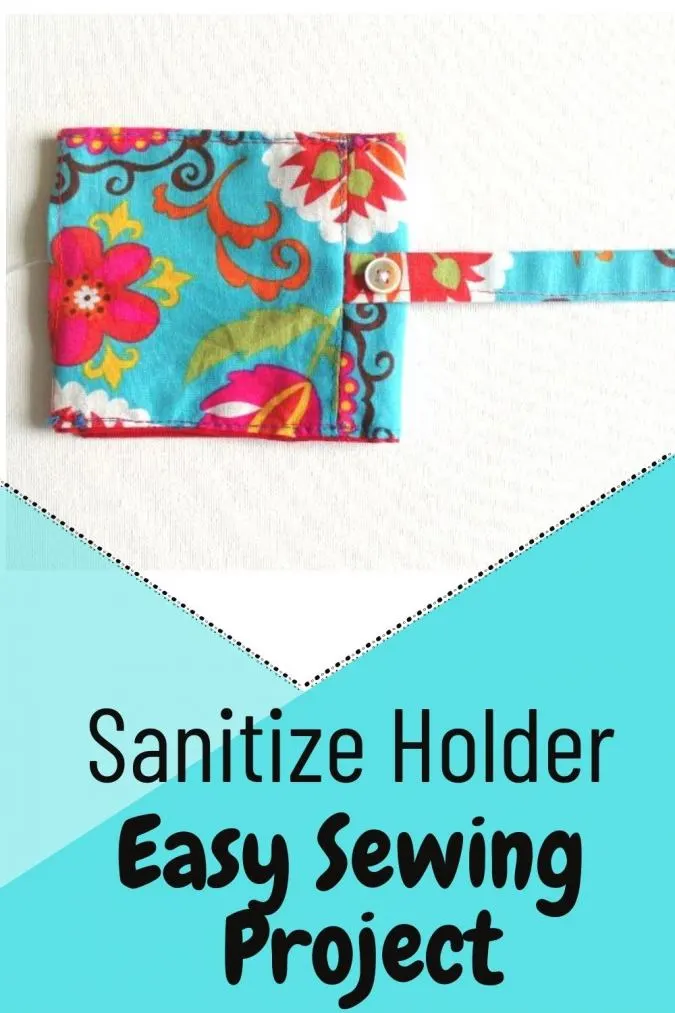
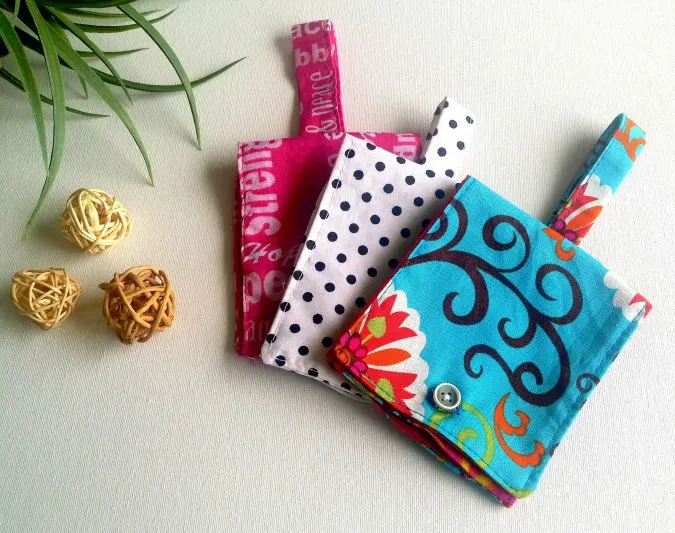
This is an easy sewing project that any beginner can try. Just a few rectangular pieces, two buttons, and you are done! You don’t need a keychain to hang the sanitizer holder on your bag. I have designed a strap that fastened to the bag with buttons. You may also change the length of the strap as desired.
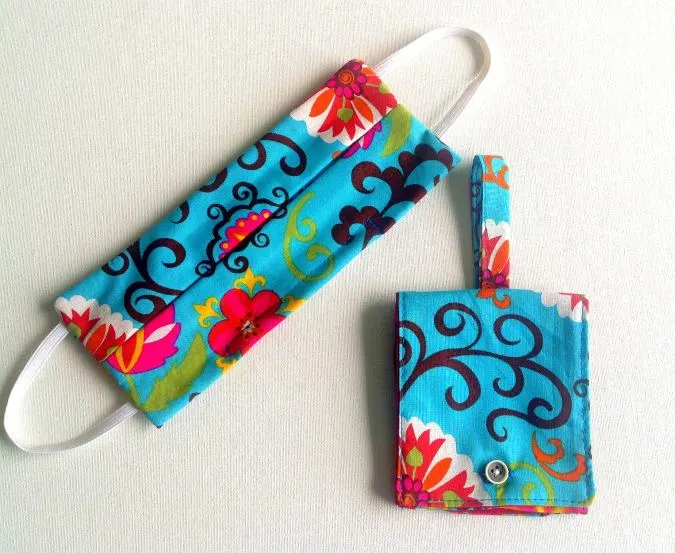
If you would like to see my face mask making tutorials, find them below:


DIY Sanitizer Holder (Easy Sewing Project)
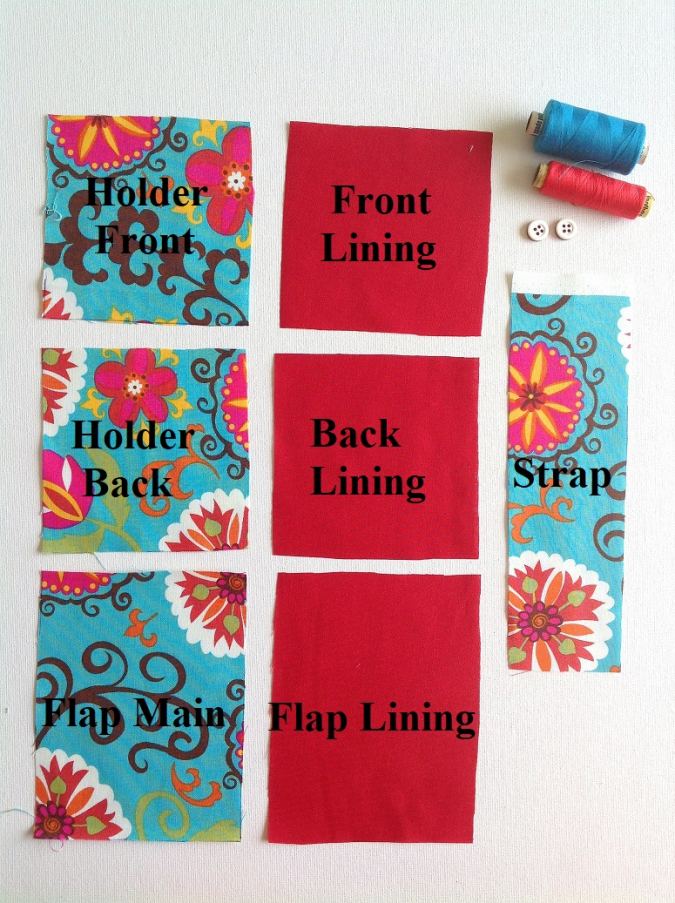
Materials Required
Fabric scraps for the holder body and lining.
Sewing notions.
Two small plastic buttons.
Cutting and Sewing
You need to cut the following pieces:

- Holder front and front lining, 4.25” W x 4.5” L
- Holder back and back lining, 4.25” W x 4.5” L
- Flap, 4.25” W x 5.75” L
- Strap, 2.25” W x 8” L
The above are measurements for a 100 ml sanitizer bottle. It should fit almost all bottles. If you would like to sew for a different size bottle, use the directions below:
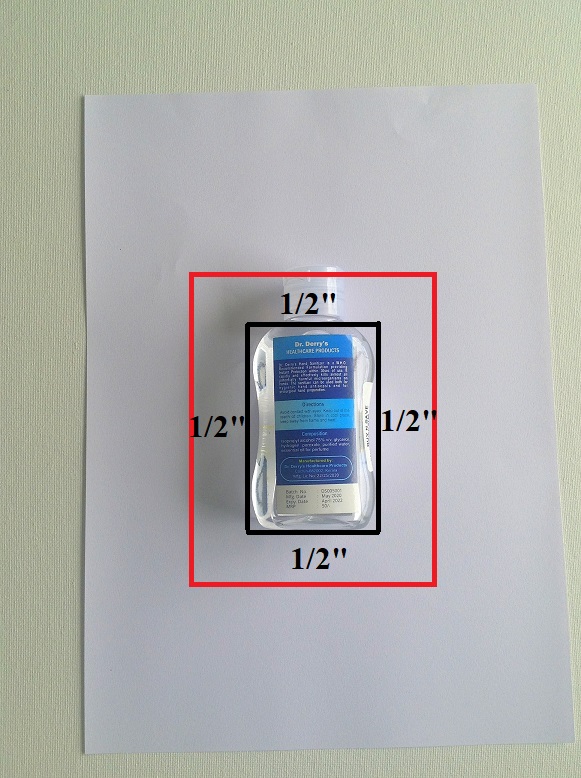

Place your bottle on a paper and draw lines marking the largest width and the height of the sanitizer bottle, excluding the bottleneck. Draw lines ½-inch away from the initial lines, all around. Cut along the larger rectangle to get the template for the holder. Take your flap piece 1.5-inch longer than the holder pieces, keeping the width as the same.

Cut your fabric pieces and gather your notions.
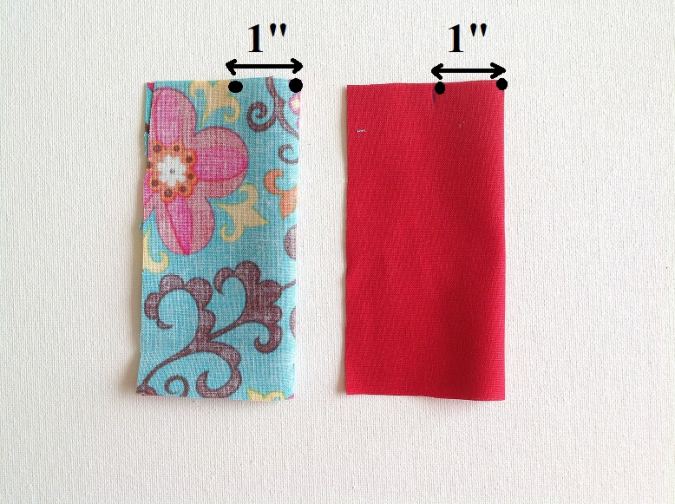

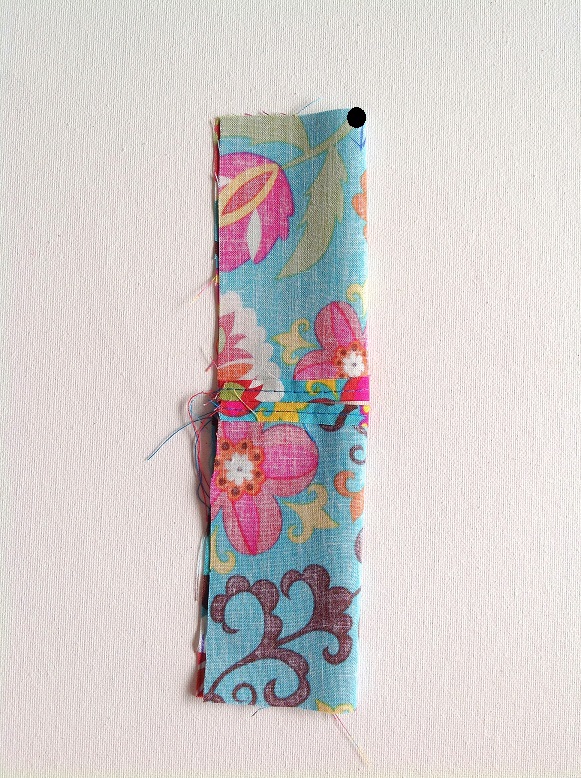
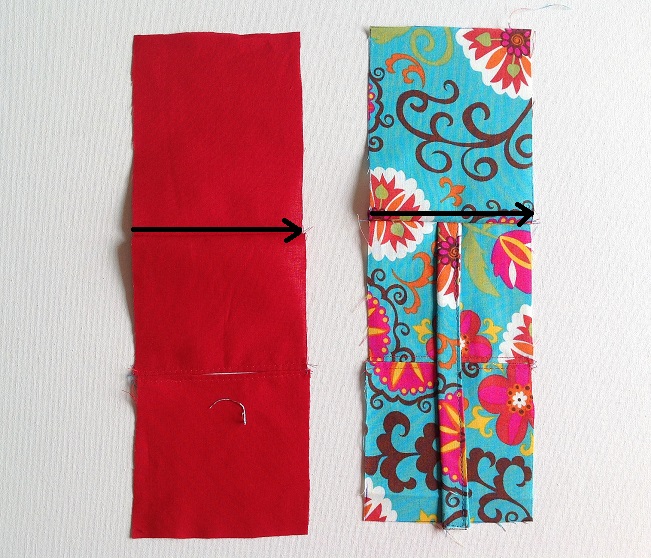
Take the holder front, fold it in half lengthwise, and mark the center along the top edge. Mark 1-inch towards either side of the center mark. This would form the aperture for the bottleneck. Repeat the same on the front lining piece.
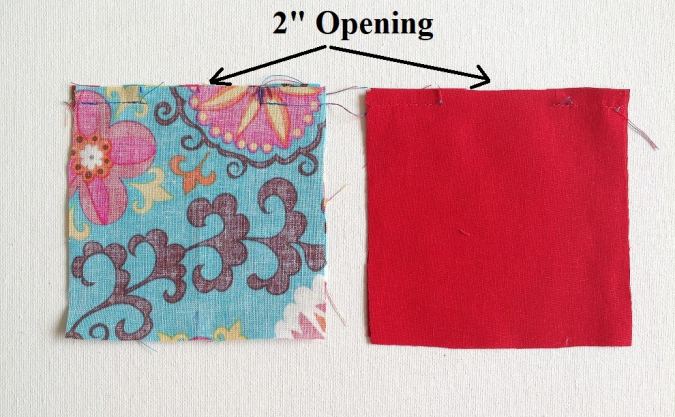

Take the holder front and back pieces and keep them layered with the right sides together and aligning the edges. Sew along either side of the marked points, leaving a 3/8- inch seam allowance. Repeat with front and back lining pieces. You will see the 2-inch opening formed in the middle for the bottleneck.
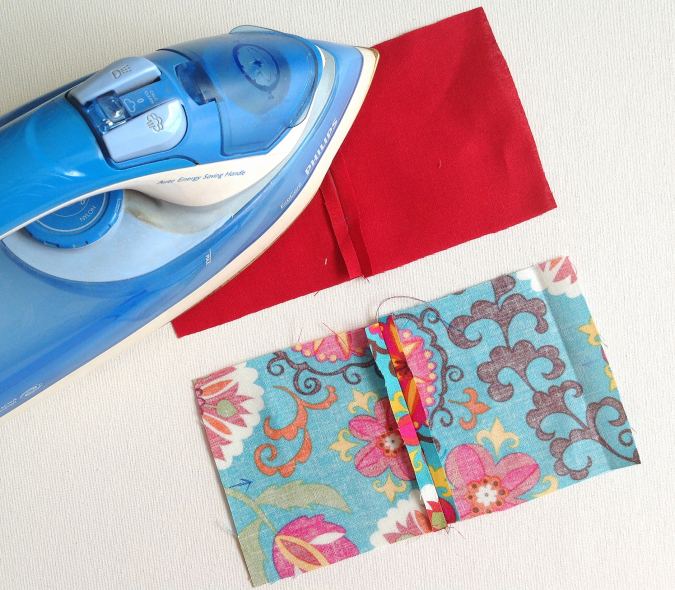

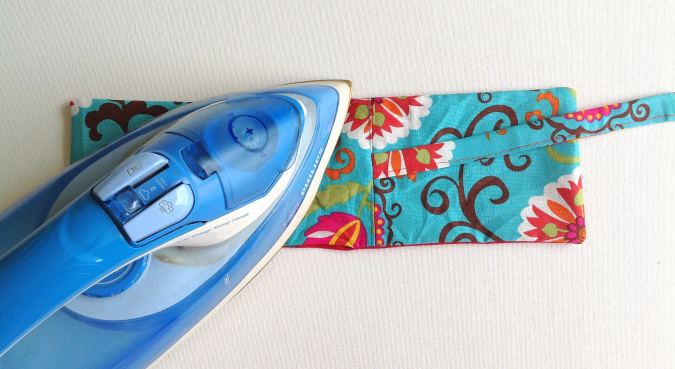
Press the seam open for the holder main and lining pieces.
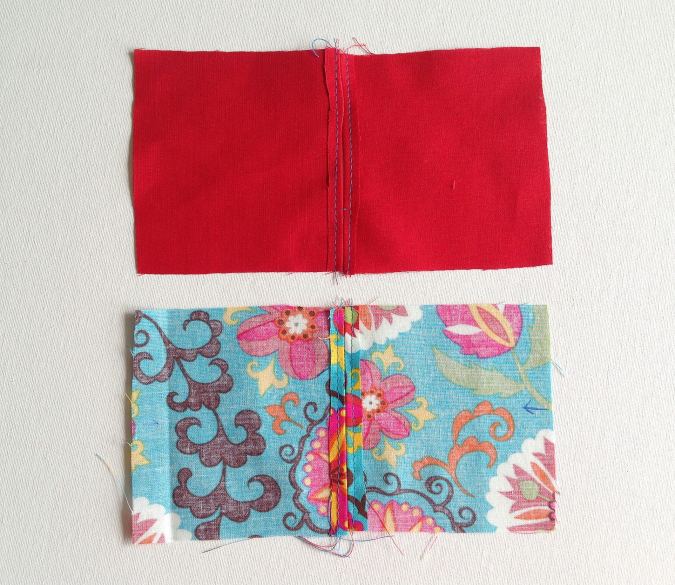

Sew the seam down on either side.

Fold the holder piece in half, lengthwise, and mark the center of the upper edge.
Next, we finish the strap.
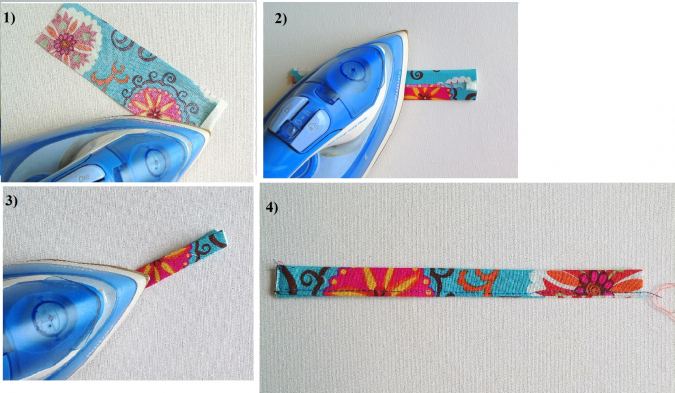

1) Take the strap piece, fold one of the short edges by 3/8- inch towards the wrong side and press.
2) Fold the two long edges towards the wrong side by 3/8- inch and press.
3) Fold it in half lengthwise and press again.
4) Sew the strap shut around the edges.
Let’s sew the strap to the holder piece.
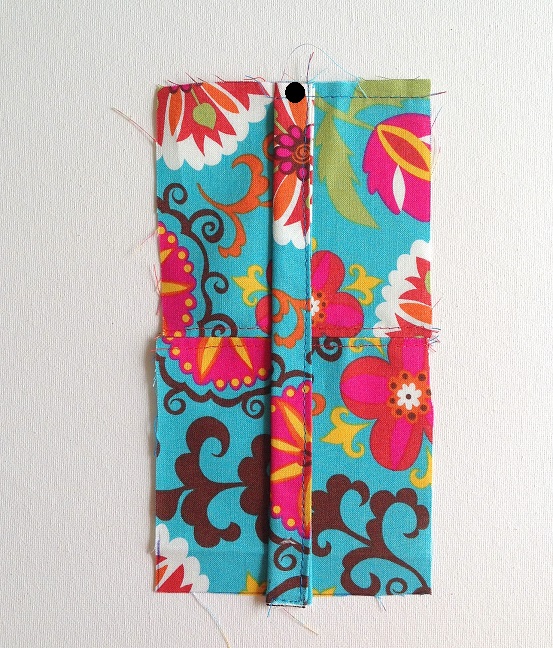

Place the raw edge of the strap on the marked point over the holder and pin. Sew to attach.

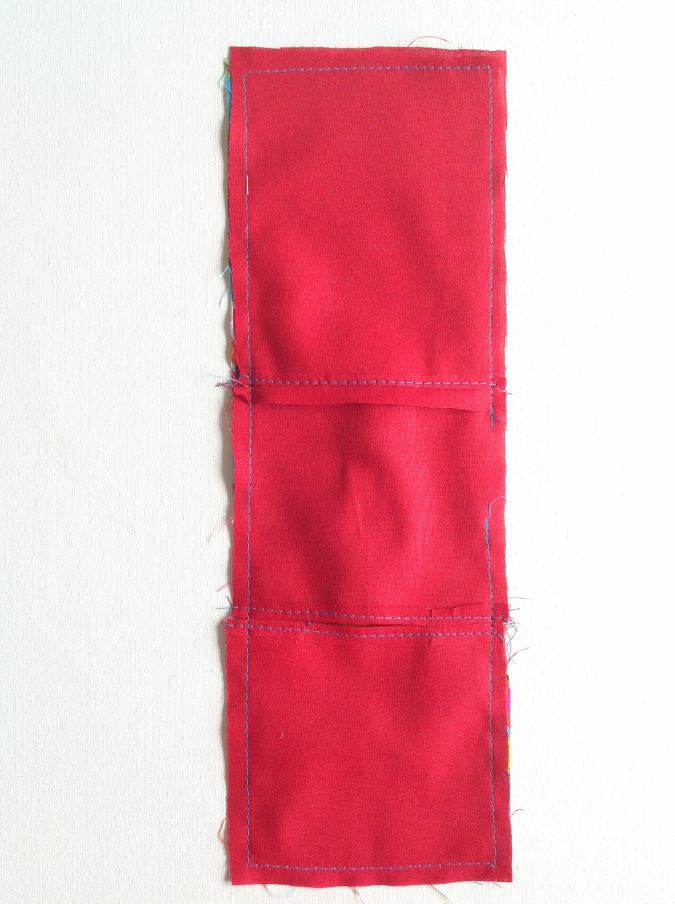
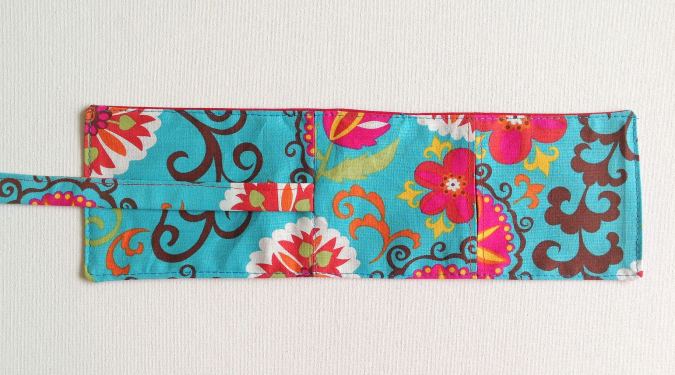
Place the main flap piece over the holder piece, aligning the shorter edge with the strapped edge and pin. Sew to join. Repeat the steps with the holder lining and flap lining piece.

Open the pieces and topstitch along the upper seamline.
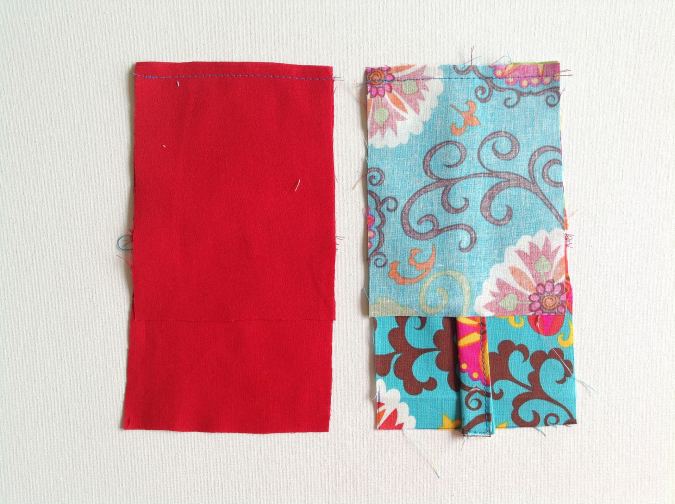
Next, we need to sew the holder main and lining pieces together.

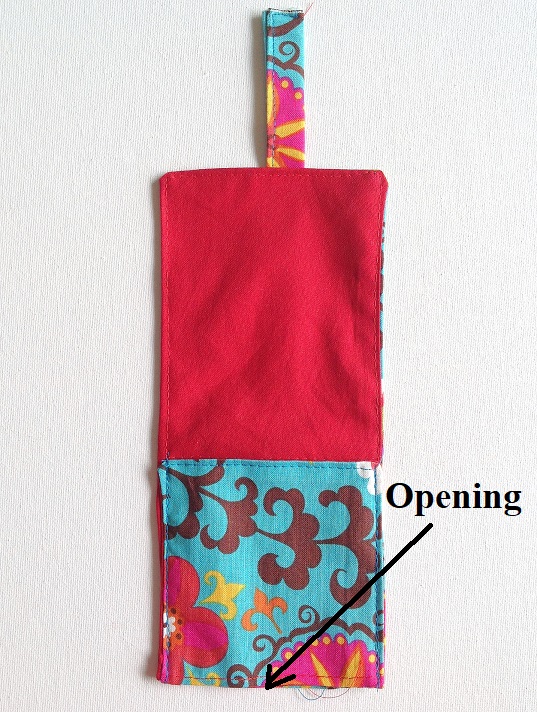
Place the main holder and lining pieces layered with the right sides together and aligning the edges. Sew around the edges, leaving a 2-inch gap on the side to turn the right side out.
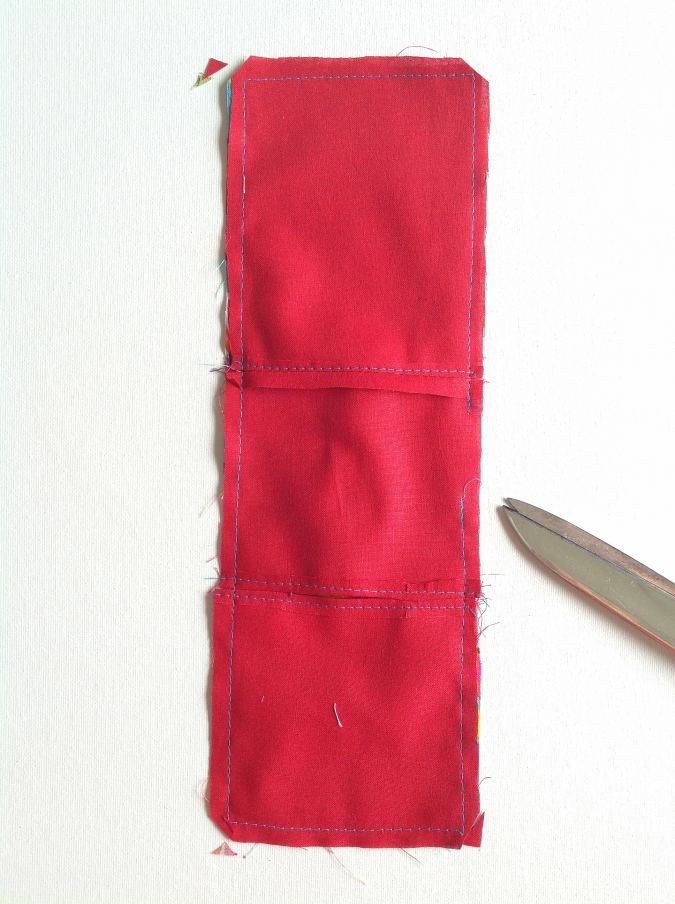

Clip the corners.

Turn the right side out through the opening. Poke the corners out with the help of your scissors( take care not to tear the seam).

Tuck the raw edges in and press taut.

Topstitch around the edges.

Lay the folder flat and fold the lower part towards the center, such that the opening for the bottleneck falls at the base. Sew on either side to secure. Make sure to reinforce the stitches at the start and finish.
Next, we do the buttonhole and the buttons.
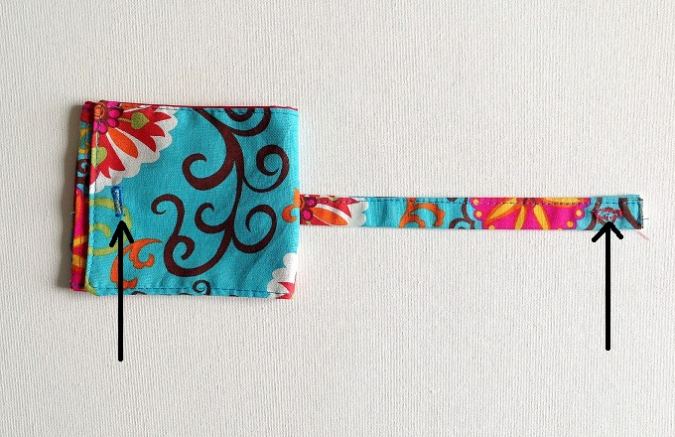

Sew buttonholes following your sewing machine’s manual, ½-inch from the edge of the strap and ½-inch from the edge of the flap, along its center.
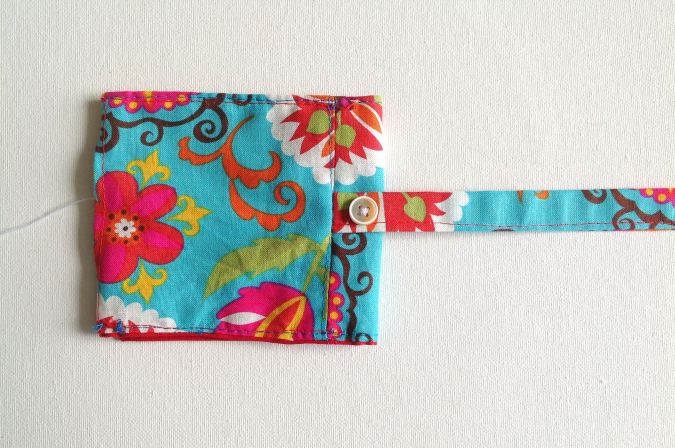

Hand -sew a button at the back of the folder for strap closure.
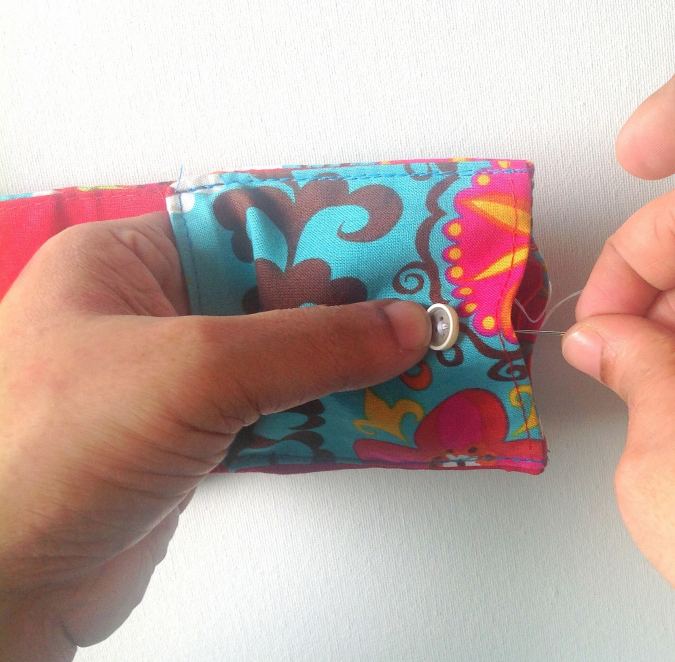

You need to hand-sew the buttons on the folder front too. You may put your hand through the holder pocket to hold it and then insert the needle through the opening at the base to make it easier to sew.
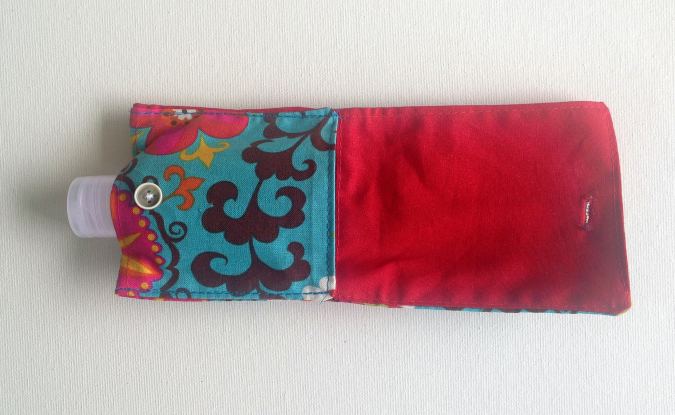

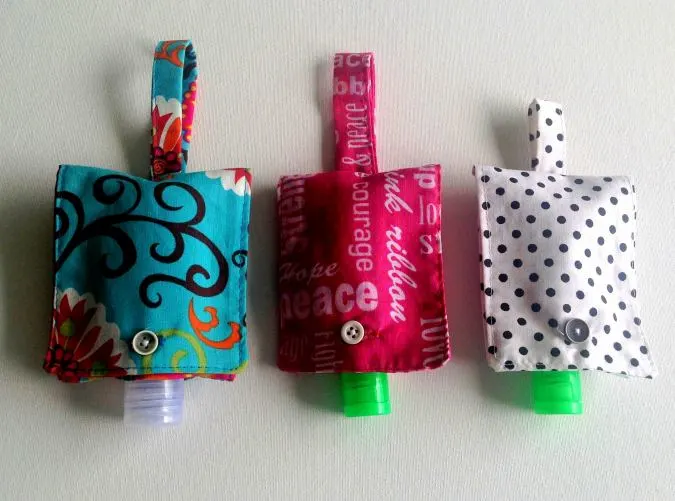
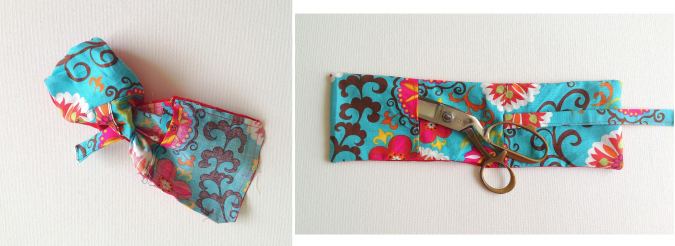
Put the sanitizer bottle into the holder pocket, with the neck of the bottle hanging out through the opening.
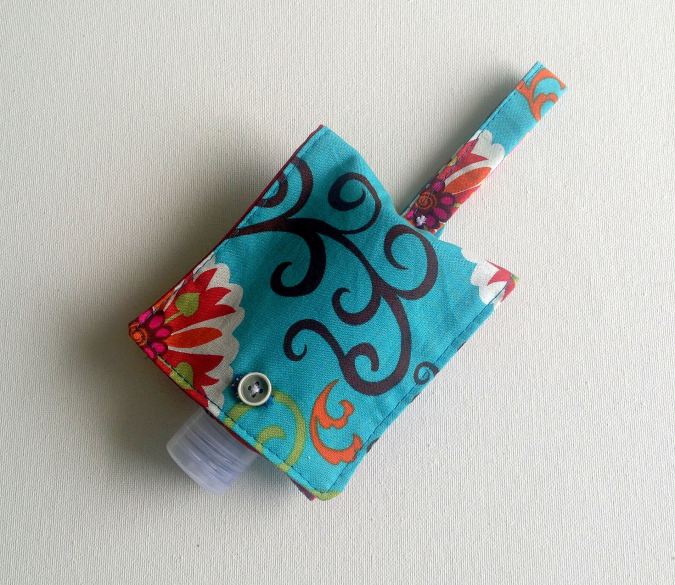

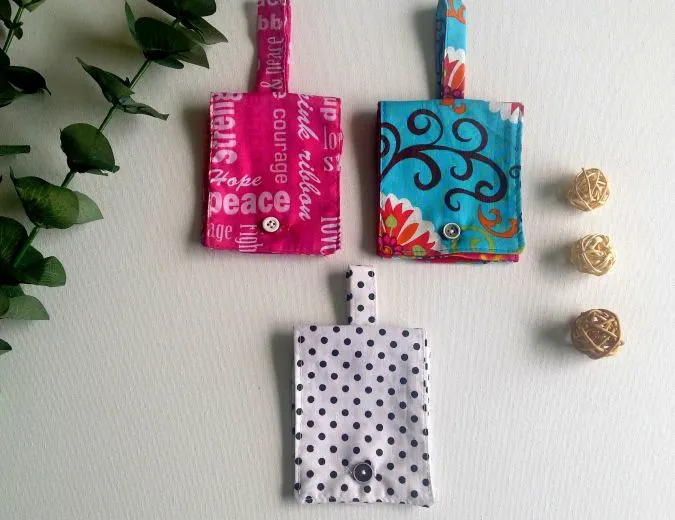
Our sanitizer bottle holder is ready!
Fins the webstory for the post here, Reusable: Fabric Hand Sanitizer Holder Tutorial
Pin it for later here,