Dress your little girl up in the spirit of the holiday season with this reversible skirt. Let her twirl, dance and play around. What more? you can flip it to the other side if you get a stain or two on one side. This is so easy to sew and requires very little materials, just two kinds of fabric, some elastic and you are all set to go! This skirt is so simple that you can sew it in less than an hour.
Note
* I suggest you read the entire pattern once before starting to get a general idea.
* The seam allowance is 1/2-inch throughout unless otherwise specified.
Materials Required
1) The cotton fabric of any print- To calculate the amount of material required, keep the tape from your little girls waist to where you want the skirt to stand. Double that length and you get the yardage. For example, I took a measurement of 10-inches length for the skirt, so I needed, 10 x 2= 20 inches (approximately 3/4 yards of fabric).
2) The cotton fabric of any coordinating print or color- Measurement same as above.
3) One-inch elastic- Measure around the waist of your girl and subtract 2-inches to get the length of the elastic. My girl measured 21-inches around the waist, so my elastic length came to, 21-2= 19 inches.
Measurements
* Lets first calculate the length of the skirt fabric (this applies to both the fabric).
Measure the length from the waist till where you want the skirt to stand. Add a 1-inch seam and subtract a 1 & 1/2-inch ( waistband). This would give you the length of the skirt material required. My girl’s measurement is 10-inches. So my required fabric length is:
10 + 1 – 1.5 = 9.5-inches
* Lets now calculate the width of the skirt material ( here again this applies to both the fabric). Measure around the waist of your child and multiply by 2.5, this would give you the width. My girl’s measurement is 21 -inches around the waist. So my calculated width is:
21 x 2.5= 52.5 inches
Since the commonly available width of the fabric is 44-inches, you will have to join pieces to get the required width of the skirt material. Here I added a 44-inch piece and an 8.5-inch wide piece to get the required width, 52.5-inches (44 + 8.5= 52.5).
* Now we have to figure out the measurement for the waistband. The width of the waistband is taken as 4-inches for all ages. For the length of the waistband, we multiply the waist measurement of your child by 1.5. This gives the length.
I took the waist as 21-inches. So my waistband length is:
21 x 1.5= 31.5 inches
Sewing
Cut the two skirt materials according to the required measurement, mine came to 9.5-length x 52.5-width.
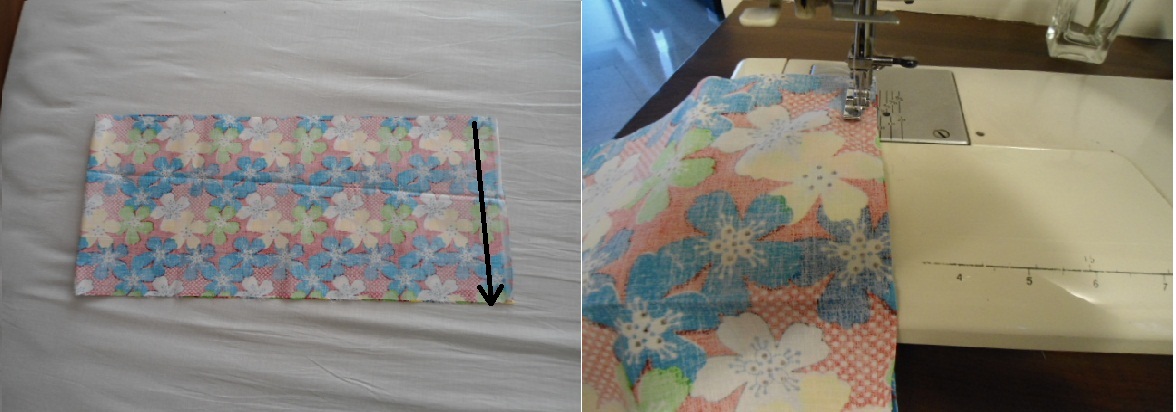
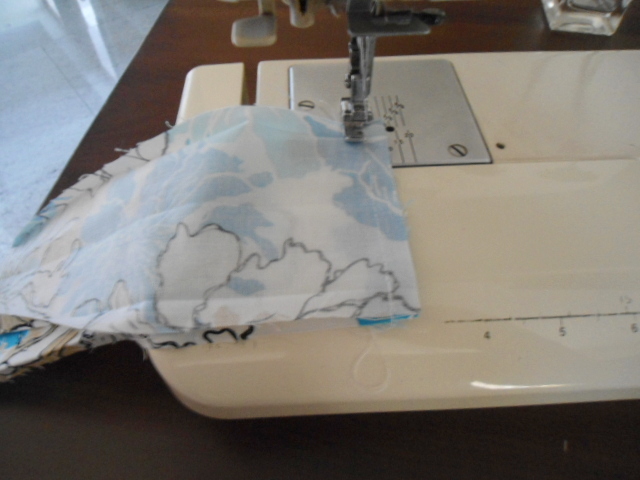
Take one of the fabrics, fold it over, aligning the edges and with the right sides together. Sew it shut along the shorter side, as shown in the picture, to form a tube. Repeat the same with the other skirt fabric.
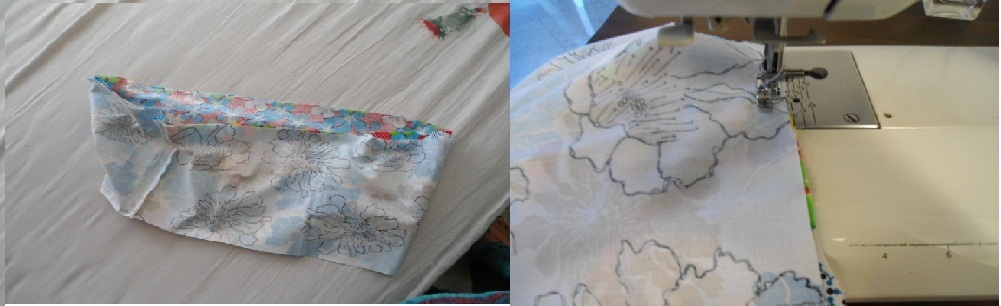
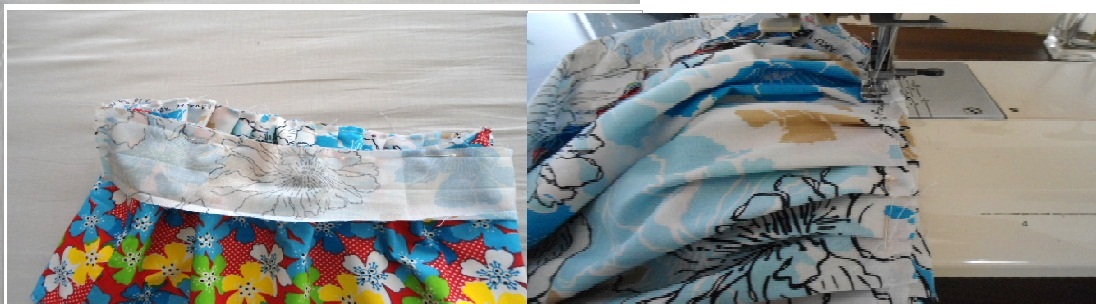
Lets name the red floral fabric, skirt one and the white floral fabric as skirt two for convenience. Take the two fabric tubes and turn skirt one to the right side. Keep it over skirt two and slip in skirt one into skirt two, as shown above.
Align the top edges and pin all around. Sew the skirt one and two together along the pinned edge, removing the pin as you go.
Now flip over skirt two to its right side, exposing the right side of skirt one also. Push skirt two into skirt one as shown above.
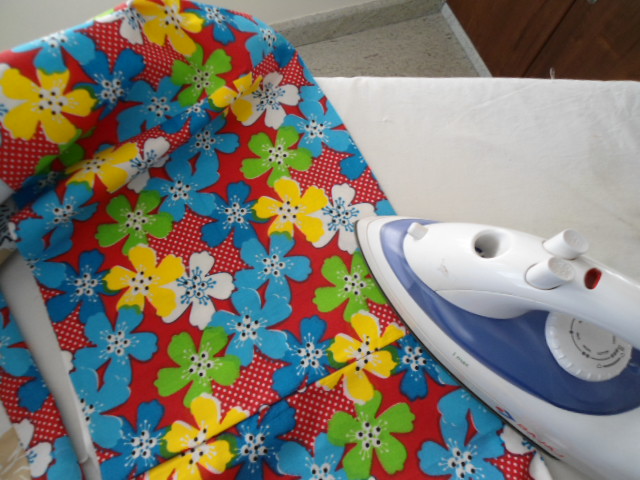
Press the seams flat for a neat finish.
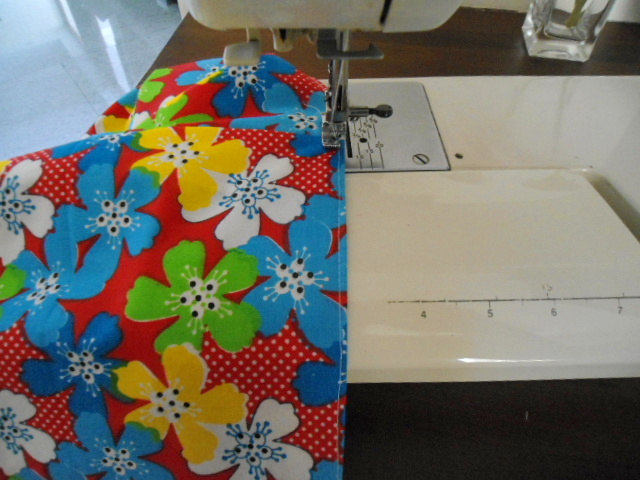
Top stitch along the pressed seam line to give it a professional finish.
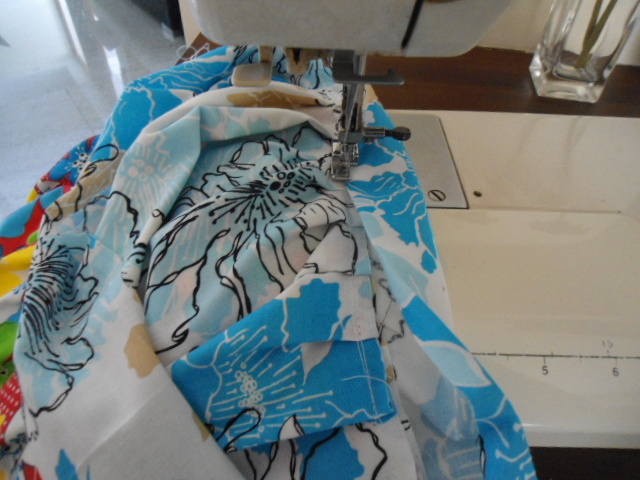
Now bring the raw edges of both the skirt together and pin. Make a basting stitch ( for that you have to turn the upper thread tension of your machine to zero and the stitch length to the longest) along the raw edges, removing the pin as you go. Turn the machine settings back to normal.
Pull the thread from the bobbin to gather it.
Now we need to do the waistband. Take the required dimension of the fabric for the waistband.
Fold the two longer edges in towards the wrong side and press.
Now fold the waistband in half along the entire length and press. Now we need to sew the waistband shut and form a tube.
Open the folds and sew the waistband shut along the shorter side. Your waistband will now look like a tube.
Keep the waistband on its wrong side, above the skirt in such a way that the ruffled edge of the skirt faces the waistband and slip the skirt into the waistband. Align the edges of the waistband and skirt and pin all around as shown above.
Sew the waistband onto the skirt, removing the pin as you go.
Fold the waistband over to the other side of the skirt, along the pressed fold and sew along its folded long edge. Take care to catch the raw edge of the skirt inside the waistband while you sew it shut. Leave a 0ne-inch gap to insert the elastic.
Take the required length of the elastic and insert it into the casing using a safety pin.
Keep the ends of the elastic overlapping and sew back and forth a few times to secure it.
Sew the opening in the waistband shut.
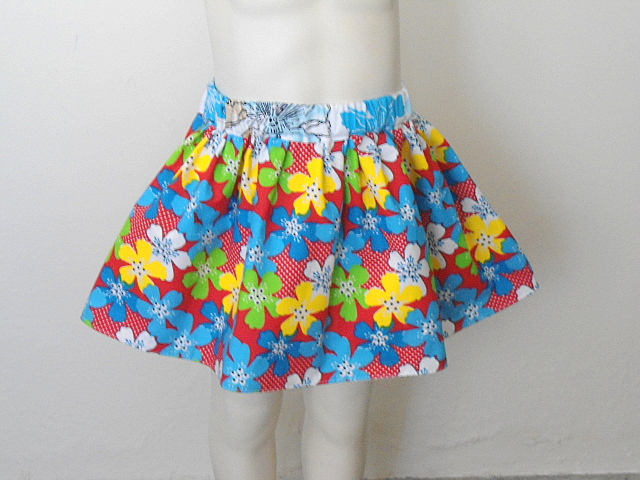
Our skirt is done and easy!
If you love it, please consider sharing it with one of the social media buttons below. Thank You!


Britt
Friday 11th of November 2022
Would like to make one for my grandchild.
Libra Scales
Monday 24th of November 2014
Very cute skirt & great tutorial-easy to follow. Thank you so much for taking the time and energy to put this together!
BlissfulSewing
Tuesday 3rd of June 2014
You may use elastic of 1-inch width, as mentioned in the tutorial.
kathy golden
Monday 2nd of June 2014
what width size of elastic should I get?
kathy golden
Monday 2nd of June 2014
What size elastic should i get? 1" [email protected]