I’ve given you plenty of easy-peasy patterns, and you’ve loved them too! But I have always had a soft spot for all things vintage, and I simply adore bringing that timeless charm into the dresses I design.
Now that you’ve tried my base-level patterns and hopefully become a pro at my classic-level patterns (hope so 😊), I think it’s time to step into something a little more special—something with a touch of vintage charm and an heirloom feel.
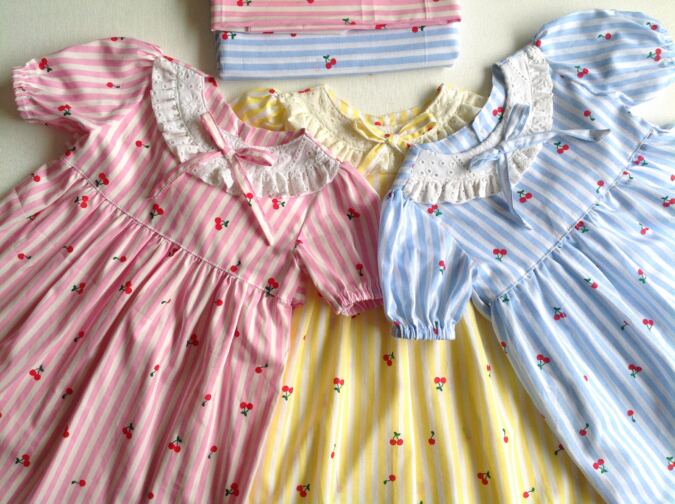
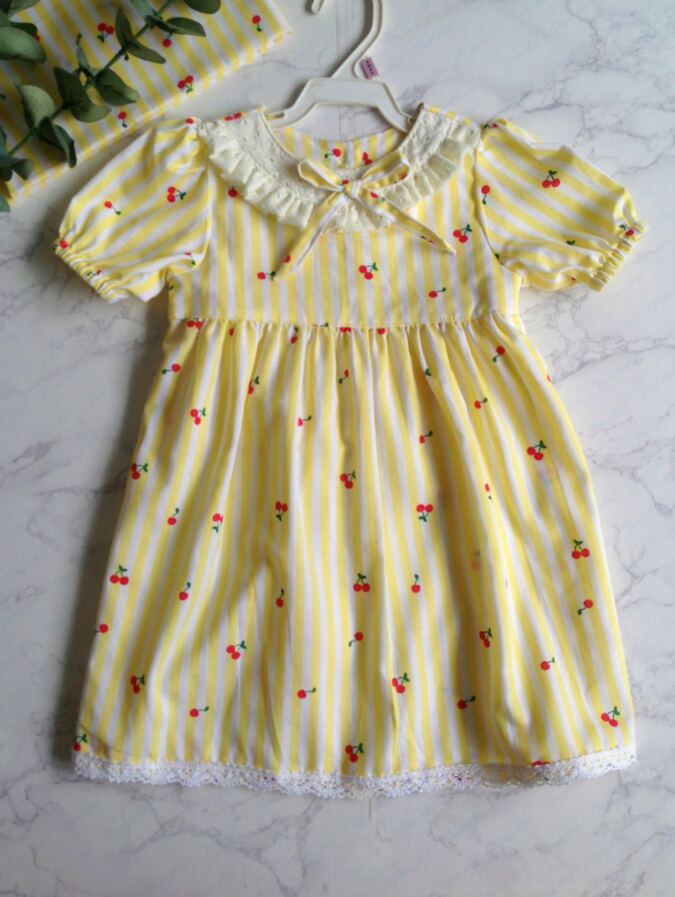
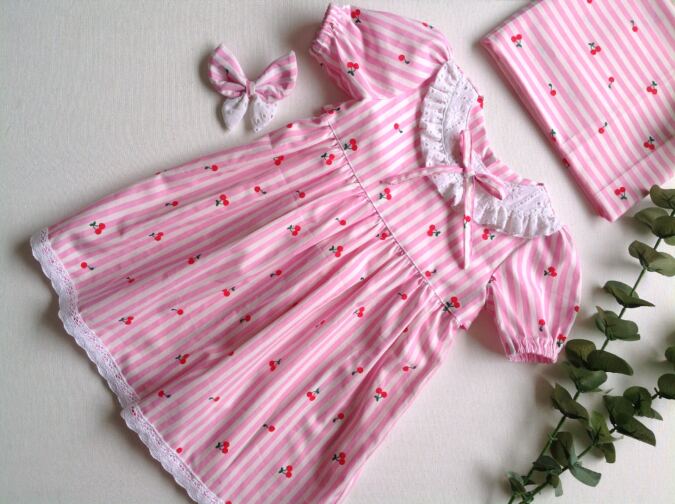
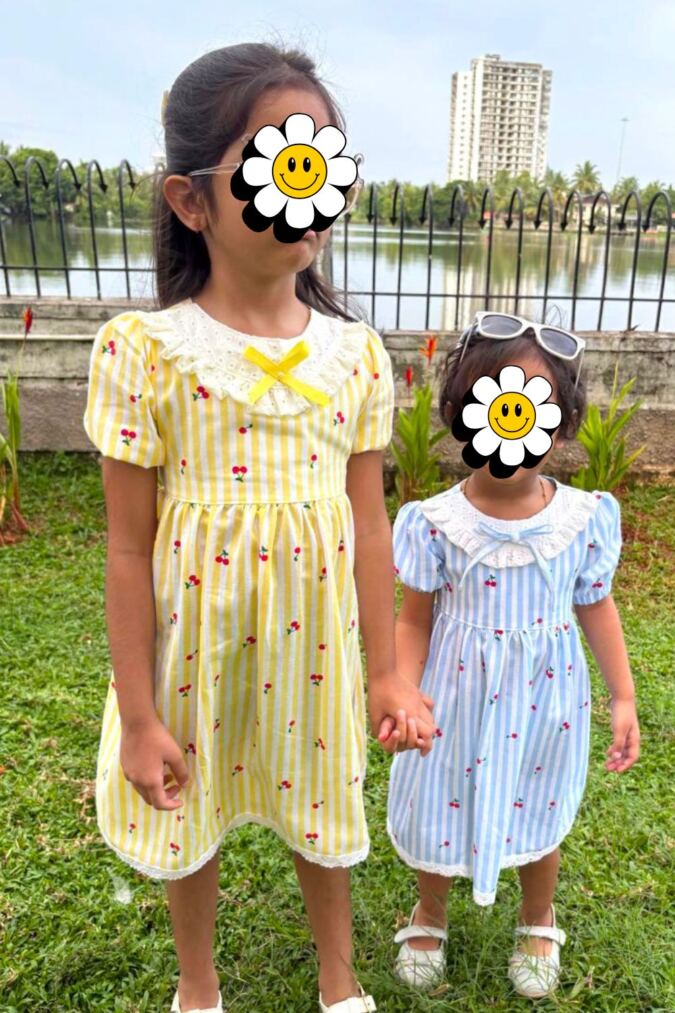
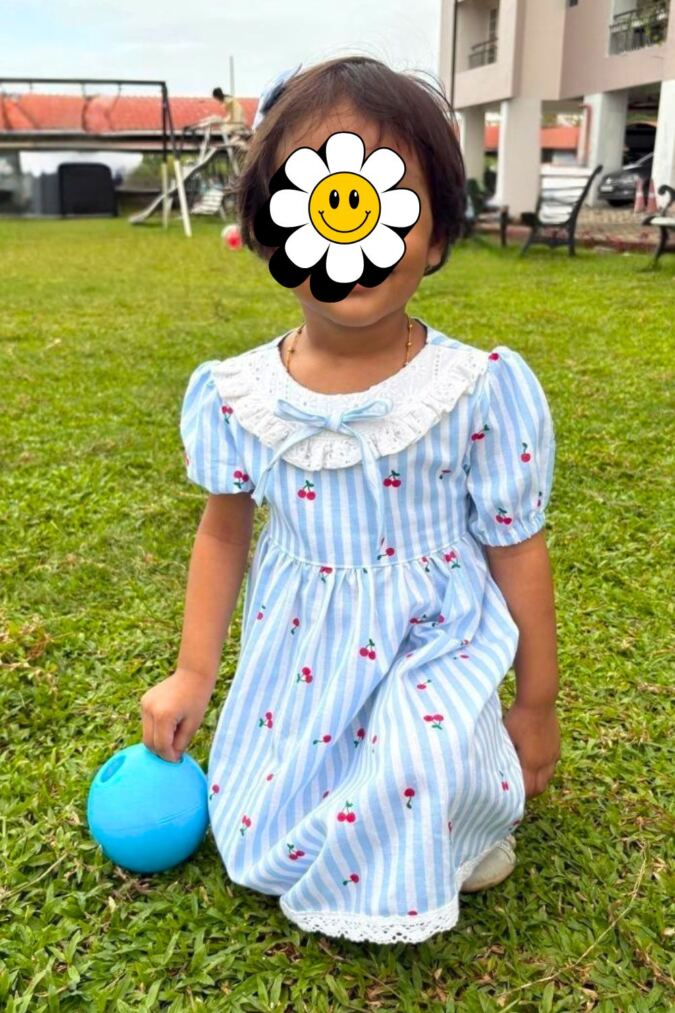
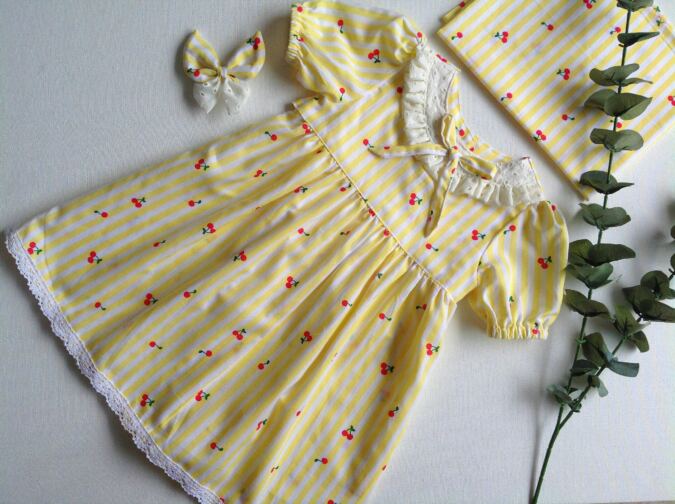
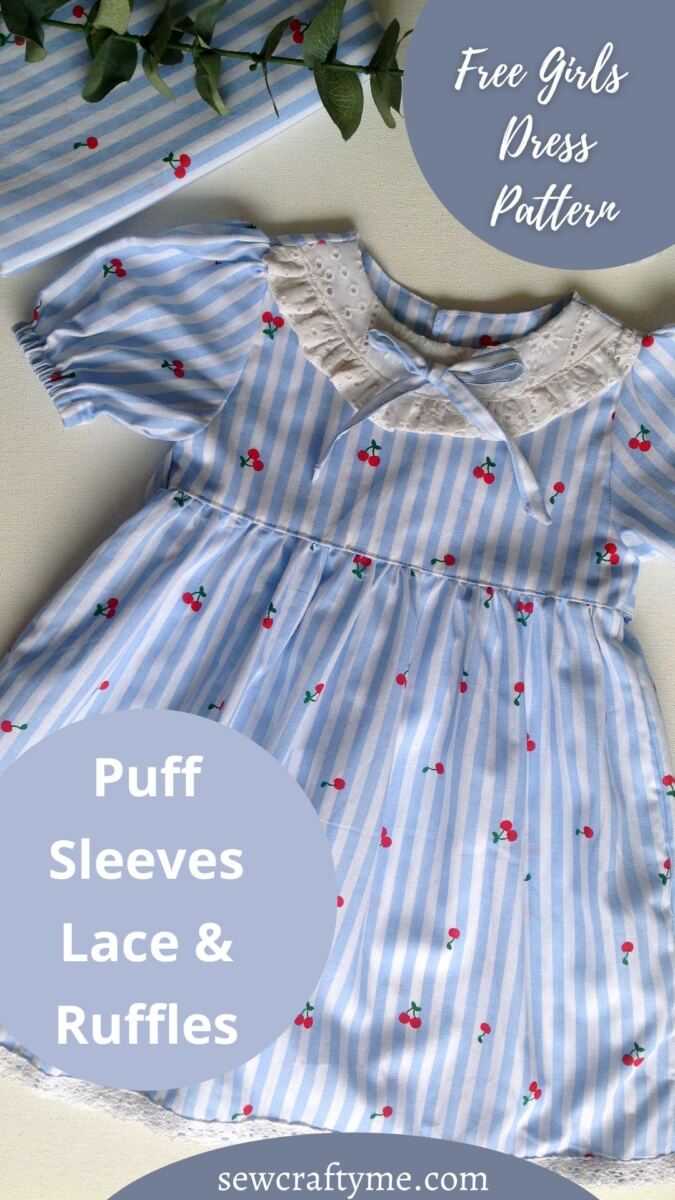
And here is my Violet Dress sewing pattern for girls—a vintage-inspired beauty with sweet puff sleeves, a delicate ruffled yoke, and a canvas for endless mixing and matching. It has that timeless, heirloom quality that makes a handmade dress feel truly special, while still being fun and enjoyable to sew.
Vintage Dress Sewing Pattern for Girls – The Violet Dress
Materials Required:
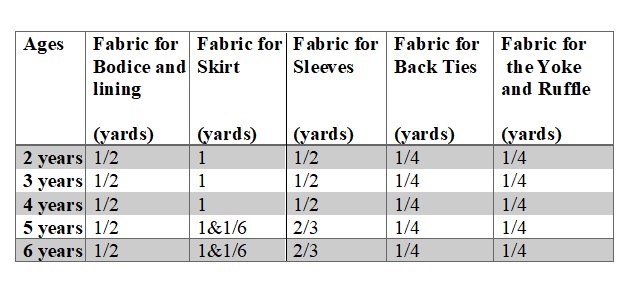
1) Medium weight cotton fabric for the bodice, skirt, sleeves and yoke- requirement specified in the table- 2 below.
2) 4 pairs of KAM snaps in matching color (or if you know how to sew buttonholes, you may use ordinary buttons too.
3) Sewing Notions.
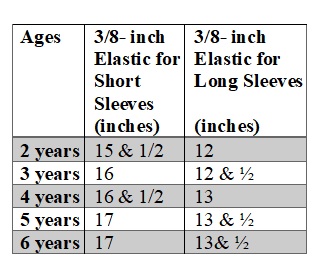
4) 3/8- inch elastic- requirement specified in the table-3 below.
5) Pattern pieces at the end of the PDF. *Enter your email address and click the subscribe button in the blue box below to download the template. kindly wait for 2-3 minutes for the download window to appear.
I suggest you read the entire pattern once before starting to get a general idea
All the fabrics used here are of 44/45 inches width.
The fabrics shown here are only for illustration purposes and as such may vary from the original.
The seam allowance is 3/8 -inch unless otherwise specified.
Size Chart
*****Pinch to zoom the tables
Table-1
Approximate Finished Measurements.
Table-2
Material Requirements
Table-3
Table-4
Measurements
Table-5
**The dress is supposed to hit below the knee. Change the length of the skirt piece, if you would like it shorter or longer.
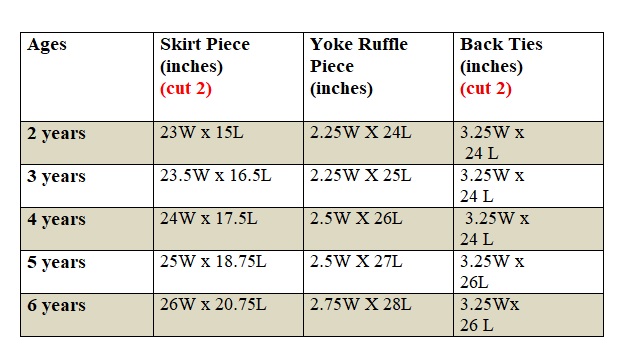
In the table below, “W” stands for the width and “L” stands for the length of the fabric piece to be cut.
Sewing
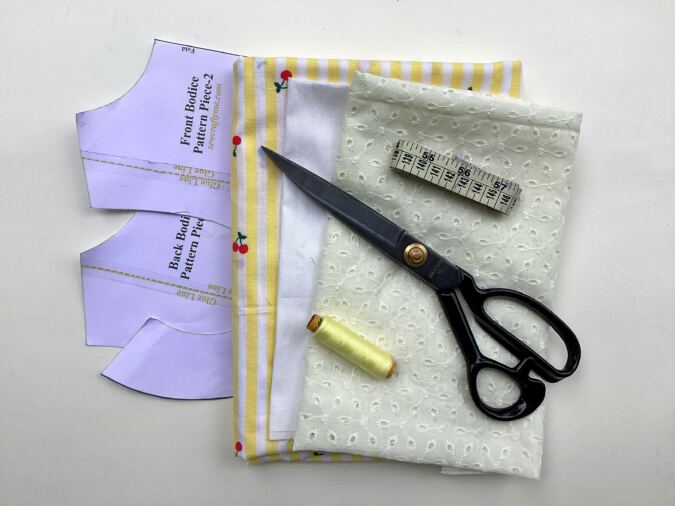
Gather the supplies.
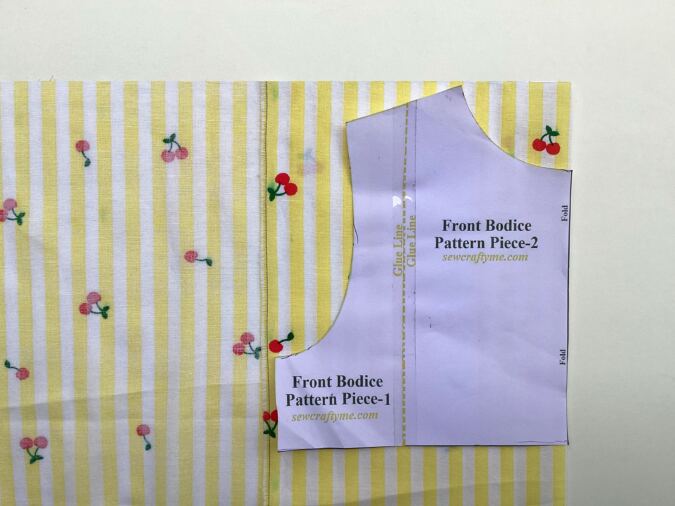
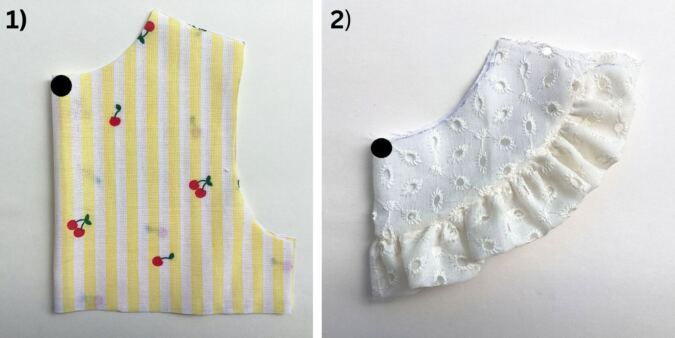
Cut the pattern template for the front bodice, fold the fabric to fit the width of the template and place the template on the fold. Mark around it and cut to get the front bodice piece. Repeat the steps to get the front lining piece
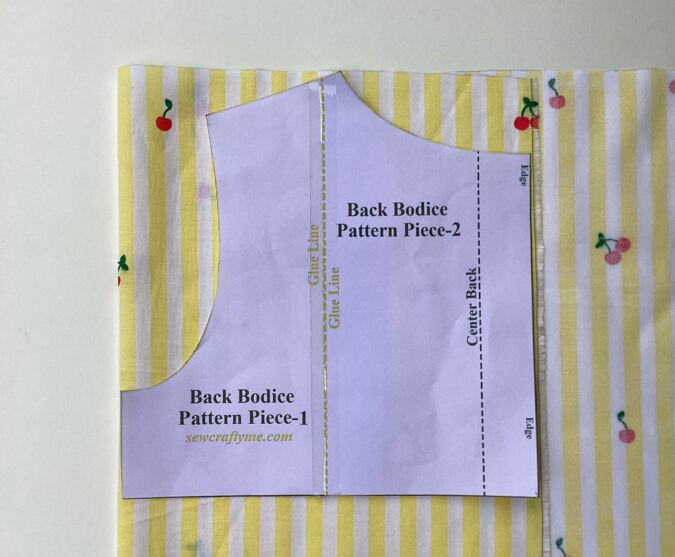
Next, cut the back pattern template and keep it along the edge of the folded fabric as shown in the picture. Mark and cut to get two pieces for the back bodice. Repeat the steps to get two more of the same piece (for the back lining).
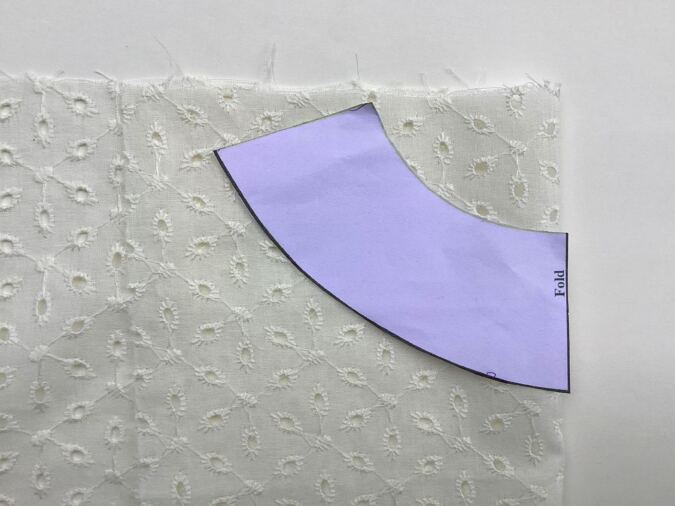
Similarly, take the yoke fabric and cut the yoke piece on the fold. Repeat on the lining fabric to get the yoke lining.
Cut the yoke ruffle, side ties and the skirt pieces referring to the table-4 above.
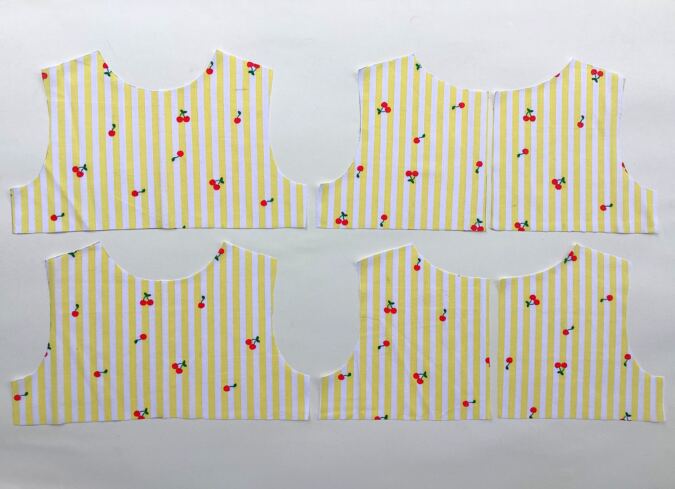
You will get your front bodice, back bodice and the lining pieces like the above.
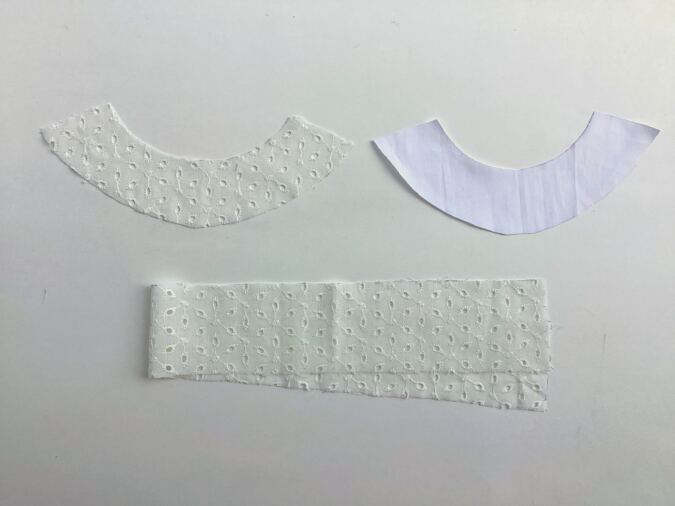
You will get your yoke, lining and yoke ruffle pieces like the above.
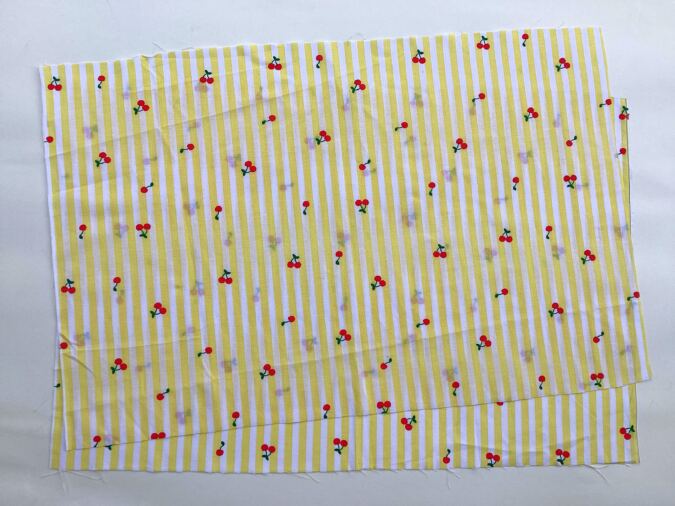
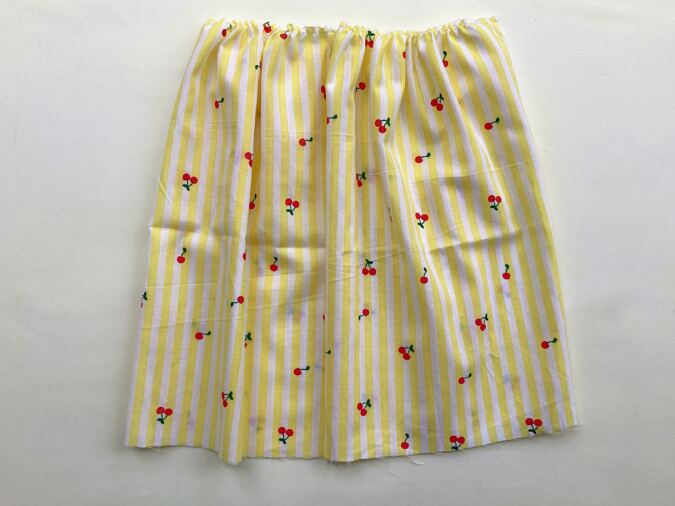
You will get your skirt pieces like this.
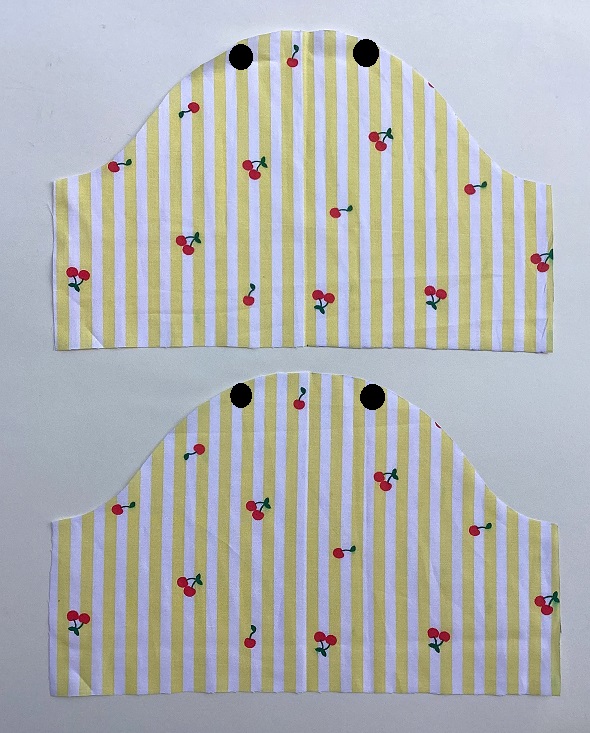
Also cut your two sleeves using the template (** Transfer the marks for the gathers to the sleeve).
Let’s start sewing. We first finish the yoke part.
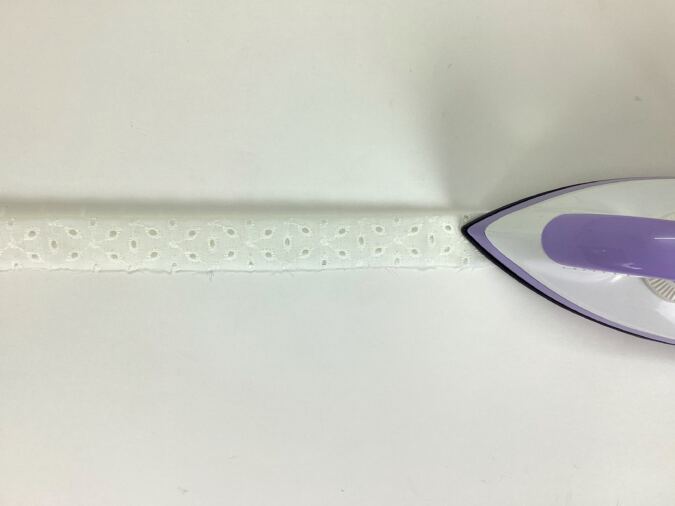
Fold the yoke ruffle piece in half lengthwise, with the wrong sides touching and press.
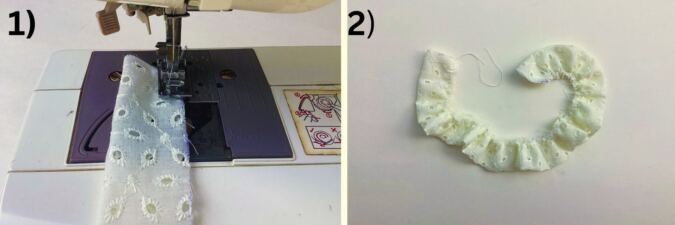
***Turn the upper thread tension of your machine to zero and the stitch length to the longest to get a basting stitch.
Sew a basting stitch along the raw edge of the folded ruffle piece. Pull the thread from the bobbin gently and gather it.
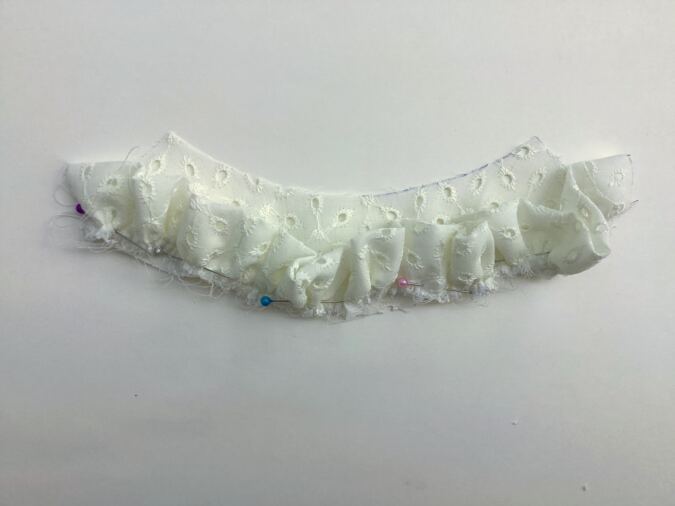
Adjust the gathering to make it uniform and to match the lower edge of the yoke.
Place the raw edge of the ruffle along the raw (lower) edge of the yoke, with the right sides touching and pin. Turn the machine setting to normal and sew the ruffle to the yoke.
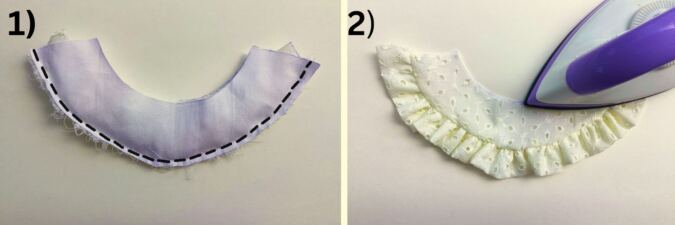
Place the yoke lining above the yoke main piece, lining up the edges and with the right sides together (the ruffle is now sandwiched between the yoke and lining). Sew along the outer curve to join. Bring the right side out and pull the ruffle taut. Align the edges together and press to make it clean and crisp.
Next, we attach the yoke to the front bodice.
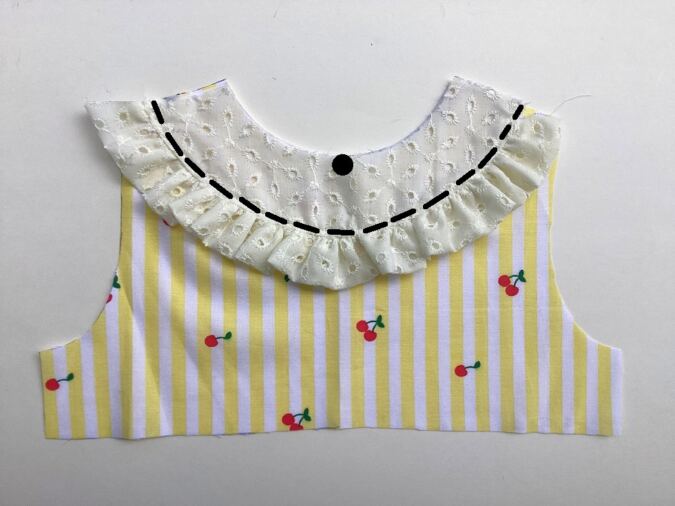
Fold the front bodice lengthwise in half and mark the upper center along the neckline. Similarly fold the yoke lengthwise and mark the upper center along the neckline.
Place the yoke over the front bodice on the right side, matching the center marks and pin. Sew along the lower curved edge of the yoke to attach it to the bodice.
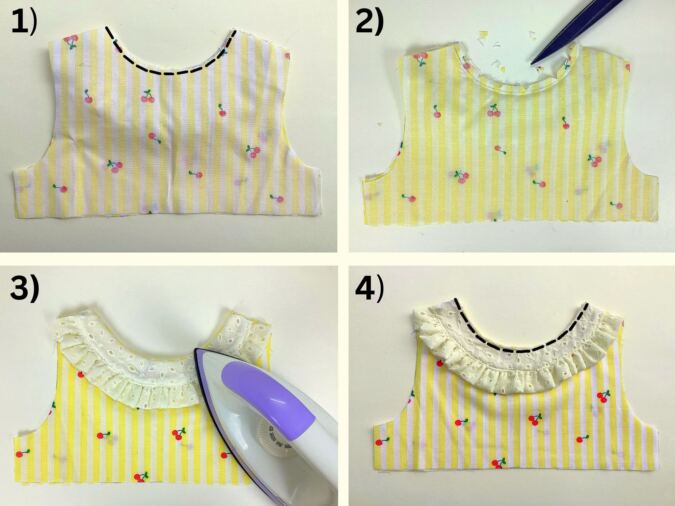
1) Take the front bodice and the front lining pieces, layer them with the right sides together, aligning the edges and sew along the neck, leaving a 3/8-inch seam. 2) Clip the curves and cut the corners to reduce the bulk in the seam. 3) Turn over to the right side and press flat. 4) Topstitch around the neck to make it clean and crisp.
Next, we finish the back bodice pieces.
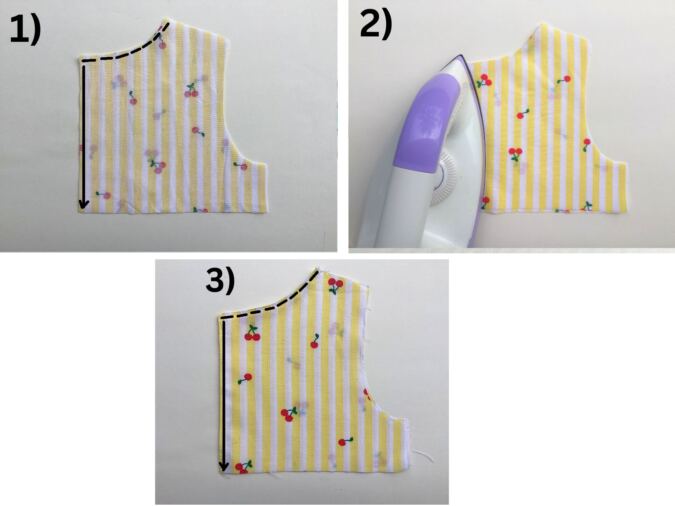
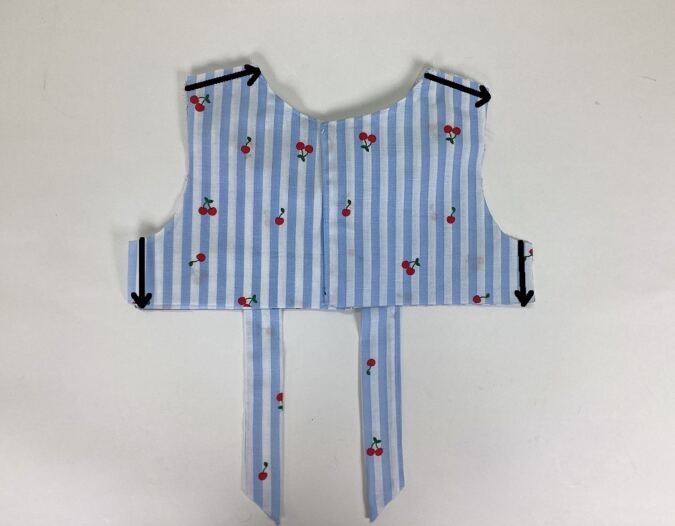
1) Take one of the back bodice pieces and a lining piece, layer them with the right sides together, aligning the edges and sew along the button edge (center back) and neck, as marked by the black line. Clip the corners and edges as you did for the front bodice. 2) Turn over to the right side and press 3) Topstitch along the neck and center back. Repeat the same with the remaining back bodice and lining pieces.
Next, we make the back tie pieces and attach it to the bodice.
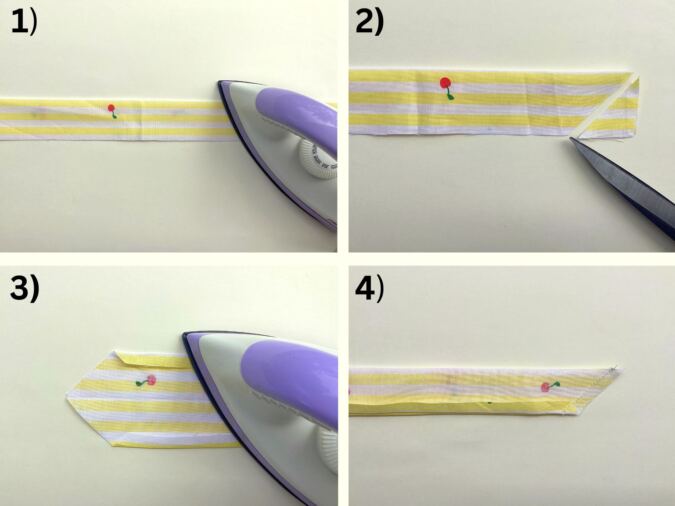
1) Take one of the pieces for the back tie, fold it in half lengthwise, with the wrong sides together and press.. 2) Cut one of the shorter edges to make it slanting as shown above. 3) Open and fold its two longer edges towards the wrong side by 3/8-inch and press. 4) Flip the sash onto the wrong side, keeping it folded along the center crease, with the right sides together. Sew the slanting edge shut, keeping the folds along the longer edges intact.
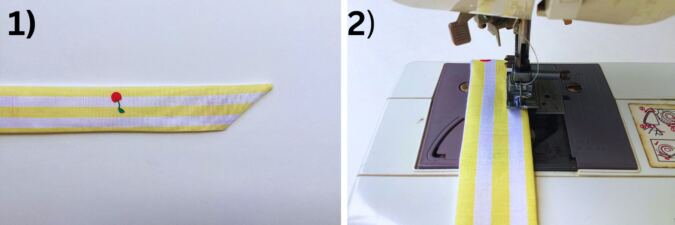
1)Flip it over to the right side and 2) Sew the tie shut along the longer edge. Repeat the steps to get the other tie.
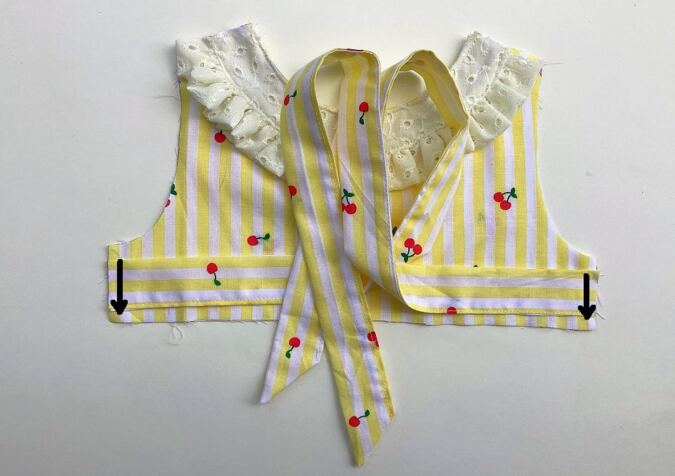
Take one of the ties and align its short edge with the side edge of the front bodice, placing it 1/2 inch above the lower edge on the right side. Pin in place and sew to secure. Repeat on the other side of the front bodice with the remaining tie.
Next, we join the front and back bodice pieces together.
Layer the front and back bodices, with the right sides together, lining up the side seams and shoulders (you will notice that the back pieces overlap along the center for button opening). Sew the side seams and the shoulders shut (picture for illustration purposes).
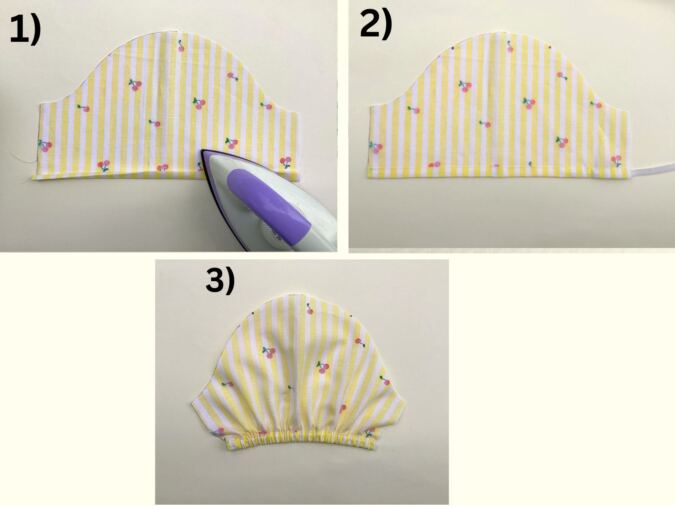
Next, we finish the sleeves. For that we first finish the hem that doubles as a casing for the sleeve elastic.
1) Fold the straight edge of the sleeve pieces by 3/8- inch and press. Fold again by ½- inch and press once more. Sew the hem along the edge of the fold. 2) Take the required length of the elastic, referring to the table- 4 above, cut it into 2 equal pieces and insert one of the pieces through the casing formed, using a safety pin. 3) Secure the ends of the elastic by sewing back and forth a few times.
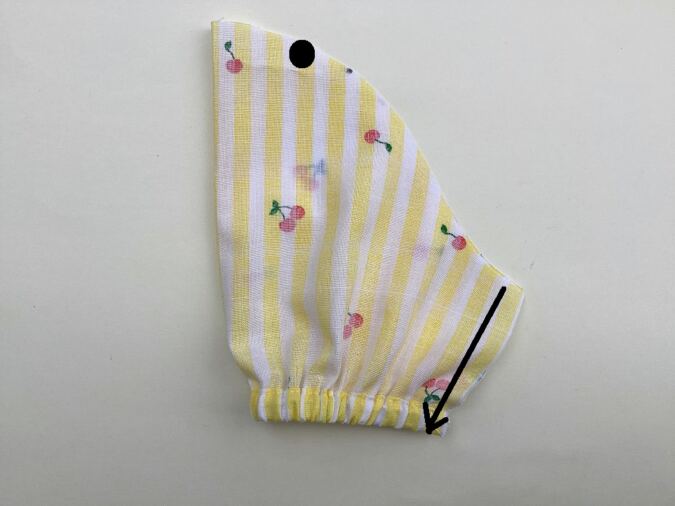
Fold the sleeve over, with the right sides together and the edges aligning. Sew it shut along the side edge.
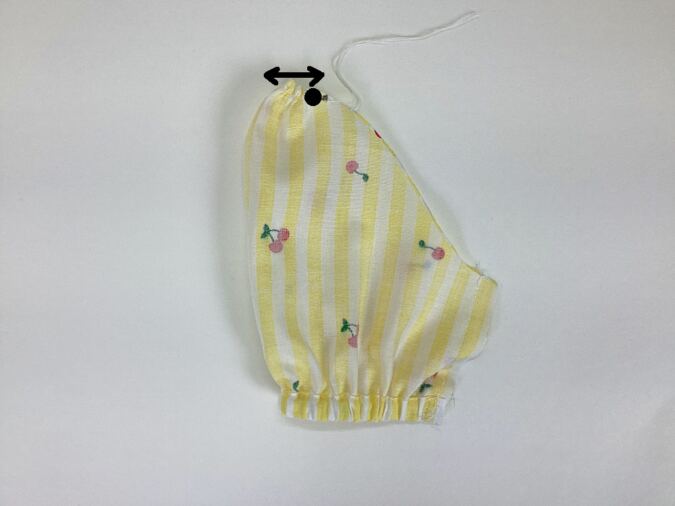
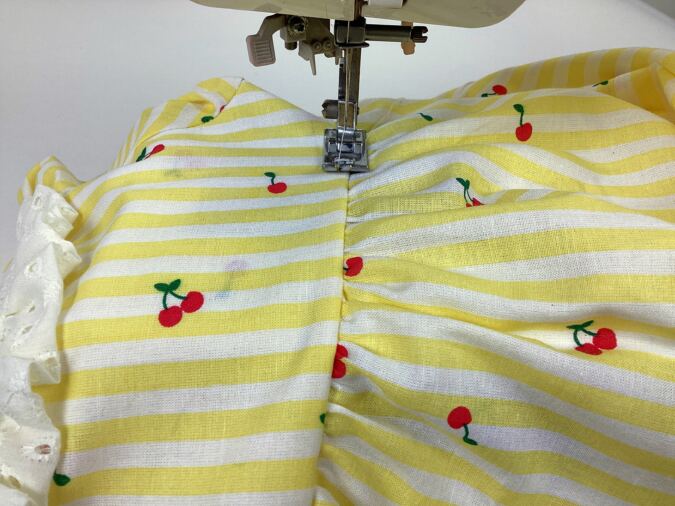
To gather the sleeve, sew a basting stitch between the points marked earlier. Pull the thread from the bobbin gently to gather it. Repeat with the other sleeve.
Let’s attach the sleeves to the bodice.
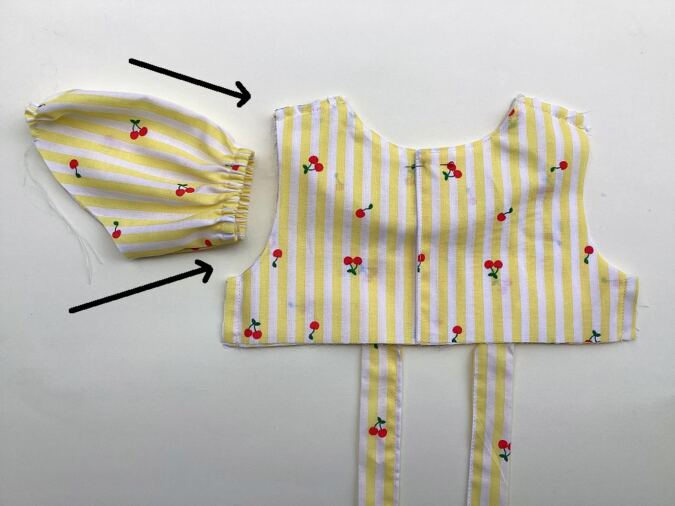
Place the sleeve on its right side and the bodice with the lining facing out. Keep the lower edge of the sleeve facing the armhole and slide the sleeve into the armhole.
Start by aligning the edge of the sleeve with the armhole, matching the sleeve seam with the bodice seam first. Adjust the gathers on the sleeve so that it fits the armhole and the gathers are evenly distributed on either side of the shoulder. Pin the sleeve to the armhole. Bring the machine settings back to normal and sew the sleeve to the armhole, removing the pins as you sew.
Repeat the steps on the other armhole with the other sleeve.
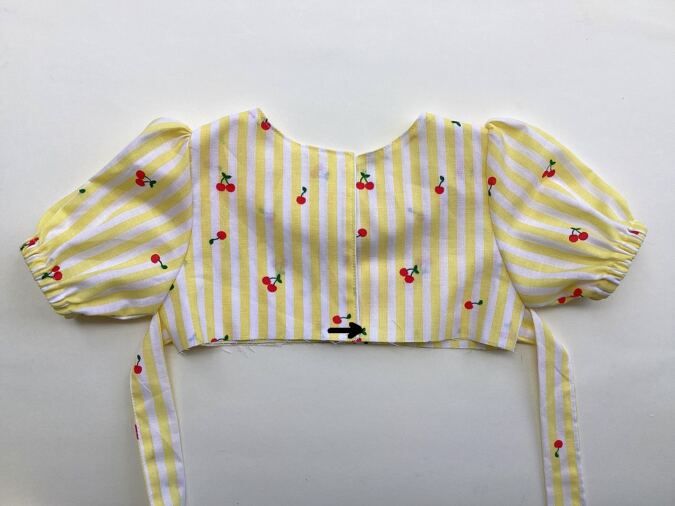
Turn the bodice over to the right side. Sew the overlapping part of the back bodice shut, 3/8-inch from the lower edge.
Our bodice is almost done. We move on to the skirt part.
Take the two pieces required for the skirt. Keep the pieces overlapping with the right sides together and sew the side seams shut.
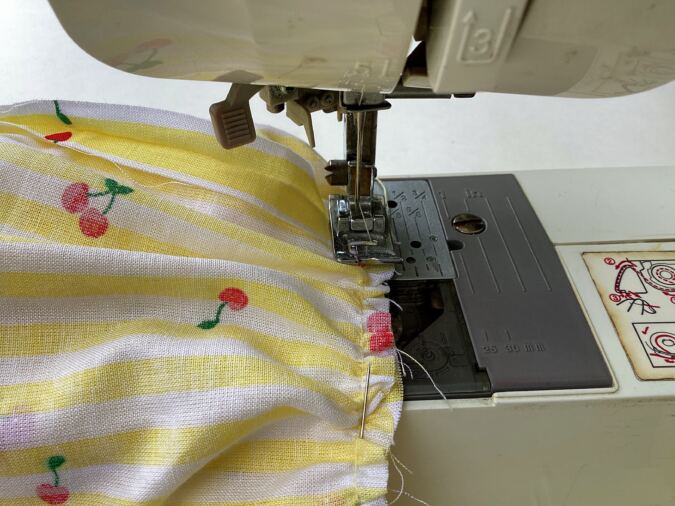
Bring the right side out. Sew a basting stitch, 3/8-inch away from the top edge. Leave a long tail of thread, of about 5 to 6 inches long to pull and gather the skirt.
Pull the thread from the bobbin gently to gather the skirt. Adjust the gathering to make it uniform and to match it with the lower edge of the bodice.
Let’s attach the bodice to the skirt.
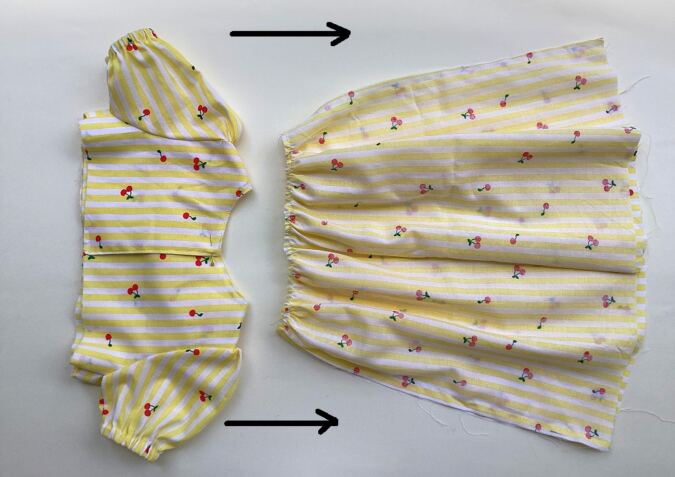
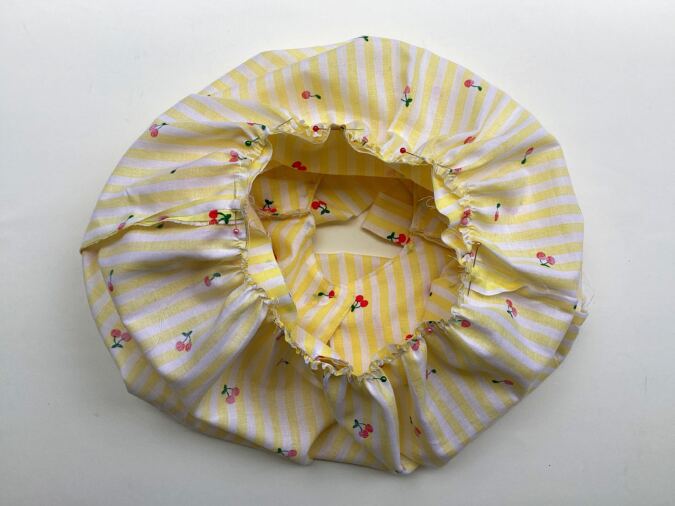
Keep the bodice on its right side and the skirt on its wrong side, with its gathered edge, facing the top edge of the bodice and slide the bodice into the skirt.
Align the raw edges of the two together and pin all around, making sure that the side seams are in line.
Turn the machine settings back to normal and sew the skirt to the bodice. Zigzag to prevent fraying.
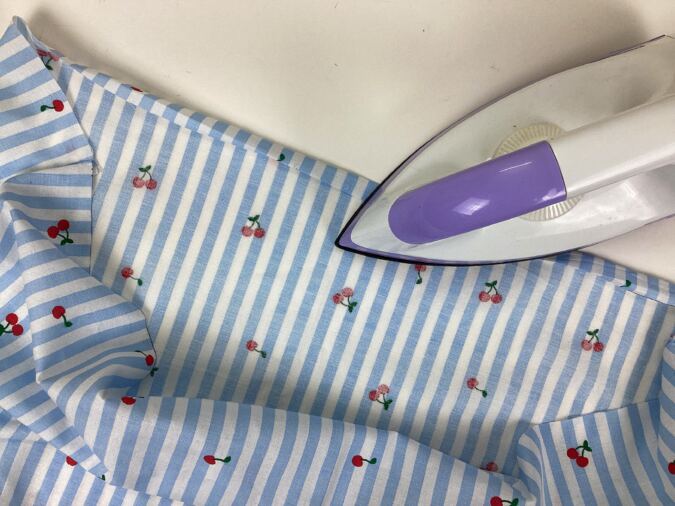
Turn over to the right side and topstitch along the seam line of the skirt and bodice to make it look neat and crisp.
Next, we finish the hem.
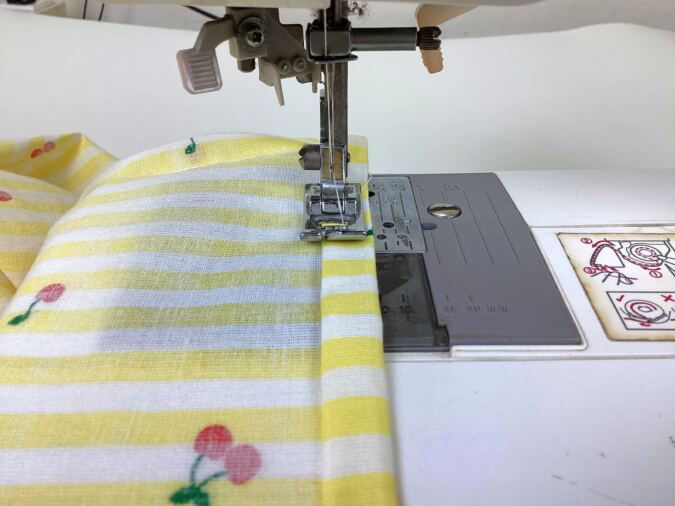
Fold the lower edge of the dress by 1/2- inch twice towards the wrong side and press (picture for illustration purposes)
.
Sew down the hem along the edge of the fold.
Let’s attach the KAM snaps.
Starting from the top edge, make markings at 2-inches gap from each other, on the right side of one of the back pieces and attach the KAM snaps. Make markings with a 2-inch gap on the wrong side of the other back piece also and attach the complimentary KAM snaps (picture for illustration purpose).
Your pictures of this dress show a bow in the front on the yoke but I don’t see any dimensions or instructions for that part. Are you able to add/send those?
The blue box is provided under the “materials required section” of the pattern page. Please enter your email address and click the Subscribe button to download the template. Kindly wait 2–3 minutes for the download window to appear after subscribing.





Your pictures of this dress show a bow in the front on the yoke but I don’t see any dimensions or instructions for that part. Are you able to add/send those?
I will be adding the instructions soon.
No pattern link. Nothing blue 🔵 to tap.
The blue box is provided under the “materials required section” of the pattern page. Please enter your email address and click the Subscribe button to download the template. Kindly wait 2–3 minutes for the download window to appear after subscribing.
I have a question. I love the trim on the yoke, but I seems it would be heavy with all those layers.
I used medium-weight cotton for the yoke, a light- weight cotton for the lining and it worked beautifully without making the yoke feel too heavy.