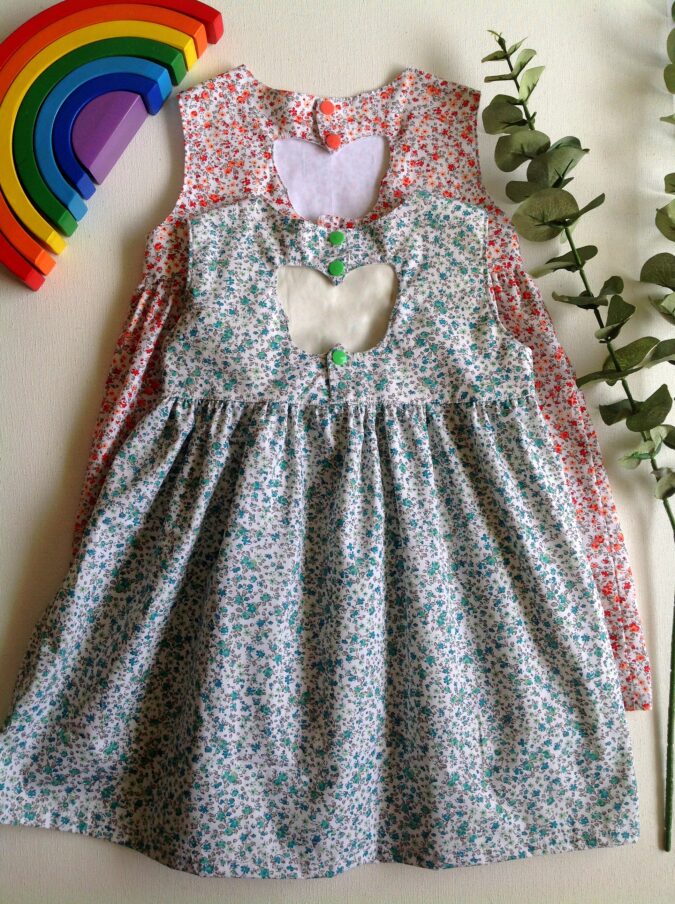
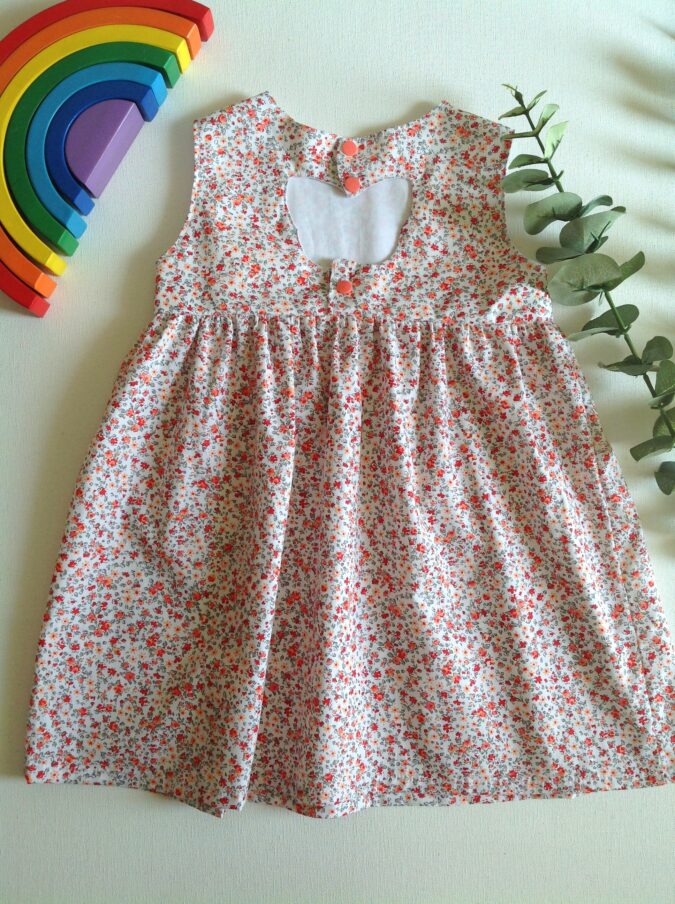
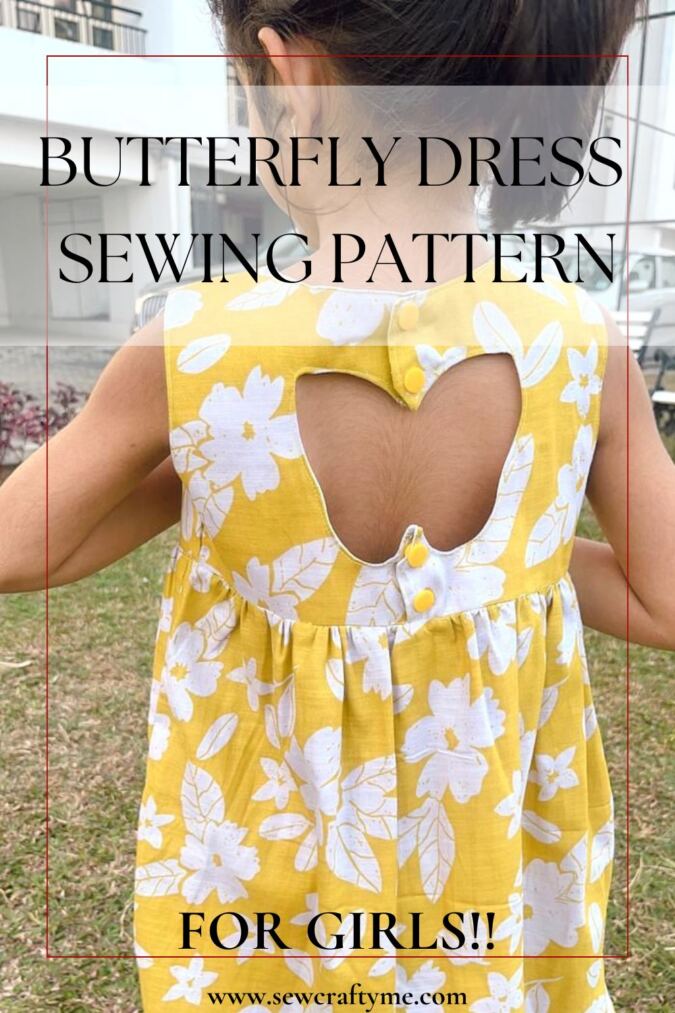
Would you love to sew something truly unique and designer-worthy for this summer? Introducing the Butterfly Back Dress — a charming piece that’s sure to turn heads.
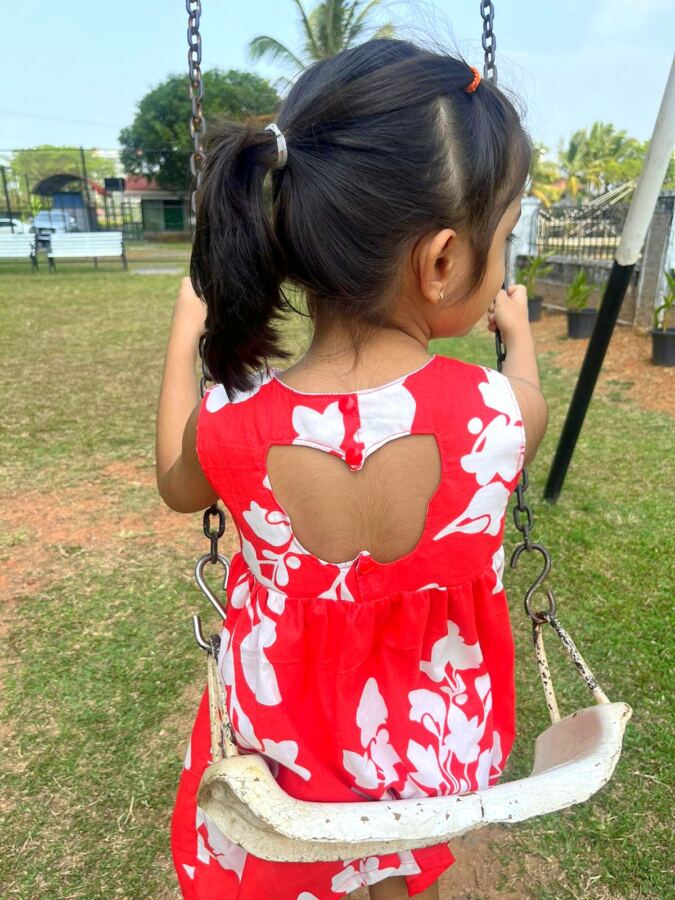
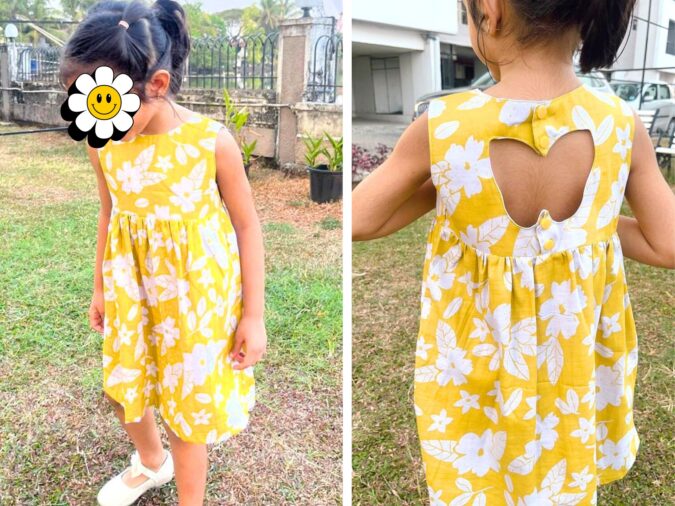
This dress features a beautiful butterfly-shaped opening along the back, adding an elegant and playful touch. If you’ve sewn my Meredith Dress pattern before, you’ll find this one easy and enjoyable to make. Simply take your time around the curves, pause at the notches, and pivot your fabric carefully to achieve a clean, perfectly shaped butterfly finish.
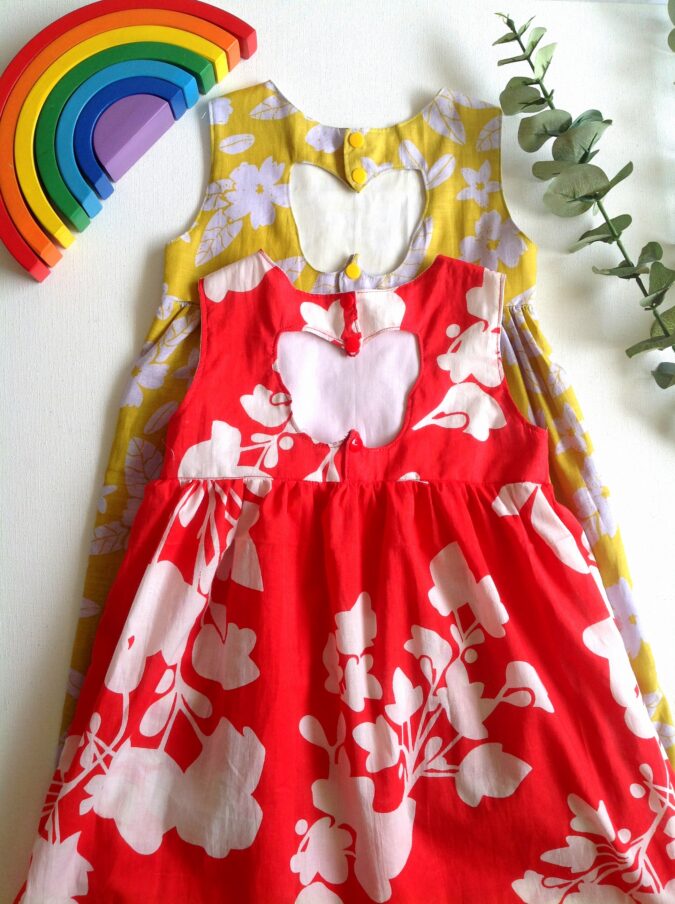
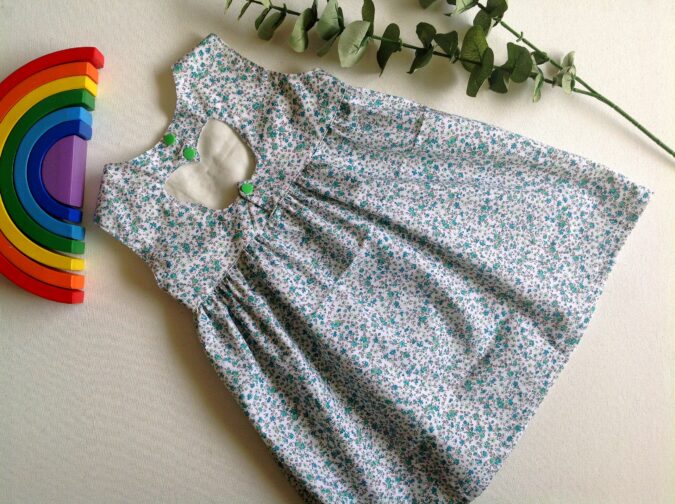
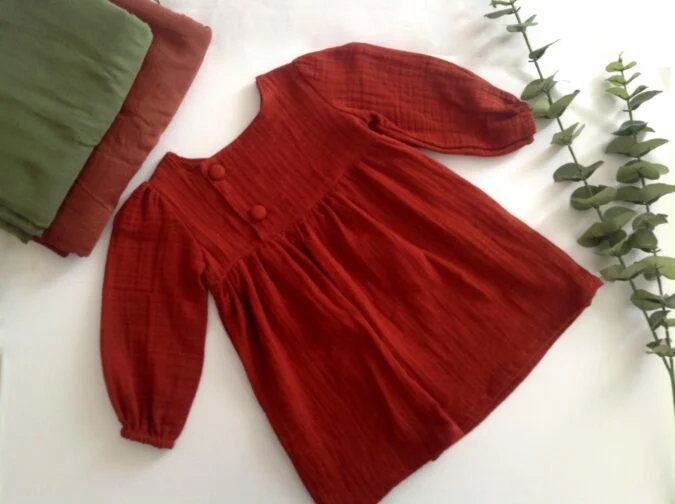
Choose breathable cotton or linen for casual outings and playtime, or elevate the look with silk or velvet for special occasions and parties. This versatile design is as delightful to sew as it is to wear.
If you would like to have a look at my “Juniper Dress” pattern with a side open yoke, click on the picture below:
The Butterfly- Back Dress Pattern for Girls
Materials Required
- Medium- weight cotton Fabric for the dress- requirements specified in the table-3 below.
- Sewing Notions.
- Fabric Marking Pen.
- KAM snaps or ordinary buttons (if you know how to sew buttonholes)- 2 sets.
- Bodice Pattern Template *Enter your e-mail address and click the subscribe button to download the template.
All the fabrics used here are of 44/ 45 inches width.
The seam allowance is 3/8-inch unless otherwise specified.
I suggest you read the entire pattern once before starting to get a general idea.
All seams are to be finished by zigzag or serger.
Size Chart
Table-1

Approximate Finished Measurements.
Table-2

Fabric Requirements.
Table-3

Measurements
**The dress is supposed to hit below the knee. Change the length of the skirt piece, if you would like it shorter or longer.
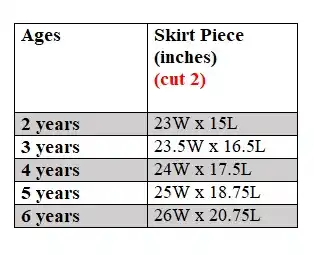
In the table below, “W” stands for the width and “L” stands for the length of the fabric piece to be cut.
Table-4
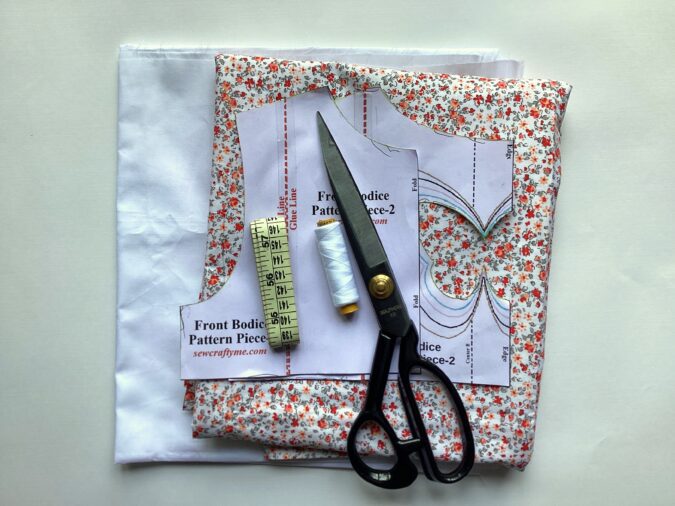
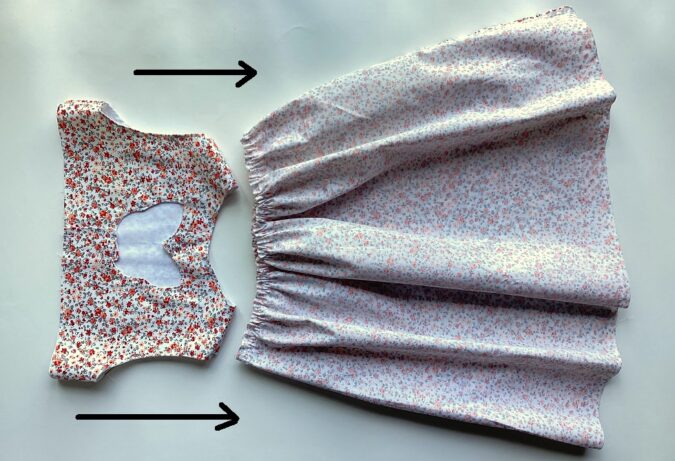
Gather the supplies. Cut the templates for the bodice front and bodice back from the attached PDF.
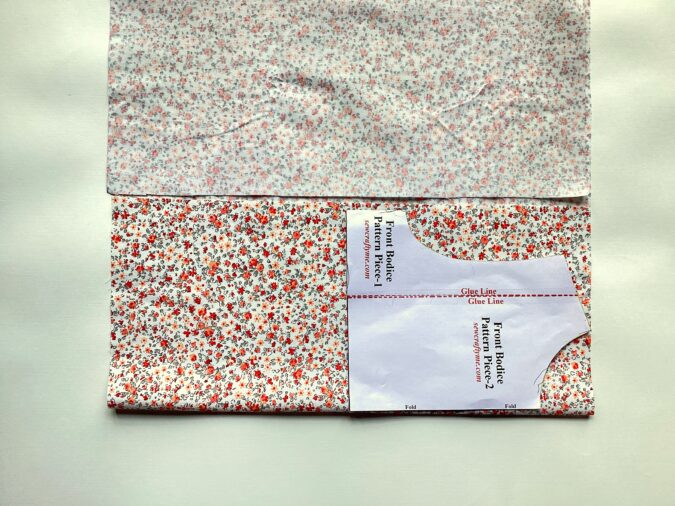
Take the dress fabric and the template for the front bodice. Fold the fabric to fit the width of the template and place the template on the fold. Mark around it and cut to get the front bodice piece. Repeat the steps to get the front lining.
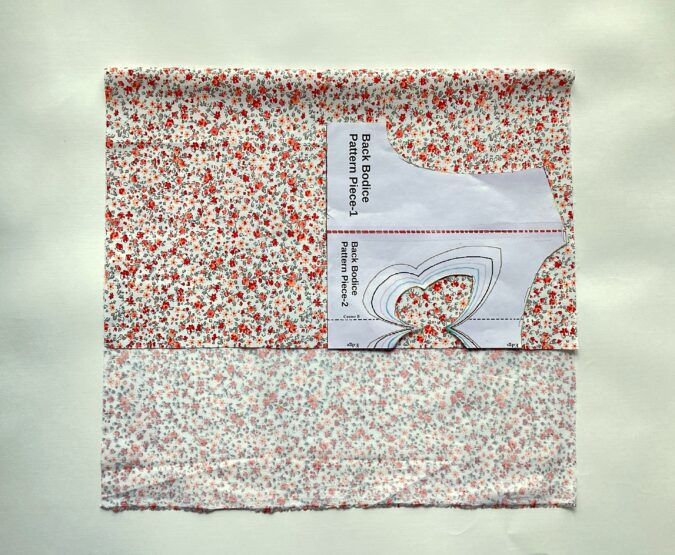
Let’s cut the back bodice. Here again, fold the fabric, but this time, place the template for the back bodice, along the edge of the fabric. Mark around it and cut to get two pieces for the back bodice (the back part of the dress is done in two pieces, for button opening). Repeat the steps to get the back lining pieces.
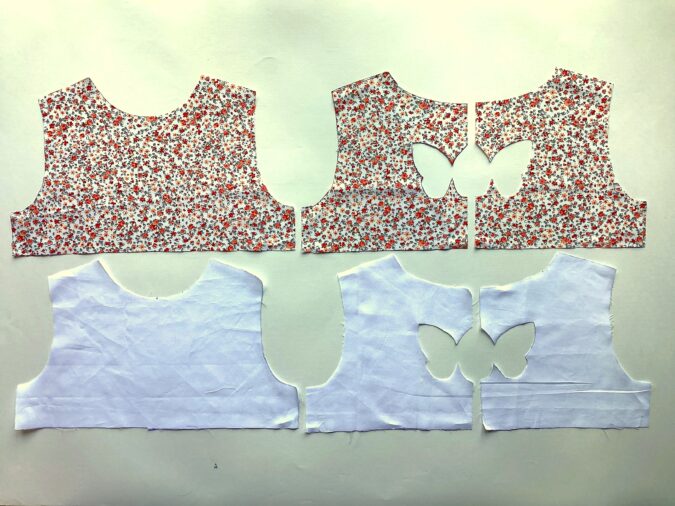
Your bodice-front, lining, bodice –back and lining pieces will look like the picture above.
Cut the skirt pieces referring to the table-4 above.
Sewing
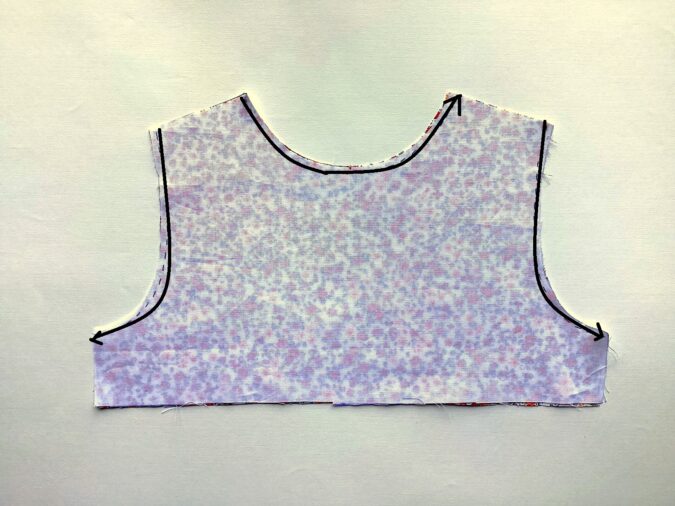
Layer the front bodice and lining pieces with the right sides together and aligning the edges. Sew along the neck and armholes.
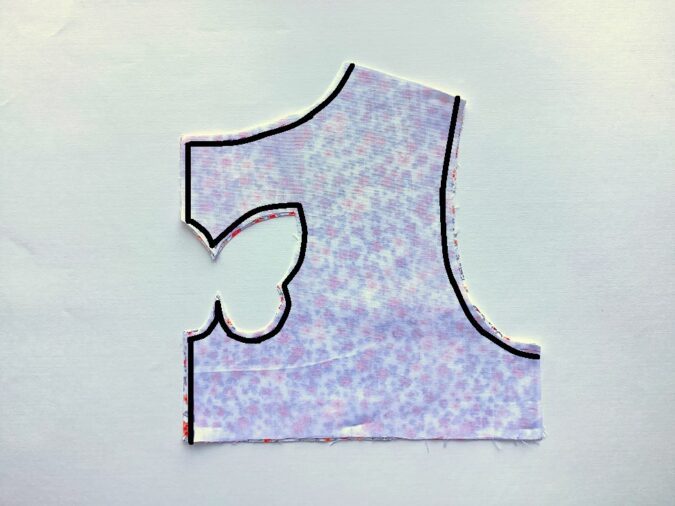
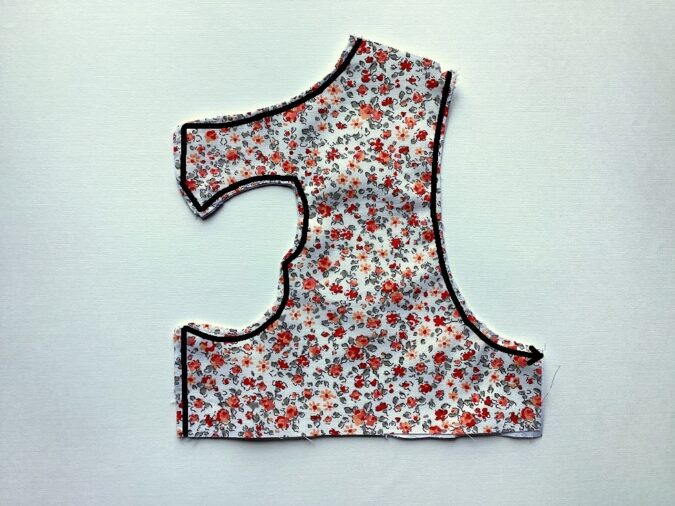
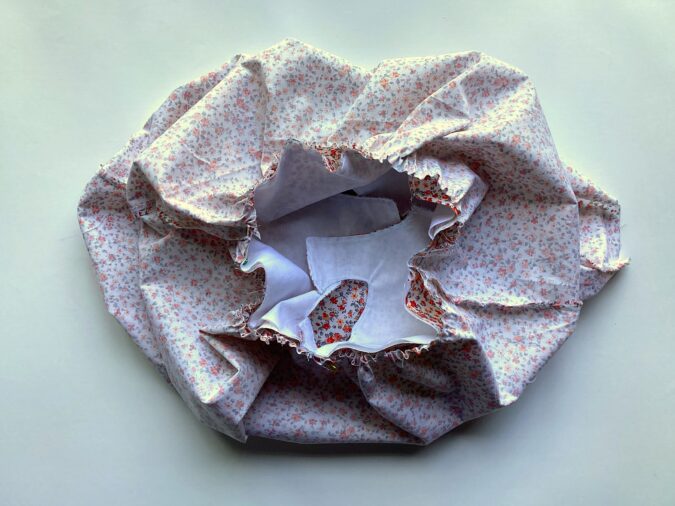
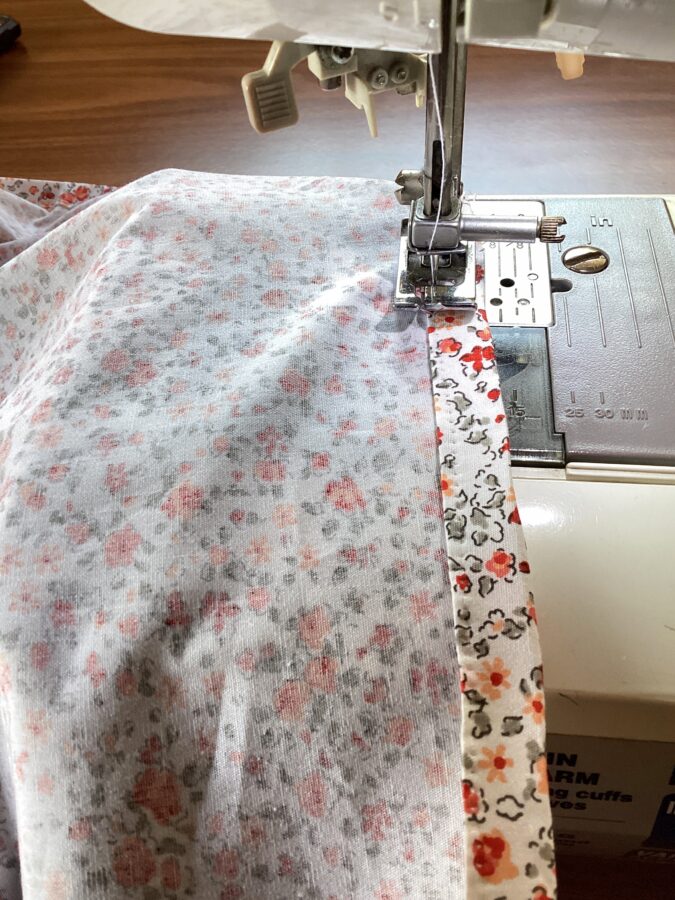
Next, take one back bodice piece and lining and layer them with the right sides together lining up the edges. Sew along the neck, armholes and center back (You will be sewing around the butterfly shaped opening too as marked in the picture.). Sew carefully going around the curves so that you get a neat and clean butterfly.
Repeat on the other back bodice and lining pieces.
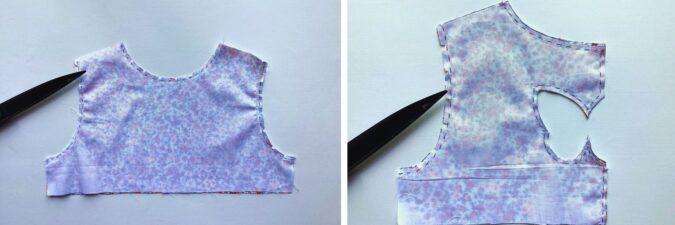
Clip the edges and cut the corners.
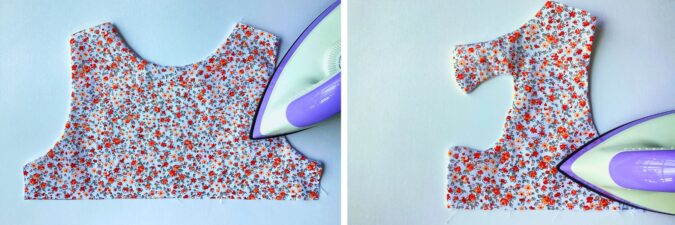
Turn over to the right side, poke the corners out with the help of a wooden dowel and press taut for the front and back bodices.
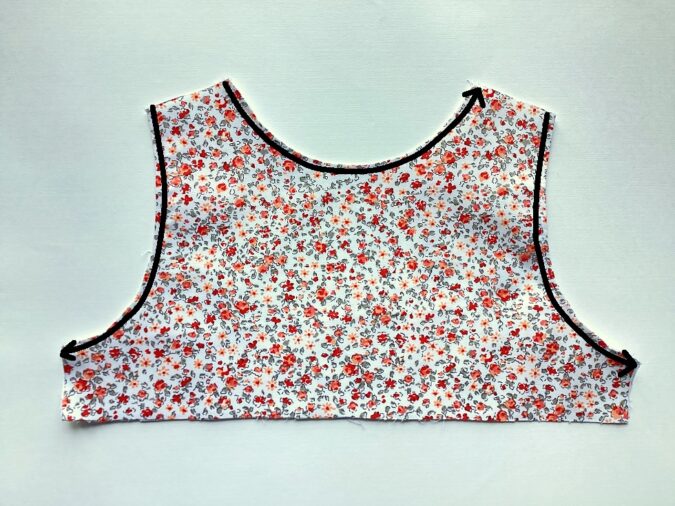
Topstitch along the neck and armhole for the front bodice.
For the back bodice, topstitch around the neck armhole and over the center back, again carefully going around the butterfly.
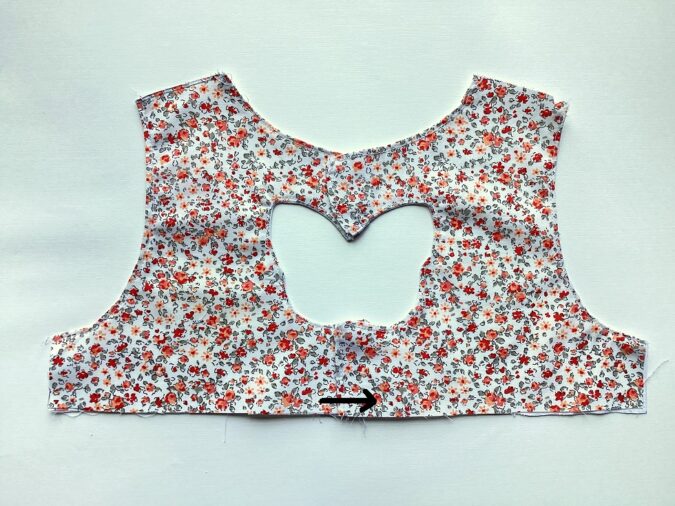
Keep the two back bodice pieces with the button edge overlapping, making sure that you get a perfect butterfly shape. Sew the overlapping edges shut, 0.25- inch above the lower edge.
Let’s sew the side seams of the bodice shut.
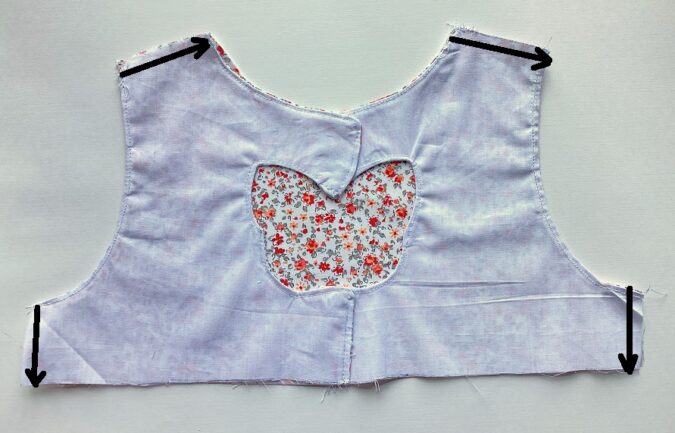
Keep the front and back bodice layered with the right sides together, lining up the shoulders, armholes and side seams. Sew the shoulders and side seams shut.
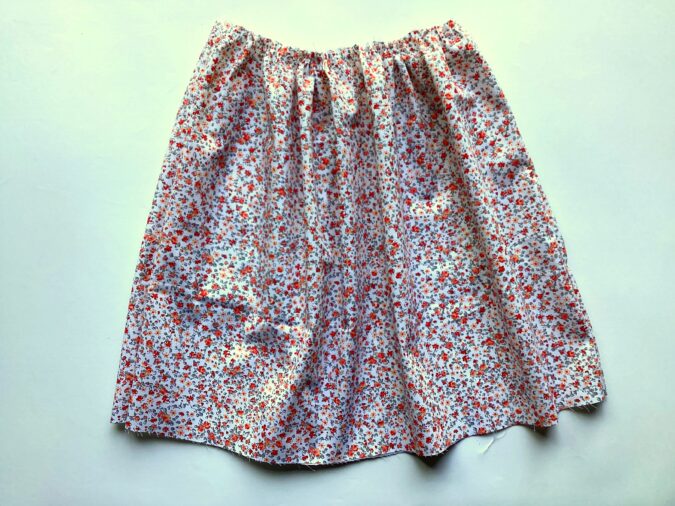
Our bodice is done. We move on to the skirt.
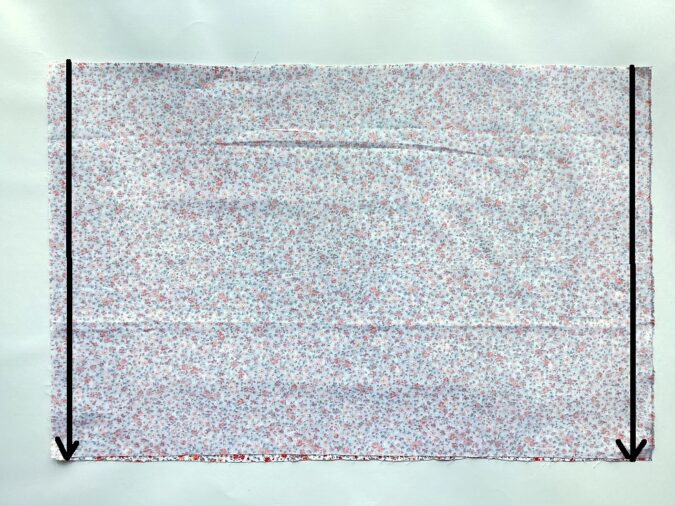
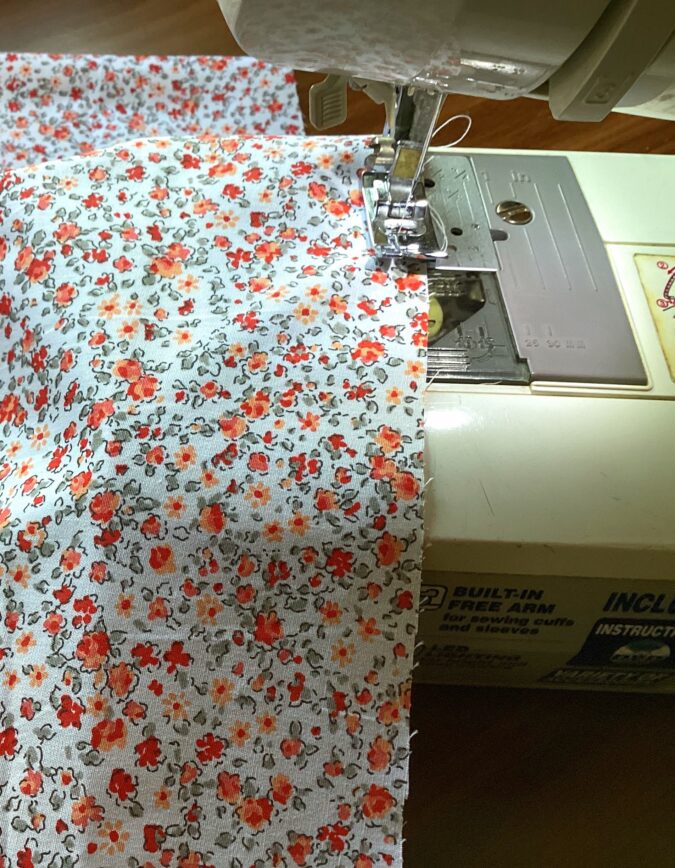
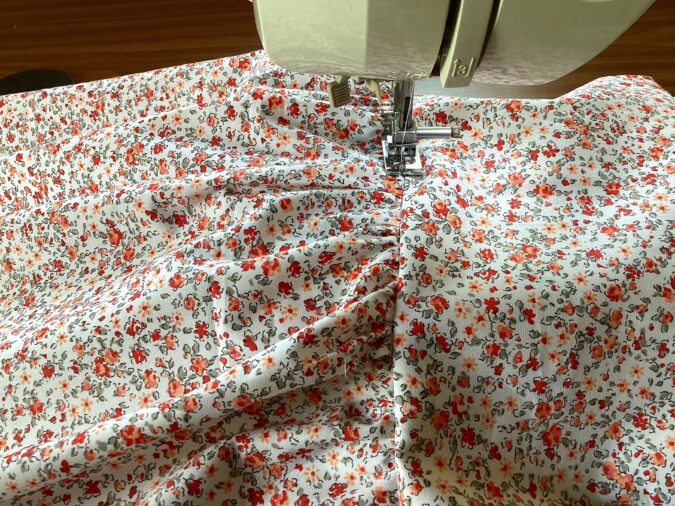
Keep the two skirt pieces layered, with the right sides together and the edges aligning. Sew the side seams shut on both sides.
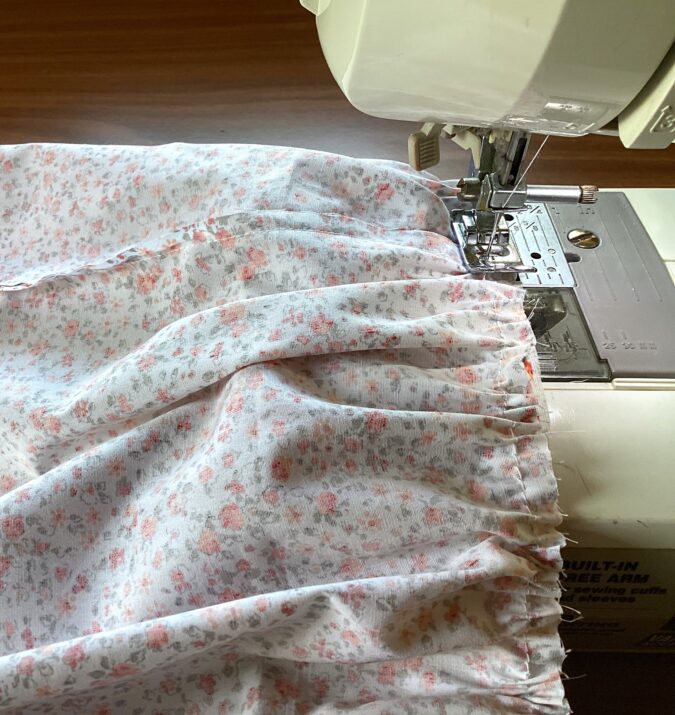
Next, we need to gather the skirt. Turn the upper thread tension of your machine to zero and stitch length to the longest to get a basting stitch.
Sew a basting stitch along the upper edge of the skirt.
Pull the thread from the bobbin and gather it. Adjust the gathering to make it uniform and to fit the lower edge of the bodice.
Let’s attach the skirt pieces to the bodice.
Keep the skirt on its wrong side. Keep the bodice on its right side, with its shoulders facing the skirt and slide the bodice into the skirt.
Align the ruffled edge of the skirt along the lower edge of the bodice, with the right sides together and pin all along. *Note: take care to keep the sides seams of the bodice and skirt lined up while pinning.
Turn the machine settings back to normal.
Sew the skirt to the bodice, removing the pins as you go. Zigag to prevent fraying.
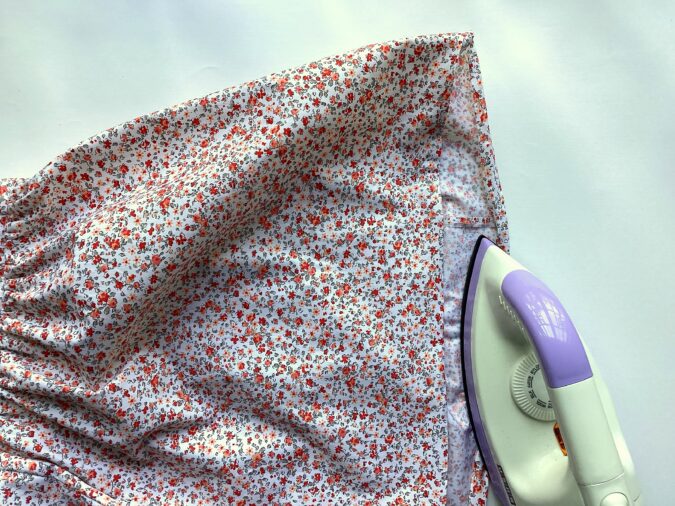
Turn over to the right side, fold the waist seam up towards the bodice and topstitch along the waist seam to make it neat and crisp.
Next, we need to hem the lower edge of the dress.
Fold the lower edge of the dress by 1/2-inch twice towards the wrong side and press.
Sew down the hem along the edge of the fold.
Attach the KAM snaps, cut off the hanging threads and our dress is done!
Candycrush
Wednesday 8th of July 2026
Hi Such a beautiful pattern! Does the seam allowance is included in the parttern?
Surayya
Sunday 12th of July 2026
Thank you! The seam allowance is included in the pattern.
Vickie Lee
Friday 26th of June 2026
I would love the pattern please
Wendy Meyer
Friday 20th of March 2026
I would suggest a stabilizing interfacing to strengthen the edges of the butterfly and the Kam snaps.
Debbie Boswell
Friday 20th of March 2026
Pattern