Ready to sew a girl’s dress with a different yoke style? What if the dress had a button opening along the sides instead of the center? Sounds interesting, right? Well, you can definitely give it a try—especially if you’ve sewn my classic style yokes before. This new design adds a fun twist while keeping the construction simple and doable.


With the included bodice template, the tutorial takes you through each step to sew the yoke clearly and easily. The side button opening gives the dress a unique look, and you’ll be surprised at how effortless it is to sew. It’s a great project if you’re looking to try something new without stepping too far out of your comfort zone.


And the best part? This pattern comes with lots of options to customize it just the way you like! Add a ruffle or lace along the neckline and button edge, sew a cute trim along the hem, or even mix and match different fabrics to create a designer-style dress your little princess will love. The possibilities are endless—just let your creativity flow!
If you would like to sew a simple but elegant classic style dress pattern with sleeve option for girls, click on the picture below:
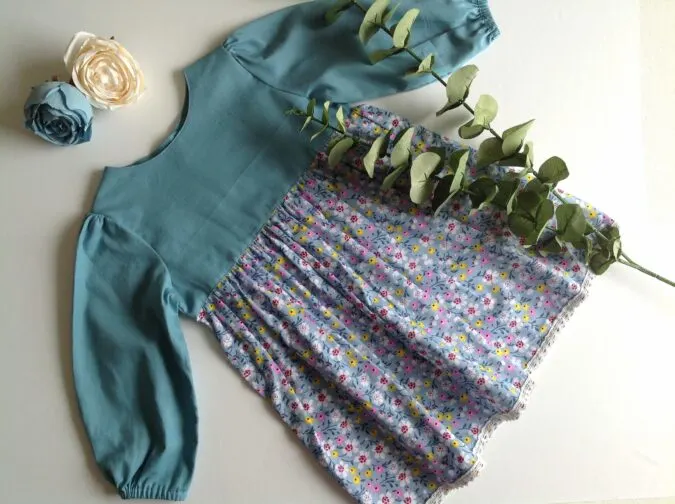
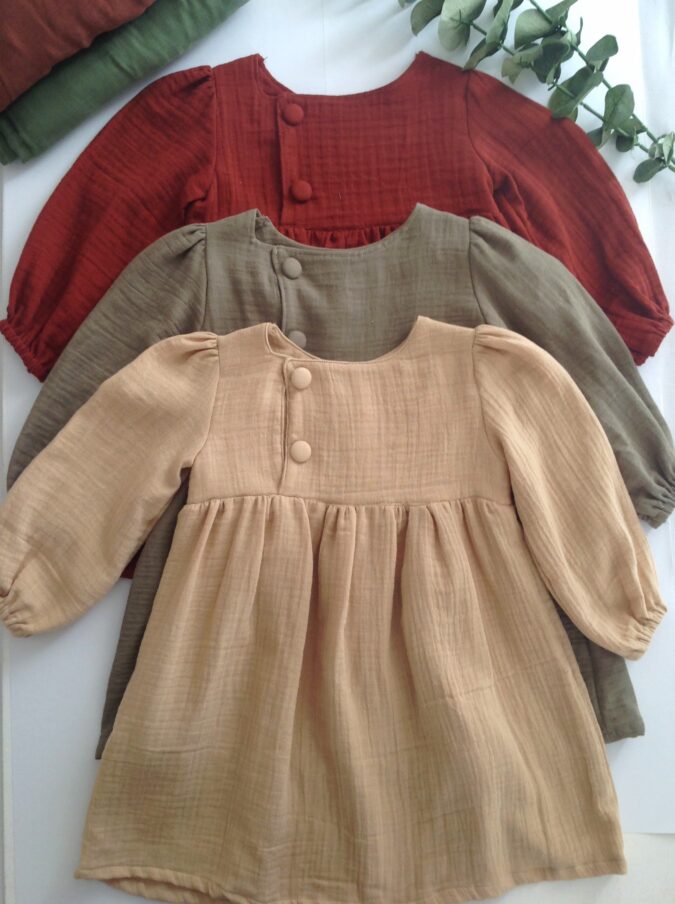
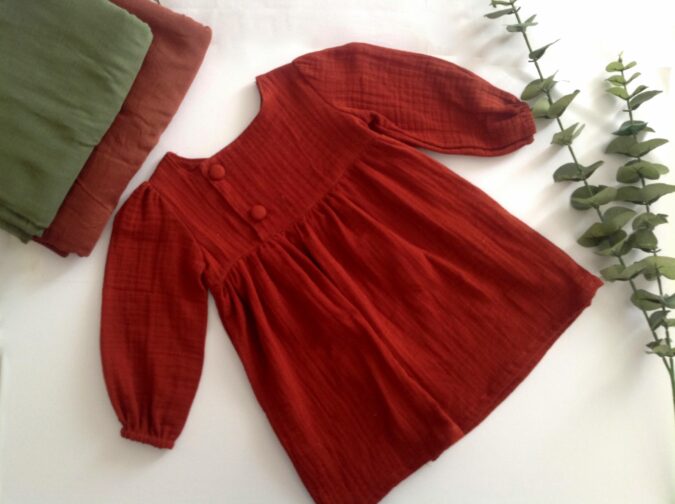
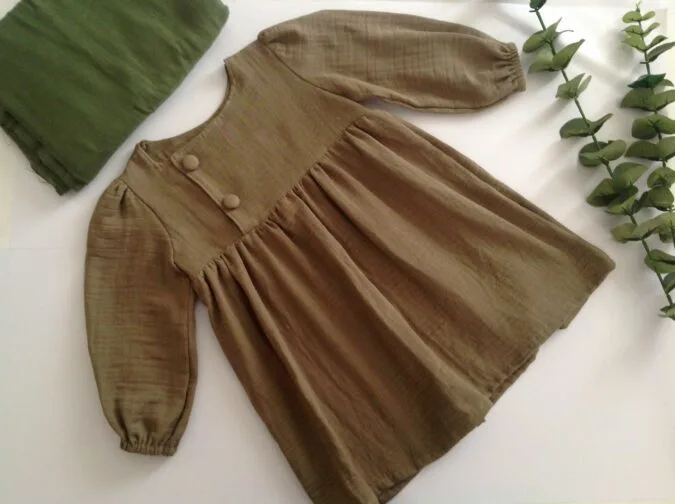
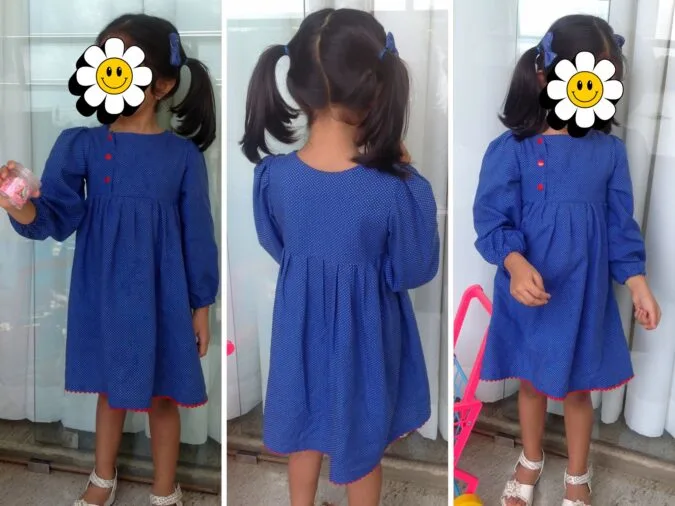
Free Side- Open Dress Pattern for Girls- The Juniper Dress
Materials Required:
1) Medium weight cotton fabric for the bodice, skirt and sleeves- requirement specified in the table- 2 below.
2) 3 pairs of KAM snaps in matching color (or if you know how to sew buttonholes, you may use ordinary buttons too.
3) Sewing Notions.
4) 3/8- inch elastic- requirement specified in the table-3 below.
5) Pattern pieces at the end of the PDF. **Enter your email address and click the subscribe button in the blue box below to download the template.
I suggest you read the entire pattern once before starting to get a general idea
All the fabrics used here are of 44/45 inches width.
The fabrics shown here are only for illustration purposes and as such may vary from the original.
The seam allowance is 3/8 -inch unless otherwise specified.
Size Chart
Table-1

Approximate Finished Measurements.
Table-2

Material Requirements
Table-3

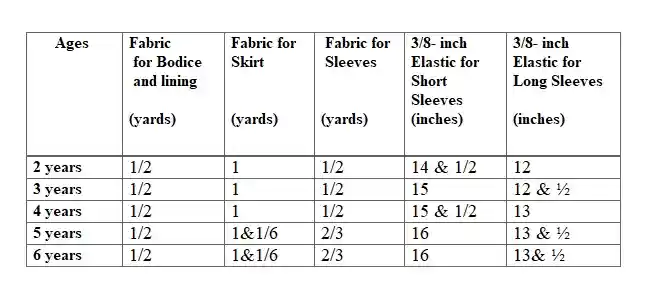
Measurements

Table-4
Measurements
**The dress is supposed to hit below the knee. Change the length of the skirt piece, if you would like it shorter or longer.
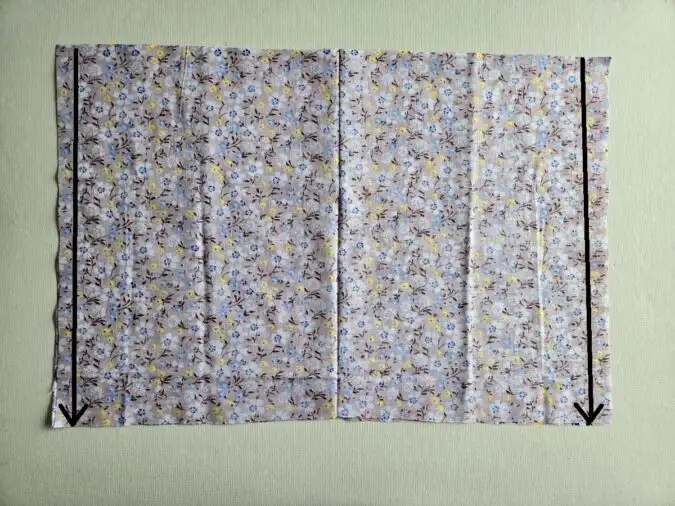
In the table below, “W” stands for the width and “L” stands for the length of the fabric piece to be cut.
Table-4

Sewing

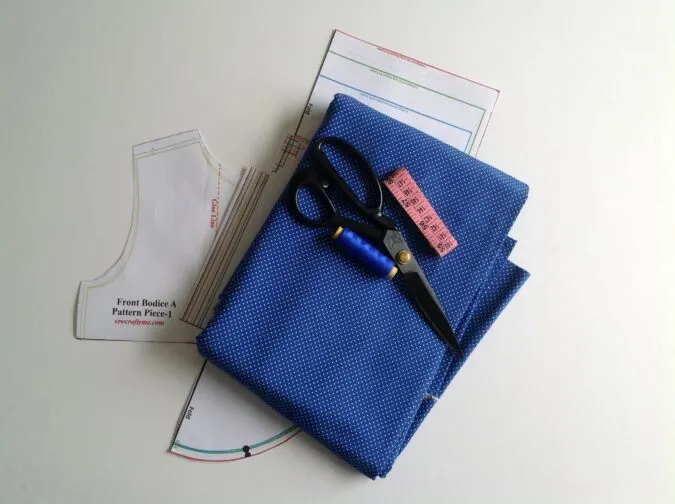
Gather the supplies.

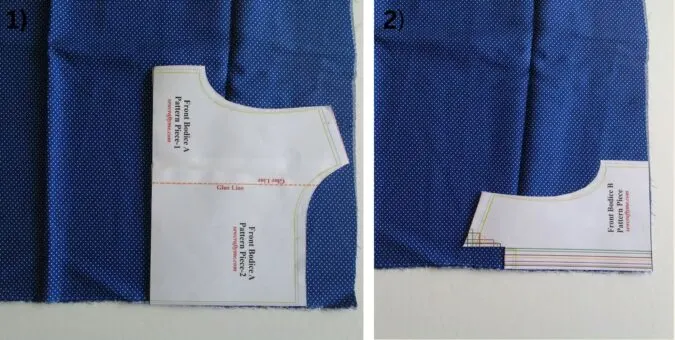
1) Take the pattern template for the front bodice A (the front bodice consists of two pieces: a longer piece A and a shorter piece B). Fold the fabric to fit the width of the template and place the template along the edge. Trace around it and cut to get the front bodice piece A and its lining.
2) Repeat the same steps to cut front bodice piece B and its lining.

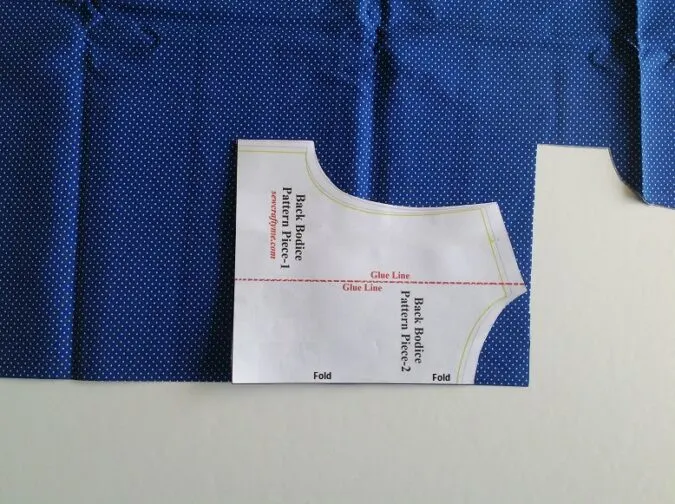
Next, cut the back pattern template and keep it along the Fold of the folded fabric as shown in the picture. Mark and cut to get the back bodice
Repeat the steps to get one more of the same piece (for the back lining).

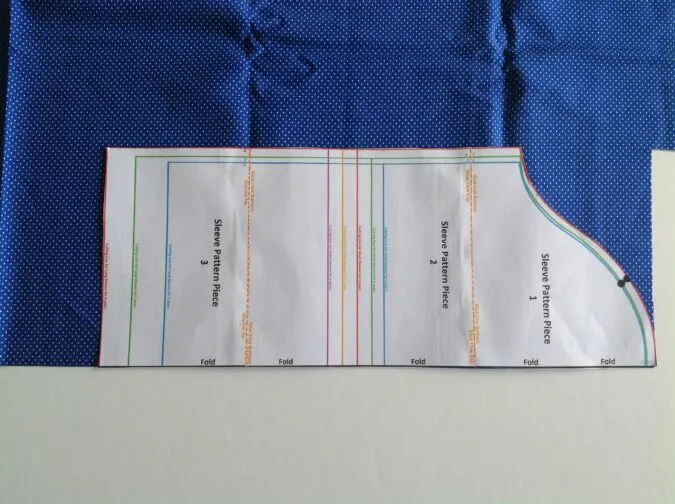
Also cut your two sleeves using the respective templates (** Transfer the marks for the gathers on to the sleeve).

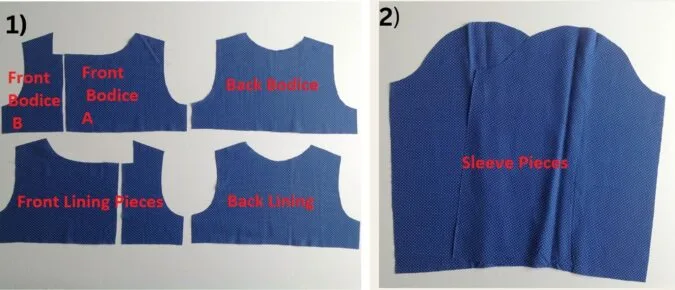
You will get your front bodice pieces, front lining pieces, back bodice piece, back lining and sleeve pieces like the above.

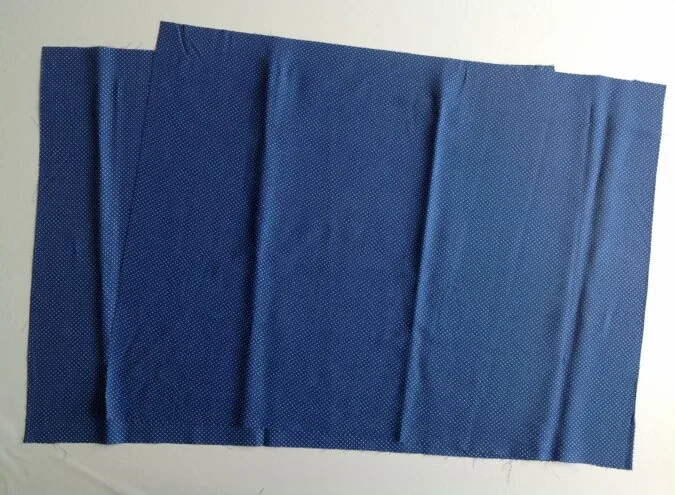
Cut your skirt pieces, referring to table-4 above.
Let’s start sewing.

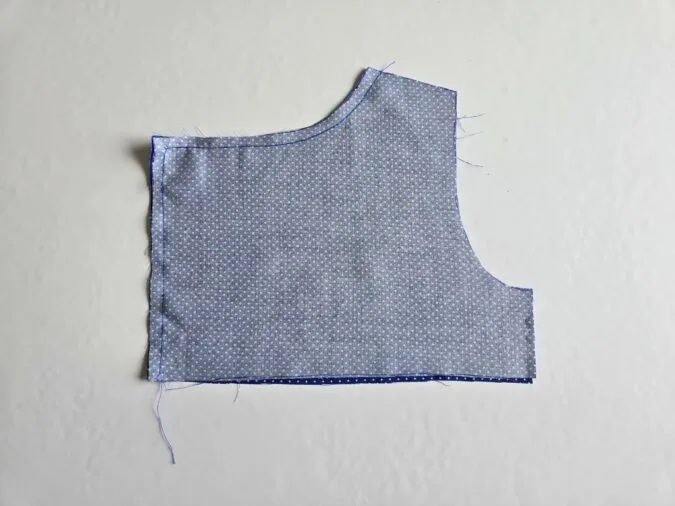
Take the front bodice piece A and the lining piece, layer them with the right sides together, aligning the edges and sew along the neck and button edge, leaving a 3/8-inch seam.

Similarly, take the front bodice piece B and lining, layer them with the right sides together and sew along the neck and button edge as shown above.

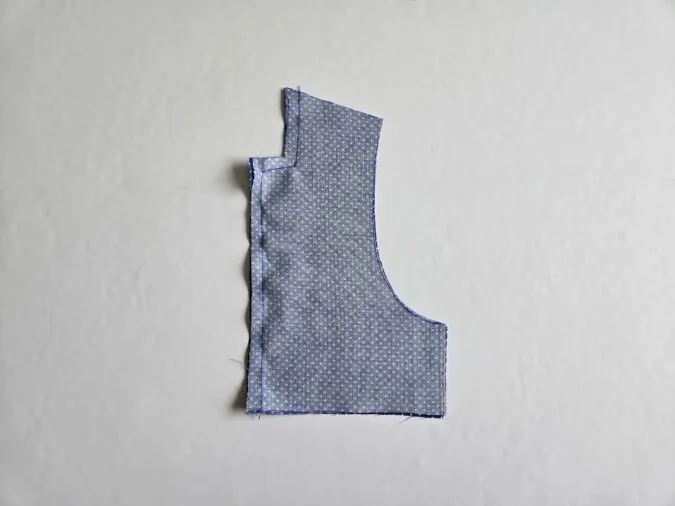
Next, layer the back bodice and lining pieces and sew around the neck to join.

Clip the curves and cut the corners for all the pieces to reduce the bulk in the seam.

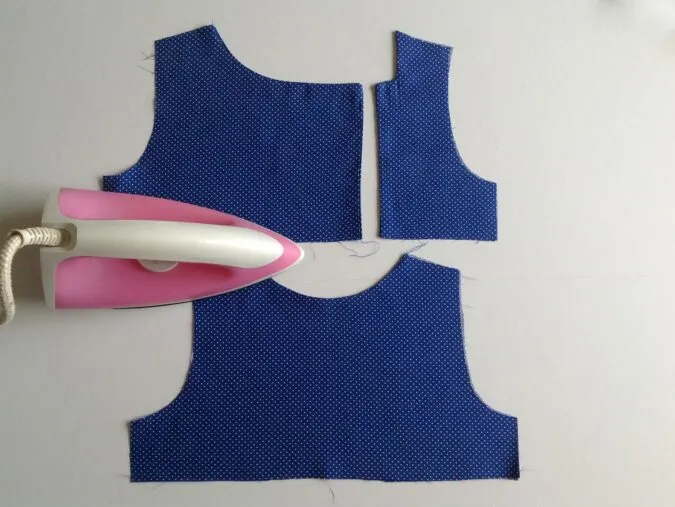
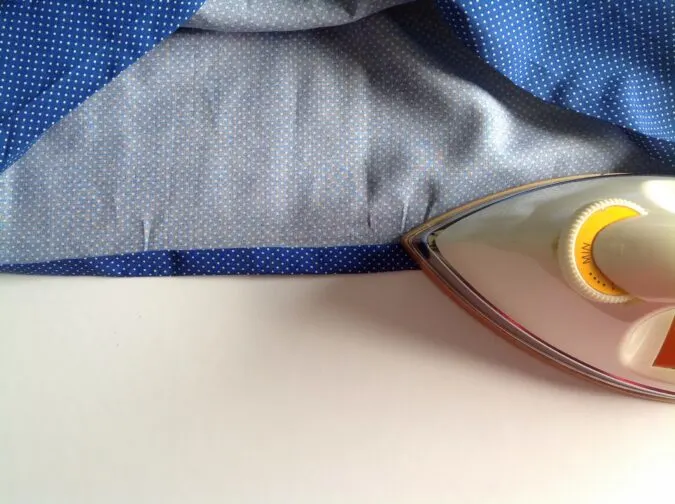
Turn over to the right side and press flat.

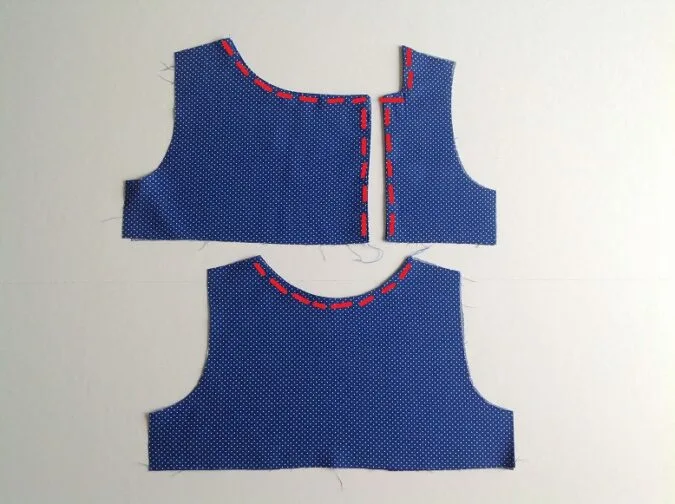
Topstitch around the neck and button edge for the front pieces and along the neck for the back piece to make it clean and crisp.
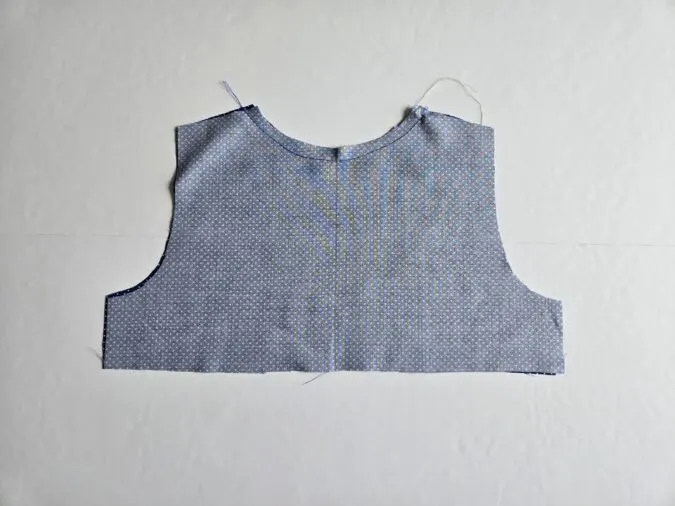
Next, we join the front and back bodice pieces together.

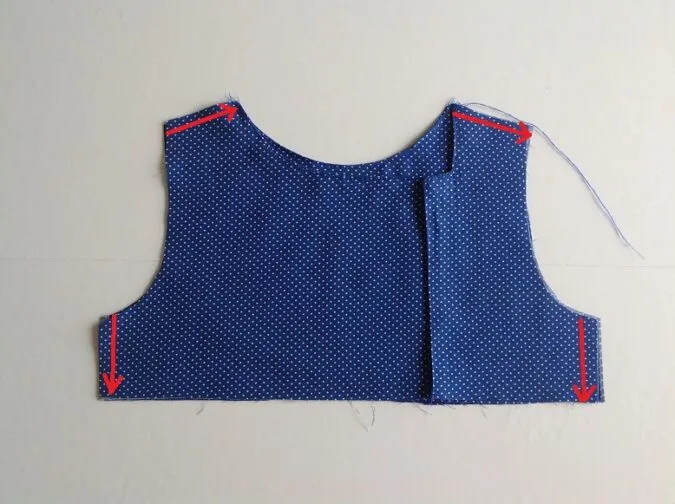
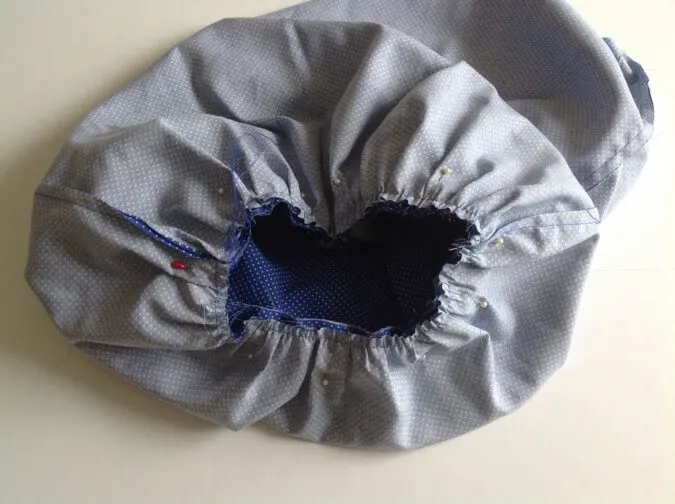
Layer the front and back bodices, with the right sides together, lining up the side seams and shoulders (you will notice that the front pieces overlap along the sides for button opening). Sew the side seams and the shoulders shut.

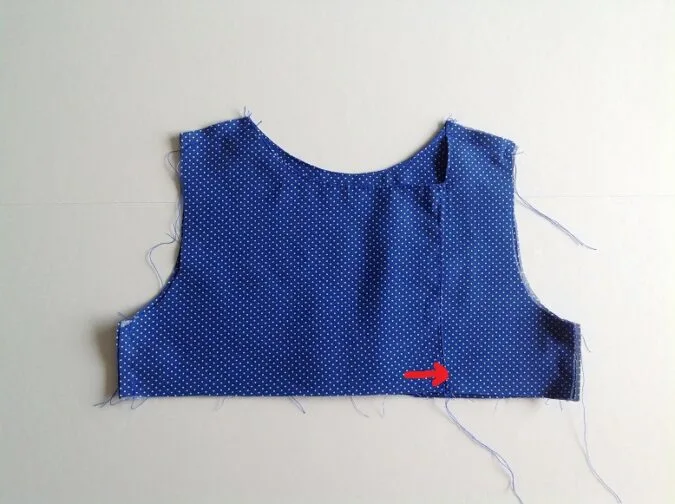
Next, sew the overlapping part of the front bodice shut, 3/8-inch from the lower edge. ***Make sure to keep the back bodice away while sewing.
Let’s finish the sleeves. For that we first finish the hem that doubles as a casing for the sleeve elastic.

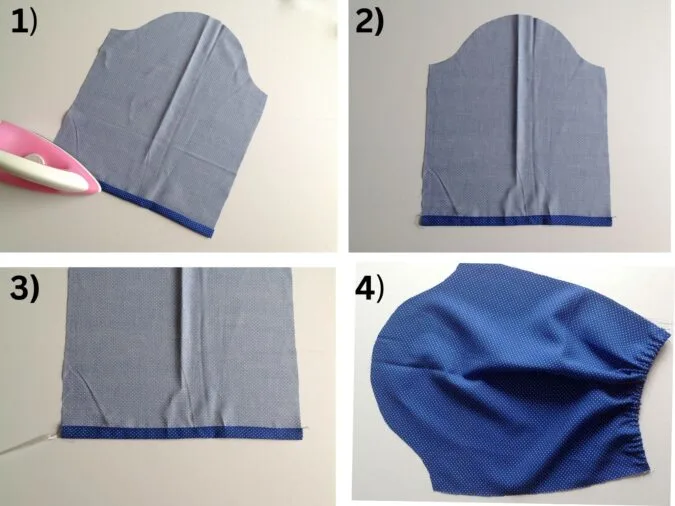
1) Fold the straight edge of the sleeve pieces by 3/8- inch and press. Fold again by ½- inch and press once more.
2) Sew the hem along the edge of the fold.
3) Take the required length of the elastic, referring to the table- 3 above, cut it into 2 equal pieces and insert one of the pieces through the casing formed, using a safety pin.
4) Secure the ends of the elastic by sewing back and forth a few times. Repeat on the other sleeve.
Let’s gather the sleeve.
Turn the stitch length of your machine to the longest and the upper thread tension to zero to get a basting stitch.

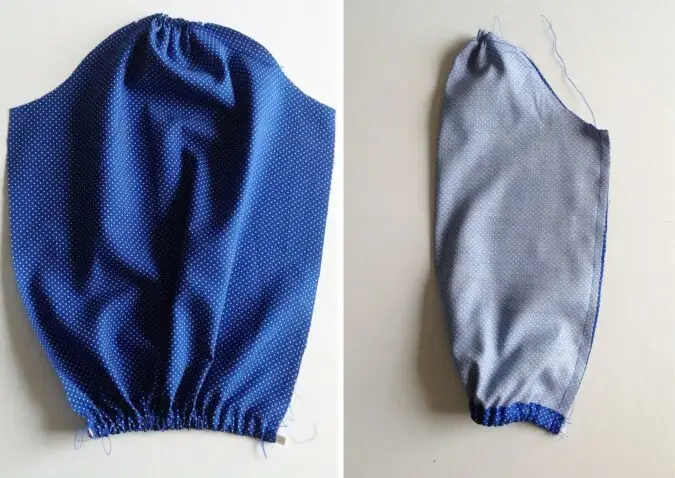
1) Sew a basting stitch between the points marked earlier. Pull the thread from the bobbin gently to gather it.
2)Fold the sleeve over, with the right sides together and the edges aligning. Sew it shut along the side edge. Repeat with the other sleeve.
Let’s attach the sleeves to the bodice.

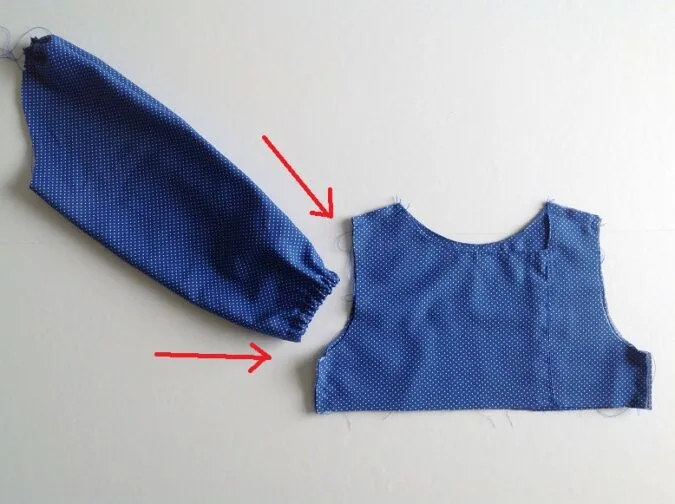
Place the sleeve on its right side and the bodice with the lining facing out. Keep the lower edge of the sleeve facing the armhole and slide the sleeve into the armhole.

Start lining up the edge of the sleeve with the armhole. Adjust the gathering in the sleeve such that it fits the armhole and the gathers are uniform on either side of the shoulder seam. Pin the sleeve along the armhole.
Bring the machine settings back to normal and sew them together, removing the pins as you go.
Repeat the steps on the other armhole with the other sleeve.
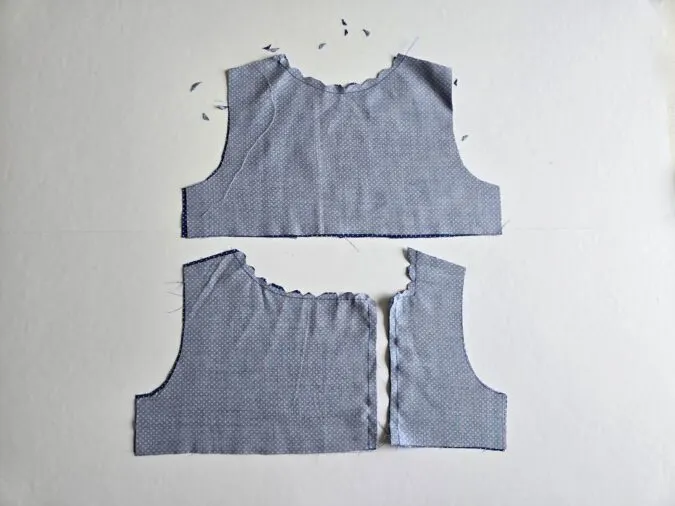
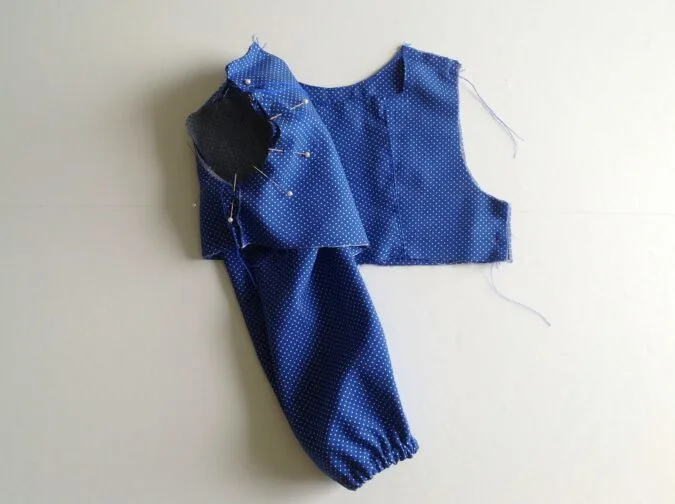
Our bodice is almost done. We move on to the skirt part.
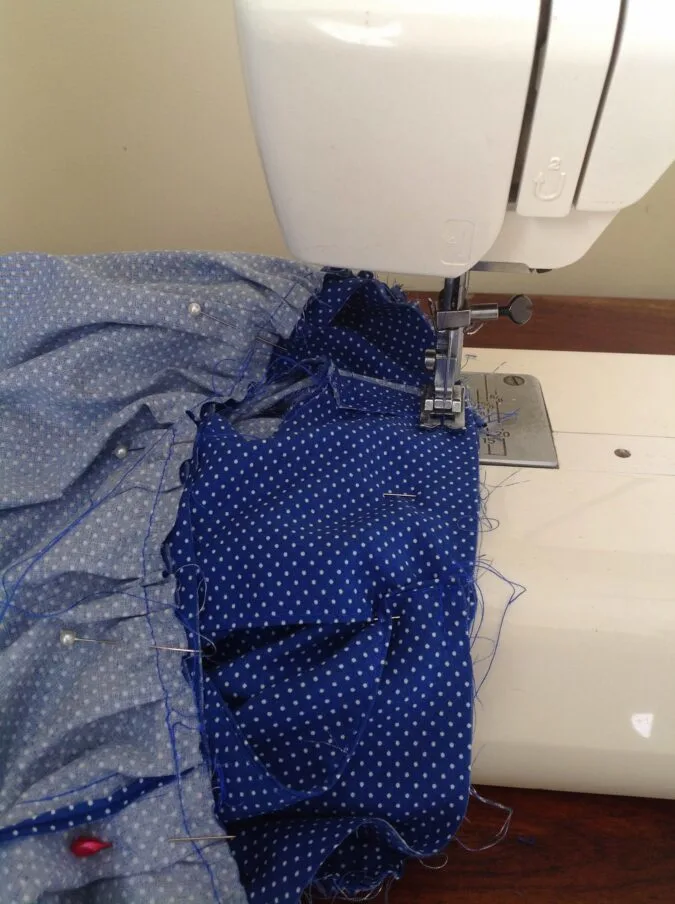
Take the two pieces required for the skirt. Keep the pieces overlapping with the right sides together and sew the side seams shut (picture for illustration purposes).
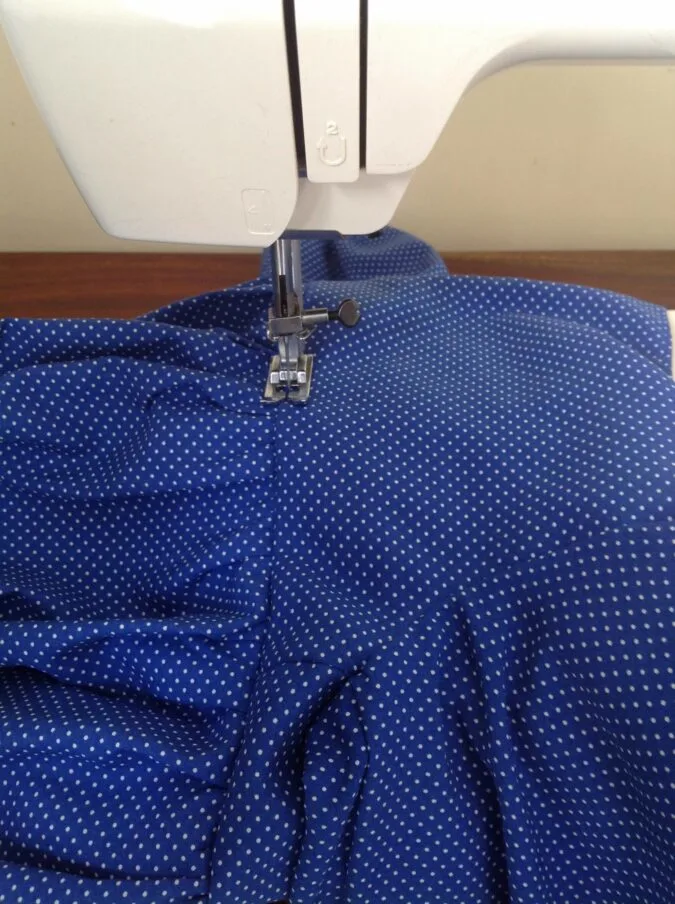
Sew a basting stitch, 3/8-inch away from the top edge of the skirt. Leave a long tail of thread, of about 5 to 6 inches long to pull and gather the skirt (picture for illustration purposes).

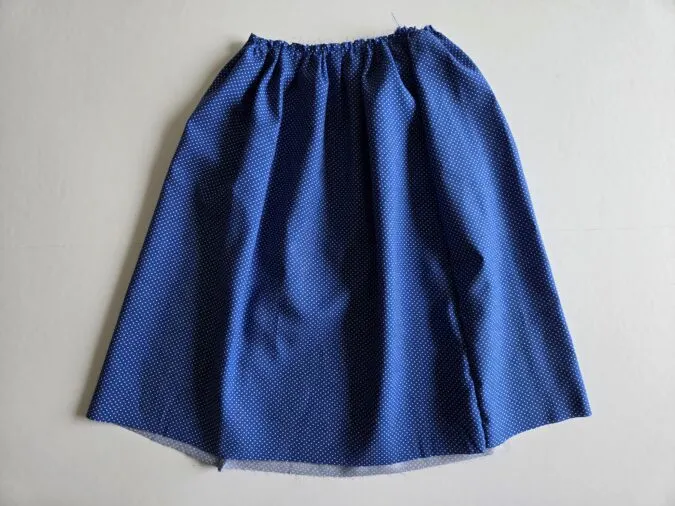
Pull the thread from the bobbin gently to gather the skirt. Adjust the gathering to make it uniform and to match it with the lower edge of the bodice.
Let’s attach the bodice to the skirt.

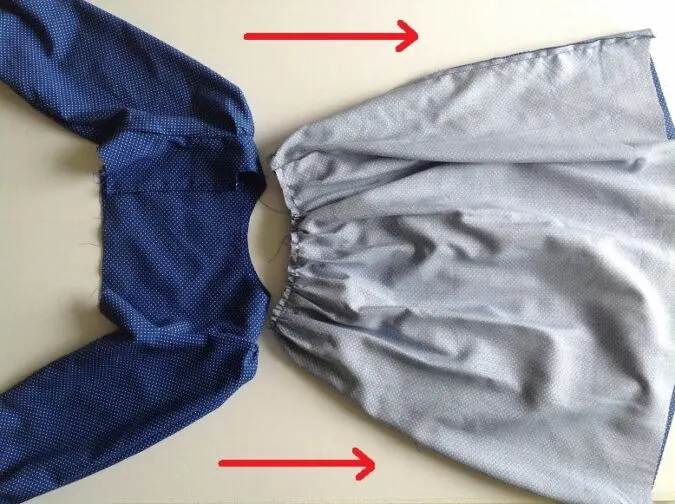
Keep the bodice on its right side and the skirt on its wrong side, with its gathered edge, facing the top edge of the bodice and slide the bodice into the skirt.

Align the raw edges of the two together and pin all around, making sure that the side seams are in line.

Turn the machine settings back to normal and sew the skirt to the bodice. Zigzag to prevent fraying.

Turn over to the right side and topstitch along the seam line of the skirt and bodice to make it look neat and crisp.
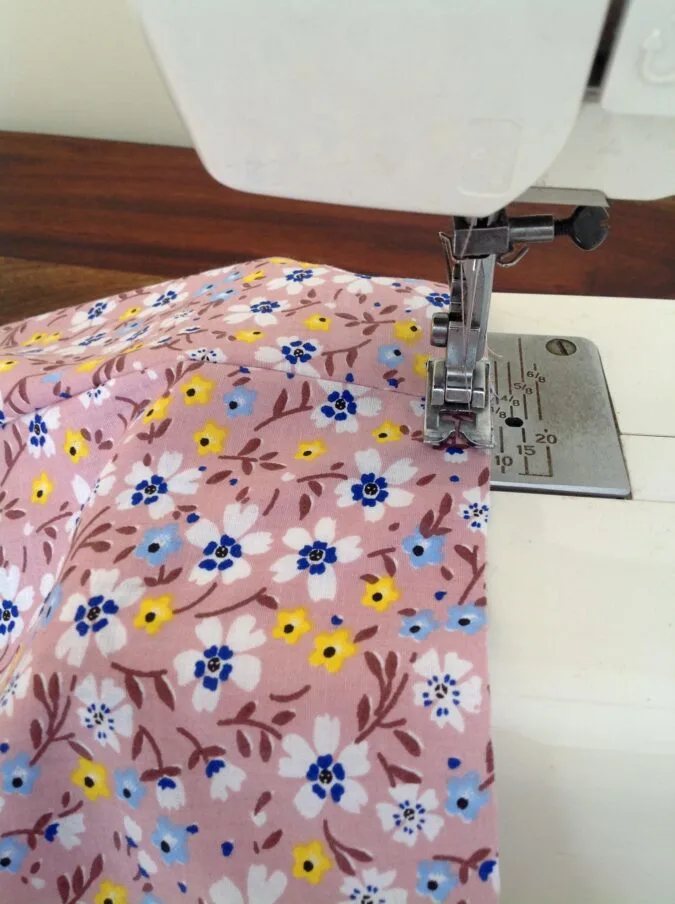
Let’s hem the lower edge of the dress.

Fold the lower edge of the dress by 1/2- inch twice towards the wrong side and press.

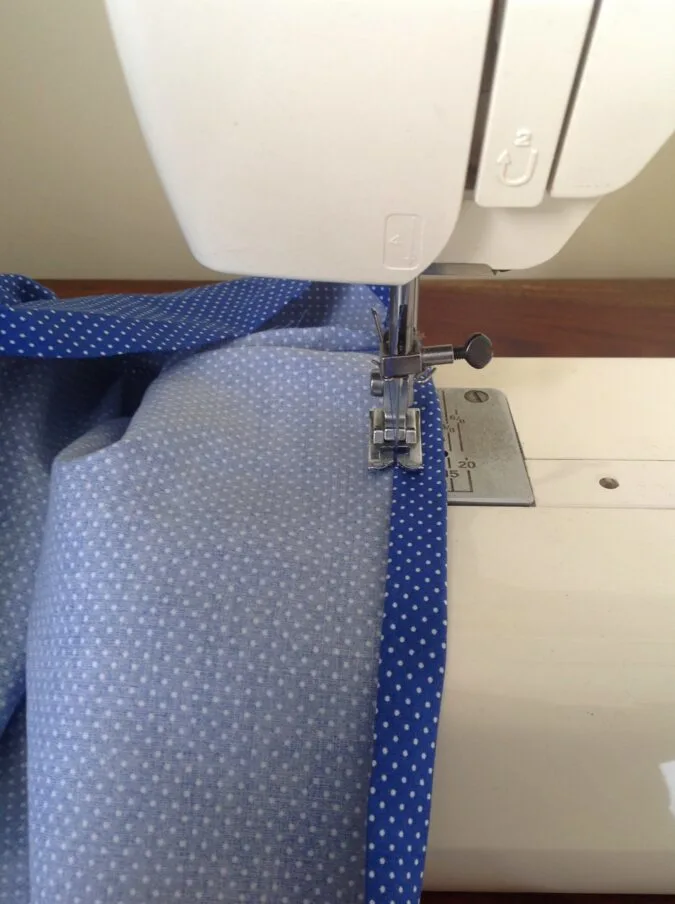
Sew the hem down along the edge of the fold.
Let’s attach the KAM snaps.

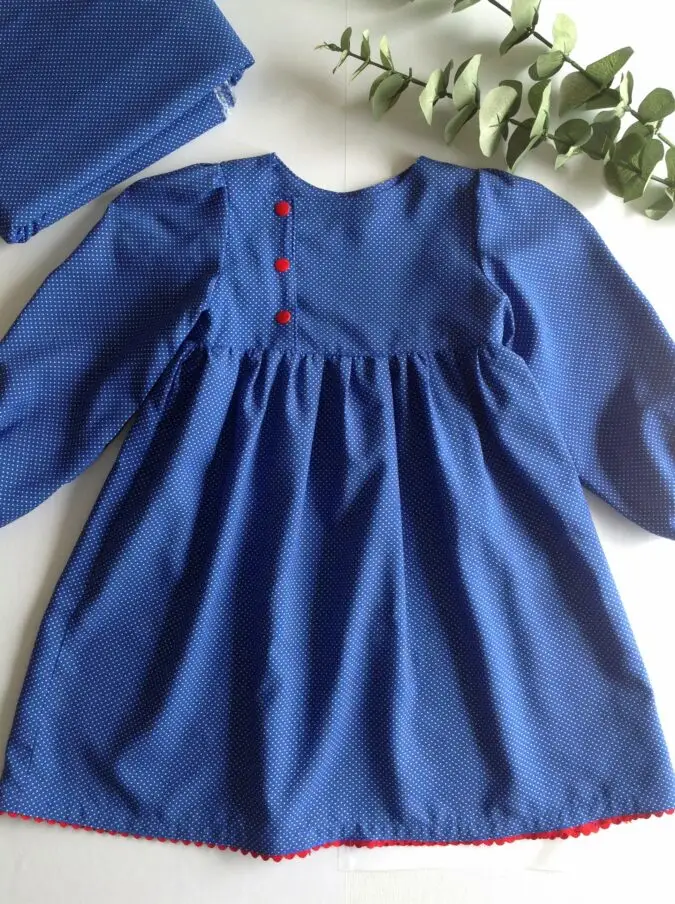
Starting from the top edge, make markings at 2-inches gap from each other, on the right side of one of the front pieces and attach the KAM snaps. Make markings with a 2-inch gap on the wrong side of the other front piece also and attach the complimentary KAM snaps (picture for illustration purpose).
**I added an optional trim along the hemline for a more girly look!
Cut off the hanging thread and our dress is done!
Find the webstory of the pattern here ; sew a Free Side-Open Girls’ Dress Pattern: The Juniper Dress
Pin it for later here,
Jackie
Saturday 7th of February 2026
Is the lining supposed to be same fabric? And does this take the place of needing interfacing?
Surayya
Wednesday 15th of April 2026
You may use the same fabric or another cotton fabric, such as cambric or poplin, in the same color. I have not used interfacing, but if you would like the button edges to be sturdier, you can iron a 2-inch strip of interfacing along the button edges.
Simone
Saturday 6th of December 2025
Would sure love to get this pattern for my girls. Looking for the link…
Surayya
Wednesday 15th of April 2026
Please enter your email address and click the Subscribe button in the blue box provided under the "materials required section" to download the template. Kindly wait 2–3 minutes for the download window to appear after subscribing. You may read the pattern instructions online.
Monika
Saturday 4th of October 2025
Has anyone actually been able to access the template for this dress after giving their email address in the blue box? There seems to be nothing but several things that say, "click me" to download. Wondering if this is legitimate?
Ann
Thursday 8th of January 2026
@Surayya, Thank you so much for this free pattern! I also downloaded the tiered dress, and have a question about both…there isn’t a “bottom line” on the bodice pieces. Did my printer cut it off on both patterns? Or, do I just draw a line straight across where the sides end? If so, then the only difference in sizing would be at the shoulder seam and the armhole. I hope this question makes sense. Thanks again!
Surayya
Sunday 5th of October 2025
Please note that sometimes when a post or free pattern goes viral, there can be a brief delay or hiccup in the download link delivery — especially if many people are trying to access it at once. The email form is legitimate, and you should be able to download the template directly, shortly after subscribing.
Stacey Olivarez
Sunday 7th of September 2025
What kind of fabric did you use for the red, green and tan dresses?
Stacey Olivarez
Friday 12th of September 2025
@Surayya,
Surayya
Monday 8th of September 2025
I used muslin fabric for the three dresses!
Pat
Saturday 6th of September 2025
I don't see where the pattern is.
Surayya
Saturday 6th of September 2025
You will need to enter your email Id and click the subscribe button in the blue box provided under the "materials required" section of the tutorial.