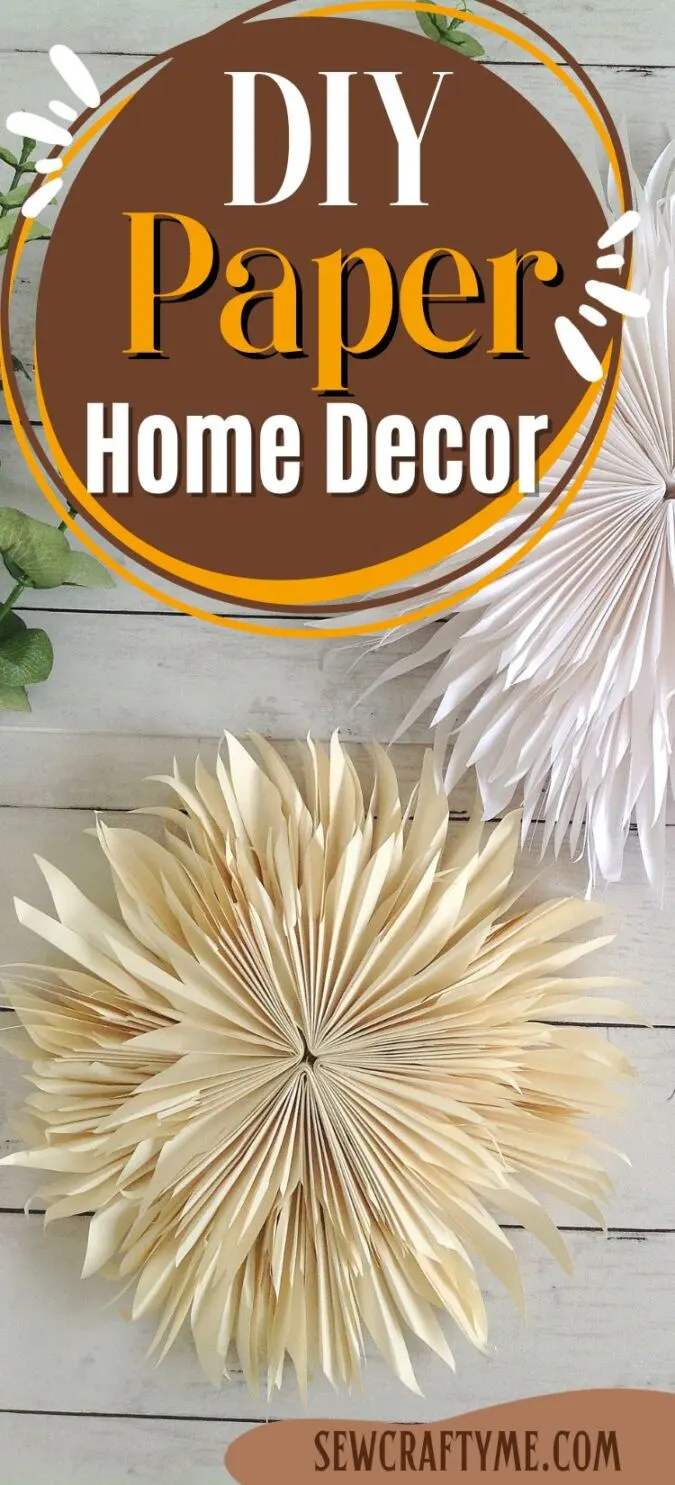
Transform your living space into a cozy autumn retreat with our easy and budget-friendly DIY home decor project: Paper Feather Wall Art. This exquisite piece of paper craft home decor captures the essence of fall and pays homage to the iconic juju hat.

Crafting this stunning masterpiece is a breeze, even for beginners. Gather your supplies, including colorful sheets of paper, scissors, and glue, and let your creativity soar. Follow our step-by-step instructions to create delicate paper feathers that mimic the texture and depth of traditional juju hats. Arrange them in a circular formation to form a mesmerizing focal point for any room.

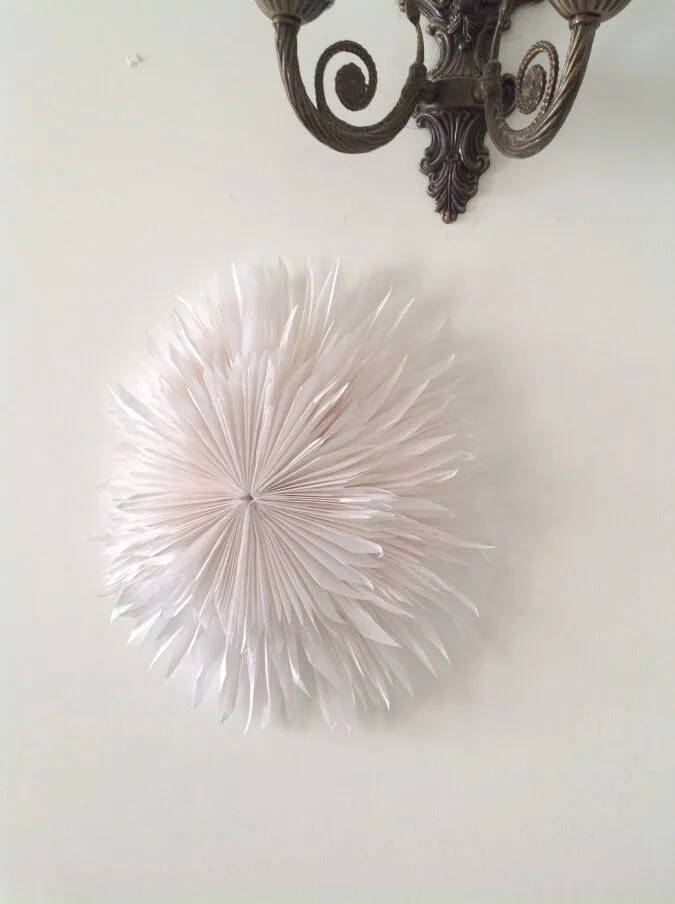
Not only does this project infuse your home with the warm, earthy tones of autumn, but it also adds a touch of artistry and nature-inspired beauty. Whether you hang it in your living room, bedroom, or entryway, your guests will be captivated by this unique DIY home decor piece.

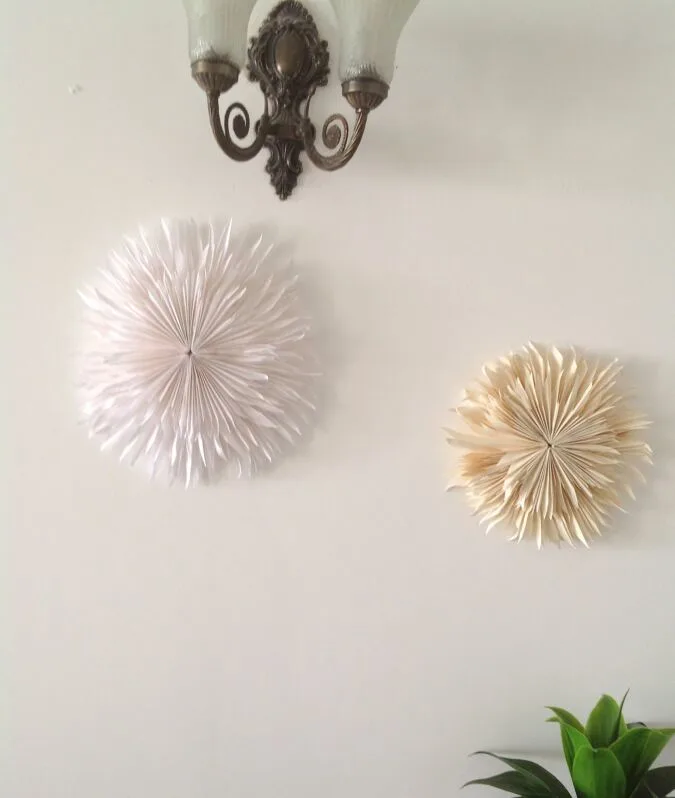
Budget-friendly and customizable, this Paper Feather Wall Art DIY allows you to experiment with different colors and sizes to suit your personal style. As the leaves outside change, so can your interior decor, making this an ideal choice for fall home transformations. Enjoy the satisfaction of crafting something beautiful and seasonally fitting, all while staying within your budget.
Paper Feather Wall Art DIY
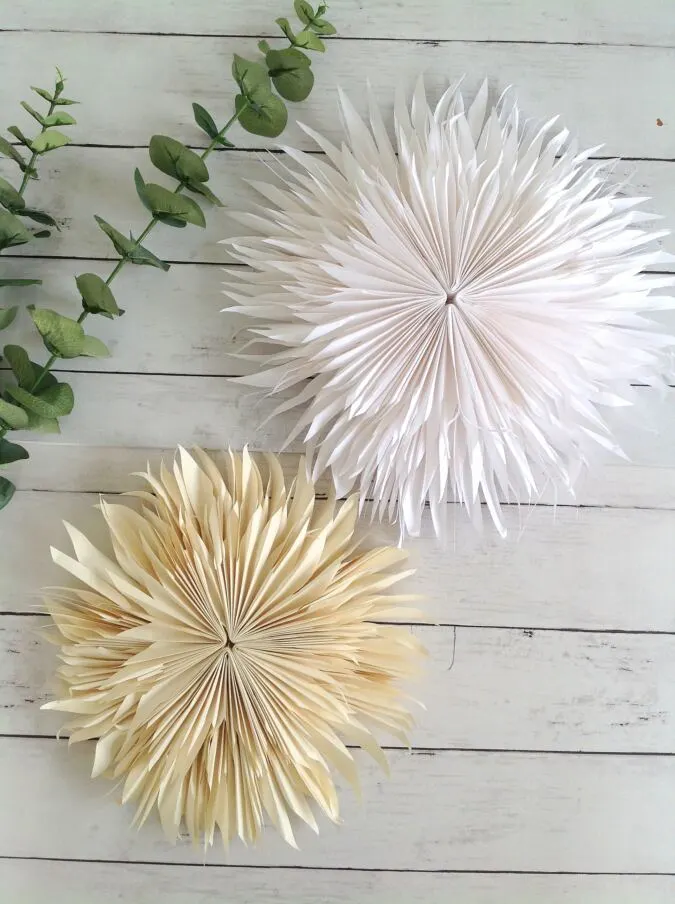
Here I have made a two and three- layer wall décor. You may add more layers if you need a fuller piece. The finished piece is 15- inches in diameter. The dimensions for the paper layers are as given below:
Large Flower:
15” x 18”
Medium Flower:
Small Flower:


Here I have shown the making of the large flower. So, you need to cut your craft paper 15” x 18”. You will need 4 pieces for one flower. Fold the 18” side in half so that your paper is now 9” wide.


Cut out a triangle from the raw edges.


Repeat along the entire raw edges.


Open and you will get your paper like this.


Next, start folding the shorter edge in accordion style from the top.


Repeat along the entire length.


Handpress along the middle, fold and glue the middle edges together to make it look like a paper fan.


You need 4 such fans for a single flower.


Glue the 4 fans together along the side edges to get the first flower layer.


Repeat to get the smaller flower.


Glue the smaller flower centered on top of the larger one and your paper wall décor is ready!
Find the webstory for the post here: Transform Your Home: Easy & Inspiring DIY Wall Art Pin it for later here,