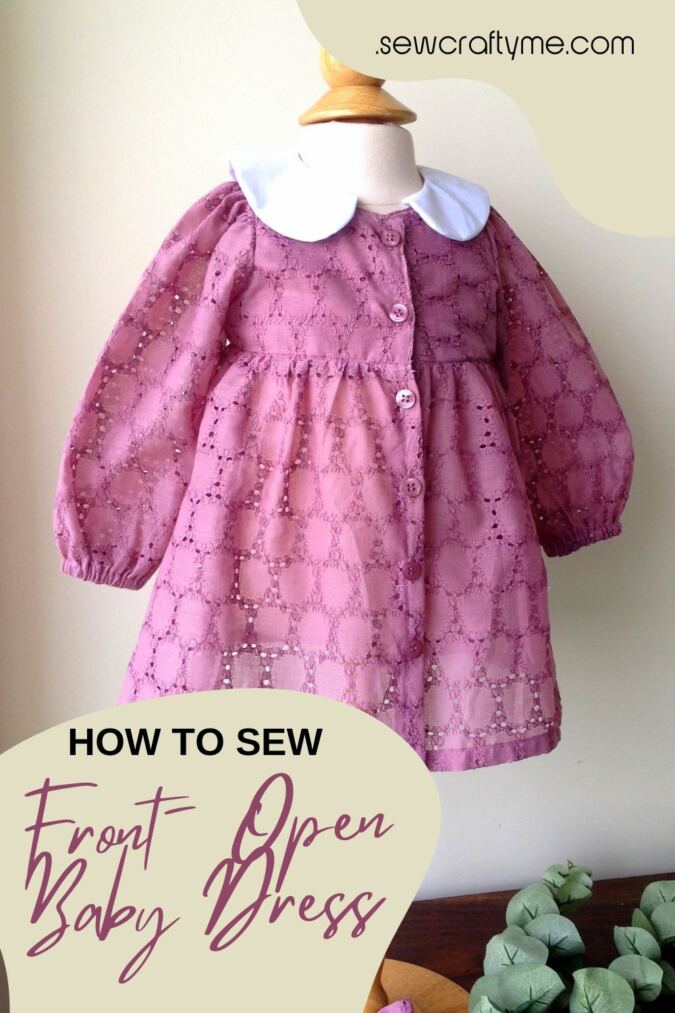
Discover the perfect solution for your next sewing project with our free girls’ dress pattern, “The Matilda Dress”! This versatile design comes complete with collars and sleeves, making it a delightful addition to any young girl’s wardrobe.
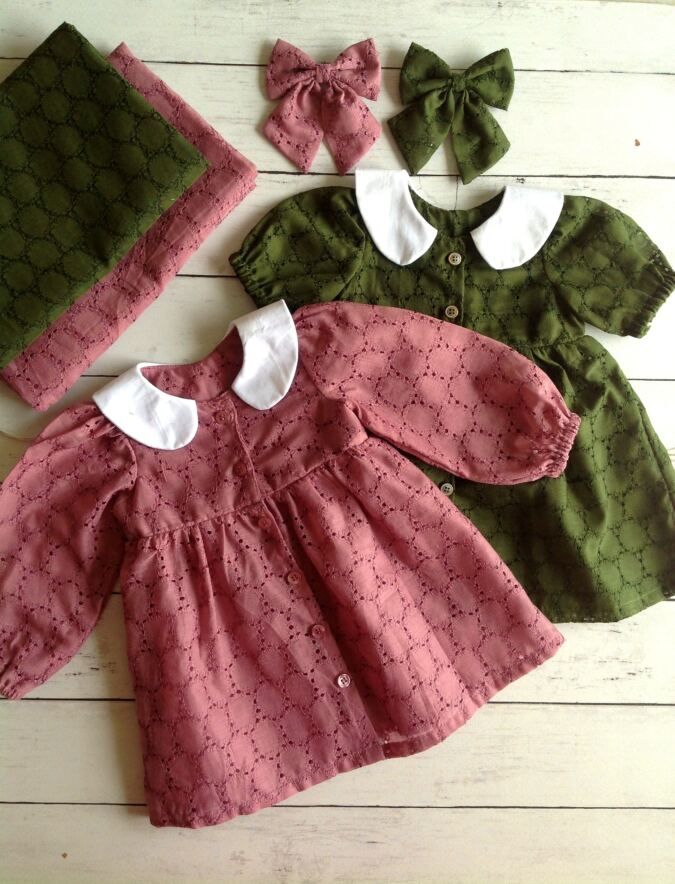


Our free girls’ dress sewing pattern with collars and sleeves offers endless possibilities for creativity and personalization. The classic collar adds a touch of elegance, while the sleeves provide comfort and style. With this pattern, you can create dresses suitable for everyday wear, special occasions, or even playtime adventures.


And, whether you’re making dresses for your own children, as gifts, or for a small business, this pattern is the perfect choice for stylish and comfortable attire.
****Please note that this is an intermediate to advanced level pattern. If you have tried my previous girl’s patterns, you can easily go ahead and try it!
Girls Dress Pattern with Collars and Sleeves
- Medium- weight cotton Fabric for the dress body- requirements specified in the table-2 below.
- Medium- weight cotton Fabric for the collar- requirements specified in the table-2 below.
- Sewing Notions.
- Fabric Marking Pen.
- Snap Buttons or ordinary buttons (optional).
- Pattern pieces. **Enter your email address and click the subscribe button to download the template.
All the fabrics used here are of 44/ 45 inches width.
The fabrics shown here are only for illustration purposes and as such may vary from the original.
The seam allowance is 3/8-inch unless otherwise specified.
I suggest you read the entire pattern once before starting to get a general idea.
All seams are to be finished by zigzag or serger.
Size Chart
Table-1.


Approximate Finished Measurements.
Table-2.
*The dress has approximately 1&1/2- inch ease for sizes newborn to 6 months, 2- inches ease from 12 to 18 months and 2& ½- inches for 2 to 4 years.


Material Requirements.
Table-3
**Note that the elastic requirement given below is for short sleeves. You will need 2.5-inch less elastic for long sleeves.


Take the fabric required for the dress and collar.
Cut the templates for the bodice front, bodice back, skirt front, skirt back, sleeves and peter pan collar.
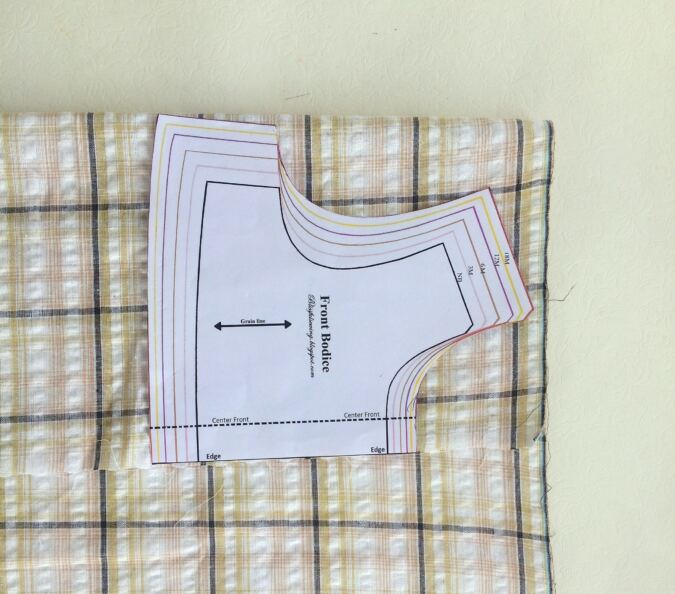
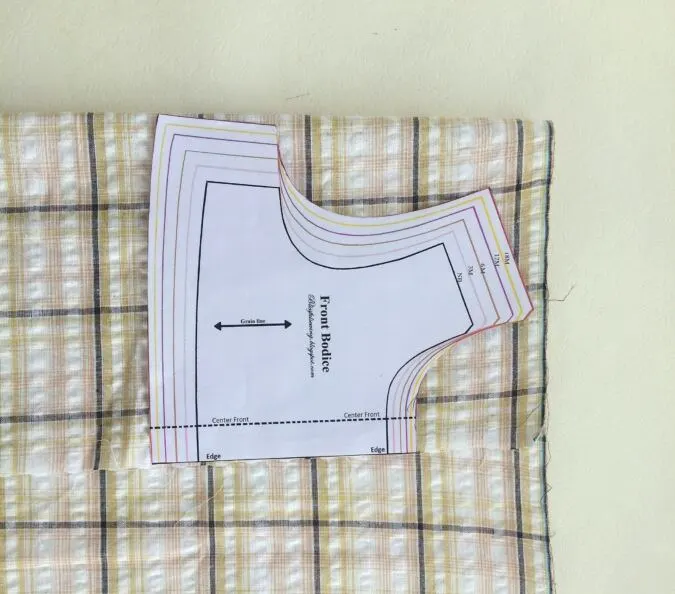
Take the dress fabric and the template for the front bodice. Fold the fabric to fit the width of the template and place the template on the edge. Mark around it and cut to get the two front bodice pieces. (the front part of the dress is done in two pieces, for button opening). Repeat the steps to get the front lining pieces.


Let’s cut the back bodice. Here again, fold the fabric, but this time, place the template for the back bodice, along the fold of the fabric. Mark around it and cut to get the back-bodice piece Repeat the steps to get the back-lining piece.


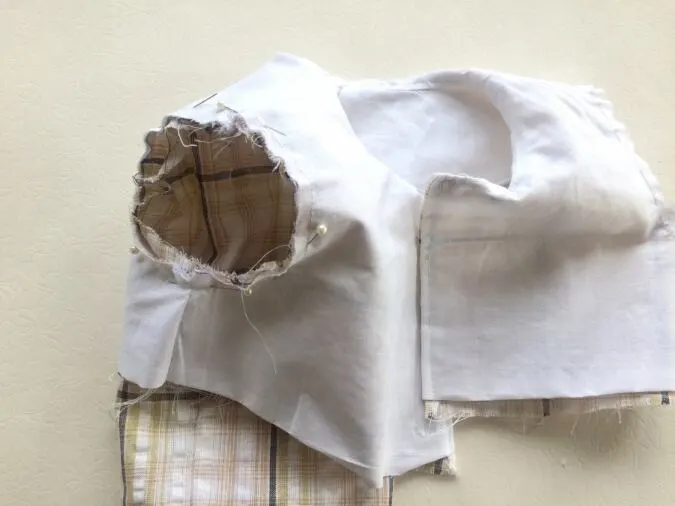
Your bodice-front, bodice–back and lining pieces will look like the picture above.


Take the front skirt template, fold the fabric and place the template on the edge of the fabric. Cut around the template to get the two front skirt pieces.

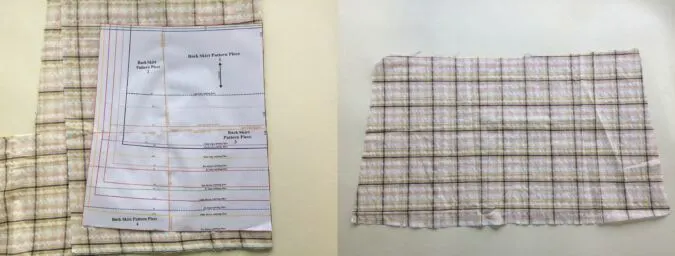
Next, take the template for the skirt back, fold the fabric to fit the width of the template and place it on the fold. Cut around the template to get the back-skirt piece.

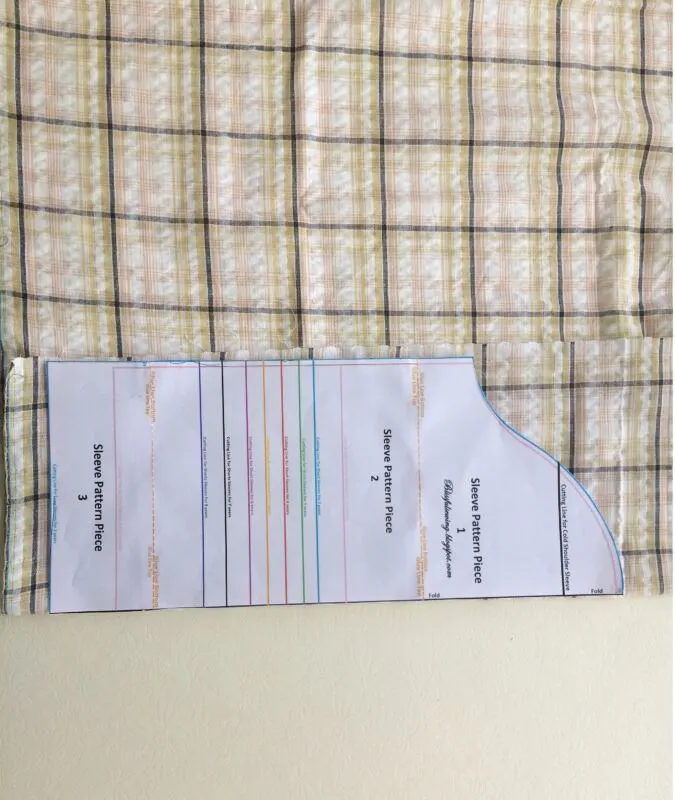
Cut two sleeve pieces also on the fold. You will see dots along the top edge of the sleeve template. Those are markings for gathering the sleeve. Transfer the markings for the gathers to the sleeve pieces.


Your sleeve pieces will look like this.

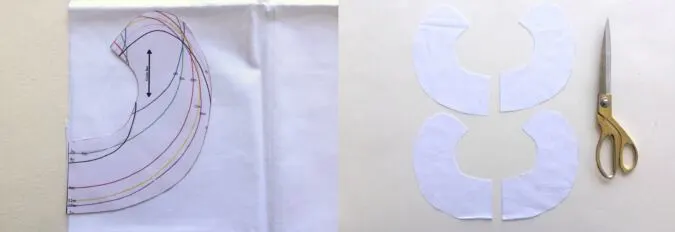
Fold the collar fabric and place the template for the collar on it. Mark around it and cut to get two collar pieces, facing opposite directions. Repeat the steps to get two more of the same.
Sewing
Before putting the bodice pieces together, let’s mark the point on the back neckline, where the straight edge of the collar is placed later.


Fold the back bodice in half, aligning the edges and mark the upper edge of the fold along the neckline.


Take the two front bodice pieces and place them over the back-bodice piece, with the right sides together, aligning the shoulders and side seams and sew the shoulders shut.


Press the seams flat.


Next, take the lining pieces, fold the lower edges towards the wrong side by 3/8-inch and press to set.
Sew the front and back lining pieces together, just as the bodice pieces.


Take two of the collar pieces, layer them with the right sides together and aligning the edges. Sew along the outer curve and the short straight edge to join. Cut few notches along the seam to reduce the bulk. Turn over to the right side and press flat. Topstitch along the outer curve and the shorter edges to make it neat and crisp.
Repeat the steps with the other two collar pieces to get the other collar ready. Let’s attach the collars to the yoke.

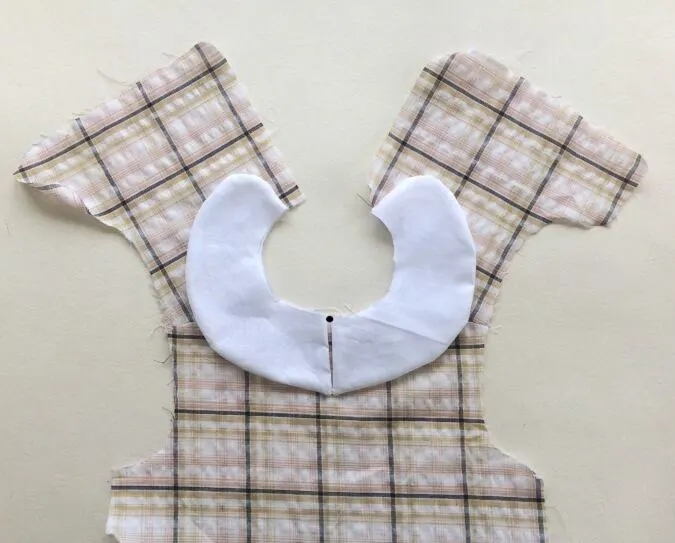
Place the collar on the right side of the yoke, aligning the center- mark on the back neckline with the straight edge of the collar. Pin the collar along the neckline, starting from the center-back. Keep pinning towards either sides, till the whole collar is pinned. Sew the collar to the yoke, removing the pins as you go.

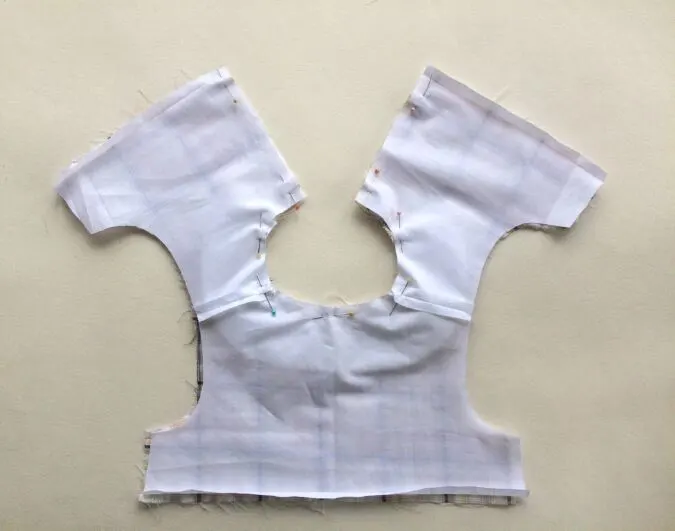
Place the bodice lining over the main bodice, with the right sides together, aligning the center front, neck and armholes, and pin.


Sew along the neck and center back. *Note that you need to leave 3/8-inch along the lower edges of the bodice for skirt attachment.


Clip the edges and cut the corner.


Bring the right side out, poke the edges sharp, with the help of your scissors and press taut.
Let’s sew the side seams of the bodice shut.


Keep the lining side out and flip the lining upwards (both the front and the back). With the right sides together, line up the side seams of the back and front bodices. Pin the aligned edges (side seams) together and sew along the pinned edges.


Next, flip the bodice upward and
line up the side seams of the lining. The right sides should be together and the fold along the lower edge kept intact. Sew the side seams shut.

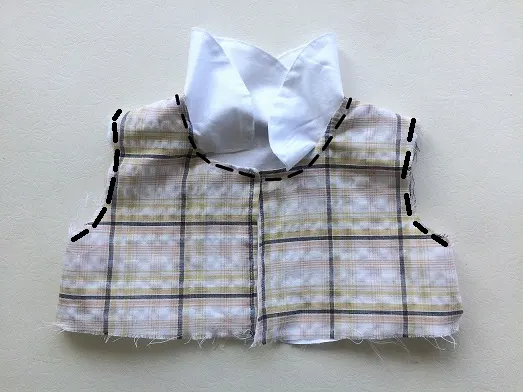
Turn over to the right side, flip the collar up and topstitch along the neck and center back???. Baste the lining and the bodice pieces together along the armhole. This is to prevent the lining from slipping away while attaching the sleeve.
Let’s prepare the sleeves. The lower hem would form the elastic casing for the sleeve.


Fold the lower edge of the sleeve by 3/8-inch and press. Fold again by ½- inch and repeat pressing. Sew down the hem.

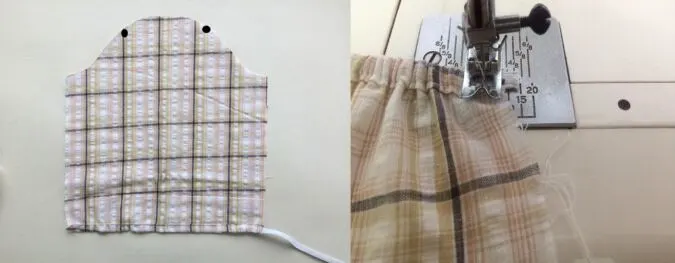
Take the required length of the elastic referring to table-2 above and cut it into two equal pieces. Take one elastic piece and insert it through the hem, using a safety pin. Thread the elastic through and secure the ends by sewing back and forth a few times.


Your sleeve will look like this.
Let’s gather the sleeve. For that we need to turn the tension of the upper thread of your machine to zero and the stitch length to the longest. You will get a basting stitch.


Fold the sleeve over, with the right sides together and the edges aligning. Sew it shut along the edge.

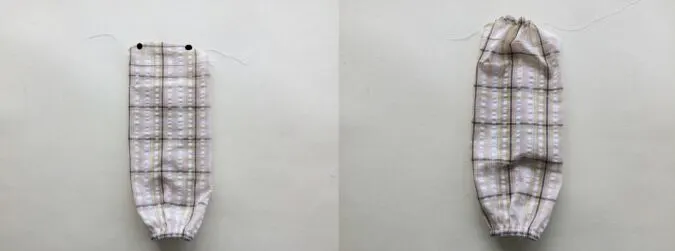
Turn the sleeve over to the right side and sew a basting stitch between the points marked earlier. Pull the thread from the bobbin gently to gather. Repeat with the other sleeve.
Let’s attach the sleeves to the bodice.


Place the sleeve on its right side and the bodice with the lining facing out. Keep the lower edge of the sleeve facing the armhole and slide the sleeve into the armhole.

Start pinning the edge of the sleeve with the armhole,keeping the seams of the sleeve and bodice in line. Adjust the gathering in the sleeve such that it fits the armhole and the gathers are uniform on either side of the shoulder.Bring the machine settings back to normal and sew them together, removing the pins as you go.
Repeat the steps on the other armhole with the other sleeve.
We move on to the skirt.


Before we gather the skirt, we need to hem the front (button) edges. For that fold the edges by ½- inch twice and press to set. Sew down the hem along the edge of the fold.


Place the two front skirt pieces above the back skirt piece and sew the side seams shut.
To gather the skirt pieces, again turn the upper thread tension of the machine to zero and the stitch length to the longest to get a basting stitch.


Sew a basting stitch along the upper edge of the skirt piece. Pull the thread from the bobbin gently and gather it. Adjust the gathering to make it uniform and to fit the lower edge of the yoke.
Turn the machine settings back to normal
Let’s attach the skirt to the bodice.


Align the ruffled edge of the skirt along the lower edge of the bodice, with the right sides together and pin all along. *Note: take care to keep the lining away while pinning,


Turn the machine settings back to normal and sew the skirt to the bodice, removing the pins as you go.
Next, we need to cover the seam along the waist line by sewing the lining shut.


Turn the waist seam up, towards the bodice. Place the folded edge of the lining over the seam and pin all along.


Turn over to the right side and topstitch along the seam line carefully to sew the lining shut, covering the waist seam. You may optionally hand-sew the folded edge of the lining onto the waist seam, using invisible stitches.
Let’s hem the lower edge of the dress.

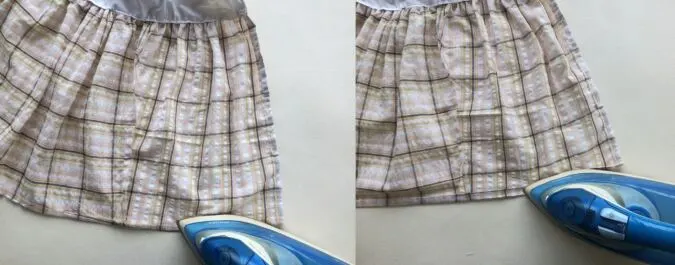
Fold the lower edge of the dress by ½-inch and press. Fold by another ½-inch and press again. Sew down the hem along the edge of the fold.
Next, we need to attach the buttons.


A quarter inch down from the top edge, make markings equidistant from each other on the left front piece for the buttons. Make markings on the other (right) front piece also for the complimentary buttons. Attach the snap buttons, following the manual provided with the buttons. Or if you are comfortable sewing buttons and buttonholes, that can be an option too.


Cut off the hanging thread and our dress is done!
Find the web story for the post here: Girls’ Dress Sewing Pattern: Free Design with Sleeves and Collars
Pin it for later here,