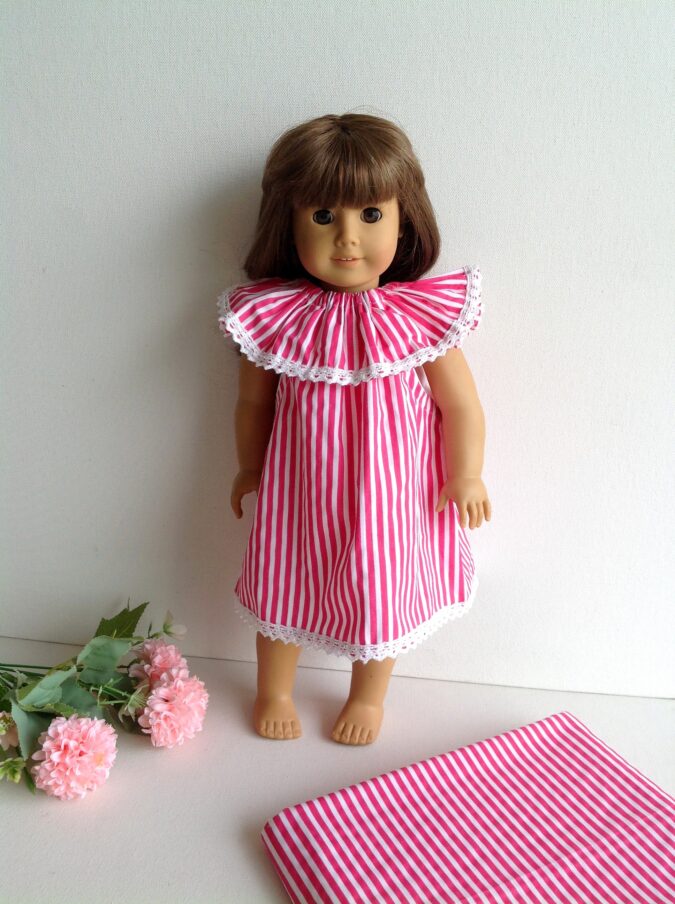
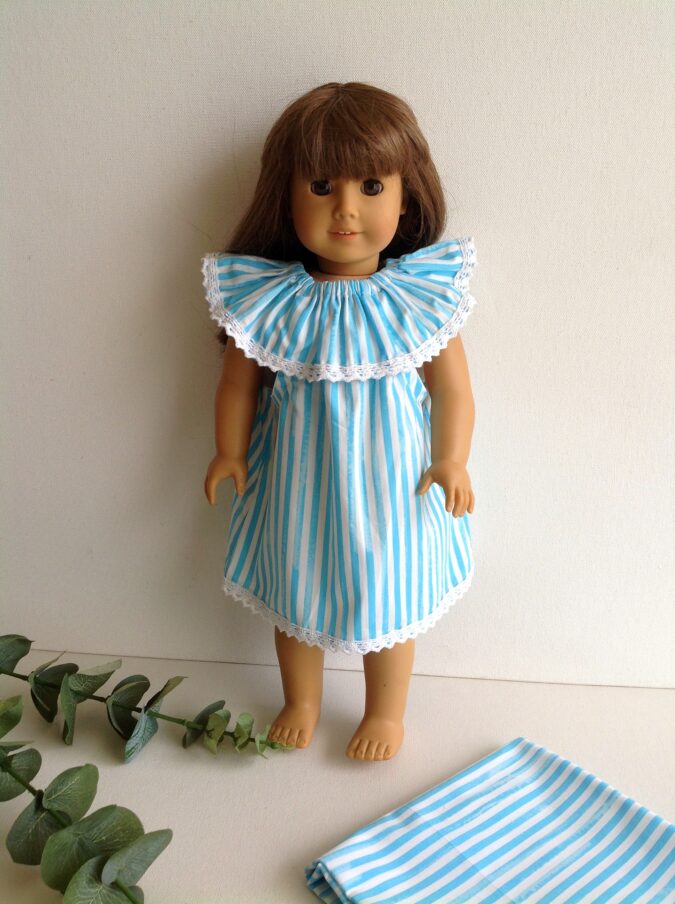
It’s been a while since I shared a new AG doll pattern, but I’m back—this time with a bang! I’m so excited to bring you the easiest ever ruffled dress pattern for your 18” doll.
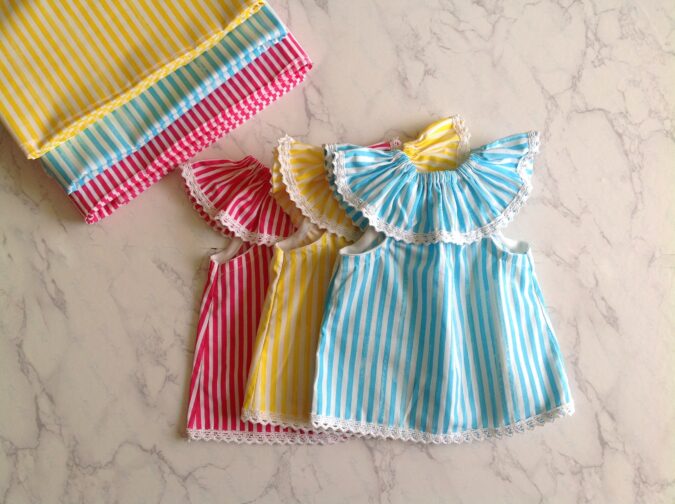

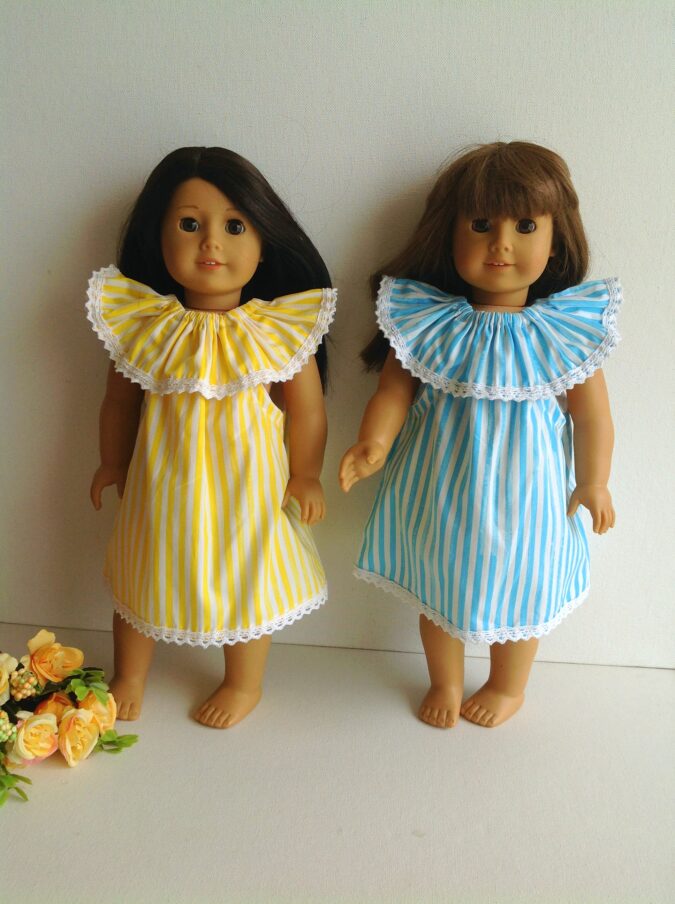

This sweet little dress features soft ruffles along the neckline, giving it a darling look—but don’t worry, it’s super simple to sew! Even if you’re a beginner, you’ll be able to whip this up in no time.


This pattern is a mini version of my popular Mallory Dress for girls, which means you can sew up adorable matching outfits for your little one and her doll. How cute is that?
So grab your fabric and let’s get sewing!
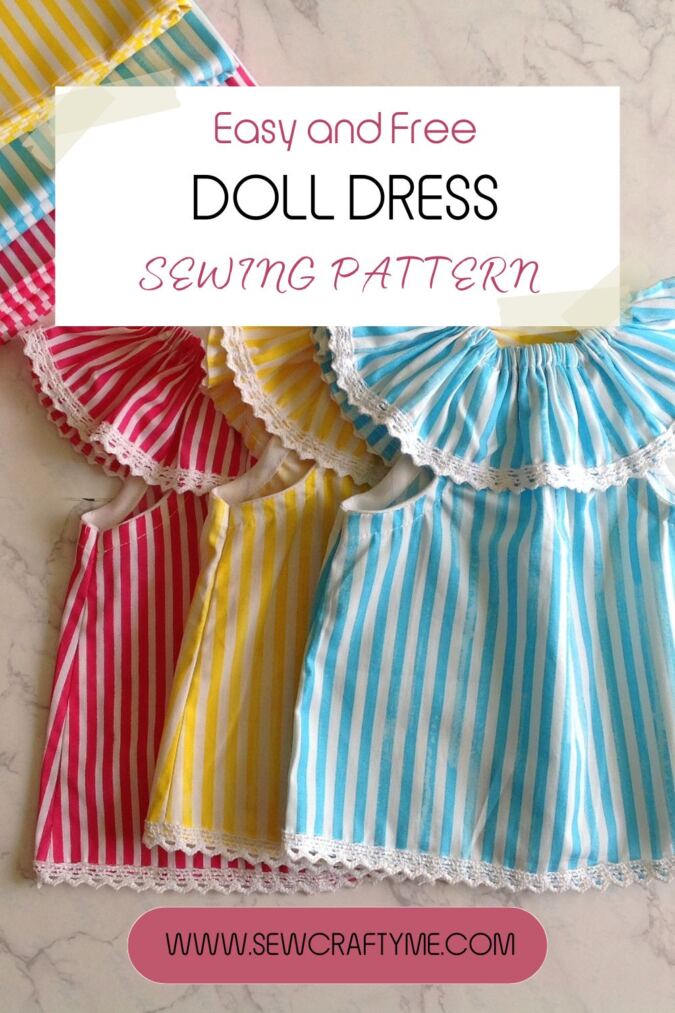
The Easiest Doll Ruffle Dress Sewing Pattern
Supplies Needed:
Medium- weight cotton fabric in any desired print and color for the dress body and ruffles- 1/2 yard.
Single- folded bias tape (optional)- 30-inches.
3/8- inch Elastic- 9-inches.
Pattern template. *Enter your e-mail address and click the subscribe button to download the template.
Pattern Notes:
All the fabrics used here are of 44 inches width.
The fabrics shown here are only for illustration purposes and as such may vary from the original.
The seam allowance is 3/8 -inch unless otherwise specified.
I suggest you read the entire pattern once before starting to get a general idea.
All seams are to be pressed flat
All seams are to be finished by zig zag or serger

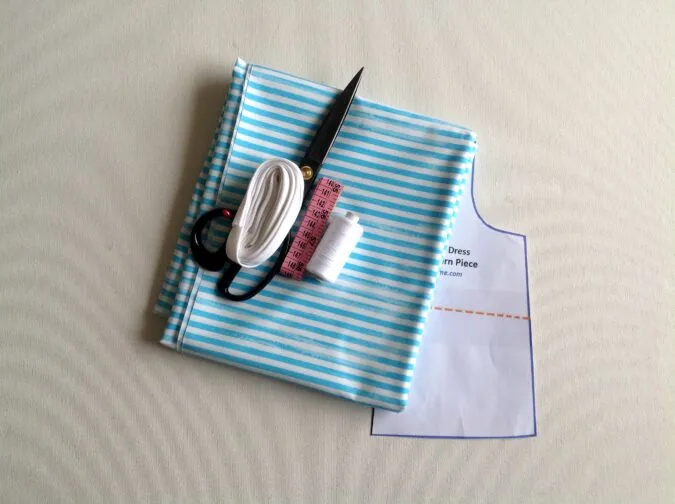
Gather your supplies.
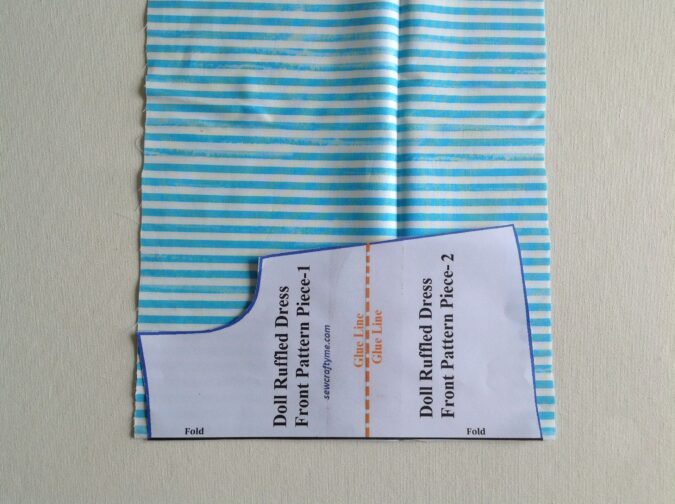

Take the fabric and the template for the front piece. Fold the fabric to fit the width of the template and place the template on the fold. Mark around it and cut to get the dress front piece.
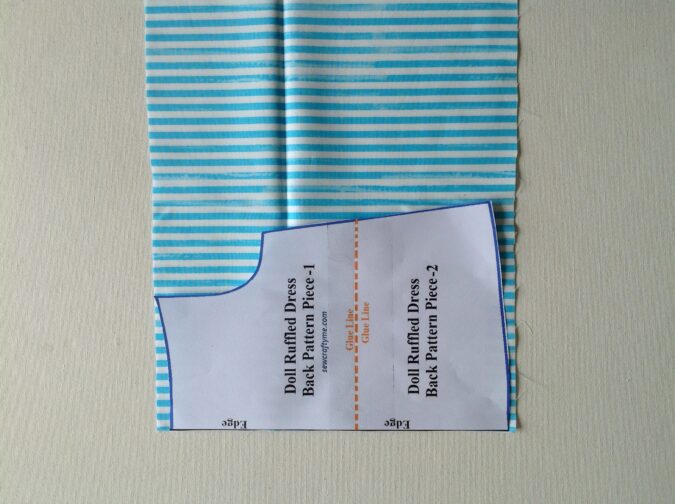
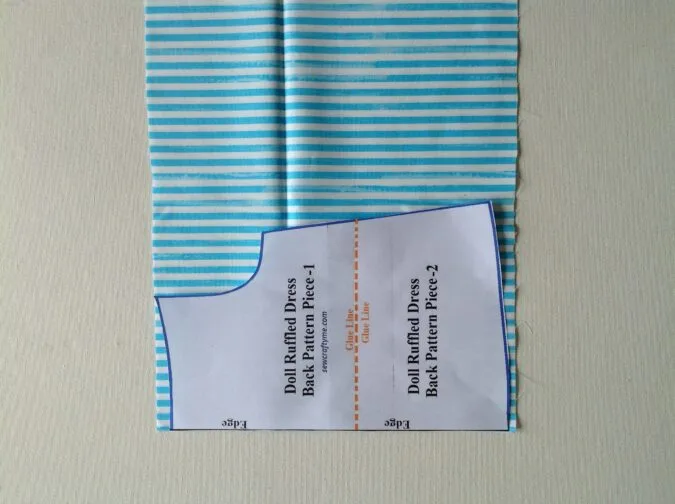
Let’s cut the dress back piece. Here again, fold the fabric, but this time, place the template for the back piece, along the edge of the fabric. Mark around it and cut to get two pieces for the back (the back part of the dress is done in two pieces, for button opening).
Also, cut the ruffle pieces, 4.5- inches wide and 34- inches long.
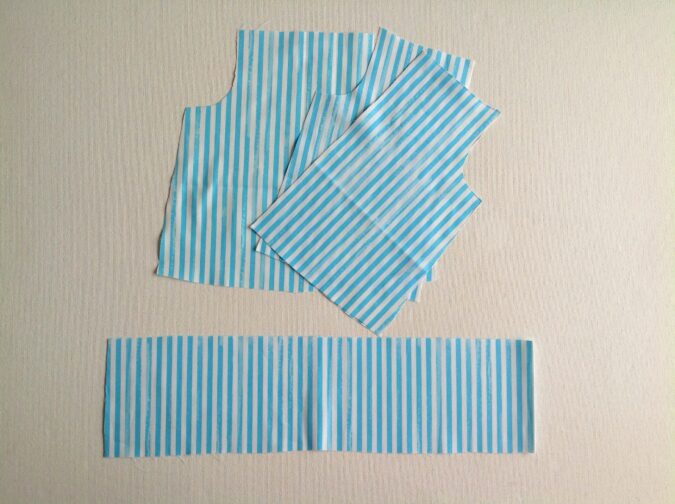
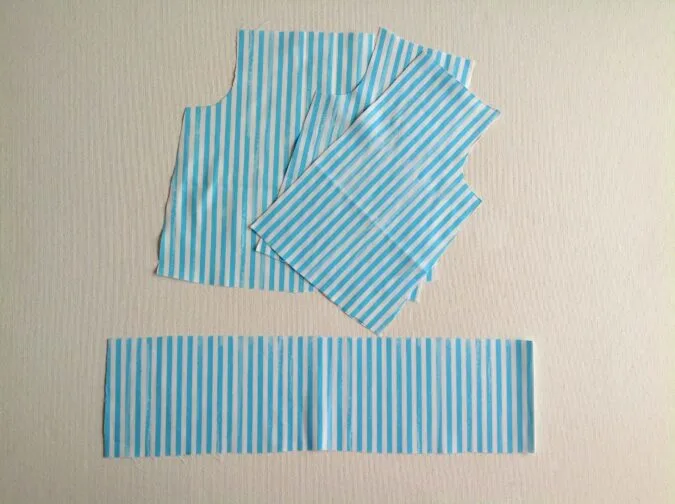
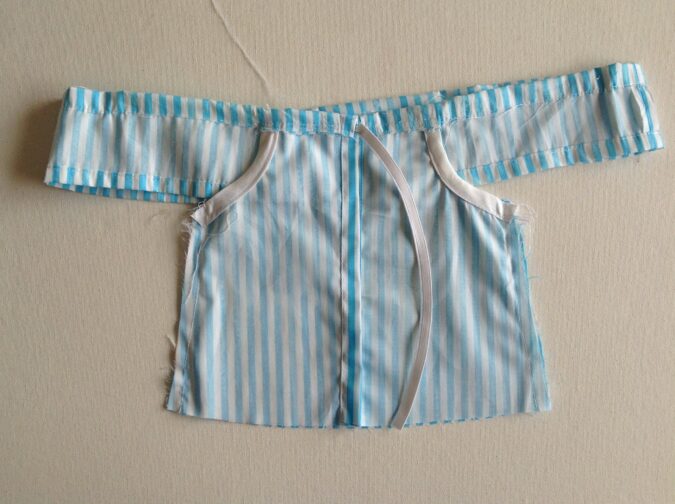
You will get your pieces like this.
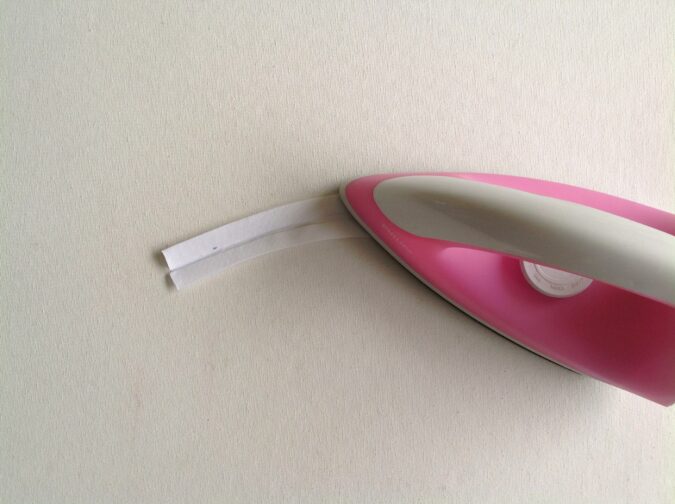
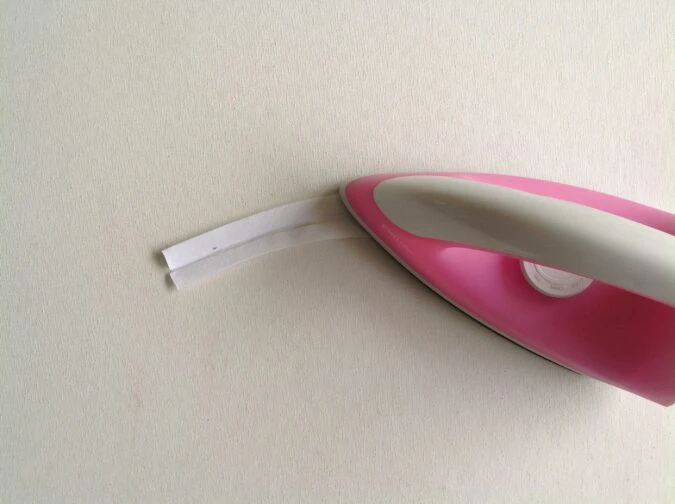
Cut the single- folded bias tape into 7-inch pieces (you will need 4 such pieces). Take one of the tape pieces, place it slightly curved and press using plenty of steam (this will make it easy to attach along the armhole curve).
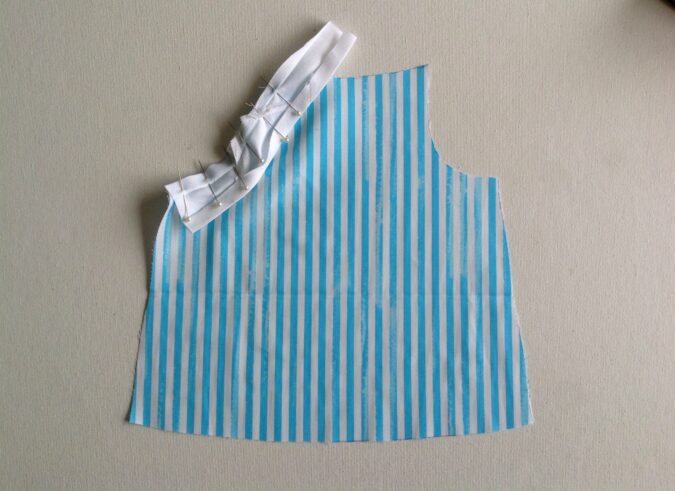

Open one of the folds of the bias tape, line up the raw edge along the armhole, with the right sides together and pin all along. Sew the tape along the armhole, removing the pins as you go.

Fold the bias tape completely over to the wrong side of the dress piece, keeping the fold along the edge intact and pin all along.


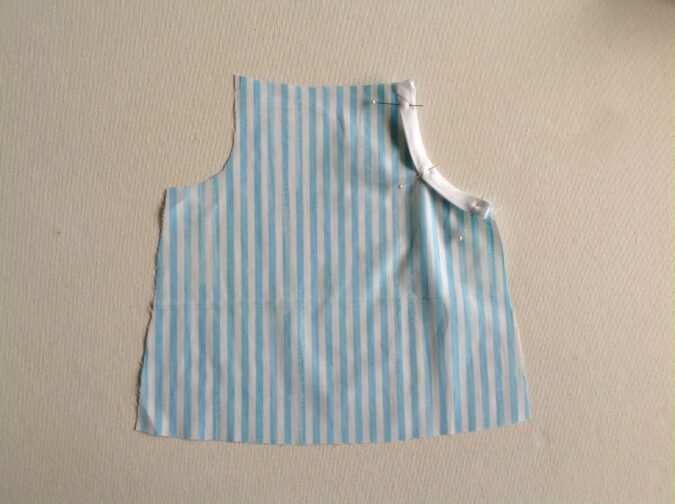
Sew along the pinned edge to finish the armhole. Repeat on the remaining three armholes.
Let’s finish the button edges of the back pieces.

Take one of the back pieces and fold the straight center edge by 1/2- inch twice towards the wrong side and press to set.

Sew down the fold along the edge. Repeat on the other back piece.
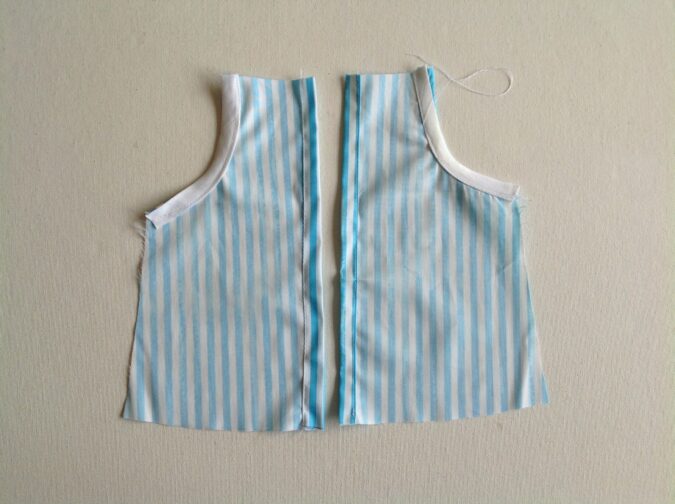
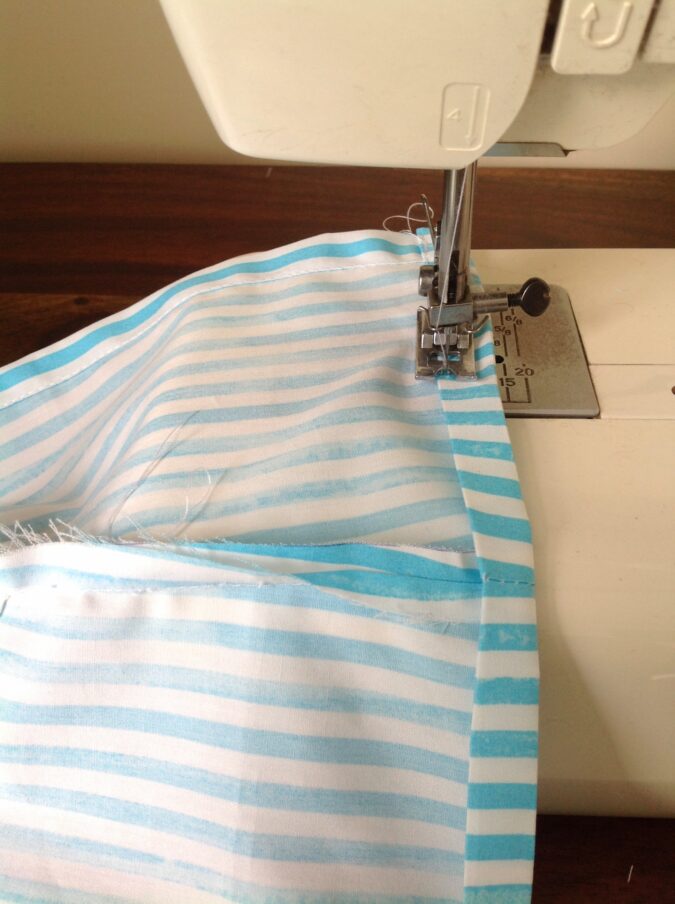
Next, we sew the side seams.

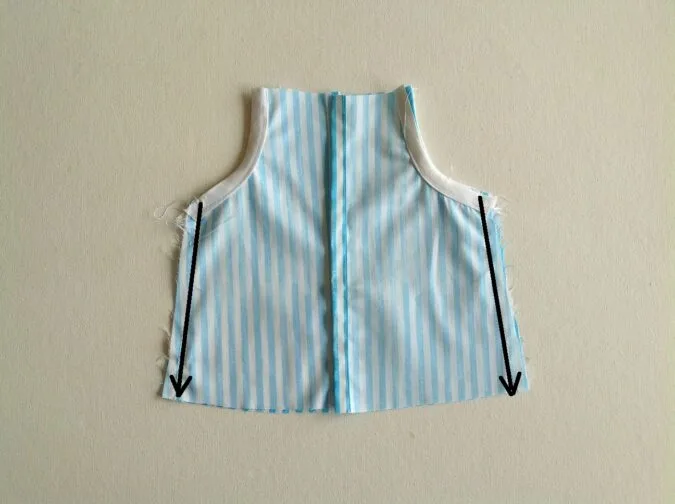
Place the front and back pieces of the dress layered, with the right sides together lining up the edges and sew both the side seams.
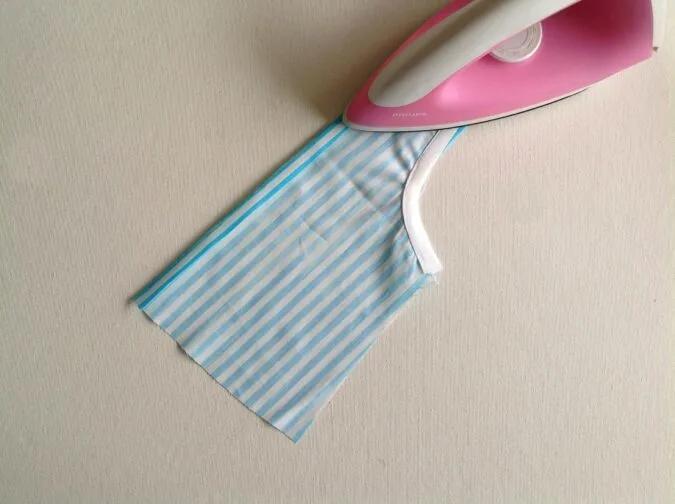
Let’s hem the ruffle.

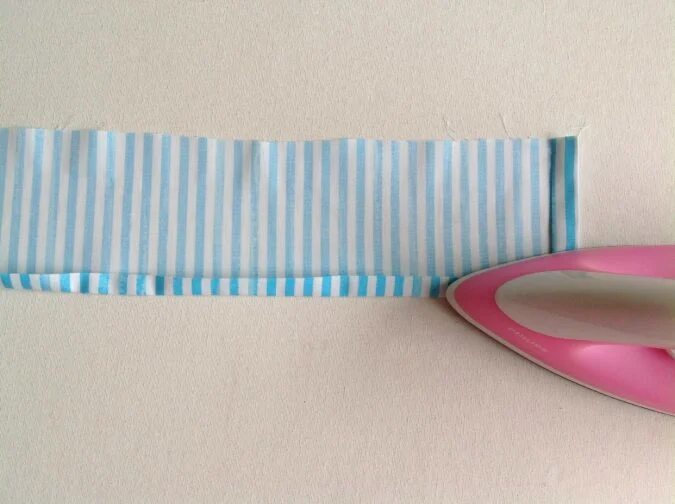
Fold one of the long edges and the two short edges by 1/2- inch twice and press.

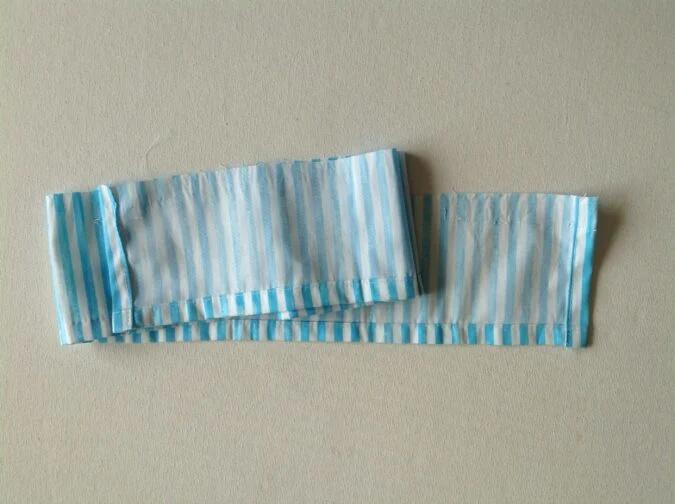
Sew down the hem along the edges of the folds, all around.
Next we pin the ruffle piece to the dress. For that we need to mark the top center of both the pieces.


Keep the ruffle piece on it’s right side, fold it widthwise in half and mark the top center as shown above. Similarly, fold the dress in half, lengthwise and mark the top center.
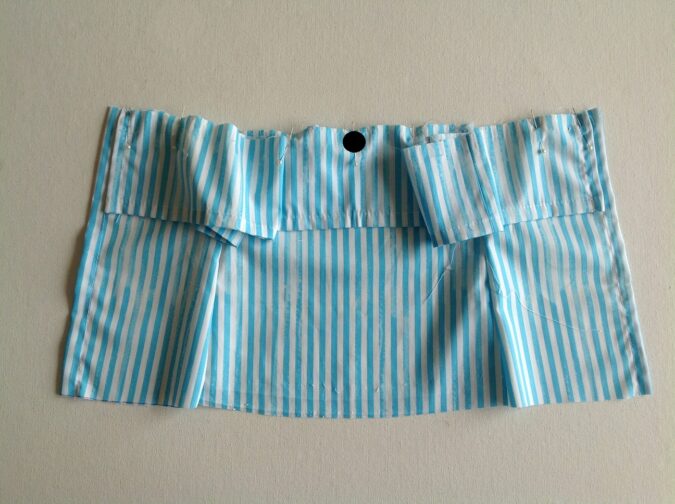
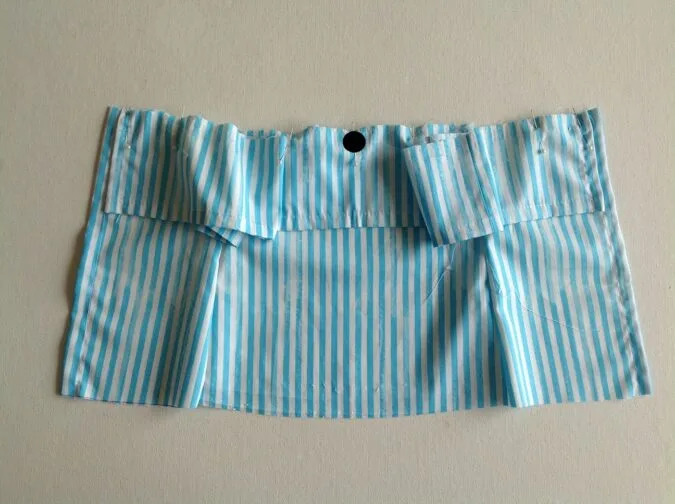
Line up the center marks and place a pin at that point. Then, pin the raw edge of the ruffle to the edge of the front piece on both sides of the pin. Next, pin the raw edge of the ruffle along the top edge of the back piece on either side, just after the button placket folds. You’ll notice the ruffle appears bare and extends longer along the armholes — don’t worry! It will even out and take shape once you insert the elastic. 😊

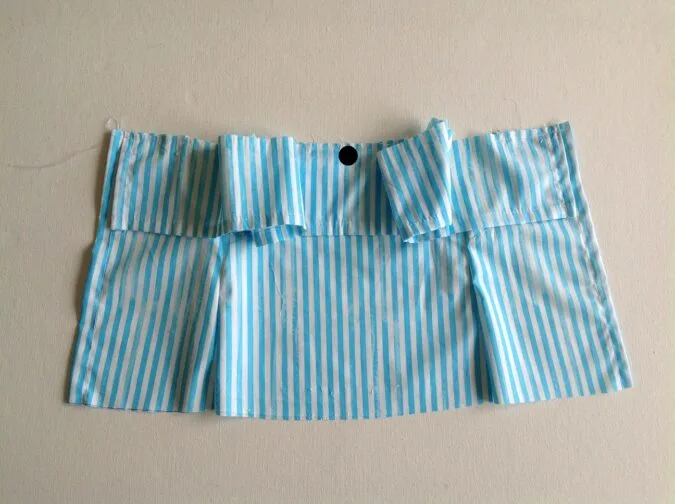
Sew along the pinned edges to join.
Zigzag along the entire raw edge of the ruffle and neckline to prevent fraying.
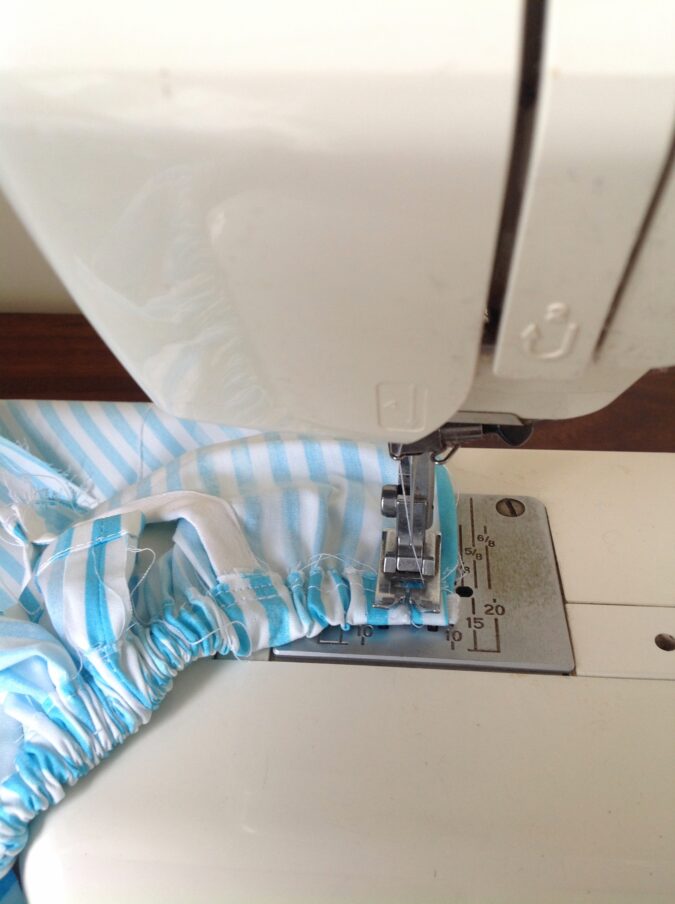
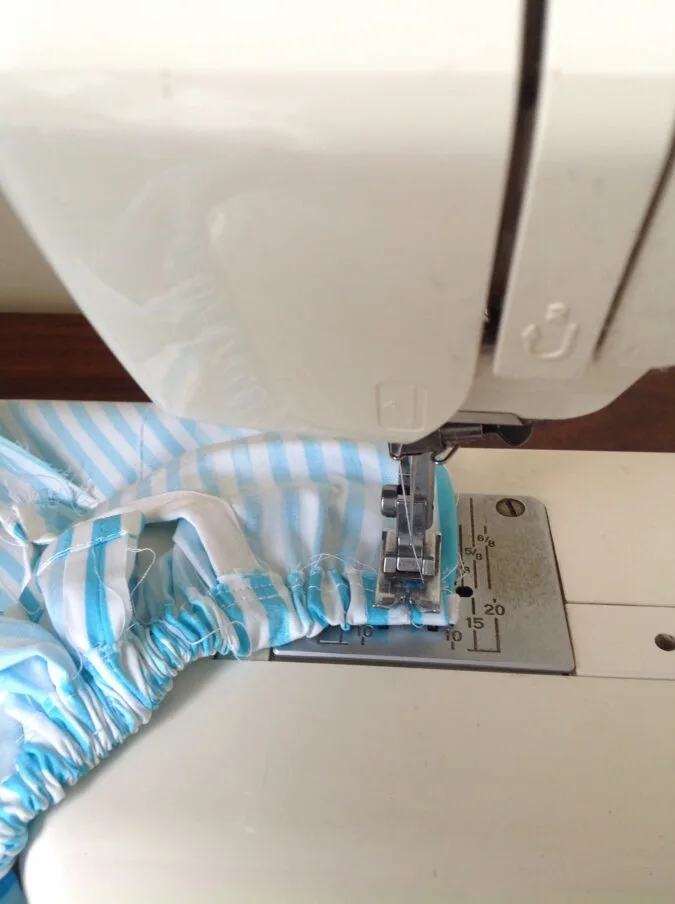
Next, we make the casing for the neck line elastic.

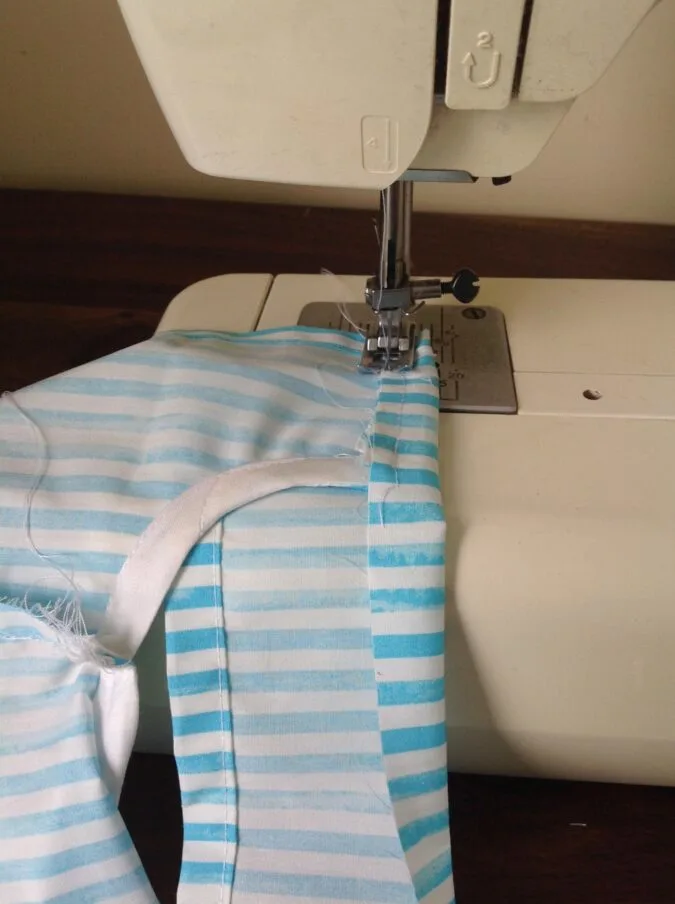
Fold the top edge of the ruffle (and neck line) by 5/8- inch towards the wrong side and press all around. Sew the casing shut along the edge of the fold.

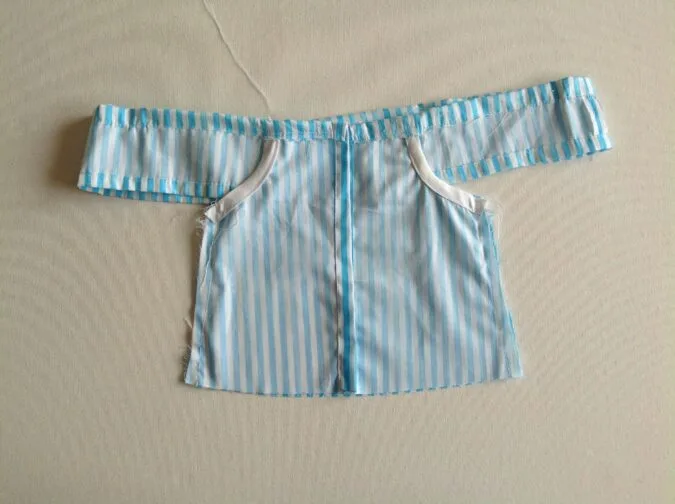
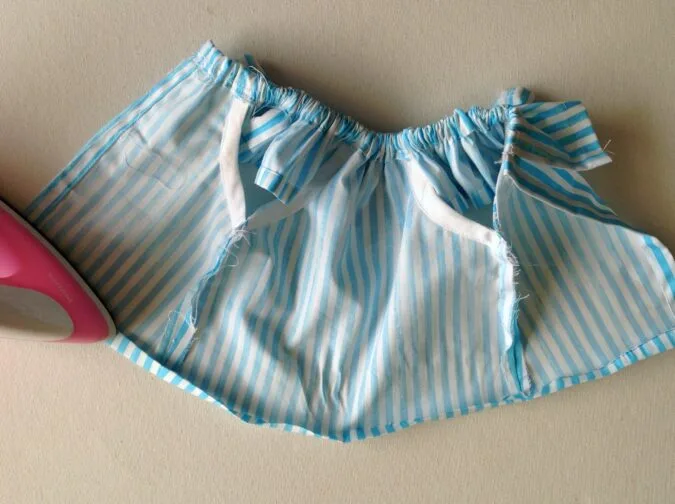
It will look like this once done. Next, we insert the elastic.

Insert the elastic through the opening on one end, using a safety pin.
Secure the elastic by sewing back and forth, just before the button folds on both ends.
Let’s do the lower hem.

Fold the lower edge of the dress twice by 1/2-inch towards the wrong side and press to set.

Sew the hem down, along the edge of the fold.

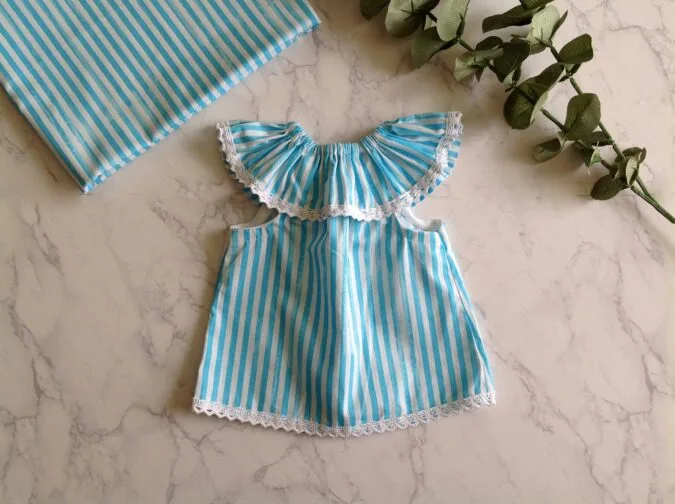
Attach velcro for closure along the back opening and your dress is ready!!
Pin it for later here,
Linda
Tuesday 17th of June 2025
I am already subscribed, but I don’t see a link in this article for the pattern for the ruffle dress. It’s possible that I am missing it. Can you please help?
Surayya
Tuesday 17th of June 2025
Kindly enter your email address and click the subscribe button in the blue box under the “materials list” section. You will be taken to the download page. Please wait for about 2 minutes for the download button to appear.