CDC now recommends we all wear face masks, but not all of us can sew or own a sewing machine. When I published a face mask sewing pattern last time, I got requests for a no-sew face mask.

I decided to come up with a simple 2 layered design that anyone can make using supplies that are found in every house.

If you have a T-shirt and a pair of sharp scissors, you can easily make this DIY face mask using my printable template.
This is a fast and easy no-sew design for those who cannot sew. If you know how to sew, you can check out my face mask sewing pattern instead.
Disclaimer:
These masks are never a replacement for N95 masks. They can only be used when N95 masks are not available and also as a covering for N95 masks, to make it last longer.
As per the CDC, children under the age of 2, people with trouble breathing, and anybody unable to remove a mask unassisted should not wear a face mask.
No-Sew DIY Face Mask Pattern
Materials Required:
1. A 100% cotton T-shirt. You will find this information at the back of the neckline or on the wash care labels attached to the side seam of your T-shirt. The thicker the material, the better. You can use new or old, but make sure to wash and iron it.
2. A pair of sharp scissors
3. A Ruler
4. A safety pin(optional)
5. A pen or fabric marker

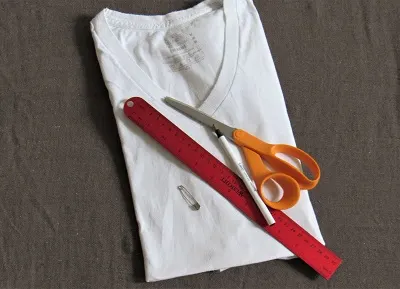
Gather your supplies. The safety pin is optional.
How to Make the Base of the Mask
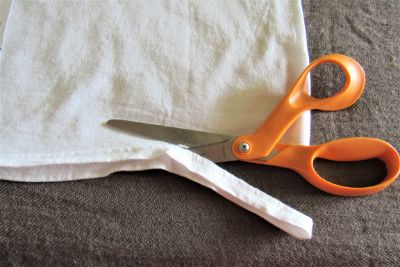

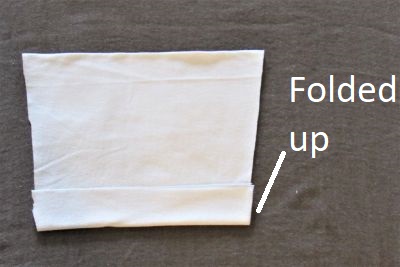
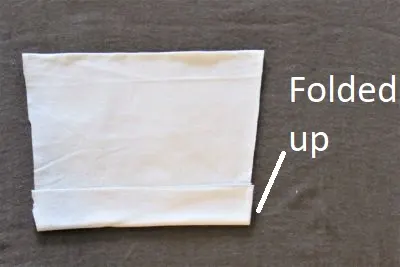
Cut off the bottom hem of your T-shirt.
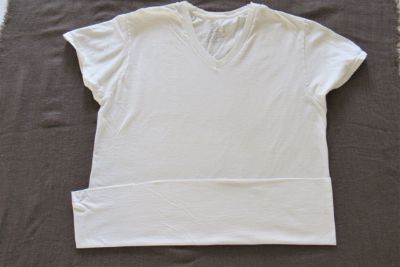
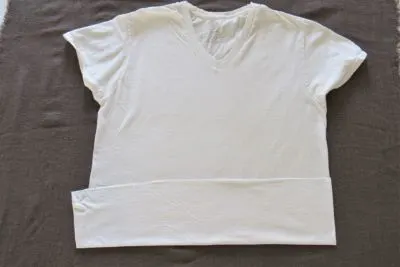
Fold it up aligning the side seams. Your fold should be wide enough to fit the template. About 5 inches will work.

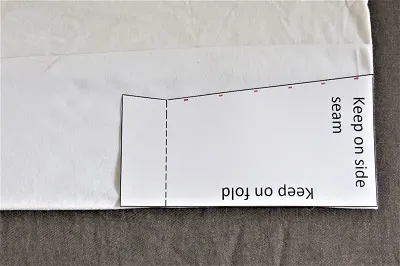
Place the template as shown and draw around it.
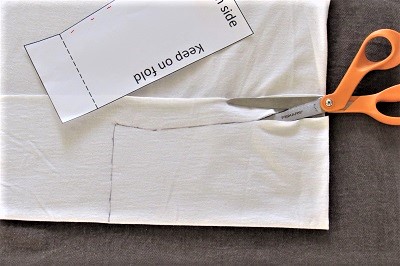

Cut it out.


Open the fold and fold 1-1/2 inch up
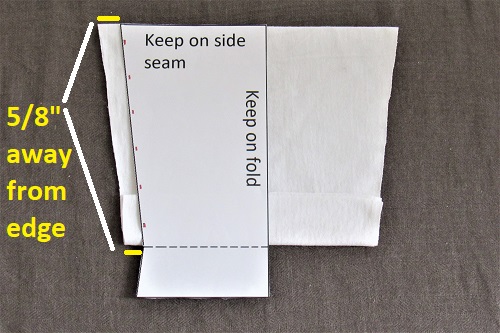

Place the template 5/8 inches away from the edge and make marks parallel to the red marks on your template. You will have a total of 6 marks.


Flip the template and place it 5/8 inches away from the right edge. Using the faint reflections of the marks as a guide, make 6 marks on this edge as well.


I used a pen to make the markings. They are dark in the picture so you can see it clearly. You will have 6 marks on each side.

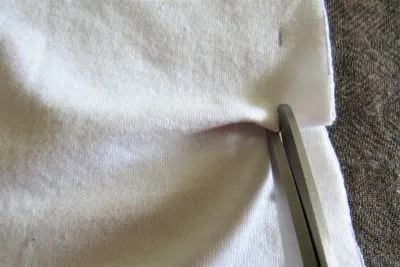
Pinch each mark taking care to catch all the layers of fabric, and snip with the tip of your scissors. Keep the slit small about 1/4 inch or less.
How to Make the Mask Ties


Cut two 1-1/2 inch strips from the bottom of your T-shirt to make your ties.
Cut open one side of the strip and gently tug. The ties will roll up by itself. Cut each tie to 33 inches length.

You can see the ties rolled up here.
Putting the DIY Mask Together

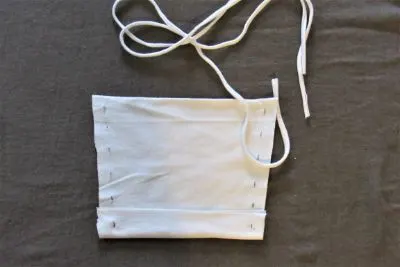
Weave the ties in and out through the slits using a safety pin. You can also use your hands to push it through.

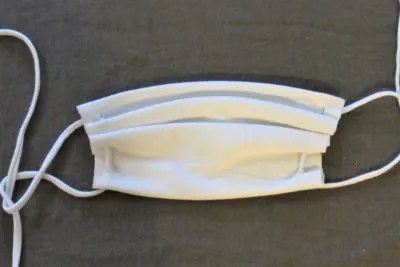
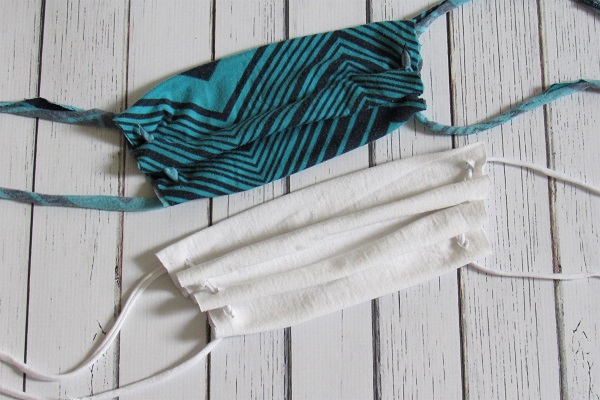
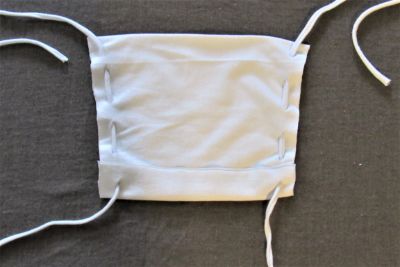
Your no-sew mask is ready!
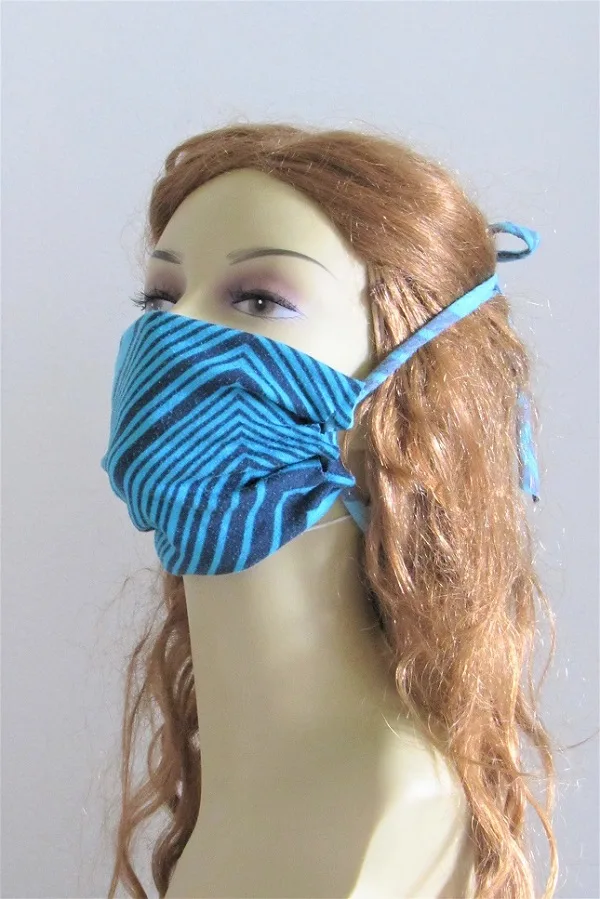
How to Wear the No-sew Mask
Note: The wider part where you have the side seam goes on your nose.
Take the two top ties, go over your ears and tie it behind your head gently. It will feel a little awkward as the ties might slide up at this point. Now, tie the two bottom ties behind your neck.
You can now take off the top ties and readjust them for a comfortable fit.
Alternative Method
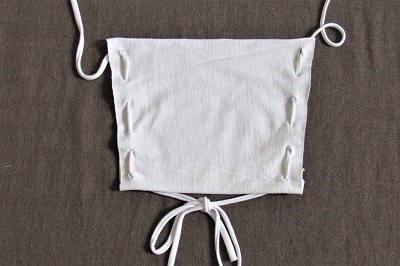

First, tie the bottom two ties. This will ensure that your ties don’t move when you put on the mask.
Now go ahead and tie the top two ties behind your head. Unravel the bottom ties and tie them behind your neck.
Pin it for later:

Leona
Wednesday 22nd of April 2020
Do you sell the sewn face masks? If so how could I order?
Surayya
Wednesday 22nd of April 2020
I am sorry, I don't sell sewn face masks :(