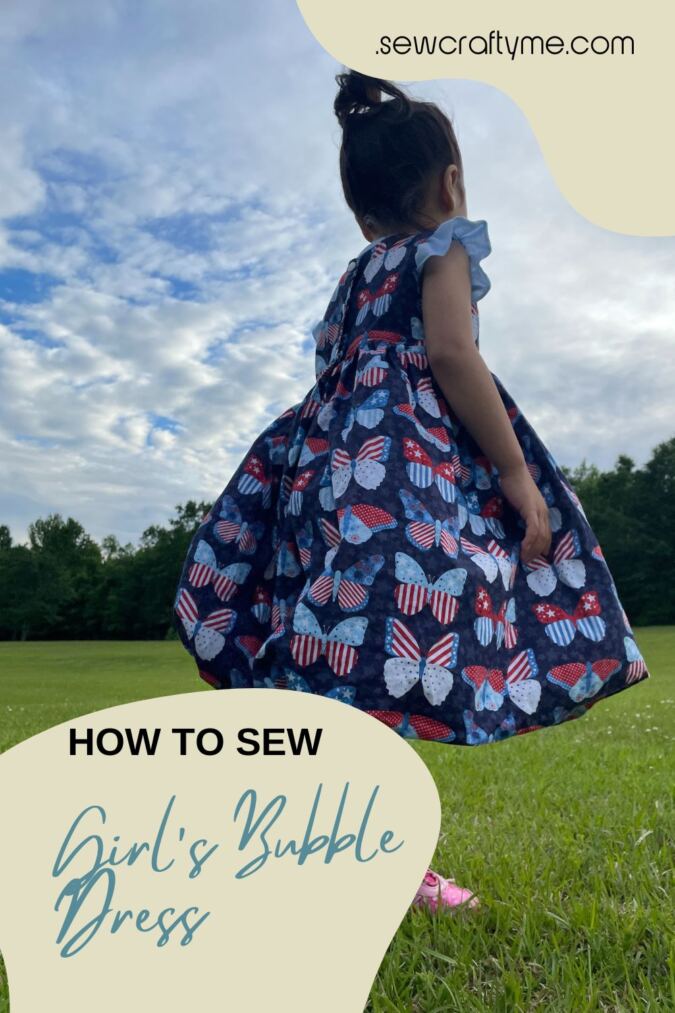
If you’ve been following my sewing journey from the very beginning—starting with the classic basic dress and moving on to the intermediate-level Meredith dress—then you’re more than ready to take on my Bubble Dress pattern!
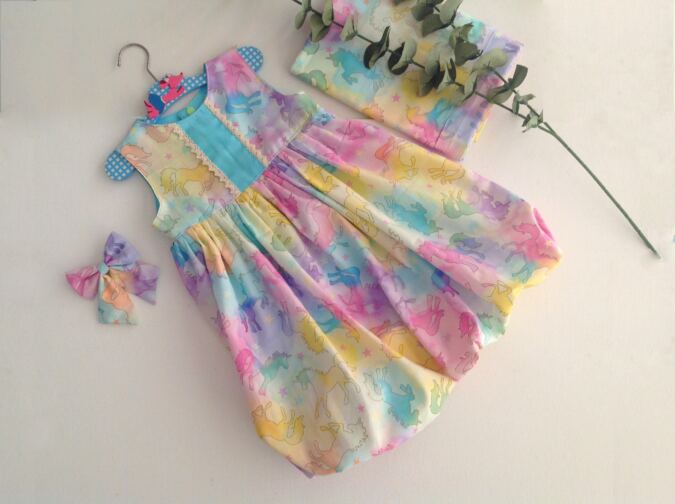


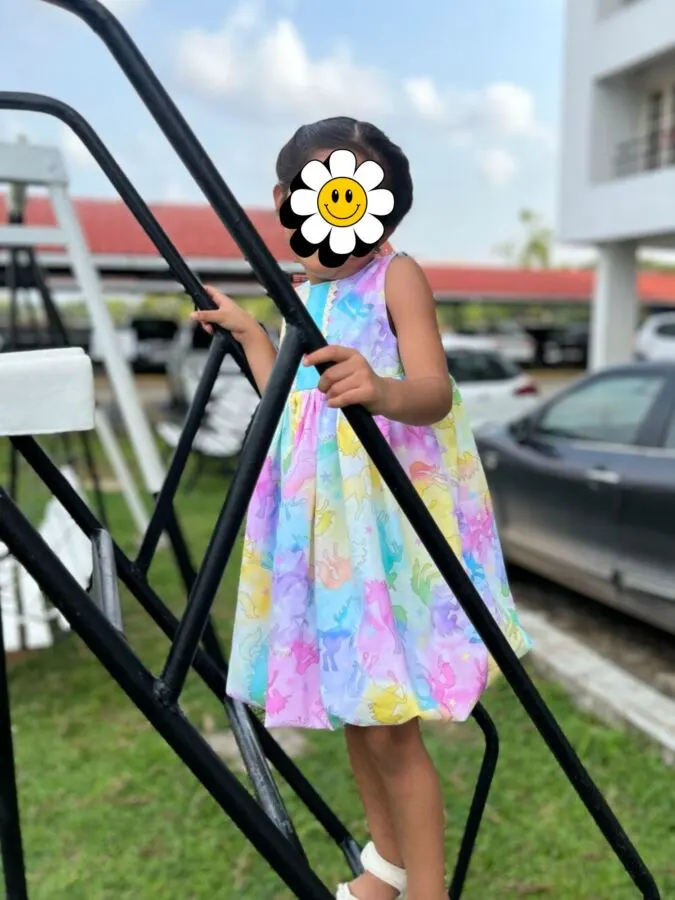
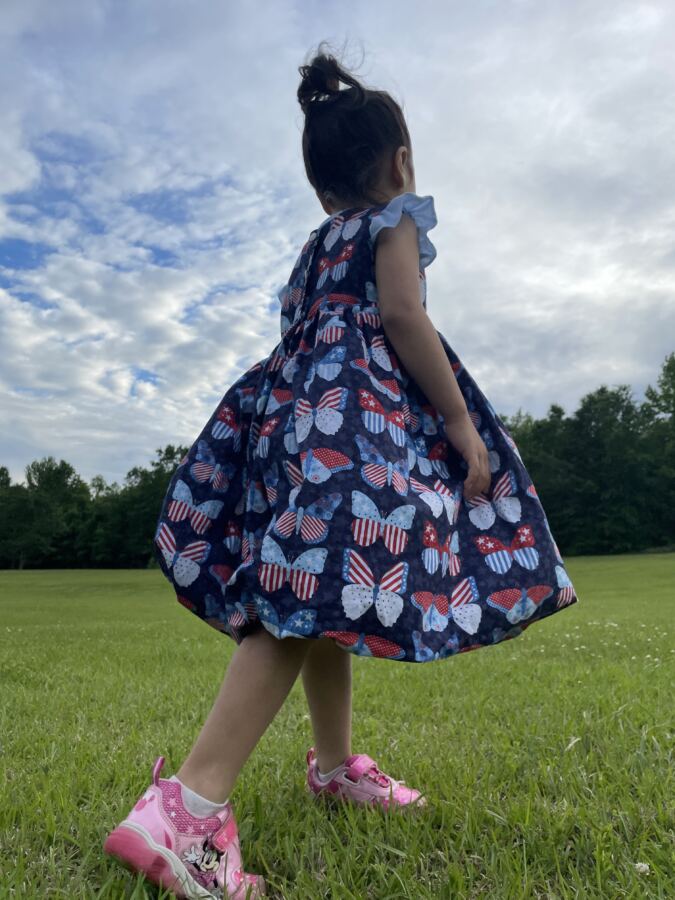
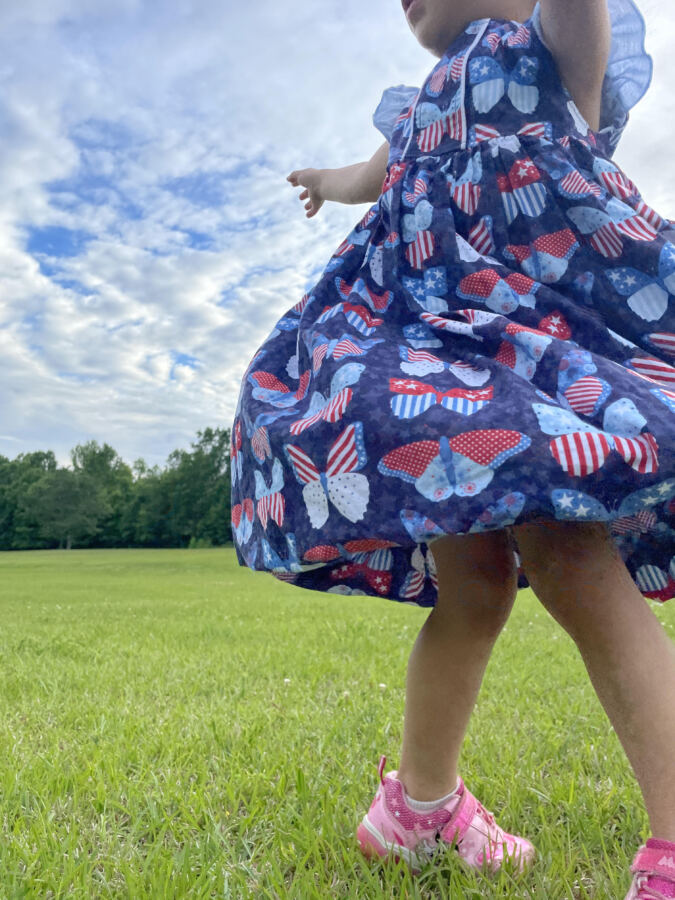
This design features a timeless yoke with a decorative trim and a delightfully puffy, bubbly skirt that’s just too lovely to resist.


I’ve broken down the process into simple, easy-to-follow steps, so you’ll be able to sew this beauty up in no time. So grab your fabric and let’s dive into this fun and stylish bubble dress sewing adventure together!
You may read the free tutorial below or optionally purchase the pattern in sizes 2 to 6 years, as an ad- free downloadable PDF for $3.99. Add to cart here.
Free Bubble Dress Sewing Pattern for Girls
Materials Required
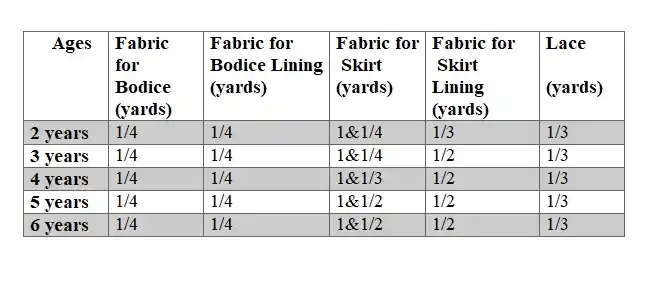
- Medium- weight cotton Fabric for the dress- requirements specified in the table-3 below.
- 1/2- inch cotton lace- requirements specified in table-3.
- Sewing Notions.
- Fabric Marking Pen.
- KAM snaps or ordinary buttons (if you know how to sew buttonholes)- 3 sets.
- Bodice Pattern Template *Enter your e-mail address and click the subscribe button to download the template.
All the fabrics used here are of 44/ 45 inches width.
The seam allowance is 3/8-inch unless otherwise specified.
I suggest you read the entire pattern once before starting to get a general idea.
All seams are to be finished by zigzag or serger.
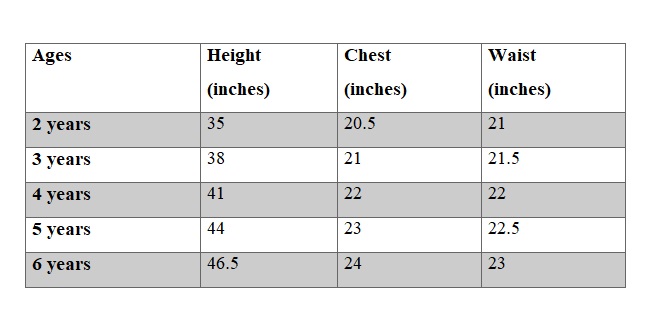
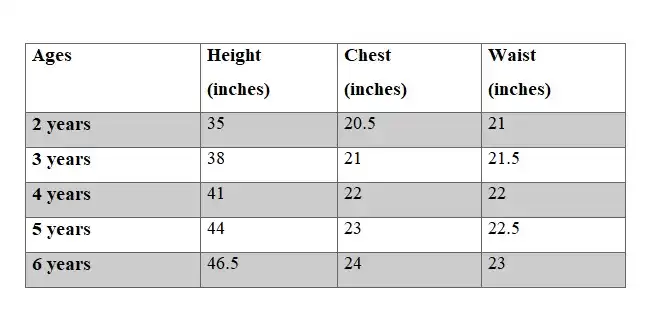
Size Chart
Table-1
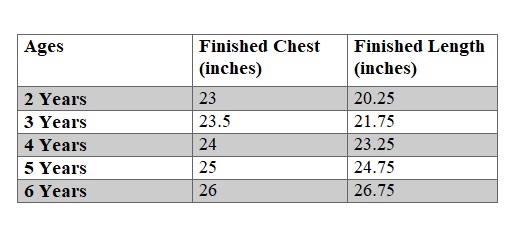
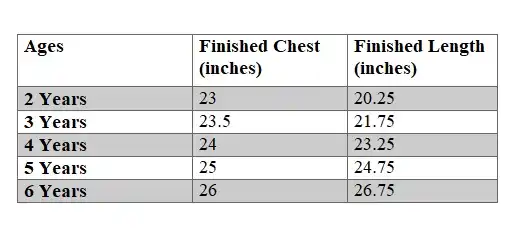
Approximate Finished Measurements.
Table-2
Fabric Requirements.
Table-3

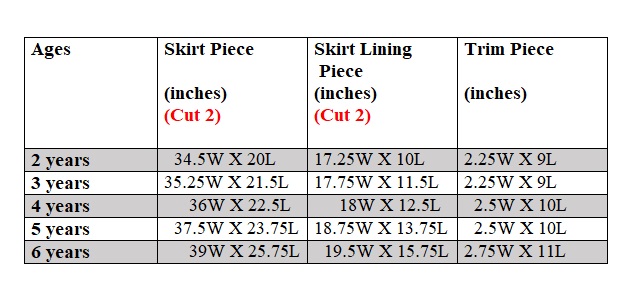
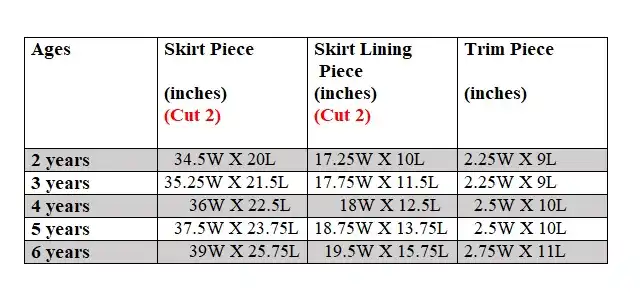
Measurements
In the table below, “W” stands for the width and “L” stands for the length of the fabric piece to be cut.
Table-4
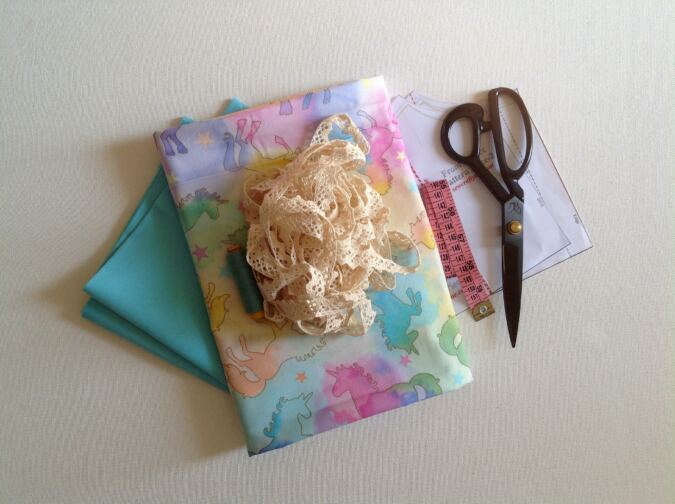

Gather the supplies. Cut the templates for the bodice front and bodice back from the attached PDF.
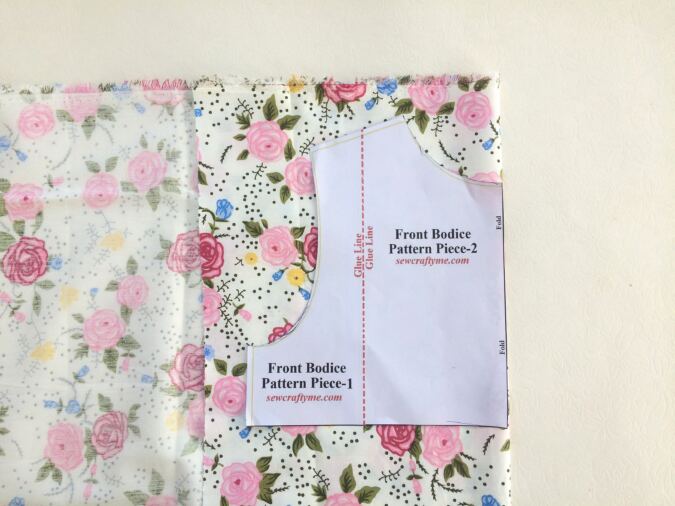

Take the dress fabric and the template for the front bodice. Fold the fabric to fit the width of the template and place the template on the fold. Mark around it and cut to get the front bodice piece. Repeat the steps to get the front lining (picture for illustration purposes).
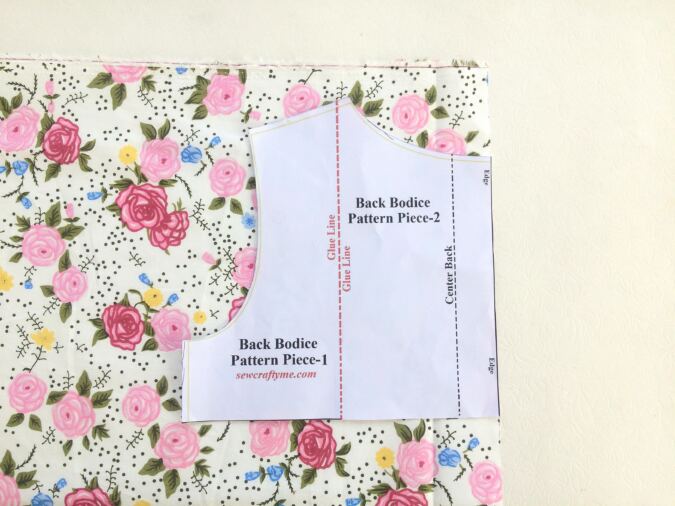

Let’s cut the back bodice. Here again, fold the fabric, but this time, place the template for the back bodice, along the edge of the fabric. Mark around it and cut to get two pieces for the back bodice (the back part of the dress is done in two pieces, for button opening). Repeat the steps to get the back lining pieces (picture for illustration purposes).
**Cut the trim piece, referring to the table-4 above.

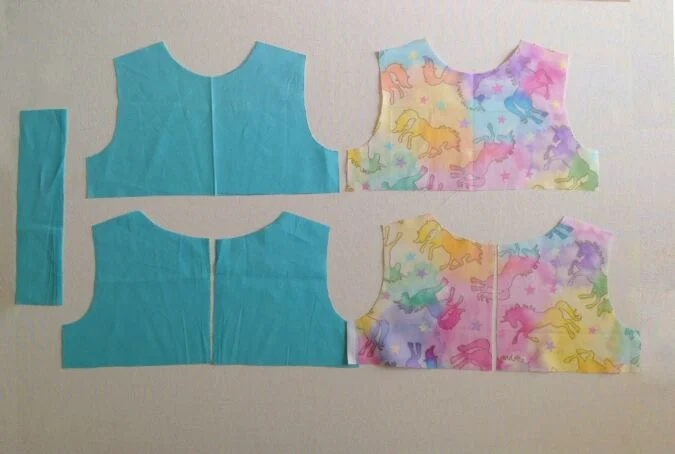
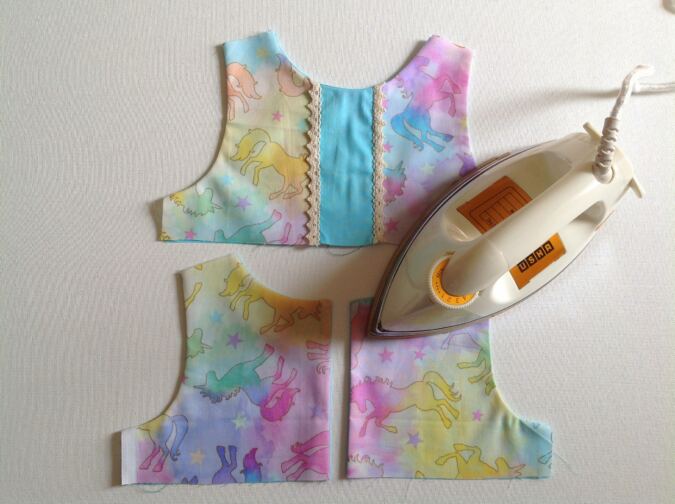
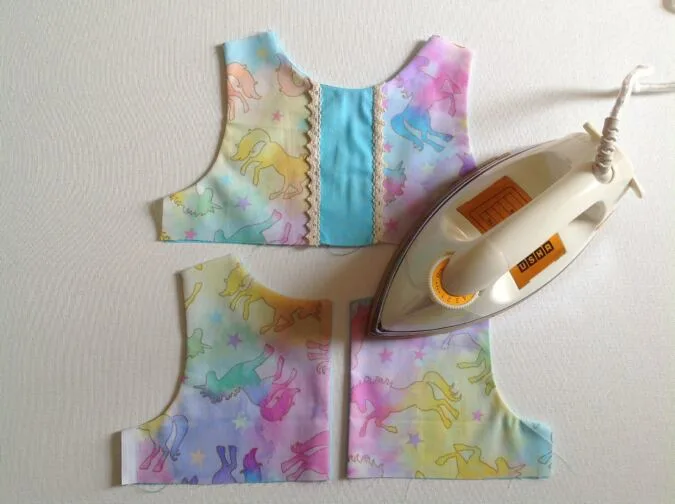
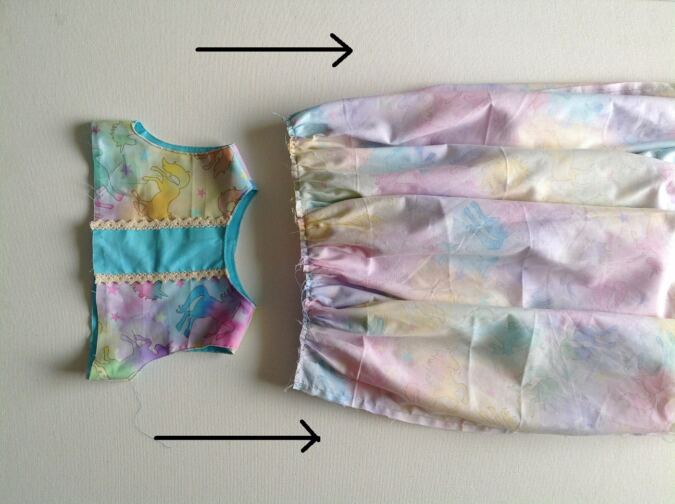
Your bodice-front, lining, bodice –back and lining and trim pieces will look like the picture above.
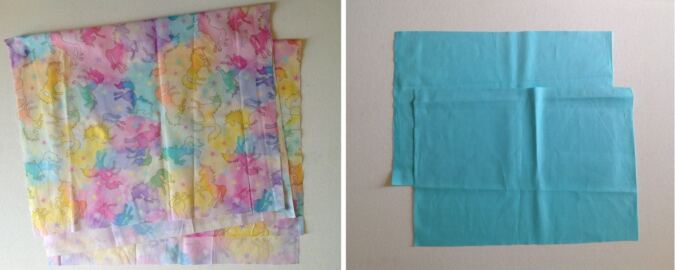

Cut the skirt and lining pieces referring to the table-4 above.
Sewing
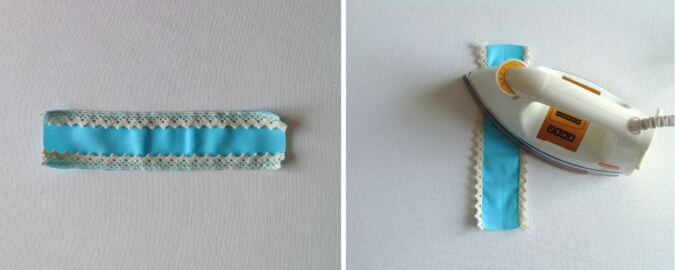

Take the lace and trim pieces and cut the lace into two equal pieces. Line up the raw edge of the lace pieces along the long edges of the trim and pin them together ( the scalloped edge of the lace should face the inside). Sew the lace pieces to the trim, removing the pins as you go.
Turn the lace over to the right side and press open.


Take the front bodice and the trim and fold them lengthwise in half. Handpress to form a crease along the center.
Open the front bodice and the trim. Place the trim above the bodice, matching the center creases. **The upper edge of the trim should extend beyond the neckline by about 1”.

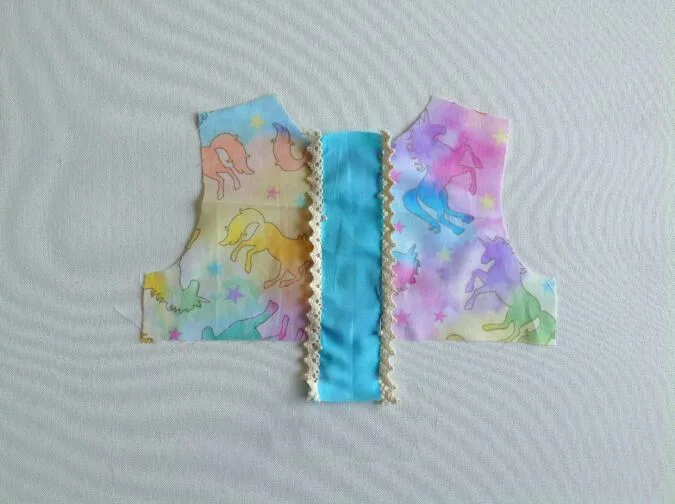
Sew the trim to bodice along the edges on both sides.

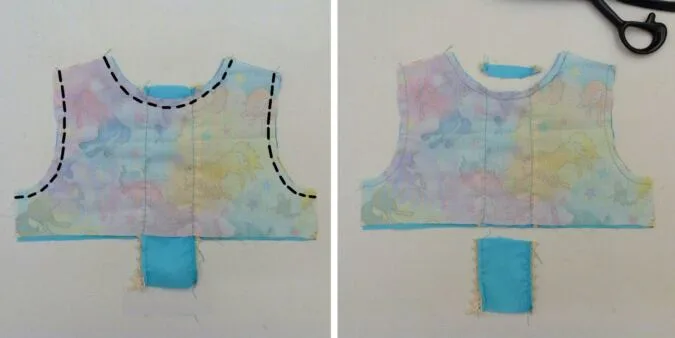
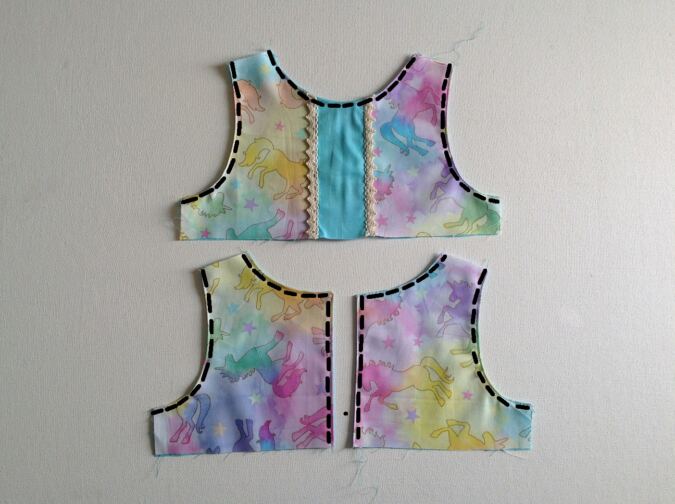
Next, layer the front bodice and lining pieces with the right sides together and aligning the edges. Sew along the neck and armholes to join.
Cut off the extra trim along the neckline and along the lower edge.

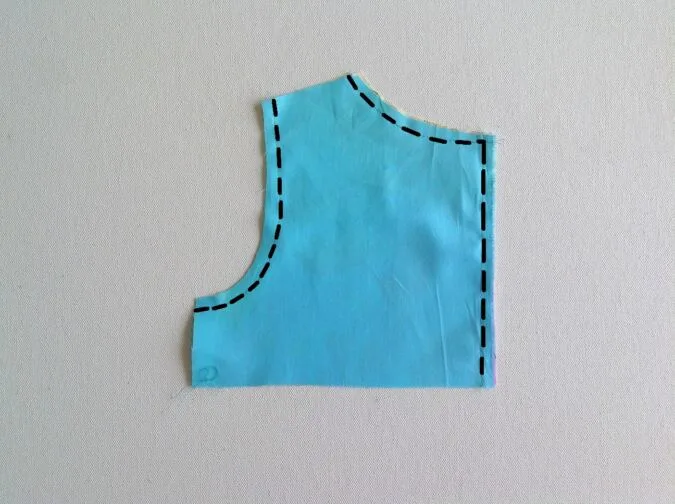
Next, take one back bodice piece and lining and layer them with the right sides together lining up the edges. Sew along the neck, armholes and center back.
Next, take one back bodice piece and lining and layer them with the right sides together lining up the edges. Sew along the neck, armholes and center back.
Repeat on the other back bodice and lining pieces.


Clip the edges and cut the corners for both the front and back bodice pieces.
Turn over to the right side, poke the corners out with the help of a wooden dowel and press taut for the front and back bodices.

Topstich along the neck and armhole for the front bodice.
For the back bodice, topstitch around the neck, armhole and over the center back.
Let’s sew the side seams of the bodice shut.

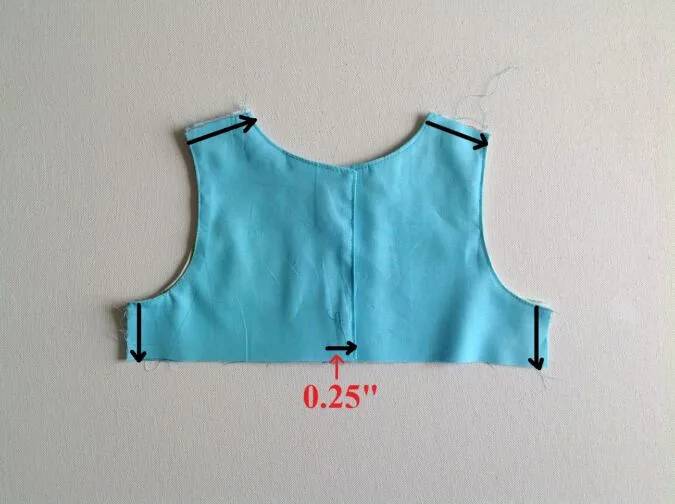
Keep the front and back bodice layered with the right sides together, lining up the shoulders, armholes and side seams. Sew the shoulders and side seams shut.You can see that the button edges are now overlapping. Sew the overlapping edges shut, 0.25- inch above the lower edge. **Make sure to keep the front bodice away while sewing the back bodice shut.
Our bodice is done. We move on to the skirt.

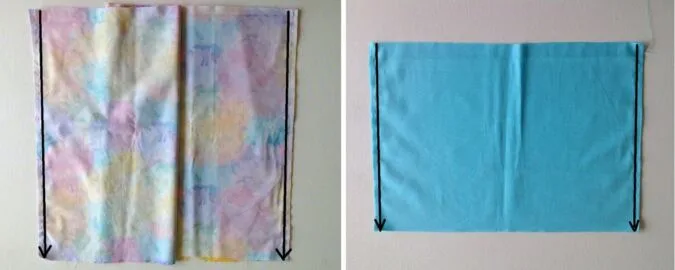
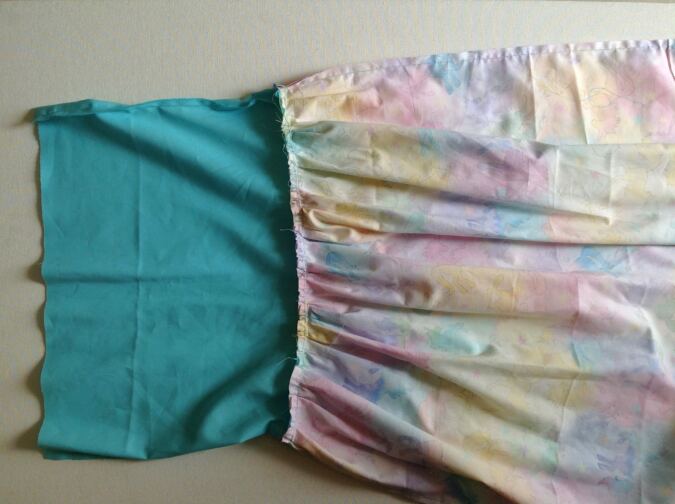
Keep the two skirt pieces layered, with the right sides together and the edges aligning. Sew the side seams shut on both sides. Repeat the same with the skirt lining pieces.
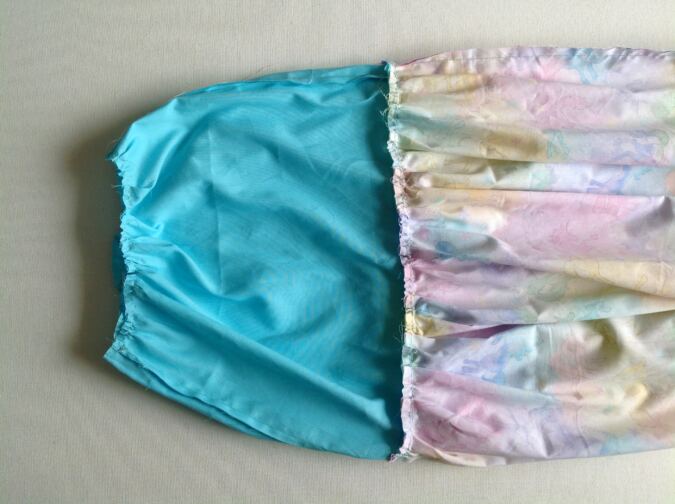
Next, we need to gather the skirt. Turn the upper thread tension of your machine to zero and stitch length to the longest to get a basting stitch.

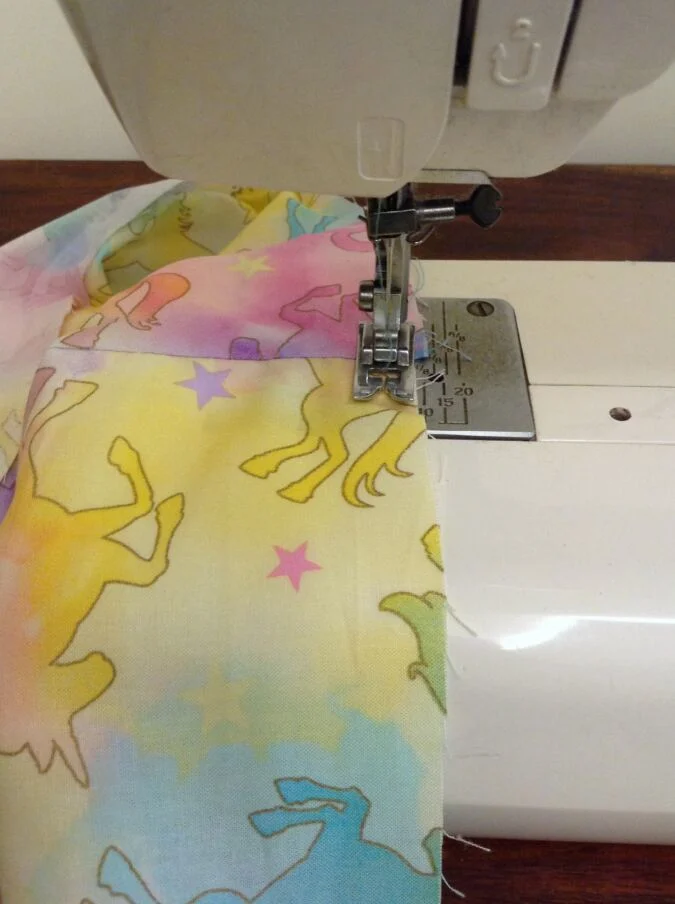
Sew a basting stitch along one of the raw edges of the skirt.

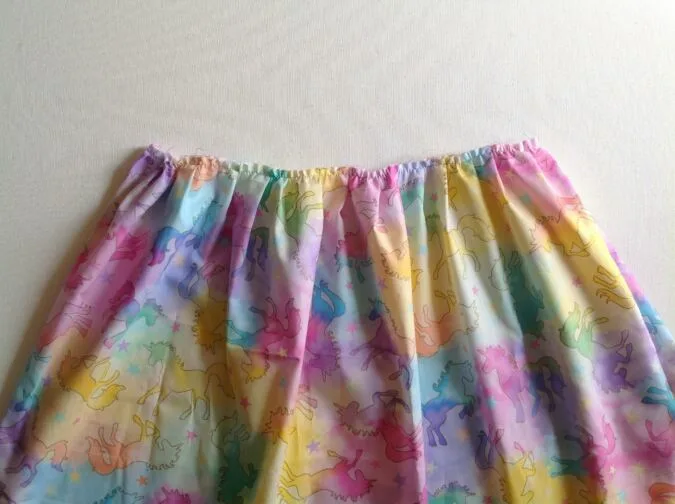
Pull the thread from the bobbin and gather it. Adjust the gathering to make it uniform and to fit the lower edge of the lining.
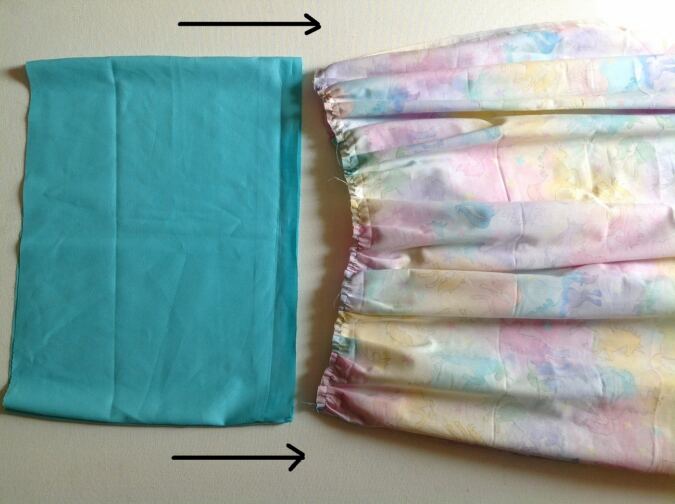

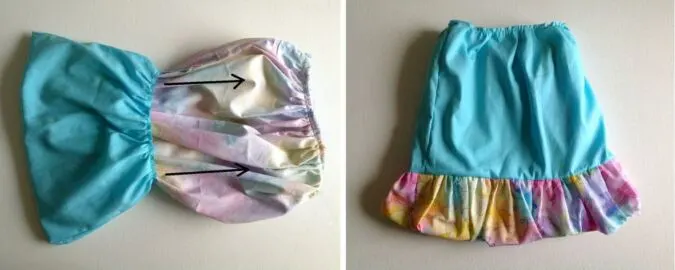
Turn the skirt over to the wrong side and keep the lining on its right side with its lower edge facing the gathered (lower) edge of the skirt. Slide the lining into the skirt.
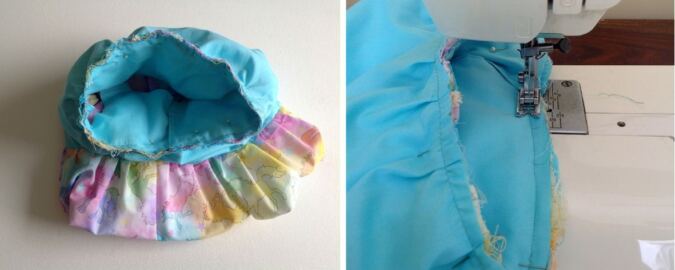

Line up the raw edges of the lining and the skirt and pin all around. Turn the machine settings back to normal and sew the lining to the skirt, removing the pins as you go.

Pull the lining out and it will look like this.
Let’s attach the skirt to the bodice.


Gather the free edge of the skirt to match the lower edge of the bodice and adjust the gathering to make it uniform.

Place the skirt on its wrong side and the bodice on its right side, with the shoulders facing the skirt. Slide the bodice into the skirt.

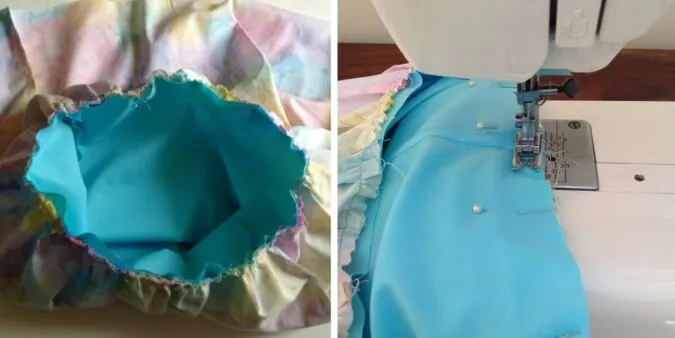
Align the upper edge of the skirt along the lower edge of the bodice, with the right sides together and pin all along. Sew the skirt to the bodice, removing the pins as you go.
Next, we need to attach the lining to the bodice.

Gather the free (upper) edge of the lining in the same way you gathered the top edge of the skirt. Adjust the gathering to make it uniform and to match the lower edge of the bodice.

Fold the lining over to bring the right side out and then gently pull the gathered edge up to line up with the top edge of the skirt.


Line up the lining with the lower edge of the bodice. Sew the lining to the skirt and bodice, which are already attached together.
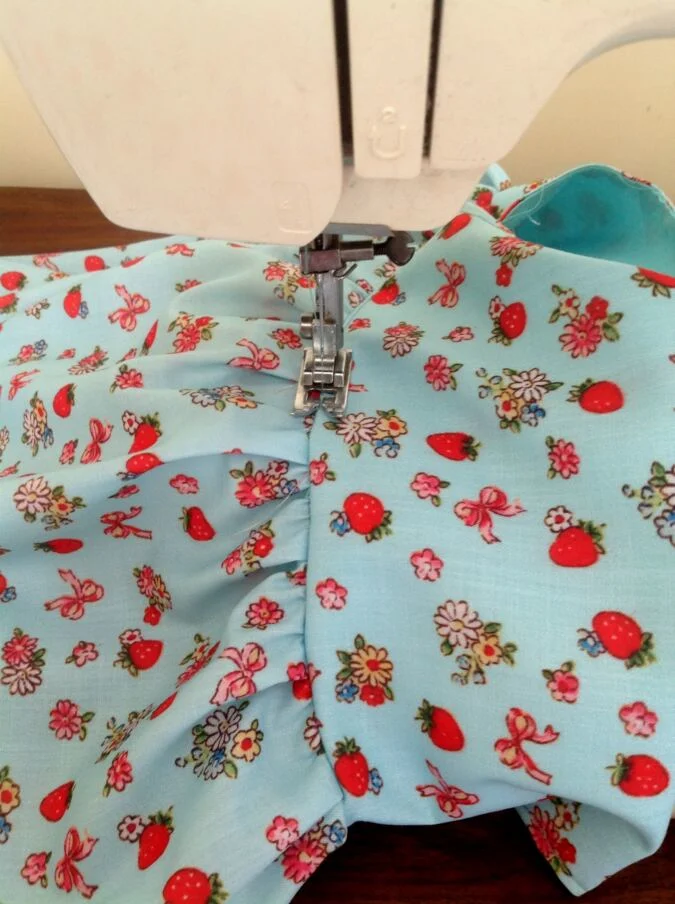
Turn over to the right side, fold the waist seam up towards the bodice and topstitch along the waist seam to make it neat and crisp (picture for illustration purposes).


Cut off the hanging thread and our dress is done!
Find The Webstory For The Post Here; Your Free Guide to Sewing a Darling Girls’ Bubble Dress
Pin it for later here,
Monika
Sunday 5th of April 2026
Id love to get the free pattern please
Laura
Sunday 15th of March 2026
the instructions seem well written. I am a beginner sewer, and would like to make for my granddaughters. Would you consider this "Easy" as stated on some patterns? Thank you
Surayya
Wednesday 18th of March 2026
I wouldn’t consider this a beginner-level pattern, as it involves more gathering and attachments, especially in the skirt part. I would classify it as an intermediate-level pattern.
Selma
Tuesday 17th of February 2026
Obrigada por esse projetotao lindo. Minhas netas vao amar!!
Judy
Thursday 30th of October 2025
Hi. Have made the bubble dress for one grand daughter, she loved it. Do you have a bigger sizing in this pattern for an older girl please
Surayya
Thursday 30th of October 2025
Hi! I’m so glad to hear your granddaughter loved the bubble dress :). At the moment, the pattern is available up to 6 years only. I’ll definitely keep larger sizes in mind for a future update!