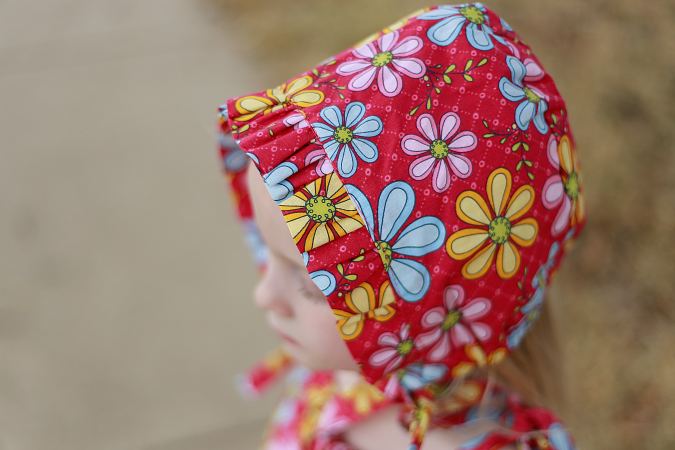
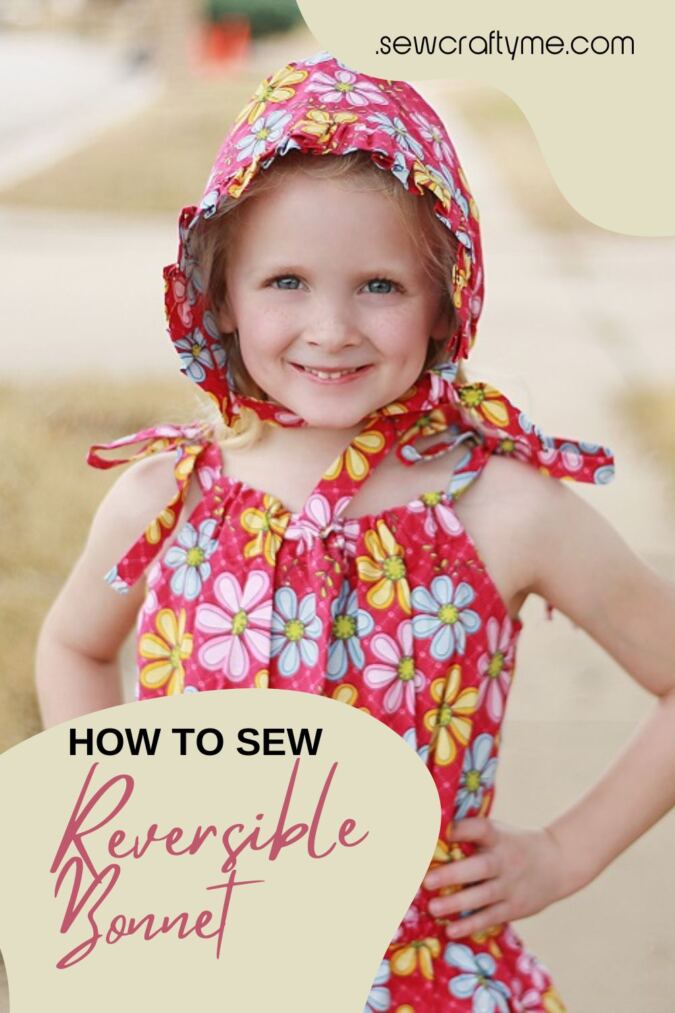
I suppose I have covered most of the summer patterns for babies. I have released patterns for baby dresses and rompers to headbands and booties. But, hey wait! Here is something more that is sure to bring some oomph to her summer dressing, a beautiful baby bonnet sewing pattern!

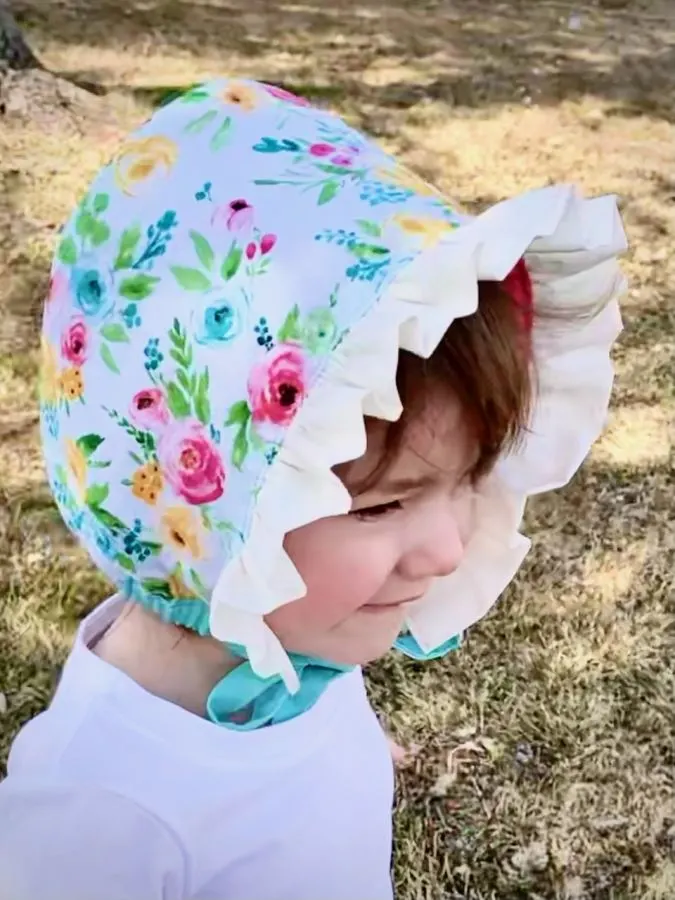
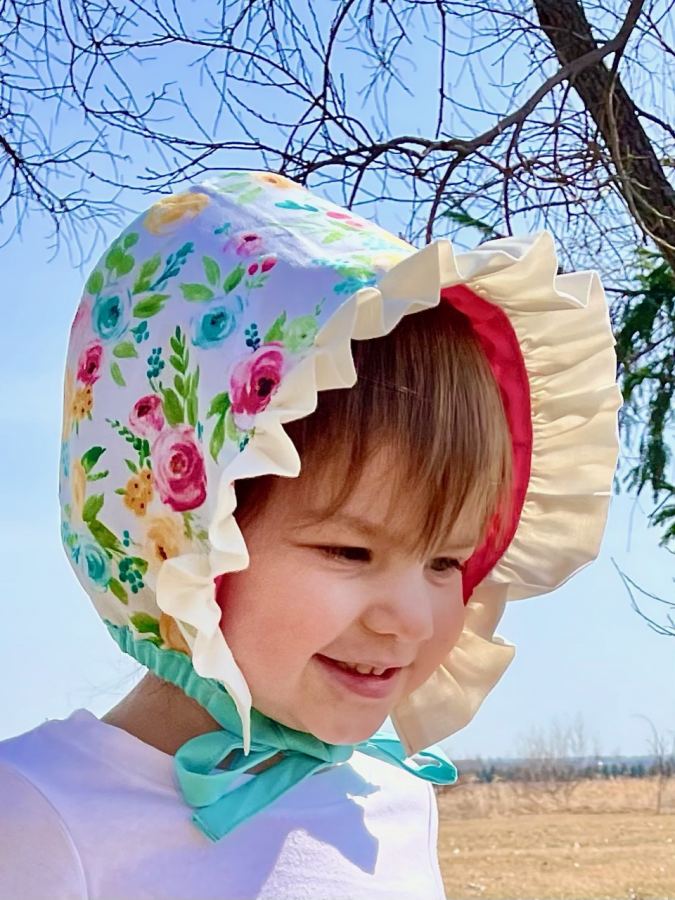

This is a lovely pattern that can give your little one the classic look she deserves. It also serves as a hat to cover her reddish cheeks under the scorching sun.


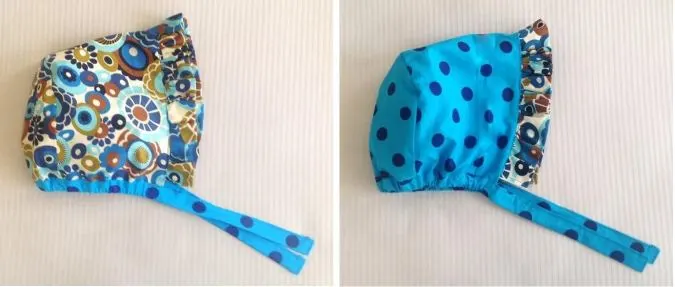
This sun bonnet pattern comes with multiple options; You can use two different fabrics for the inside and the outside for a two-in-one bonnet. You can either sew it with the beautiful ruffle or use lace instead to get a beautiful vintage-style bonnet.


Below I have given measurements and templates free for sewing reversible baby bonnets starting from newborn to 24 months.
If you would like to see all my baby patterns in one place, click on the picture below:

Free Baby Bonnet Sewing Pattern
Materials Required
- Medium-weight cotton fabric for the bonnet body, ruffles, and ties- 1/3 yard (you can use your leftover fabric scraps or fat quarters).
- Medium-weight cotton fabric in a different color or print for the bonnet lining- same as above.
- 3/8 -inch elastic- requirement specified in table- 2 below.
- Sewing Notions.
- Bonnet Back Template. * Enter your e-mail address and click the subscribe button to start downloading the template automatically.
I suggest you read the entire pattern once before starting to get a general idea.
All the fabrics used here are 44/45 inches in width.
Seam allowance is 3/8-inch unless otherwise specified.
**Few pictures below are for illustration purposes and as such may vary from the original.
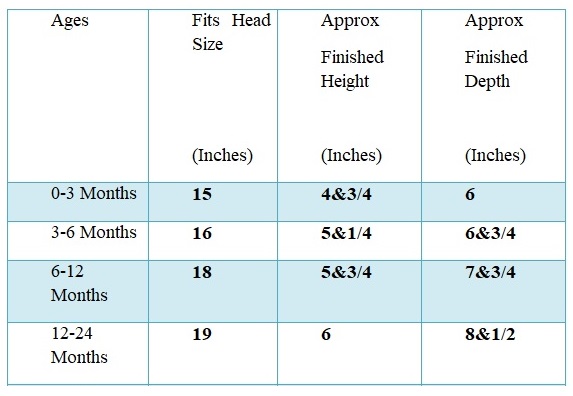
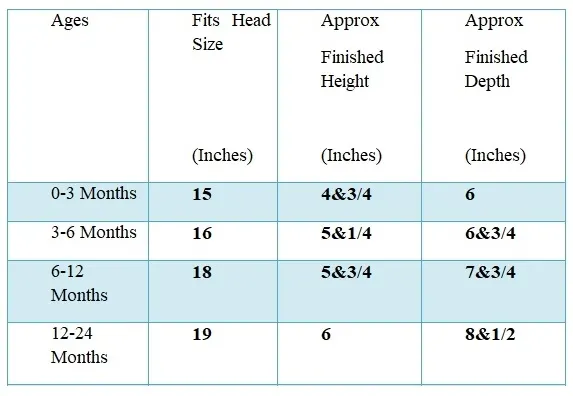
Table-1
Finished Measurements


Note
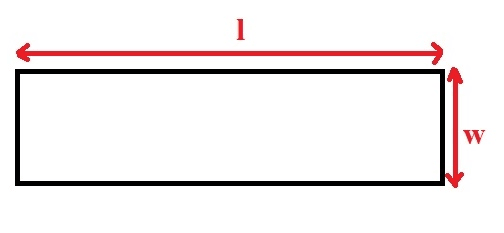
- In the table below, “l” stands for the length and “w” stands for the width of the fabric pieces.
- The bonnet body pieces and the bonnet back pieces are to be cut from the main fabric and the lining fabric. The ruffle and the tie can be cut from either of the two, depending upon your taste.
Measurements
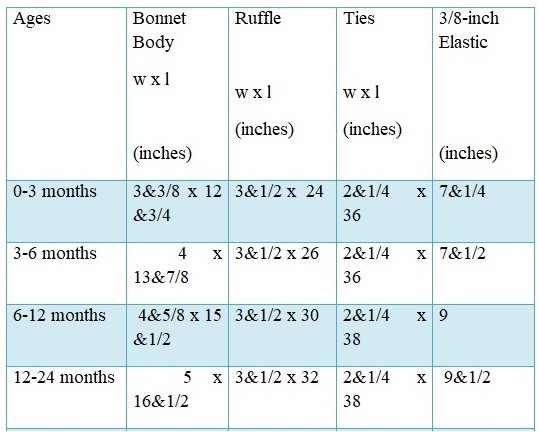
Table-2


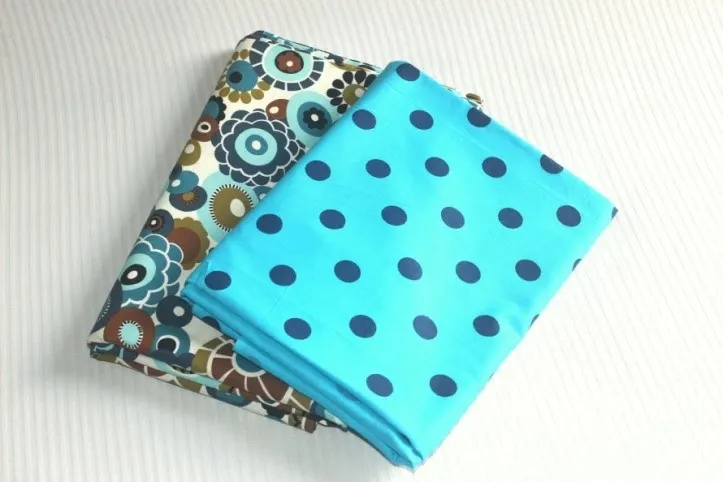
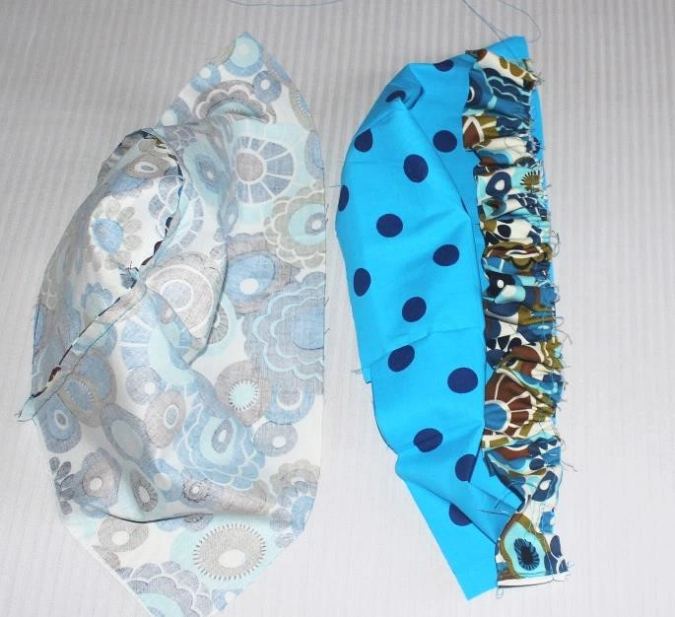
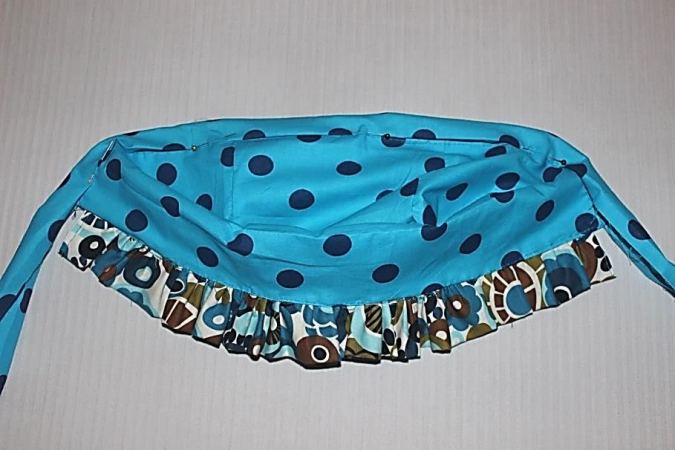
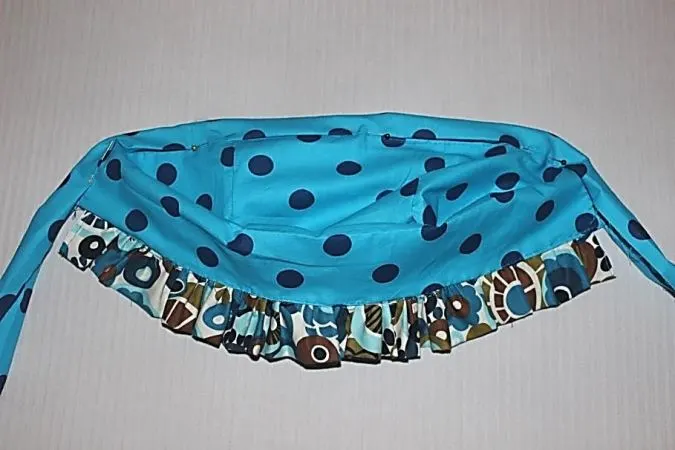
Take the two different fabrics for the main bonnet and the lining. Here I chose the polka dot fabric for the main bonnet and the floral fabric for the lining.
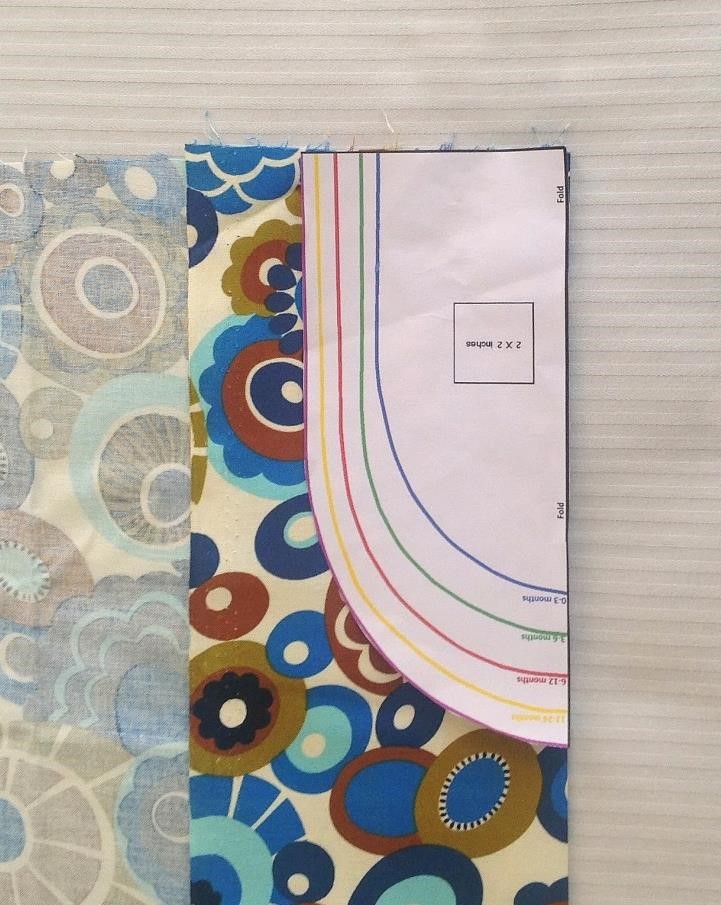
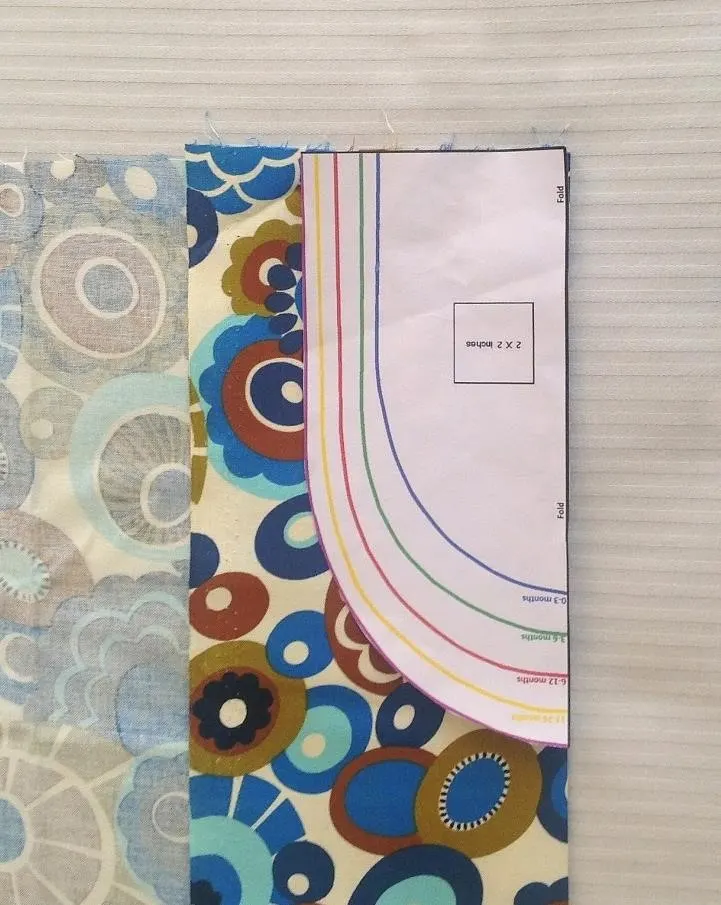
Take the template, fold the fabric to fit the width of the template and place the template on the fold. Mark around it and cut to get the bonnet back. Repeat the steps on the other fabric to get the bonnet back lining piece.
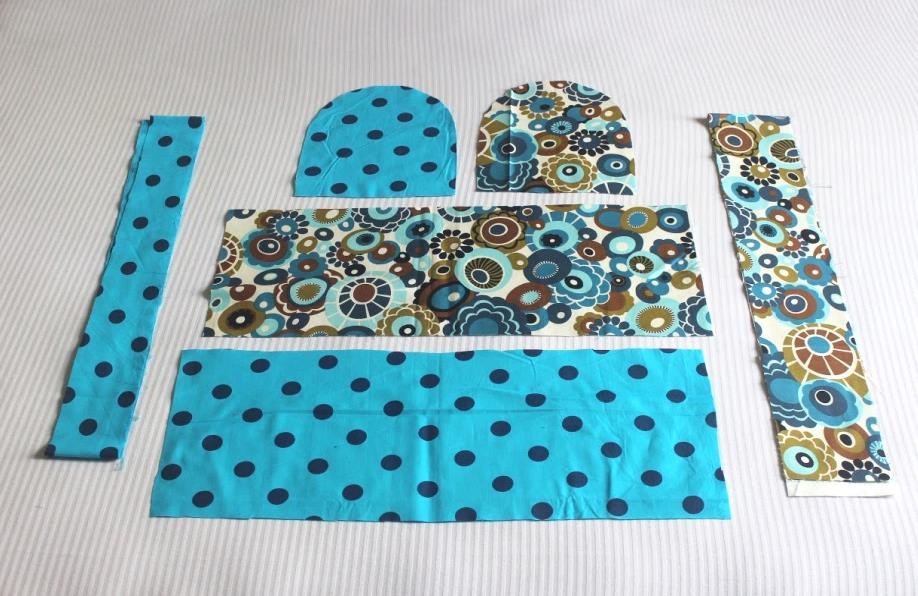
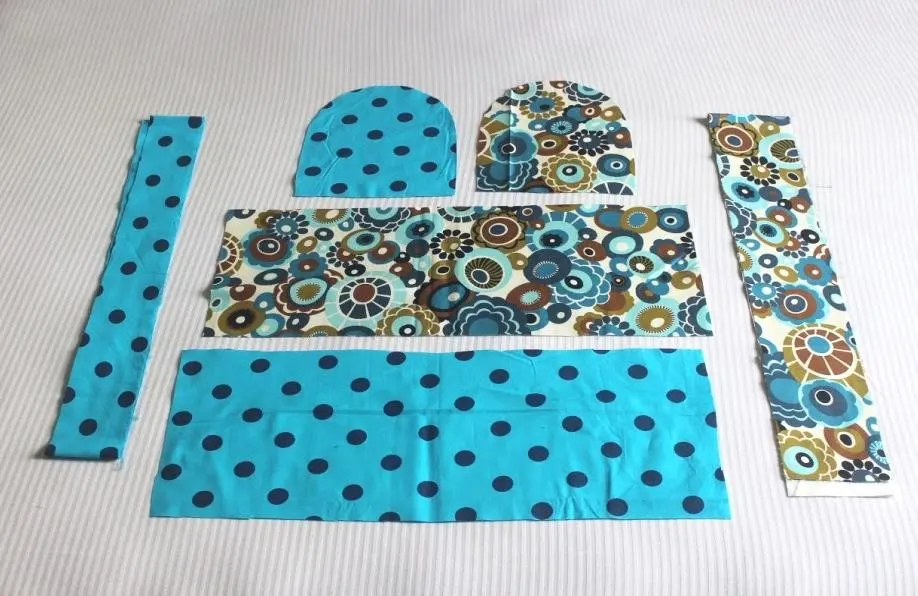
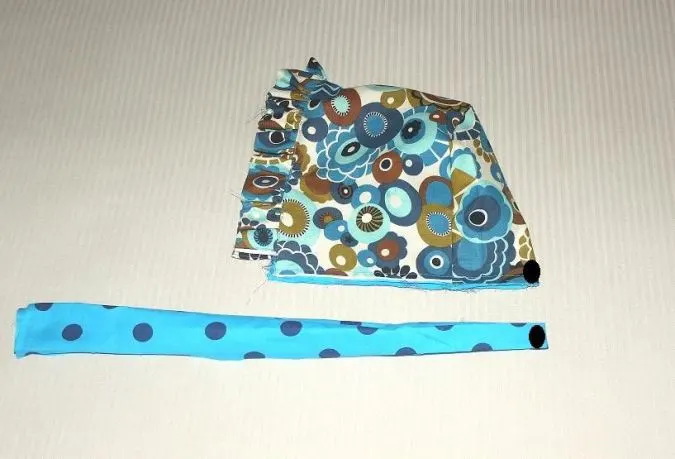
Cut the bonnet body pieces, bonnet ruffle piece, and bonnet tie piece. referring to the table-2 above. You will get your pieces like this.
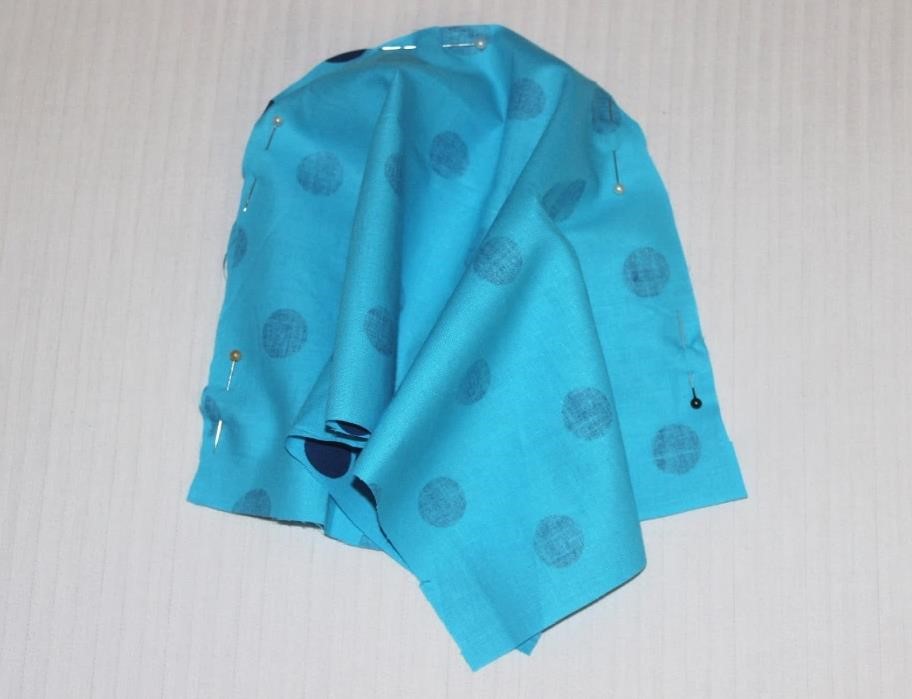
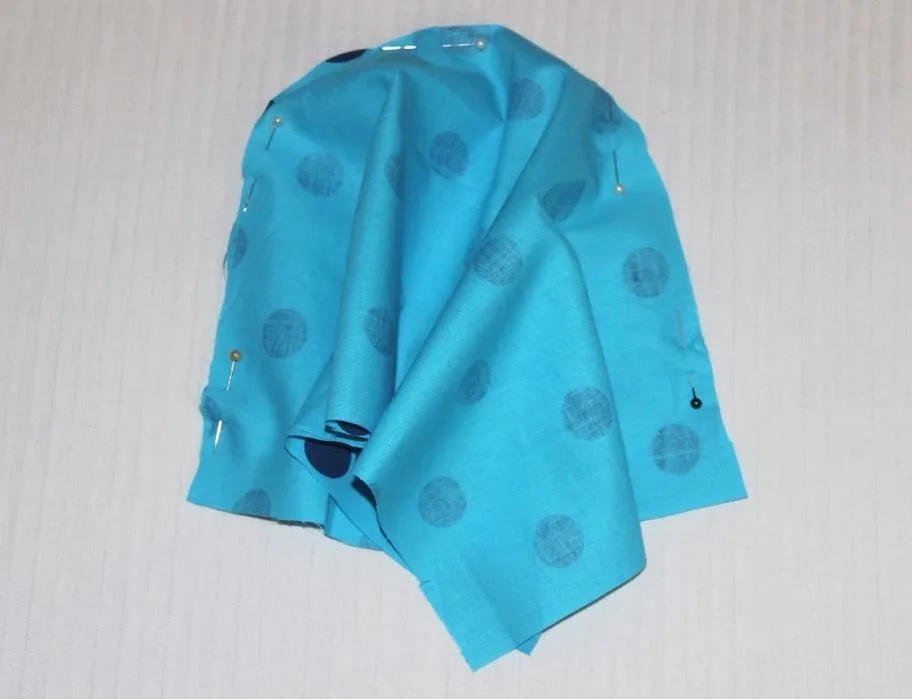
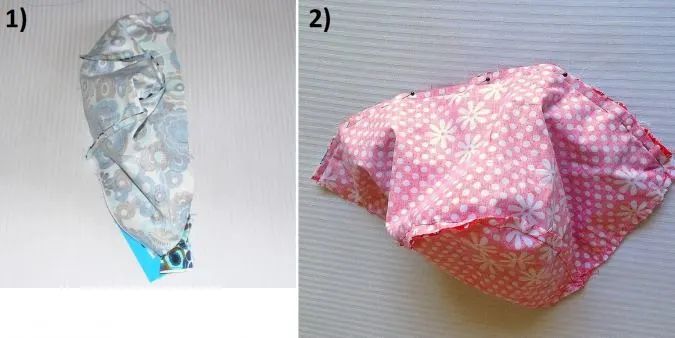
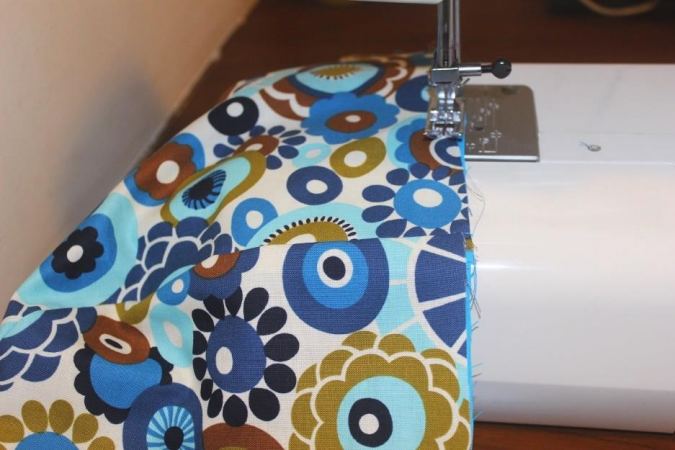
Take the bonnet back and the body piece. Align one of the longer edges of the body piece with the curved edge of the back piece, keeping the right sides together and pin. You will need to ease the body piece a bit to fit it around the curved edge of the back piece.
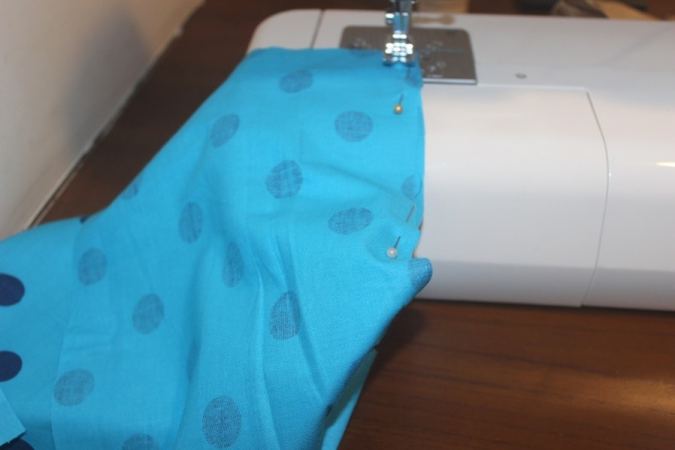
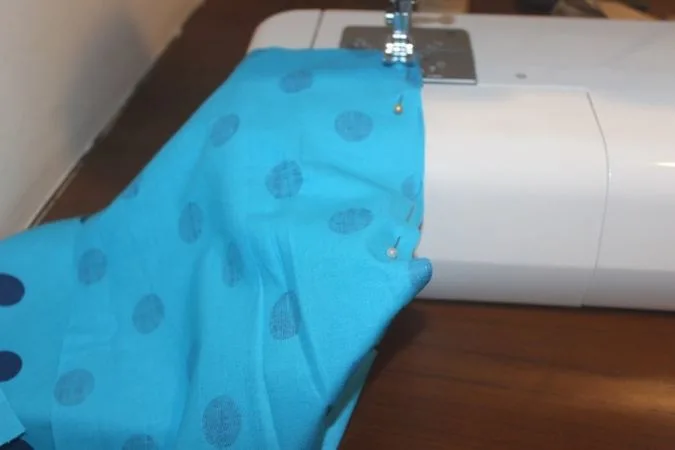
Sew the two pieces together, removing the pins as you go. Repeat the steps with the lining pieces.
Next, we move on to the ruffle.
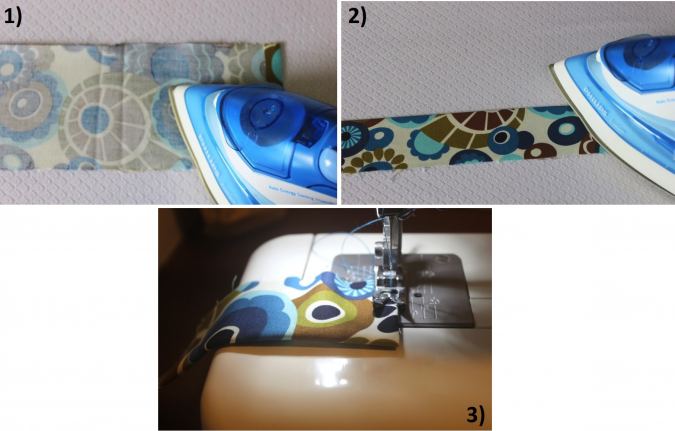

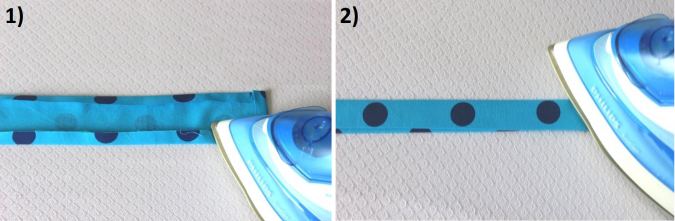
1) Take the ruffle piece; fold the two shorter edges toward the wrong side twice by 3/8-inch and press. 2) Fold the ruffle in half, lengthwise, with the wrong sides together, and press again. 3) Sew the two shorter sides shut.
Next, we gather the ruffle. Turn the upper thread tension of your machine to zero and stitch length to the longest to create a basting stitch.
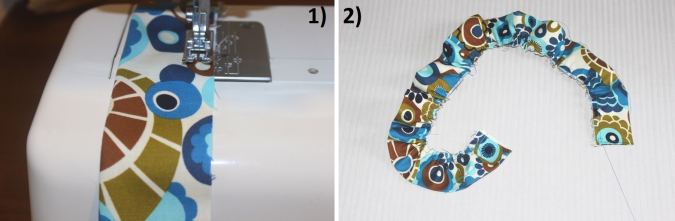
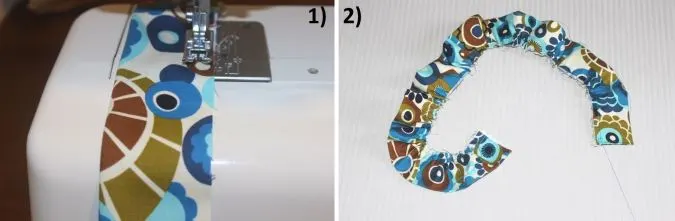
1) Sew a basting stitch ¼-inch away from the raw edge of the ruffle, leaving a long tail of thread about 6 to 7 inches long. 2) Pull the thread from the bobbin gently and gather the ruffle.
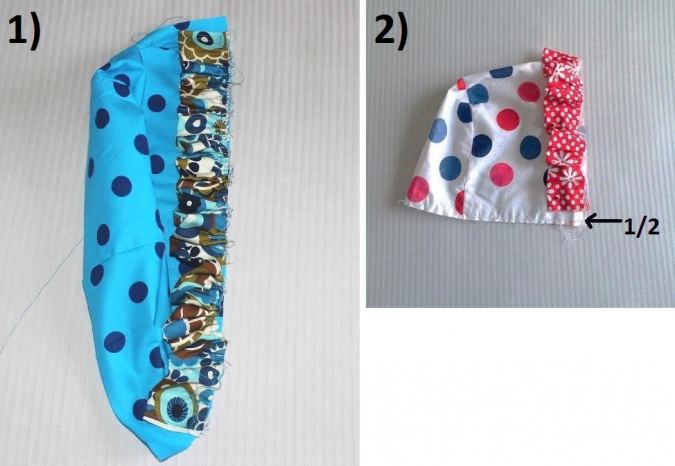
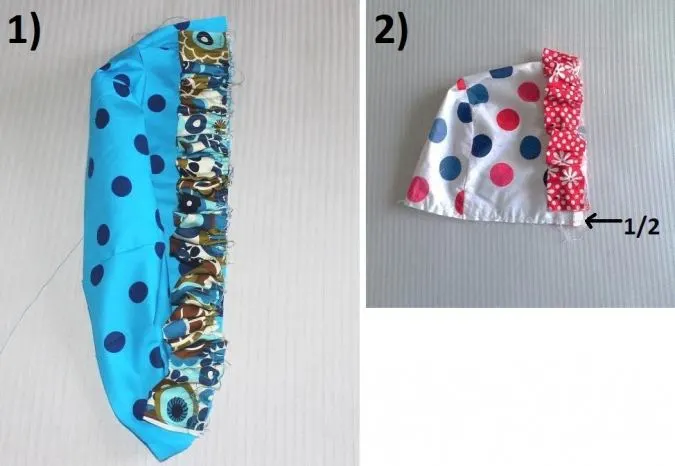
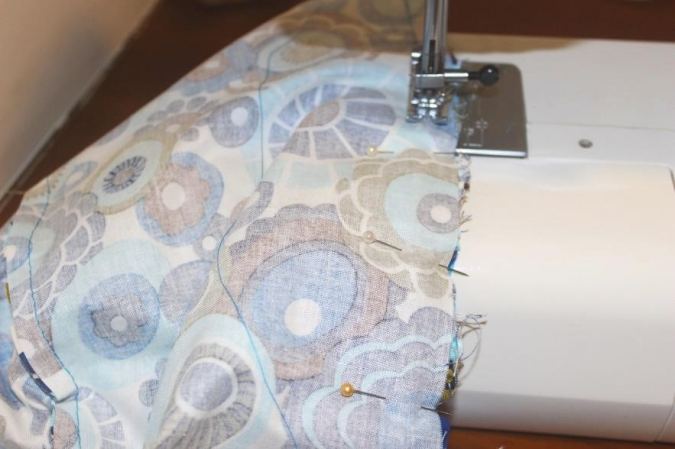
Align the raw edge of the ruffle along the top raw edge of the bonnet body, on the right side. Adjust the gathering in the ruffle to make it uniform and to leave 1/2-inch on either side of the raw edge of the bonnet body. Pin the ruffle to the bonnet.
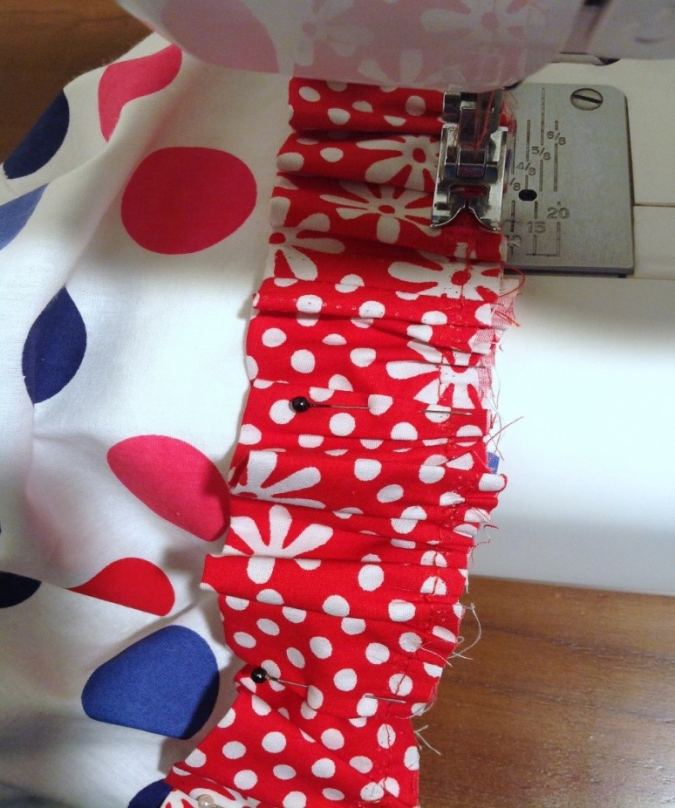

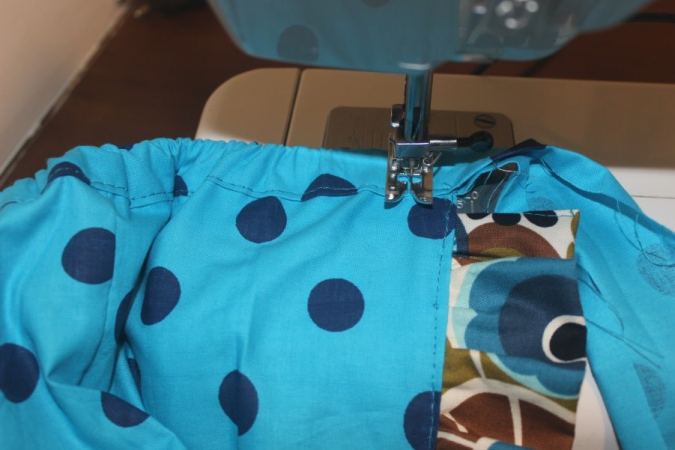
Turn the machine settings back to normal and sew the ruffle to the bonnet.
Next, we sew the bonnet body and bonnet lining pieces together.

Place the main bonnet piece on the right side and the bonnet lining on the wrong side.

Align the lower and upper raw edges of the two pieces together and pin the upper edges, sandwiching the ruffle in between.

Sew the main bonnet and the lining pieces together along the pinned edge. The lower edge of the bonnet is left open.

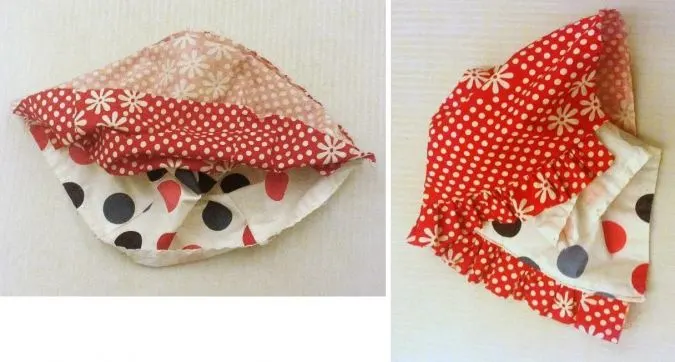
Bring the right side out through the opening along the lower edge of the bonnet and push the lining into the main hat.
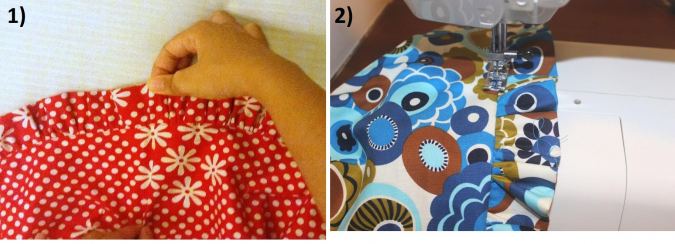

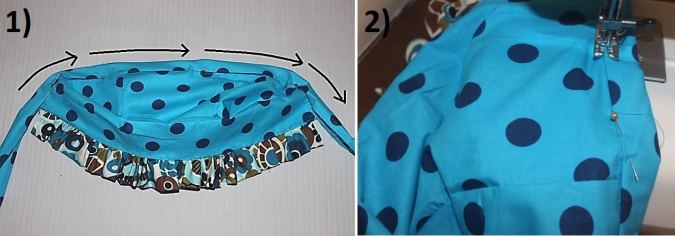
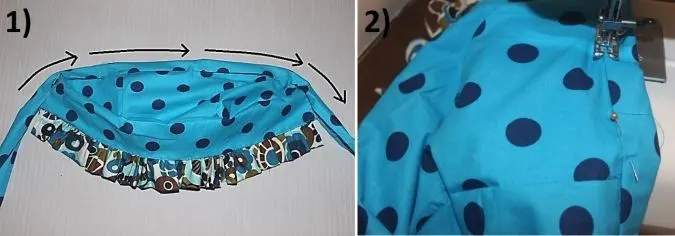
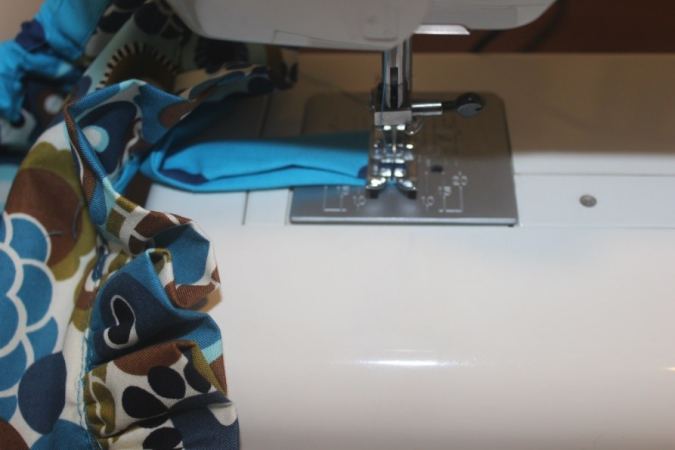
1) Pull the ruffle taut and press the edge. 2) Topstitch next to the ruffle to make it neat and crisp.

Align and sew the lower edges of the two pieces together, using a 1/4-inch seam.
Next, we attach the tie to the lower edge of the bonnet.

1) Take the tie piece; fold the two longer edges and the two shorter edges towards the wrong side by 3/8-inch and press. 2) Fold the tie in half, lengthwise, and press again.
Let’s mark the center of the tie and bonnet.

Fold the tie in half and mark its center. Fold the bonnet also in half, aligning the edges and mark the lower center.
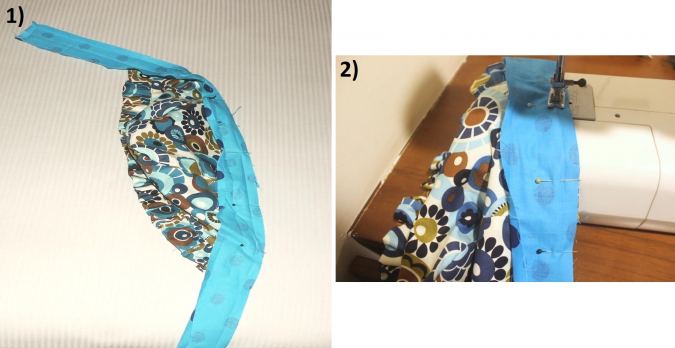

1) Open the fold along one of the longer edges of the tie and pin it along the raw lower edge of the bonnet, matching the center marks. 2) Sew the tie to the lower edge, removing the pins as you go.
Fold the tie over to the other side, along the center crease, and align its folded edge along the lower edge of the bonnet and pin all along.
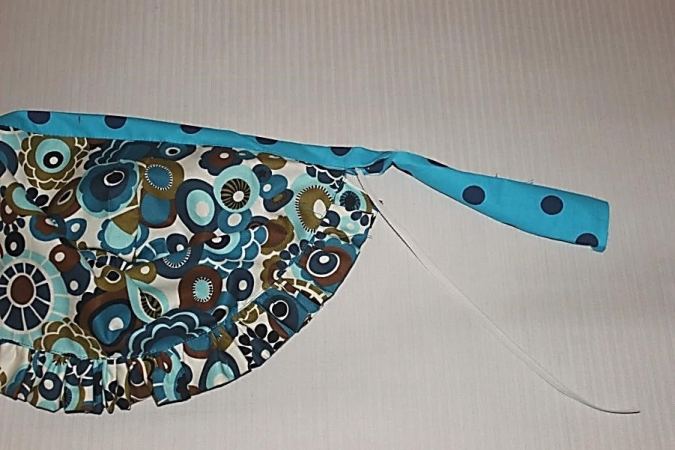
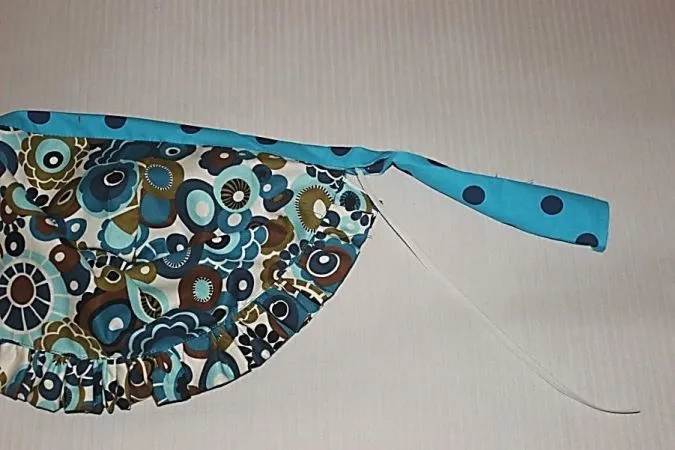
Sew the tie closed starting from one end of the bonnet to the other as marked in the picture above (the remaining part of the tie is to be sewn only after the elastic is inserted).
Take the required length of the elastic, referring to the table-2 above, and insert it through the tie using a safety pin.

Secure the ends of the elastic at both the edges of the bonnet by sewing back and forth a few times.
Next, we need to sew the tie closed.

Sew the remaining part of the tie shut on both sides, starting from the shorter edges.

Cut off the hanging threads and your reversible baby bonnet is ready.
Have a look at the webstory for the post here, Baby Bonnet Beauty: Free Sewing Tutorial
Pin it for later here,
Kingsley
Thursday 5th of September 2024
Hello, how soon after purchase can I expect the pattern to be emailed please?
Surayya
Monday 9th of September 2024
Your pattern would be emailed within 24 hours of payment.
Maureen
Monday 2nd of October 2023
Free Bonnet pattern please
Rose
Thursday 15th of December 2022
Why cant I download the free pattern. Thanknyou
Surayya
Friday 16th of December 2022
Try clearing your cache and refreshing your browser before downloading the templates again. It should work.
Laura
Saturday 13th of August 2022
Thank you for the bonnet pattern it was great explained perfectly and truly free, this you don't see much. Very greatful. Laura
Elizabeth Lovell
Sunday 29th of May 2022
I have paid for the Baby Bonnet template through PayPal, how do I get my template ?
Surayya
Monday 30th of May 2022
The pattern has been e-mailed.