Your little girl’s summer fashion wardrobe is never complete without a maxi dress. Maxi dresses have made a come back during recent years. They are modest and comfy, yet stylish on your little girl’s torso.


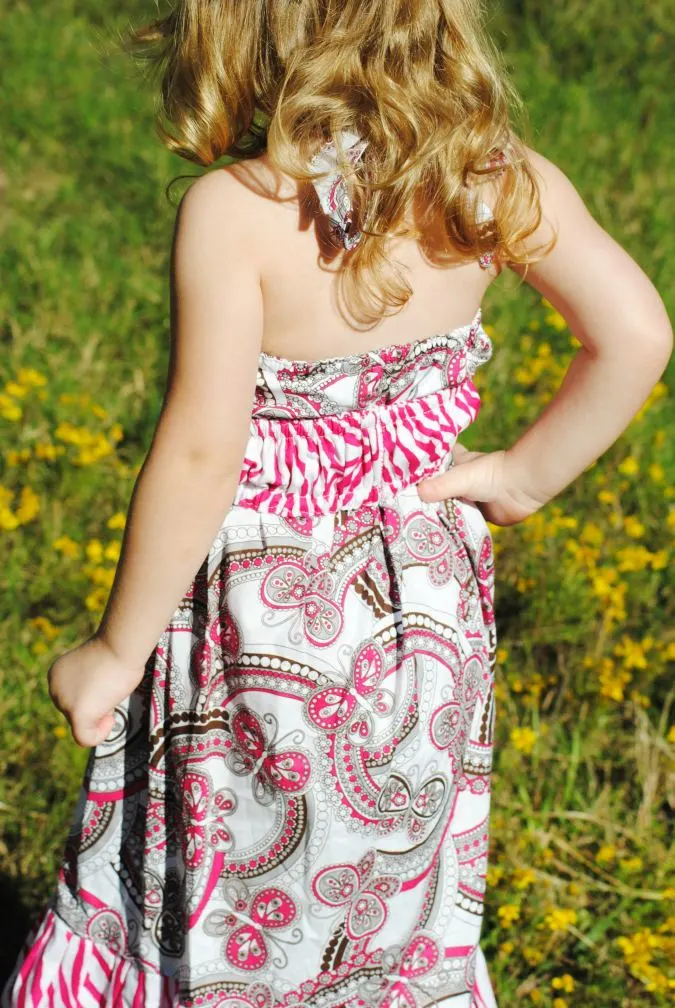
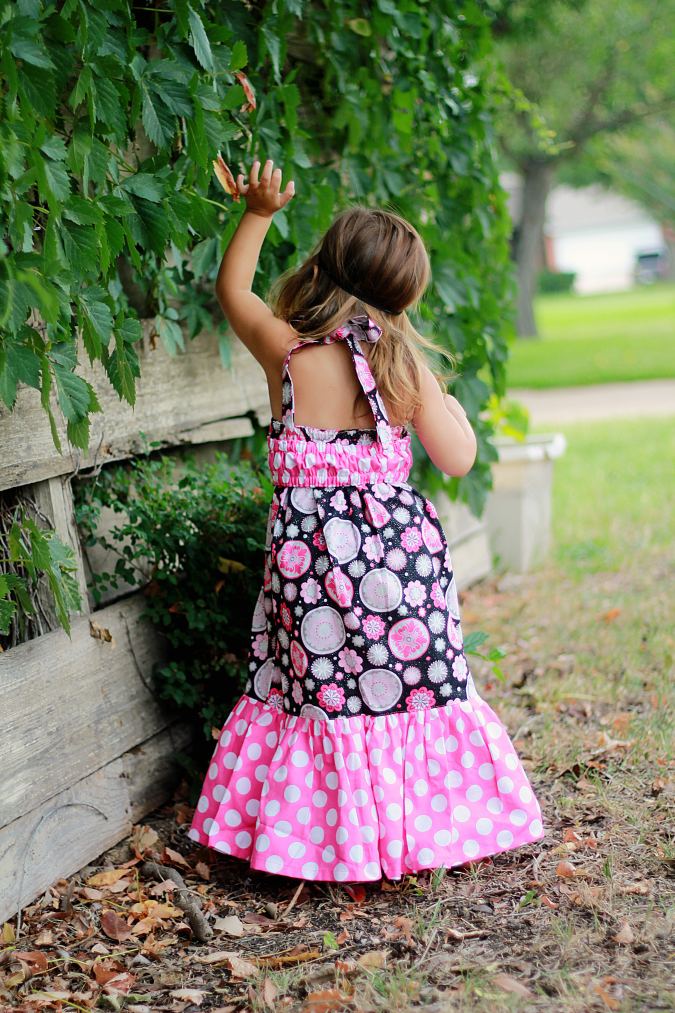
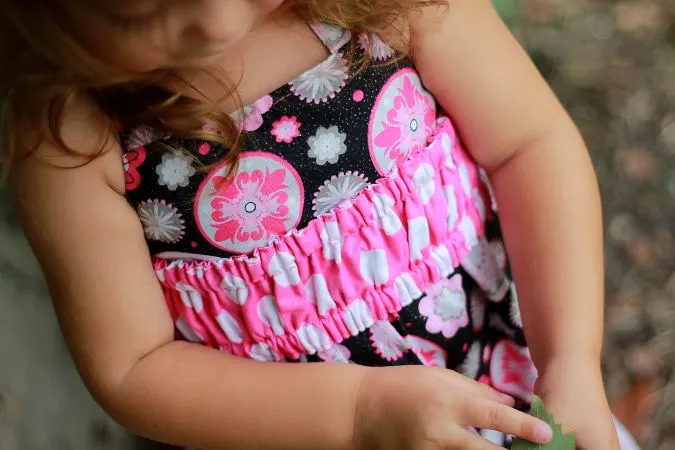
Sew this maxi dress for your little girl and create a perfect blend of cuteness and fashion. This elegant maxi dress is great for her Spring/Summer style. This dress is easy to sew with my full body template and explicit instructions. The elastic sash at the waist adds to the fashion quotient of the dress. It is detachable, gives a good fit to the dress and is also easy to wear. Add a flower or bow at the bodice to make her look even more fabulous in this pretty dress.

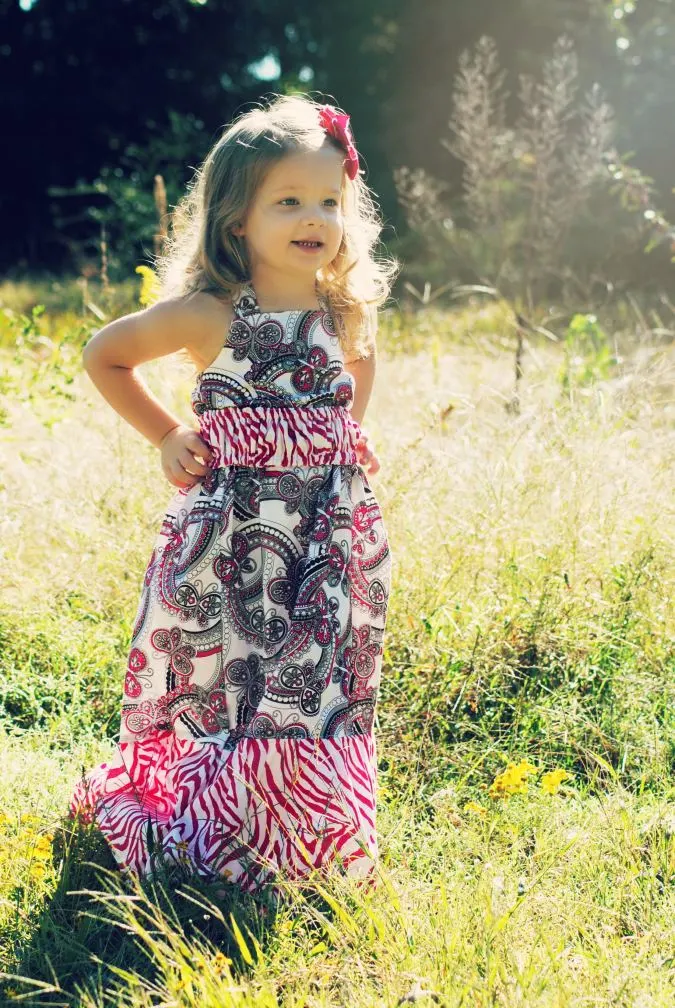

This maxi dress sewing pattern for your little girl is a perfect blend of cuteness and fashion. This elegant maxi dress is great for her Spring/Summer style. This maxi dress is easy to sew with my full body template and explicit instructions.
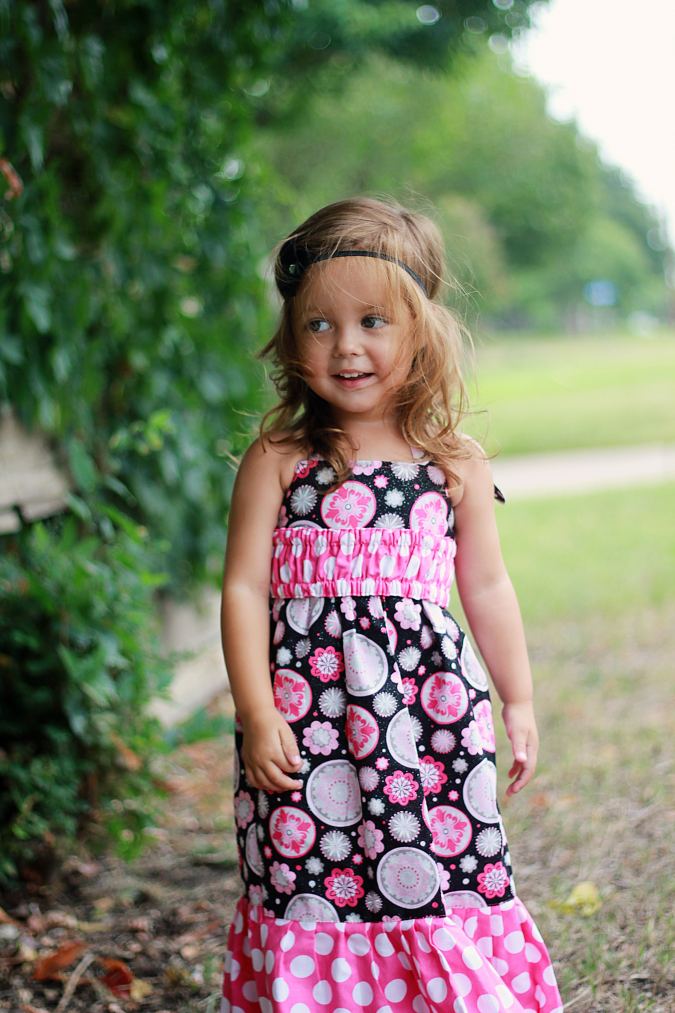

The elastic sash at the waist adds to the fashion quotient of the dress. It is detachable, gives a good fit to the dress and is also easy to wear. Add a flower or bow at the bodice to make her look even more fabulous in this pretty dress.


*The pattern contains detailed step by step instructions for ages ranging from 12 months to 10 years and can be used many times as your child grows.
* It is complete with a pictorial representation of the whole sewing process and is suitable for any beginner.
Maxi Dress Sewing Pattern for Girls
Materials Required
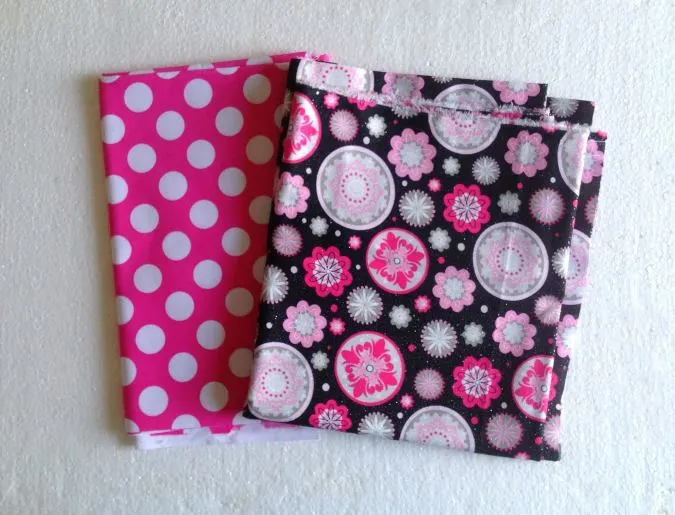
- Cotton fabric in any desired print or color for the yoke and skirt- requirement specified in the table-2 below.
- Cotton fabric in a contrasting or coordinating print or color for the ruffle and waist sash- requirement specified in the table below.
- 3/8-inch elastic- requirement specified in the table below.
- Templates for the bodice.
Finished Measurements
Table-1
| Ages | Finished length
(top yoke edge to skirt hem) (inches) |
Finished Chest
(inches) |
| 12 months | 22.5 | 20 |
| 2 years | 25.75 | 21 |
| 3 years | 27.25 | 22 |
| 4 years | 30 | 23 |
| 5 years | 31 | 24 |
| 6 years | 33.75 | 25 |
| 7 years | 34.5 | 26 |
| 8 years | 36 | 27 |
| 9 years | 36.75 | 28 |
| 10 years | 37.5 | 29 |
All the fabrics used here are 44 inches width.
The fabrics shown here are only for illustration purposes and as such may vary from the original.
The seam allowance is 3/8- inch unless otherwise specified.
I suggest you read the entire pattern once before starting to get a general idea.
All seams are to be pressed flat
All seams are to be finished by zig-zag or serger
Table-2
| Ages | Yoke and Skirt
Fabric (yards) |
Ruffle and Sash
Fabric (yards) |
3/8 Elastic
(inches) |
| 12 months | ¾ | ¾ | 44 |
| 2 years | 1 | ¾ | 45 |
| 3 years | 1 | 1 | 46.5 |
| 4 years | 1 | 1 | 49 |
| 5 years | 1 & ¼ | 1 | 51.5 |
| 6 years | 1 & ¼ | 1 | 53.5 |
| 7 years | 1 & ½ | 1 & ¼ | 54.5 |
| 8 years | 2 | 1 & ½ | 57 |
| 9 years | 2 & ¼ | 1 & ½ | 58 |
| 10 years | 2 & ¼ | 1 & ½ | 59.5 |
Measurements
Table-3
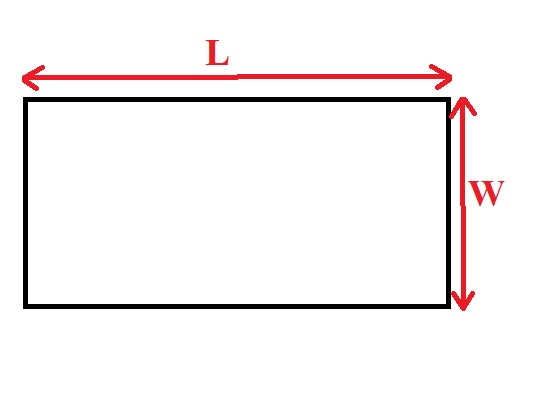
In the table below, “L” stands for the length and “W” stands for the width of the fabric piece to be cut.

| Ages | Skirt
(inches) |
Ruffle
(inches) |
Sash
(inches) |
Sash Elastic
(inches) |
Back Strap
(inches) |
Back Elastic
(inches |
| 12 months | 36L X 12W | 36L X 9.75W
(cut 2) |
39L x 3W
(cut 2) |
18.5
(cut 2) |
20L x 1.5W
(cut 4) |
7 |
| 2 years | 37.5L X 13.75W | 38L X 10W
(cut 2) |
40Lx 3.5W
(cut 2) |
19
(cut 2) |
20L x 1.5W
(cut 4) |
7 |
| 3 years | 39L X 14.5W | 39L X 10W
(cut 2) |
42L x 3.5W
(cut 2) |
19.5
(cut 2) |
22L x 1.5W
(cut 4) |
7.5 |
| 4 years | 41L X 17W | 41L X 10.5W
(cut 2) |
43Lx 3.5W
(cut 2) |
20.5
(cut 2) |
22L x 1.5W
(cut 4) |
8 |
| 5 years | 42L X 18.25W | 42L X 10.5W
(cut 2) |
44L x 3.5W
(cut 2) |
21.5
(cut 2) |
22L x 1.5W
(cut 4) |
8.5 |
| 6 years | 44L X 19.75W | 44L X 11W
(cut 2) |
22Lx 3.5W
(cut 4) |
22.5
(cut 2) |
24Lx 1.5W
(cut 4) |
8.5 |
| 7 years | 44L X 20W |
44L X 11.25W (cut 2) |
22L x 3.5W
(cut 4) |
23
(cut 2) |
24L x 1.5W
(cut 4) |
8.5 |
| 8years | 23.5L X 21W
(cut 2) |
31L X 11.5W
(cut 3) |
25L x 3.5W
(cut 4) |
24
(cut 2) |
24L x 1.5W
(cut 4) |
9
|
| 9 years | 24L X 21W
(cut 2) |
32L X 12W
(cut 3) |
26L x 3.5W
(cut 4) |
24.5
(cut 2) |
25L x 1.5W
(cut 4)
|
9 |
| 10 years | 25L X 22W
(cut 2) |
33L x 12.5W | 26L x 3.5W
(cut 4) |
25
(cut 2) |
25L x 1.5W
(cut 4) |
9.5 |
Sewing

Take the required fabric.

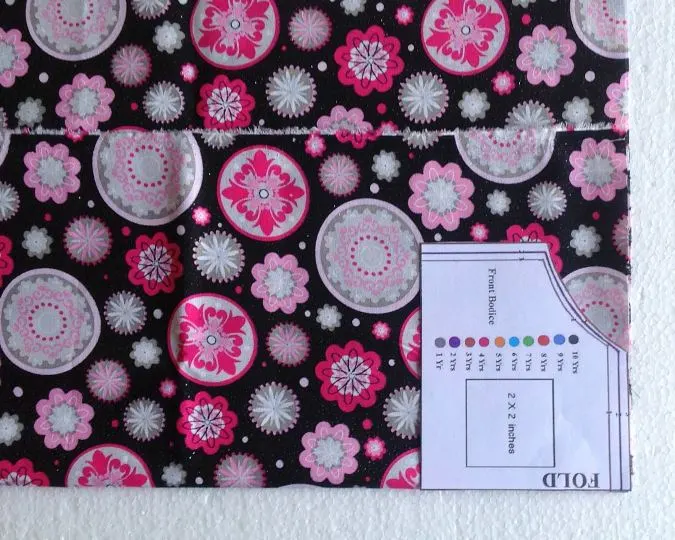
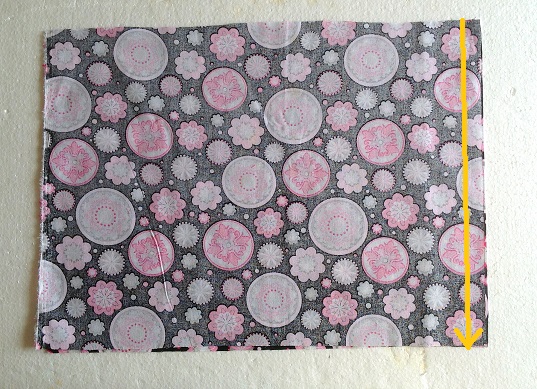
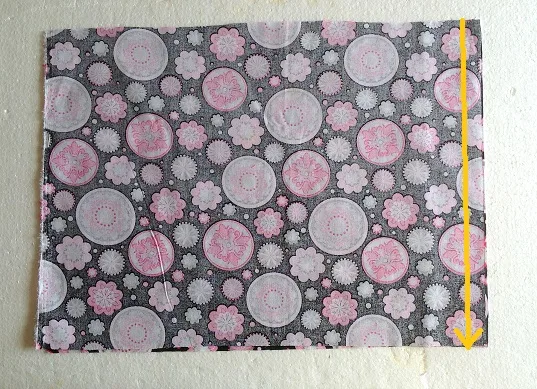
Cut the pattern template for the front yoke from the end of this pdf and fold the fabric to match the width of the template. Keep the template on the fold, aligning the top and side edges. Mark and cut to get the front piece. Repeat the steps to get one more of the same piece for the lining.
Repeat with the template for the back yoke.
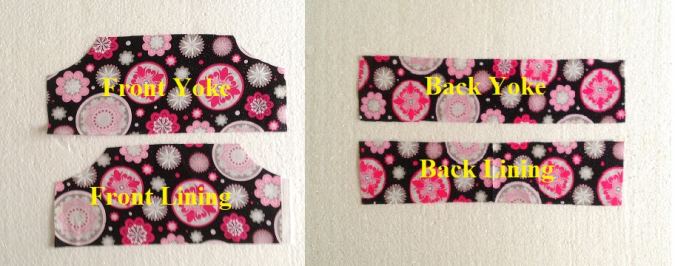
Your front yoke, back yoke and lining pieces would look like the picture above.
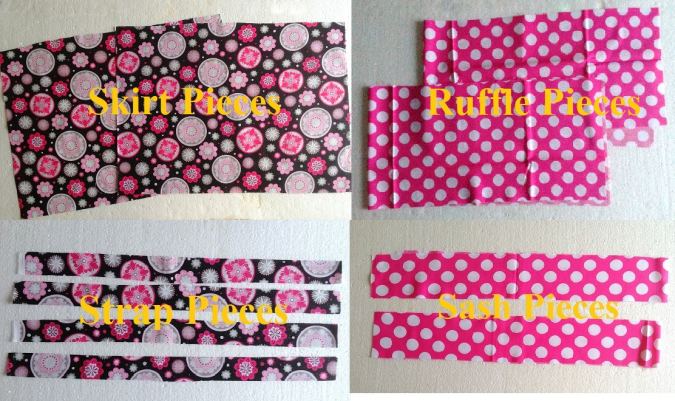

Cut your skirt, ruffle, strap and sash pieces, referring to the table-3 above.
Let’s start with the back strap.


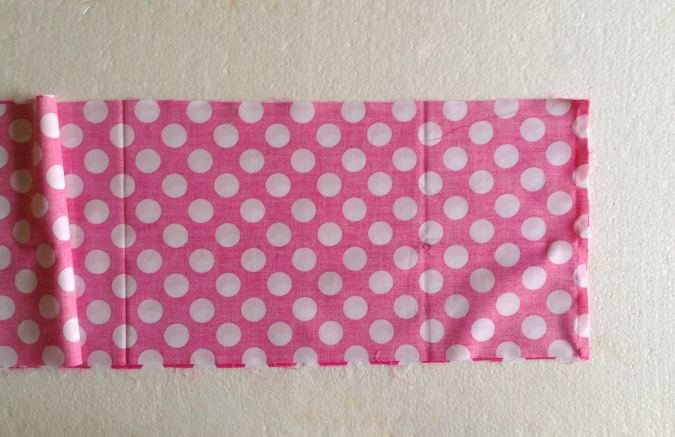
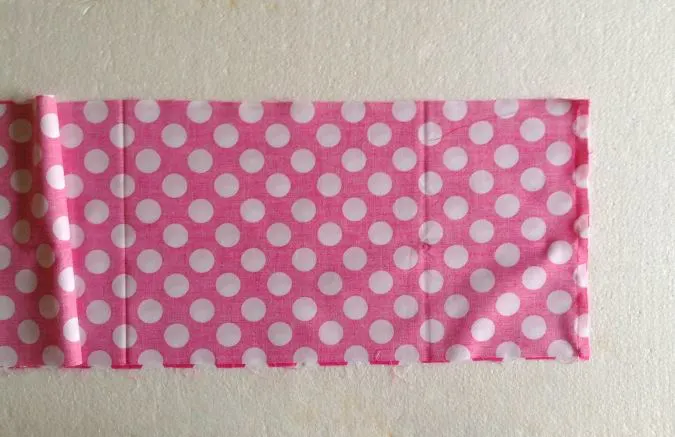
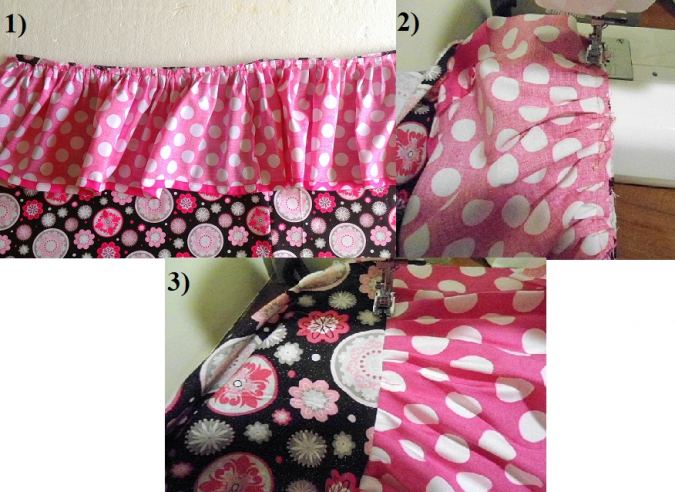
Take two pieces of the strap and layer them with the right sides together. Make one end slanting by cutting across the shorter edge as shown above. Repeat with the other two pieces.

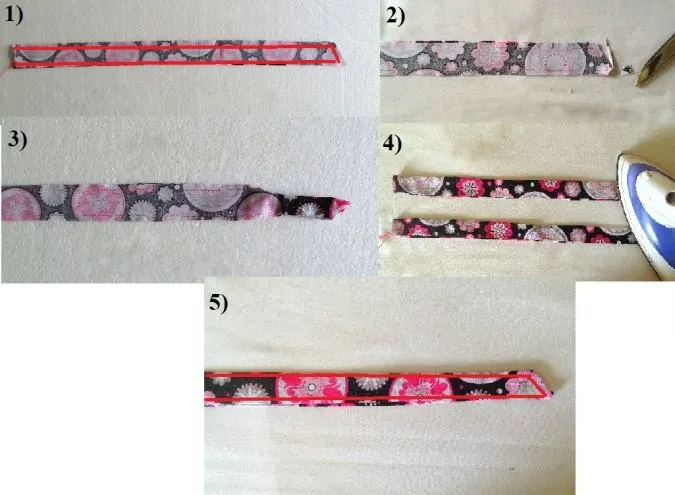
1) Sew around three edges of the strap, keeping the corners intact. The lower edge is left unstitched (this is to turn the strap inside-out).
2) Trim the corners and edges to reduce the bulk in the seam.
3)Turn the strap inside out.
4)Press to make it neat and crisp.
5)Topstitch along the edges of the strap as marked above to make it look neater.
Repeat the steps to get the other strap
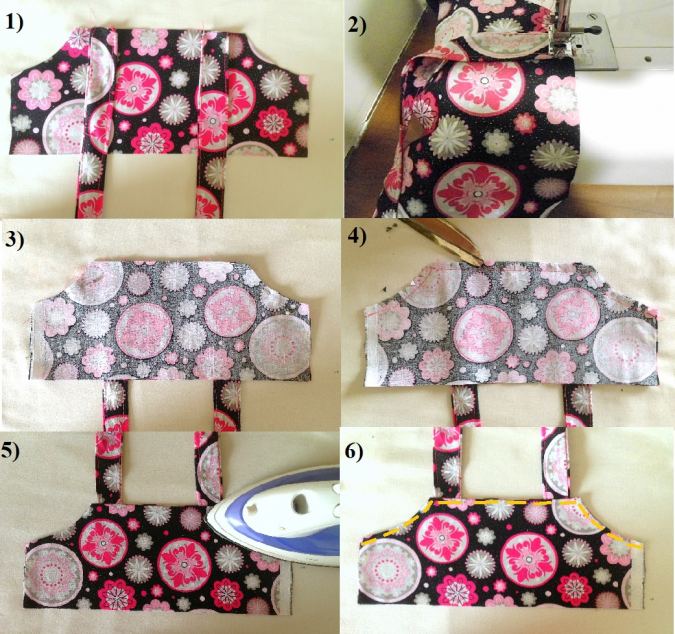
1)Take one of the front pieces and keep the shorter edges of the two straps along the upper edge, leaving ½ an inch from the armhole and pin.
2)Sew the two straps to the front piece, leaving a 3/8-inch seam.
3)Keep the other front piece (lining) over it with the right sides together and pin. Sew along the armhole and top edge leaving a 3/8 inch seam.
4) Clip the corners and trim the edges
5)Turn over to the right side and press, keeping the corners intact.
6)Topstitch along the armhole and upper edge for a finished look.
Let’s move on to the back piece.

1)Take the fabric pieces for the back yoke. Layer the back yoke and lining with the right sides together, aligning the edges and sew along one of the longer edges.
2)Turn the yoke inside-out and press taut.
3)Sew a straight line, 1/2 –inch below the upper edge of the back yoke. This is to make a casing for the elastic.
4)Take the elastic, referring to table-3 above and insert the elastic into the casing.
5)Secure the ends of the elastic by stitching back and forth a few times.
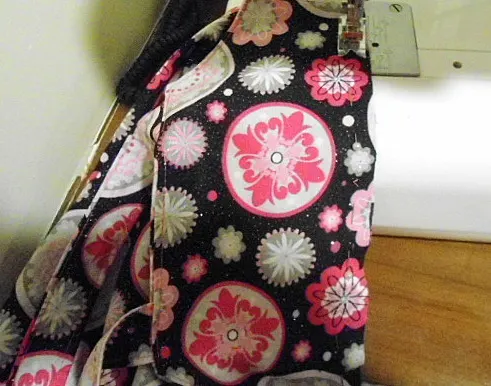
Next, take the done back yoke and keep it over the front yoke with the right sides together and aligning the side seams. Sew one of the side seams shut.

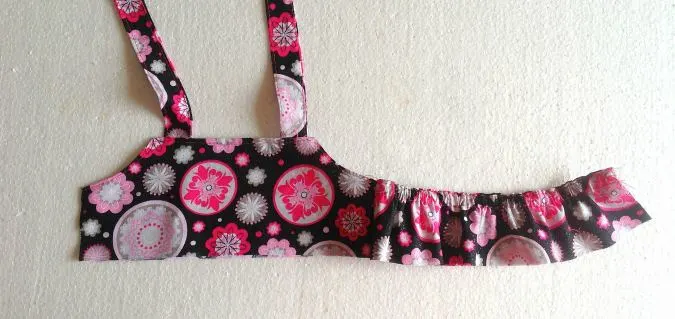
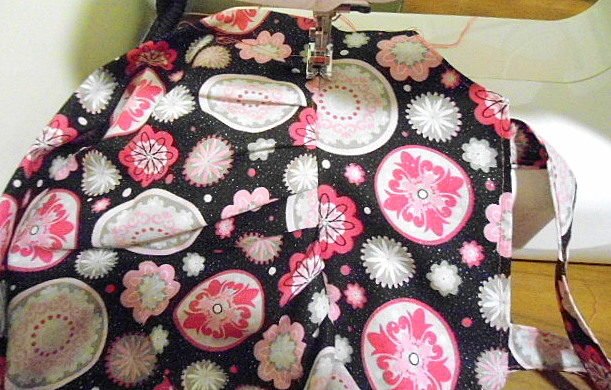
Your yoke will look like this.
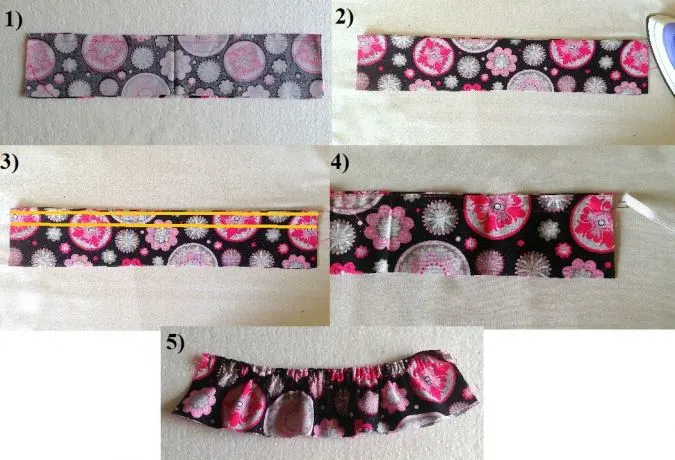
Let’s do the skirt part. We begin with the lower ruffle of the skirt.
Take the pieces required for the lower ruffle. Join them along one of the shorter edges to get the required length (if required).
We first do the lower hem of the ruffle.
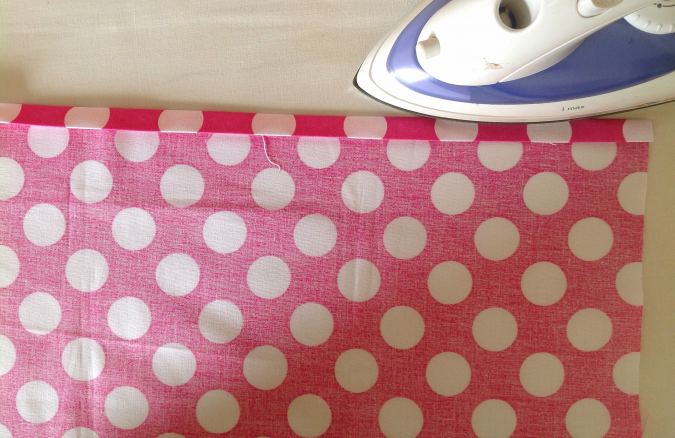
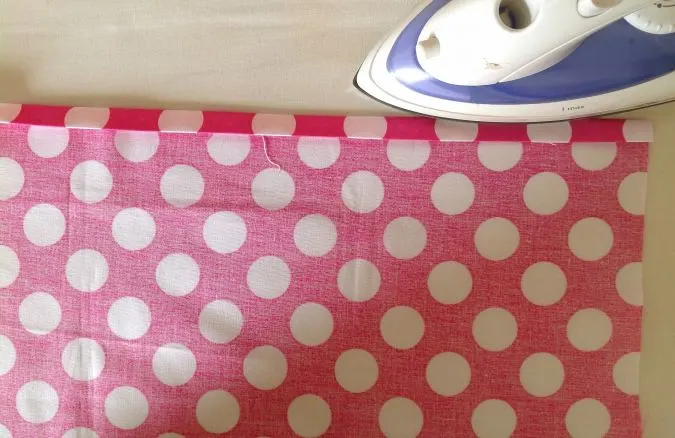
Fold one of its longer edges twice by ½” and press.

Sew down the hem.
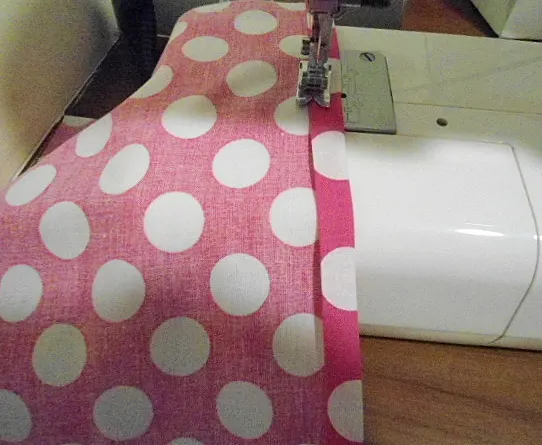
We need to gather the ruffle. Turn the upper thread tension of your machine to zero and the machine stitch length to the longest to get a basting stitch.

Sew a basting stitch along the raw edge of the ruffle piece. Leave a long tail of thread about 5 to 6 inches long to pull and gather the ruffle.

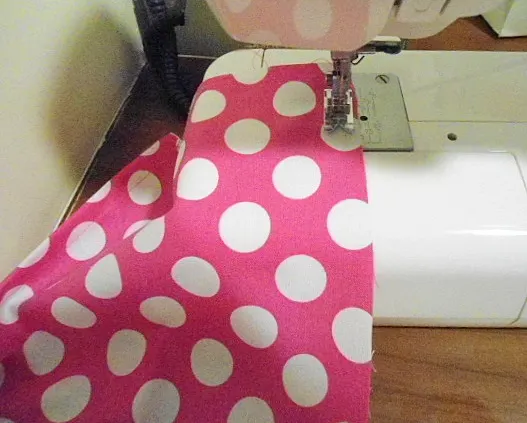
Pull the thread from the bobbin gently to gather the ruffle.
Let’s move on to the skirt.
Turn your machine settings back to normal.
Take the skirt pieces and keep them layered with the right side together, aligning the edges. Sew along one of the side seams as marked above.
Let’s attach the done ruffle to the skirt.

1)Adjust the gathering in the ruffle to make it uniform and to match it with the longer edge of the skirt. Keep the ruffle along one of the longer edges of the skirt with the right sides together and aligning the edges. Pin the ruffle to the skirt.
2)Sew the ruffle to the skirt, removing the pin as you go. Zigzag to prevent fraying.
3)Turn over to the right side and topstitch along the seam line of the skirt and ruffle to make it neat and crisp.
Let’s gather the skirt.

Sew a basting stitch along the raw edge of the skirt, leaving a long tail of thread 5 to 6 inches long to pull and gather it.

Pull the thread from the bobbin gently and gather the skirt.
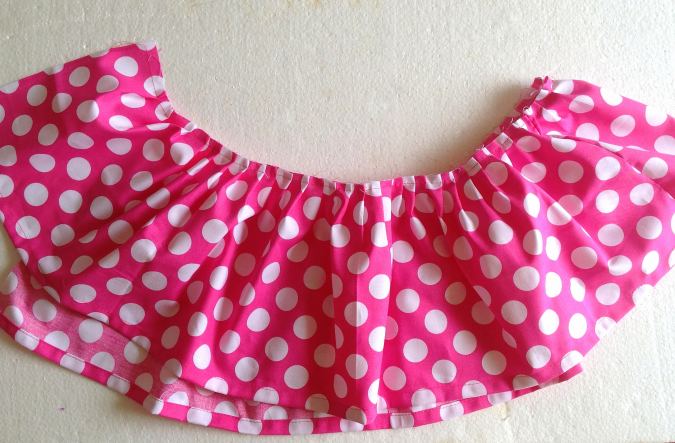
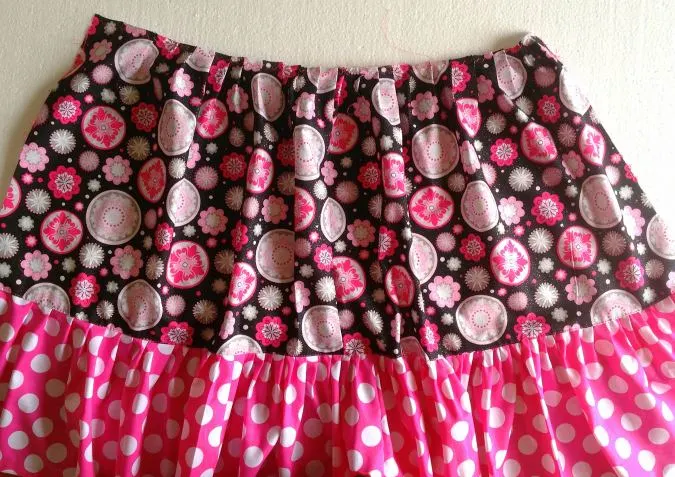
Next, we need to attach the skirt to the yoke. Adjust the gathering of the skirt to match the lower edge of the yoke.
Keep the lower edge of the yoke along the ruffled edge of the skirt with the right sides together and aligning the edges. Pin the yoke to the skirt.
Turn your machine settings back to normal.

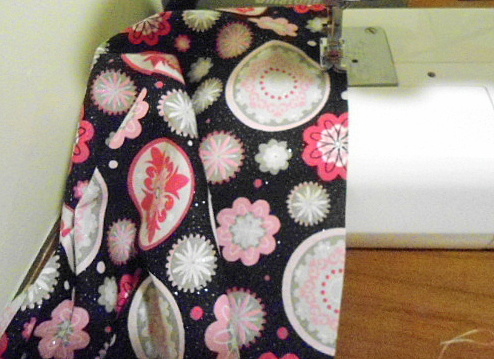
Sew the yoke to the skirt, removing the pin as you go. Zigzag to prevent fraying.

Turn over to the right side and topstitch along the seam line of the skirt and yoke to make it neat and crisp.
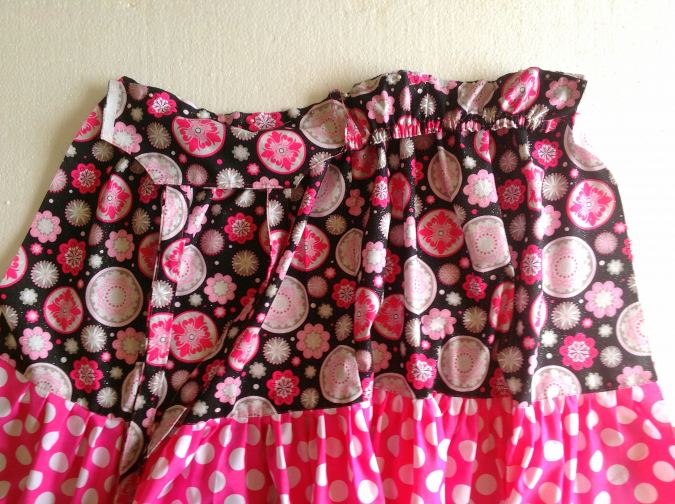
Let’s do the other side seam of the dress.
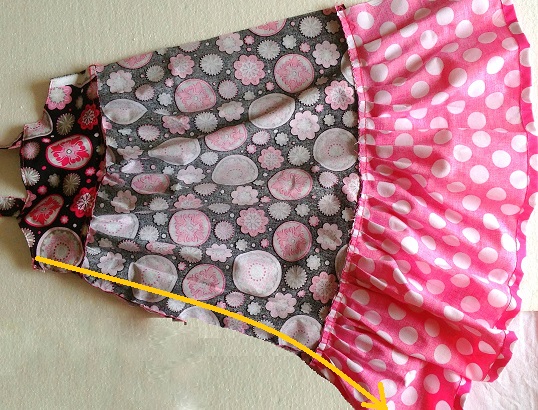
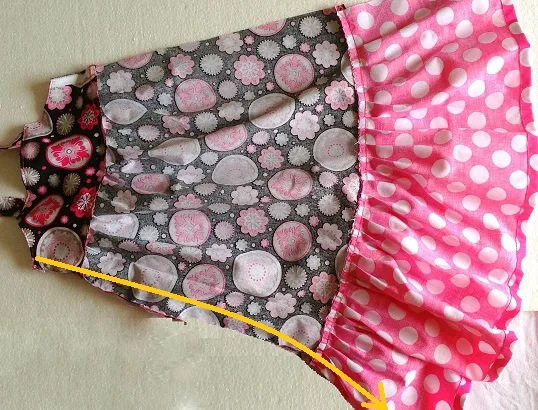
Fold the dress over, matching the side seam and sew it shut along the marked line above.
We are almost done with the dress. We need to do the elastic sash which would give a perfect fit for the dress.
- Note that for ages 6 years and upwards, you will have to join two fabric strips to get the required length of each piece of the sash.
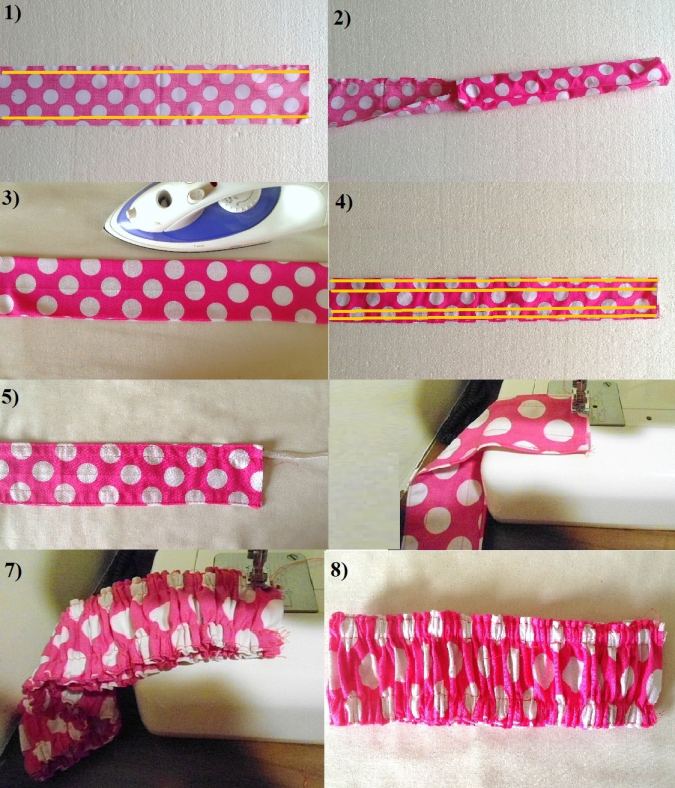

1)Keep the two pieces layered with the right sides together and aligning the edges. Sew along the two longer edges. The shorter edges are kept open.
2)Turn the sash over to the right side.
3)Press it taut.
Next, we need to do two casings to insert the elastic.
4)Topstitch the edges and sew two straight lines about ½” from the long edges as shown above.
5)Take the required length of the elastic referring to the table-3 above and insert it through the casing.
6)Secure the ends of the elastic by sewing back and forth a few times at the ends. Do the same with the other casing also.
7)Your sash would ruffle up. Fold it over and sew it shut along its shorter edge as shown. Zigzag to prevent fraying.
8)Turn the sash right side out and it is done.
You may now slip it down your chest and lo you get a beautiful fit!


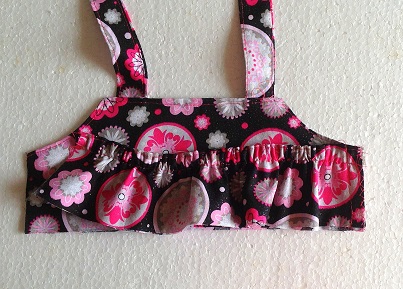
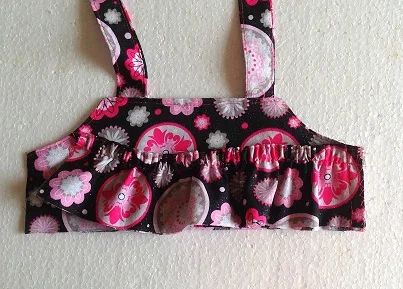
Your maxi dress for girls is done.
Pin it for later here,
Have a look at our web story here: Sew a Girl’s Maxi Dress: Free Pattern