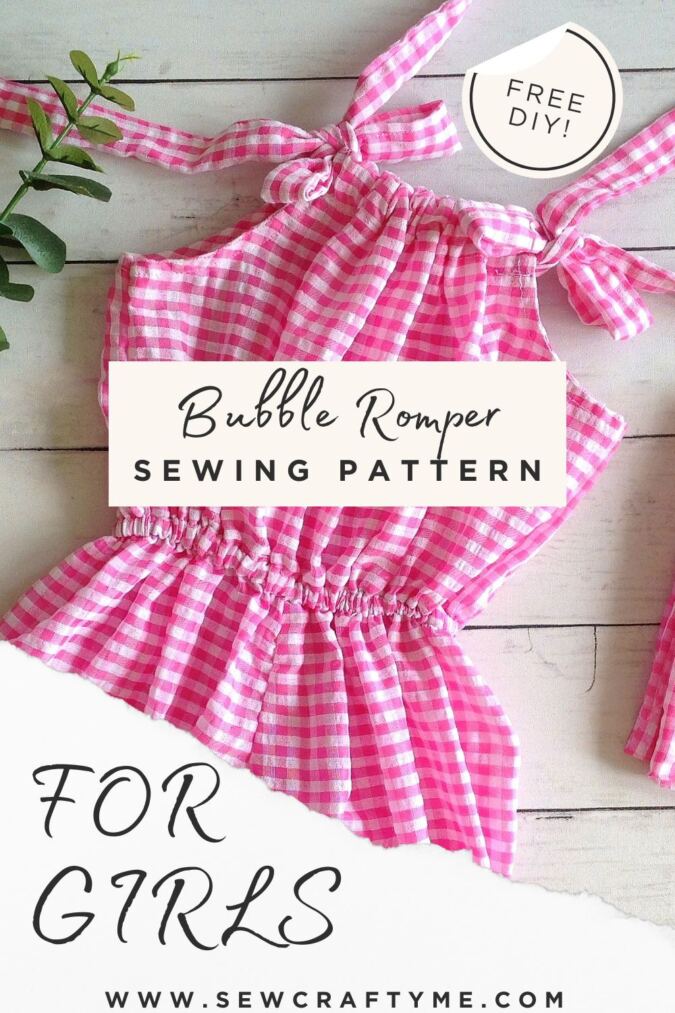
I’m back once more with a delightful and stylish romper sewing pattern that’s incredibly easy to create. This time, the pattern is tailored for girls, ranging from 12 months to 6 years old. Say hello to the adorable Florence bubble romper!
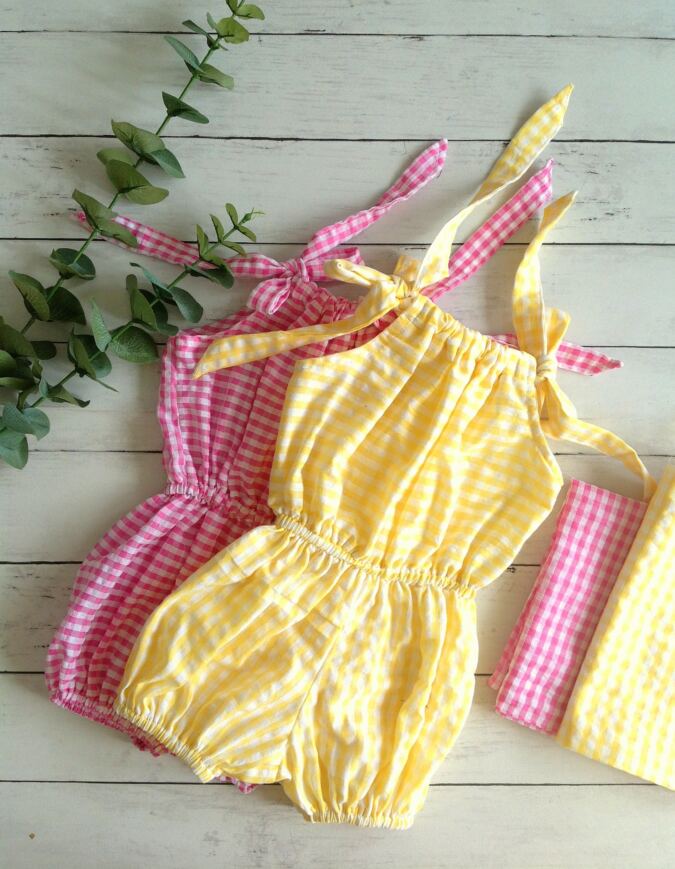


Designed with a charming gathered neckline and puffy bubble bloomers, this romper is sure to make any little girl look absolutely adorable. The best part is, it’s forgiving, making it perfect for beginners, as it cleverly conceals any imperfections in your sewing.


If you’ve previously tried my pillowcase dress sewing pattern, you’re in luck! The finishing touches for the necklines and armholes are just as simple and hassle-free as before. Get ready to create a wonderful romper that will make any little one look even more precious! And the best part? The pattern is completely free!
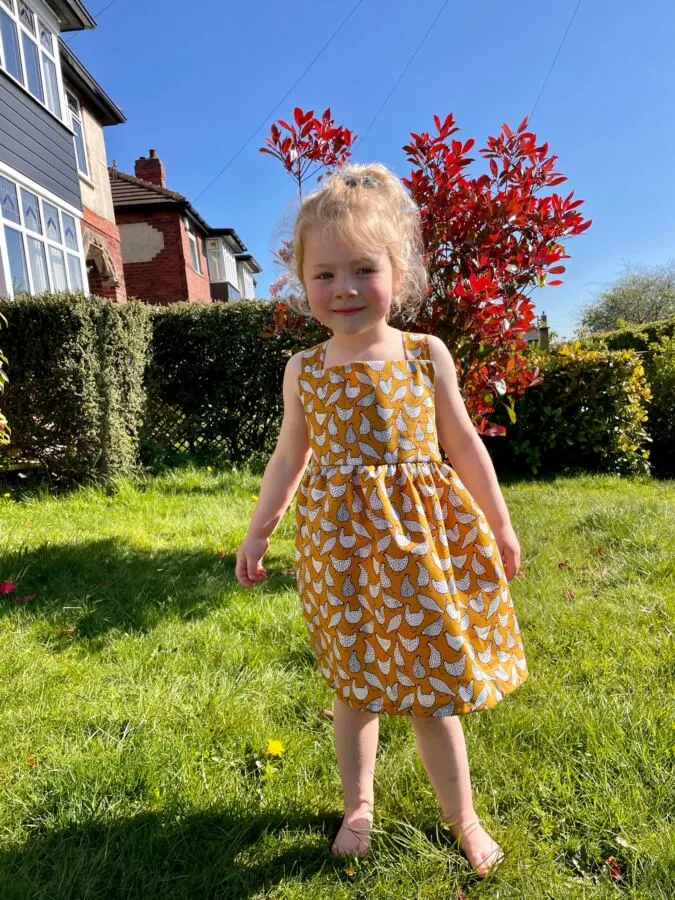
If you would like to have a look at an easy bare-back sundress design for girls, click on the picture below:

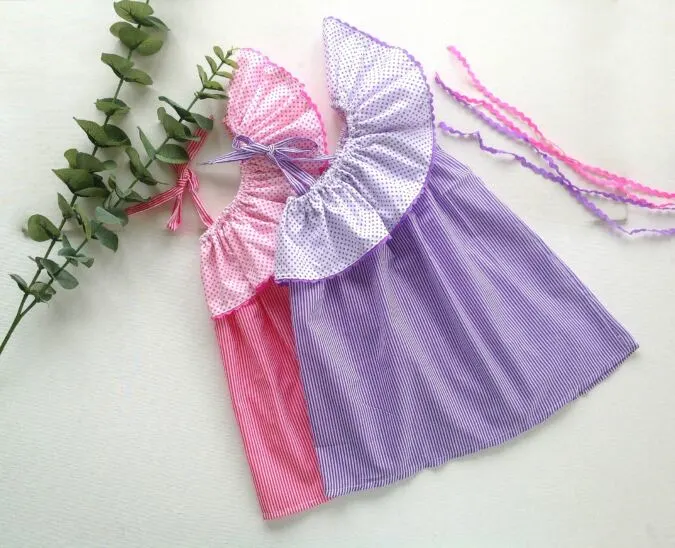
or if you would like to have a look at the easy asymmetrical dress pattern, click on the picture below:

Free Bubble Romper Pattern for Girls
Materials Needed
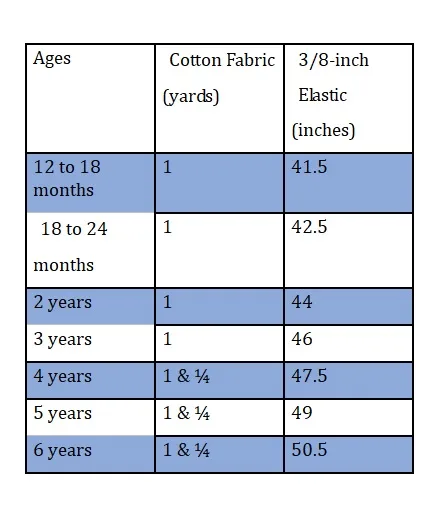
1) Cotton fabric in any desired color or print for the romper- requirement specified in the table-1 below.
2) 3/8-inch elastic- requirement specified in the table below.
3) Single fold bias tape (optional) – 40 inches.
4) Pattern Template. **Enter your e-mail address and click on the subscribe button in the blue box below to start downloading the template automatically.
All the fabrics used here are of 44/ 45 inches width.
The fabrics shown here are only for illustration purposes and as such may vary from the original.
The seam allowance is ½-inch unless otherwise specified.
I suggest you read the entire pattern once before starting to get a general idea.
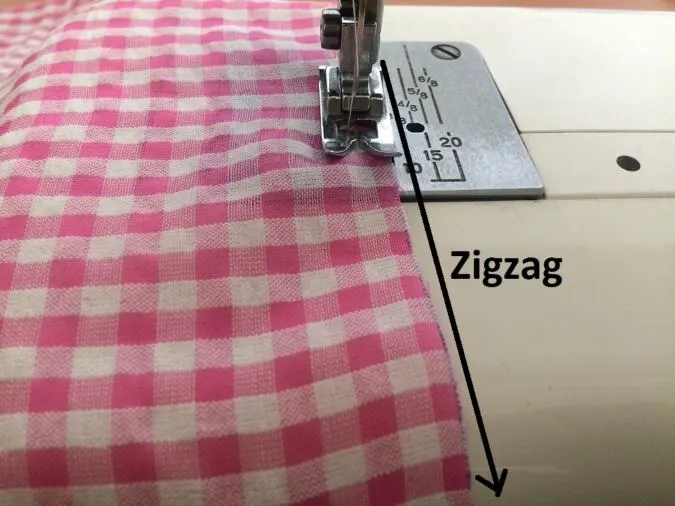
All seams are to be finished by zigzag or serger.
Fabric Requirements
Table-1

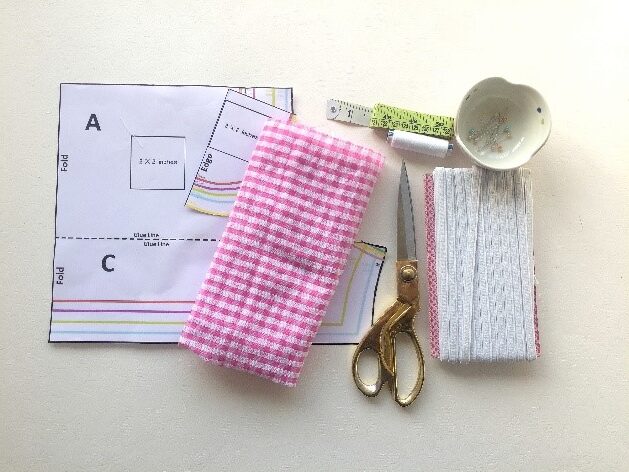
Gather the supplies.
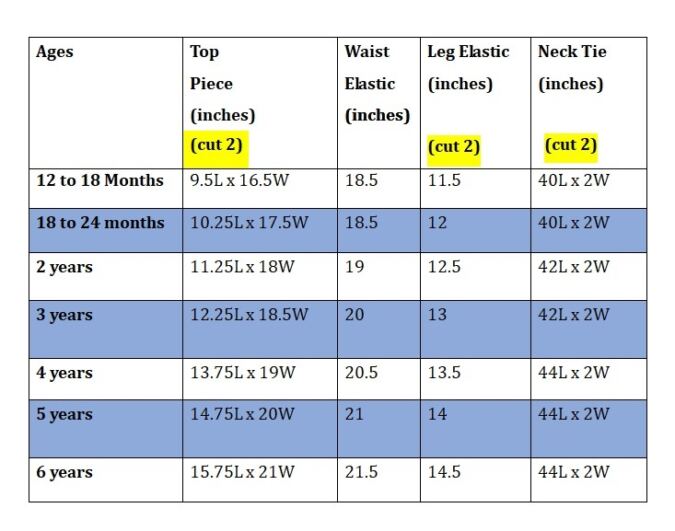
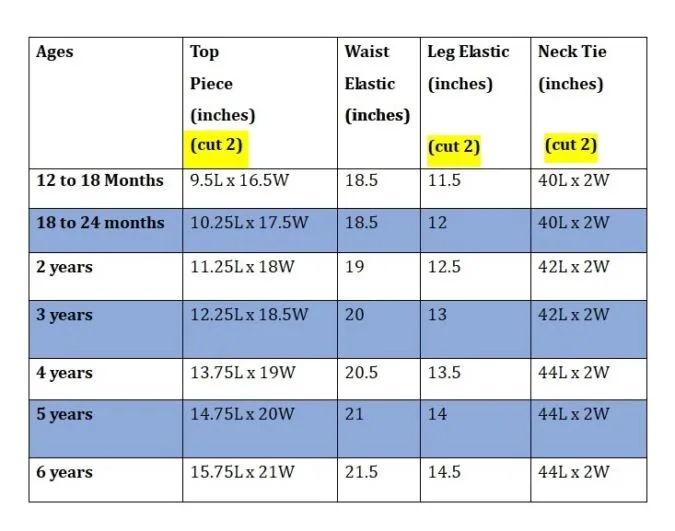
Measurements
Table-2
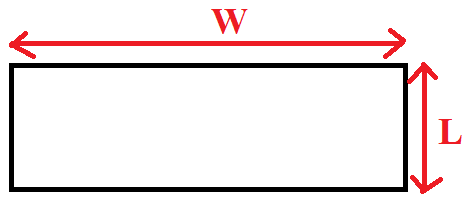

** In the table below, “L” stands for the length and “W” stands for the width of the fabric piece to be cut.
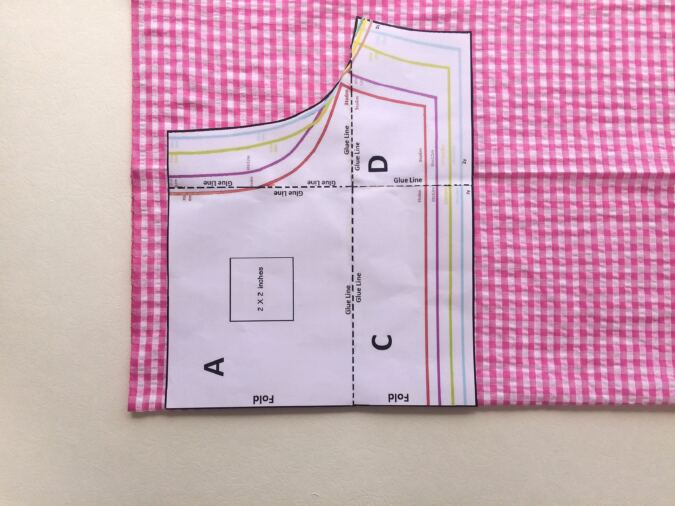
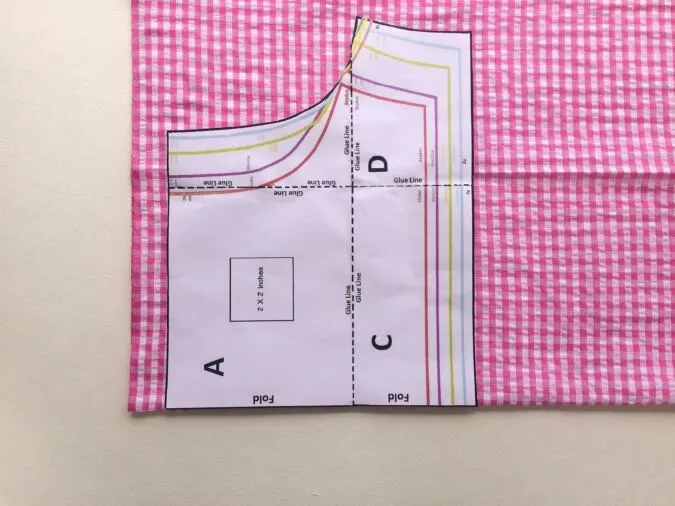
Cut the pattern template for the romper shorts at the end of this PDF. Take the fabric for the romper, fold it lengthwise to fit the width of the template and keep the template on the fold as shown above. Mark and cut to get one piece of your romper shorts. Repeat the steps to get one more piece.
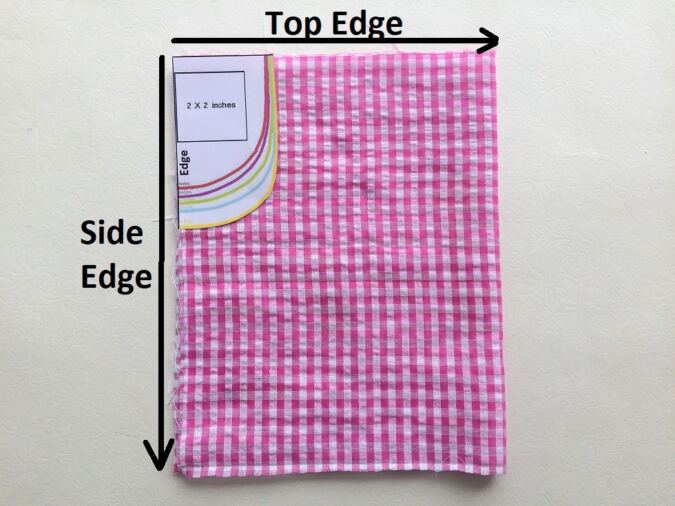
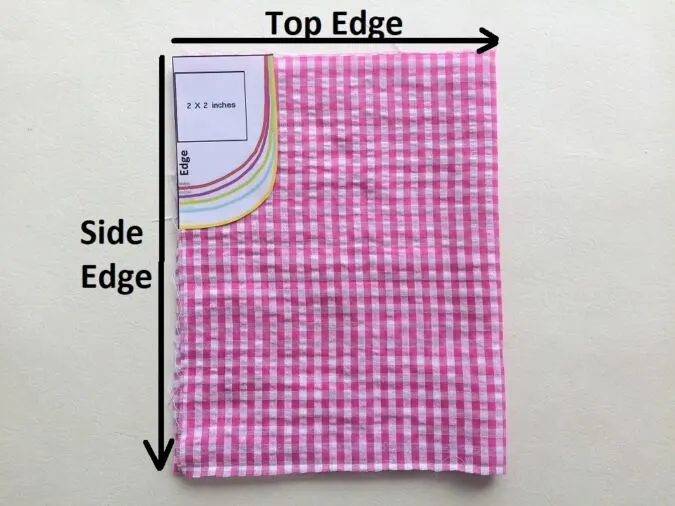
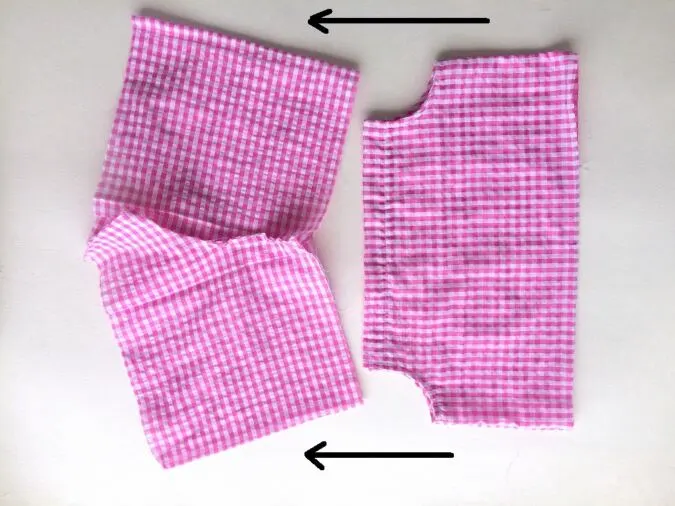
Refer table-2 to get the measurements for the top part of the romper and cut the top pieces with the required dimensions. Mark the top and side edges to avoid messing up.

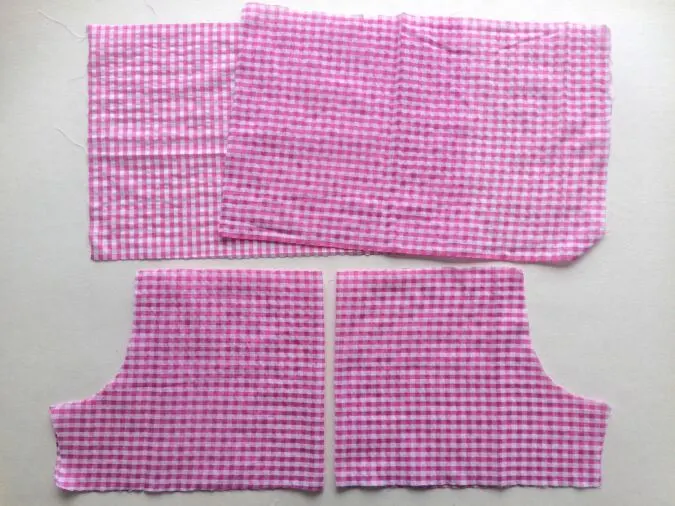
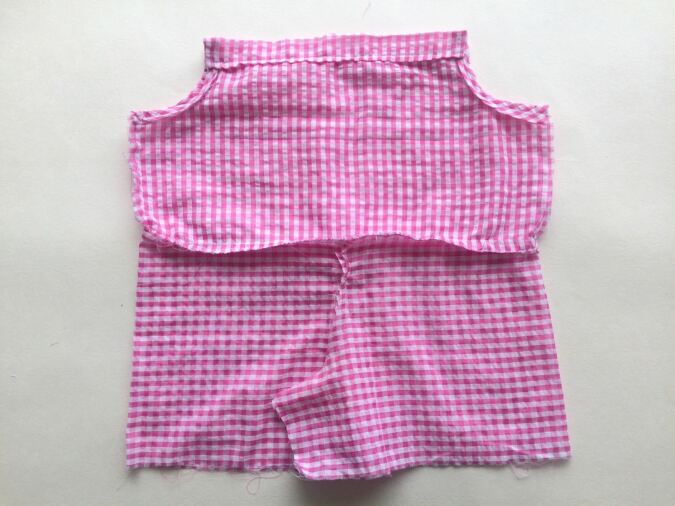
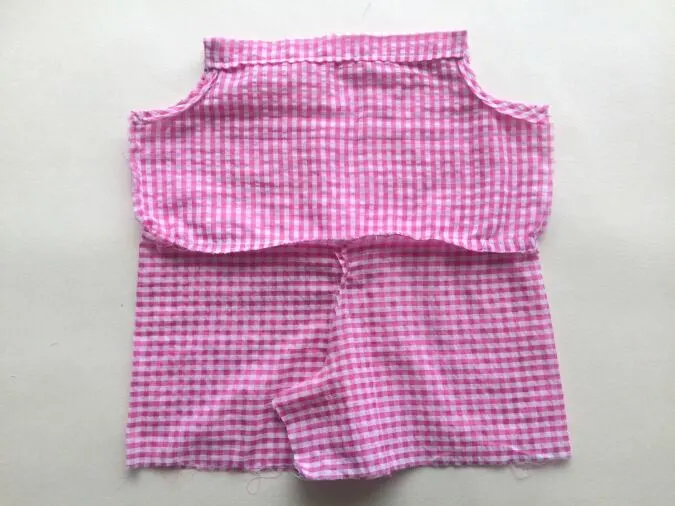
You will get your top pieces and shorts pieces like the above (note that in the picture, the shorts pieces are not kept opened).

Cut two neck-tie pieces, also referring to table-2 above.
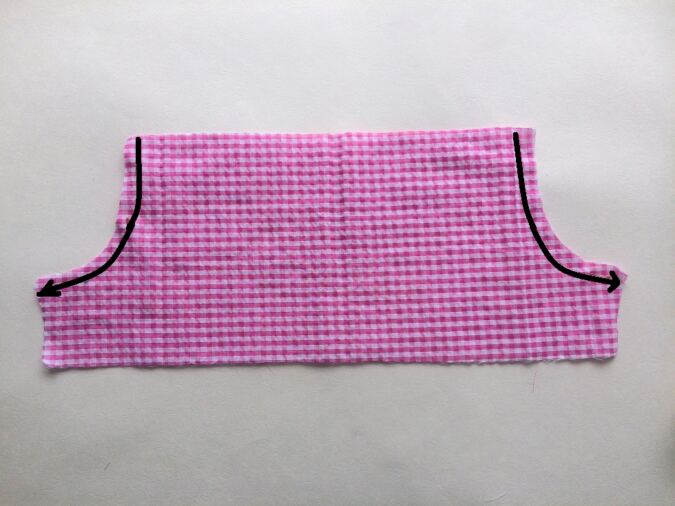
Take the front and back top pieces, layer them lining up the edges and fold in half width wise. Cut the appropriate pattern template for the arm hole, from below and keep it at the top left hand corner as shown above.
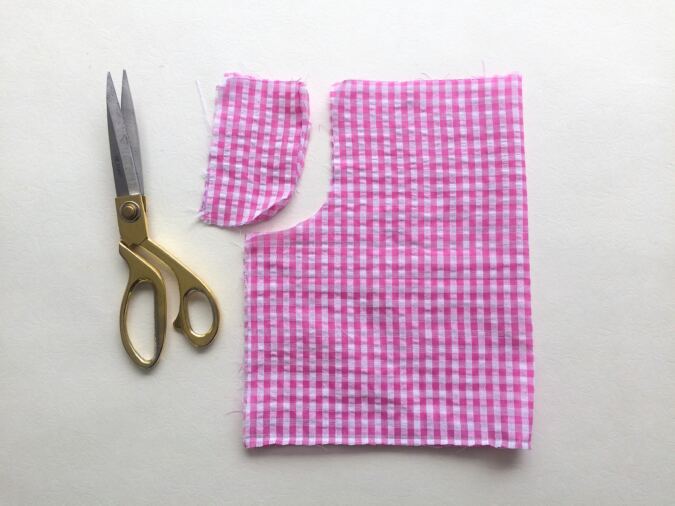

Mark and cut out the armhole. Discard the smaller piece.

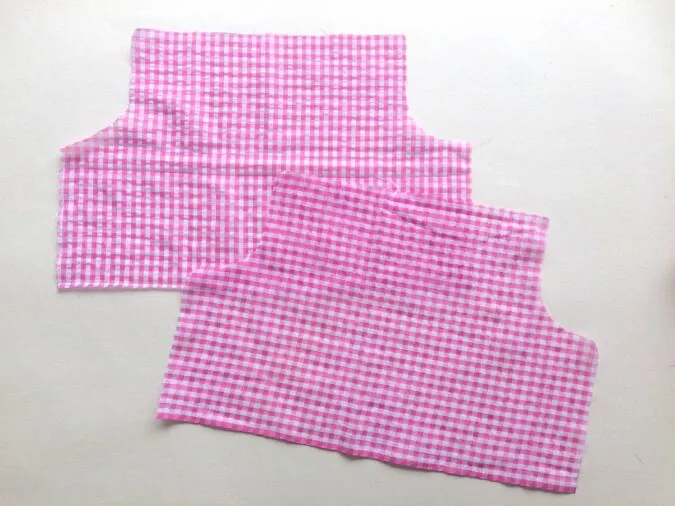
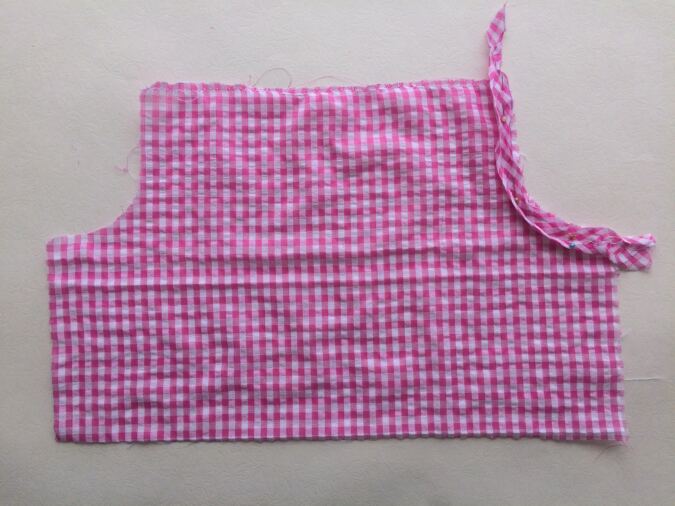
You will get you front and back top pieces like the above.
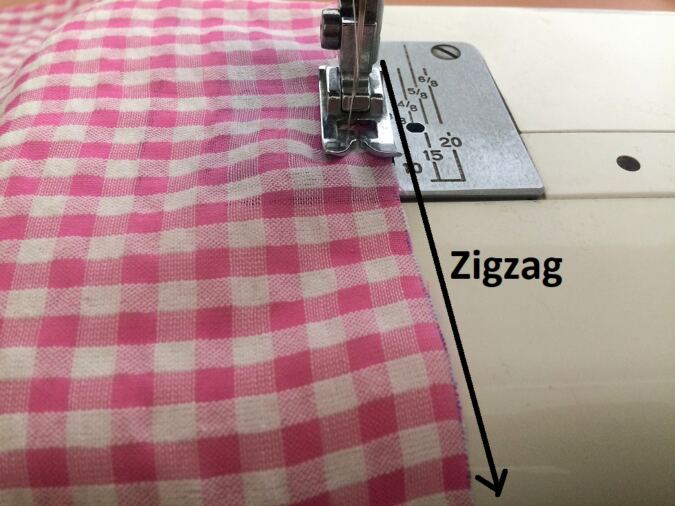
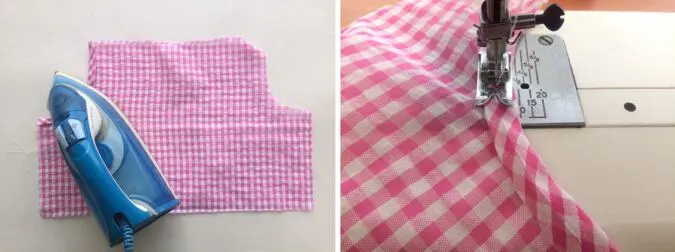
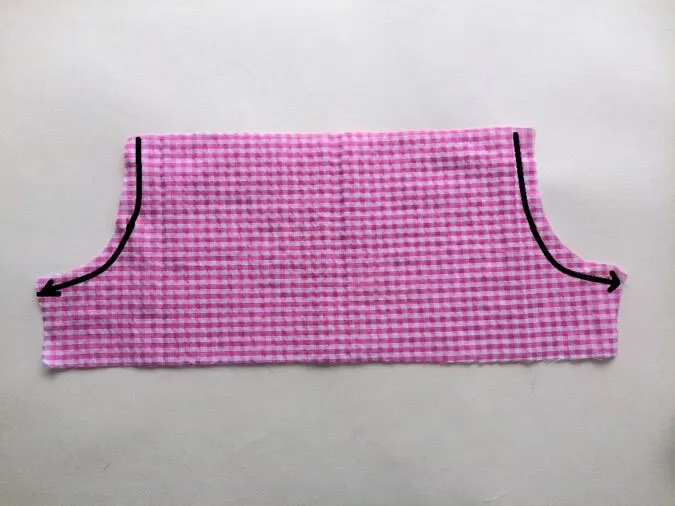
Zigzag the top edge of both the front and back top pieces. This is where the neck is formed.
Let’s finish the armholes (you can either use the readymade ones or make your own bias tape by referring to the tutorial here.
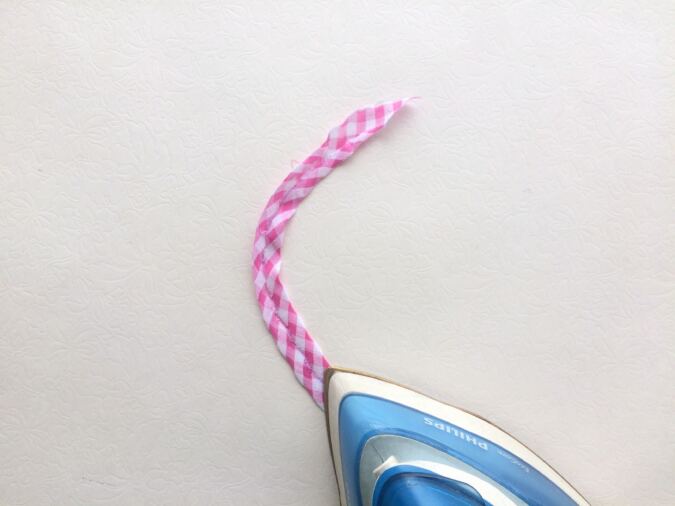

Cut the single- folded bias tape into 10-inch pieces. Take one of the tape pieces, place it slightly curved and press using plenty of steam (this will make it easy to attach along the armhole curve).

Open one of the folds of the bias tape and align its edge along the edge of the armhole, on the right side of the fabric as shown above and pin.
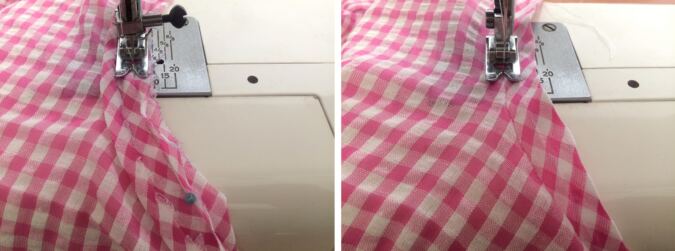
Sew the bias tape on to the armhole along the edge, removing the pin as you go. Turn the bias tape over to its right side and topstitch along the seam line of the tape and the armhole as shown in the picture.
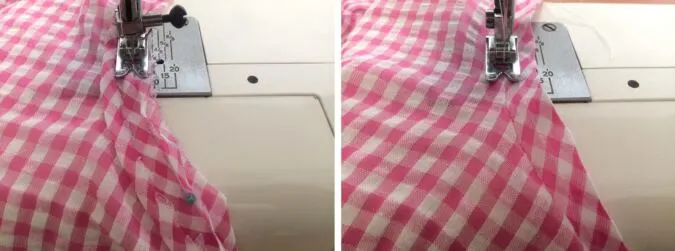
Fold the bias tape completely over to the wrong side of the fabric and press. Sew along the folded edge of the tape to secure.
Repeat the same with the other armholes.

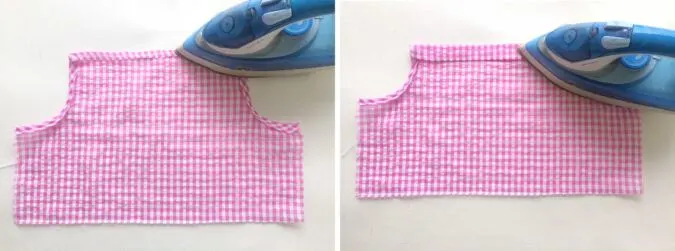
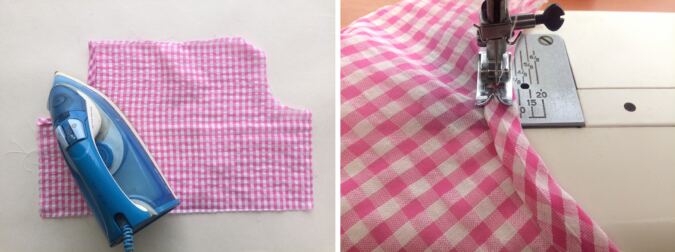
Now fold the upper edge of the front piece by 3/8-inch and press. Repeat by another 1 & ¼-inch and press again. Repeat the same with the back piece.
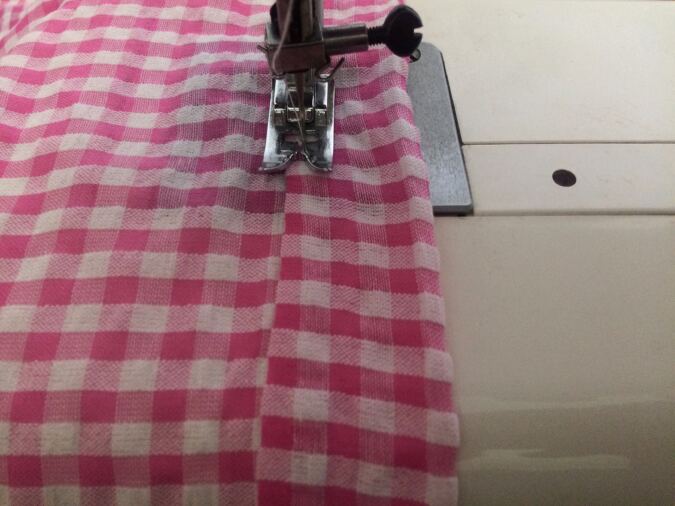

Sew along the edge of the fold to form the casing for the neck tie (make sure to reinforce at the start and finish). Repeat the steps on the back piece.

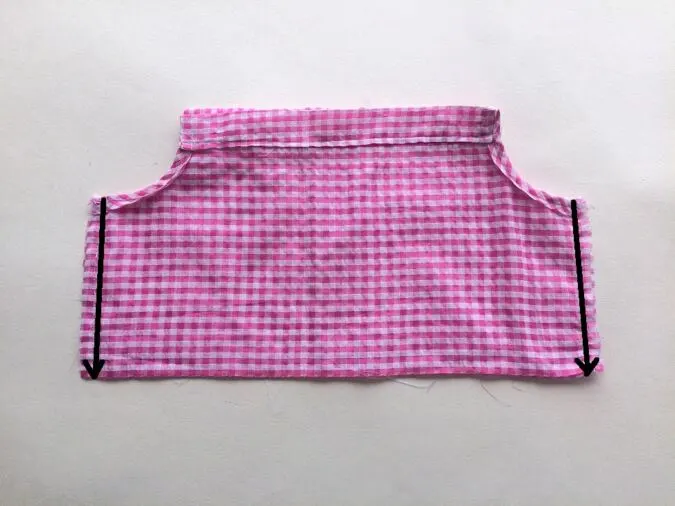
Keep the back piece over the front piece, with the right sides together, aligning the edges and sew both the side seams shut as marked by the lines. Take care to reinforce at the start and finish.
Our top is almost done, let’s move on to the romper shorts.
Take the two fabric pieces for the romper shorts and layer them with the right sides together and aligning the edges. Sew along the two curved edges as marked by the red line above.
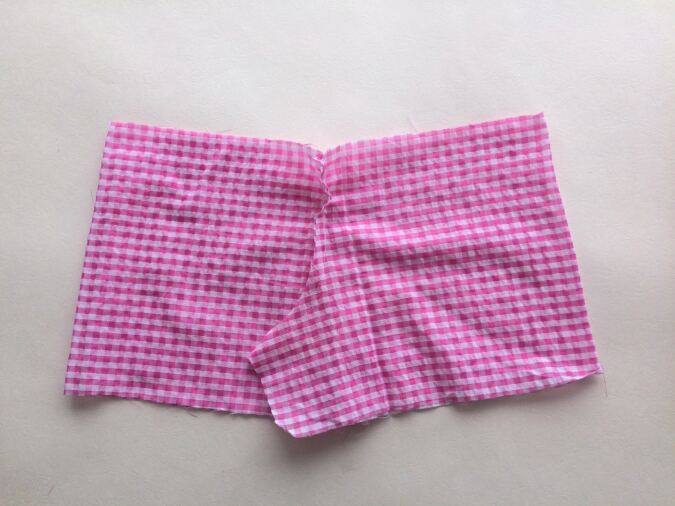

Open up and you will see them looking almost like a pair of shorts.
Now we need to attach the top of the romper to the shorts.


Fold the top of the romper lengthwise, aligning the side seams and make a mark at the centre of the lower edge(this has to align later with the center seam of the shorts).
Let’s attach the top to the shorts.

Keep the shorts on its wrong side and the top on its right side, with its upper edge facing the upper edge of the shorts and slide the top into the shorts. Make sure that the mark on the top and the center seam of the shorts fall in line.


Align the upper raw edge of the shorts with the lower edge of the top and pin all around.

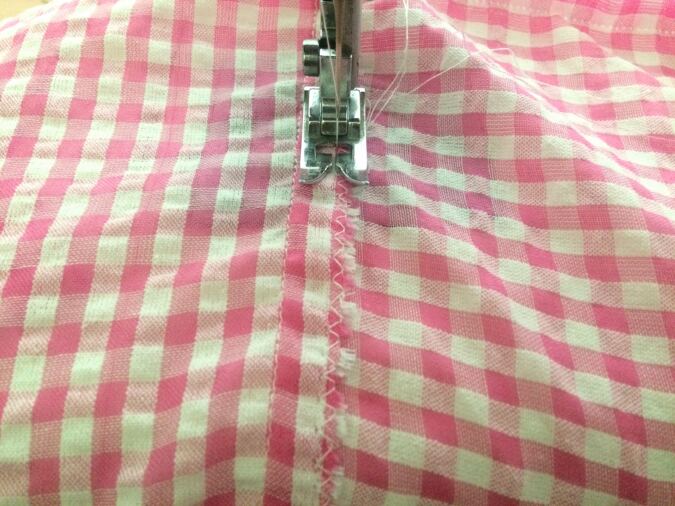
Sew the top to the shorts, leaving a seam allowance of 5/8- inches. Zig zag to prevent fraying. *Note that here we make use of the seam allowance to make a casing for the waist elastic.
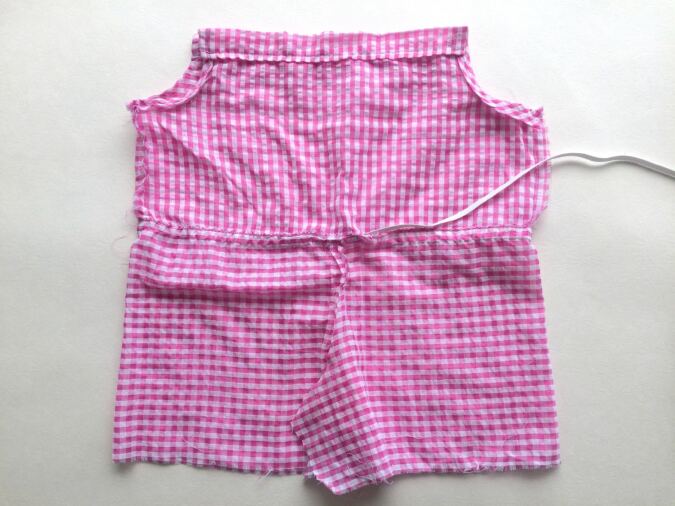
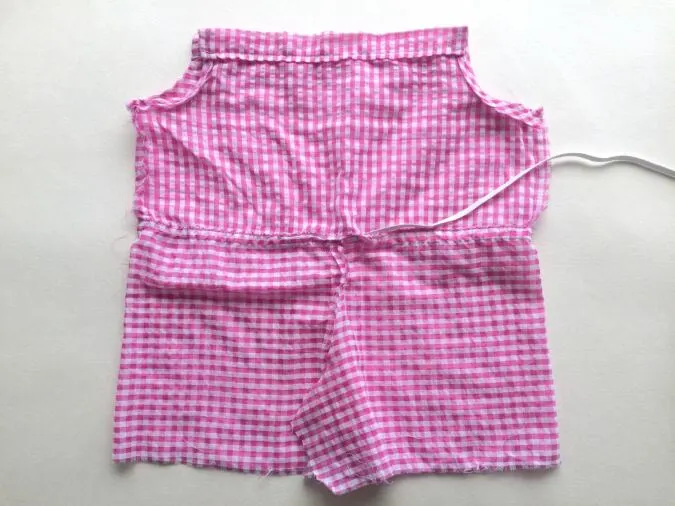
Pull out the top you will see that it has started looking like a romper already.

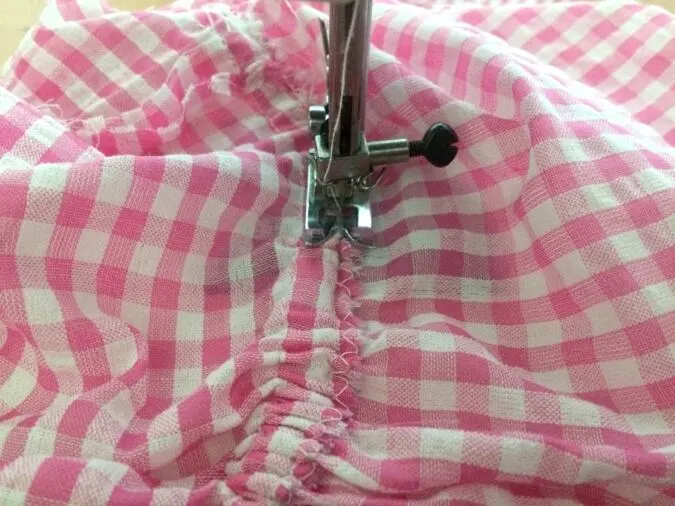
Fold the seam upwards. Carefully sew along the top edge of the seam to make a casing for the elastic. Leave a 2-inch gap to insert it.
Take the elastic, referring to the table-2 above and insert it through the casing using a safety pin. Keep the ends of the elastic overlapping and sew it shut

Sew the opening in the casing shut.
Let’s do the lower hem of the shorts.


Fold the lower edge by ¼ -inch and press. Fold by another
½-inch and press again.
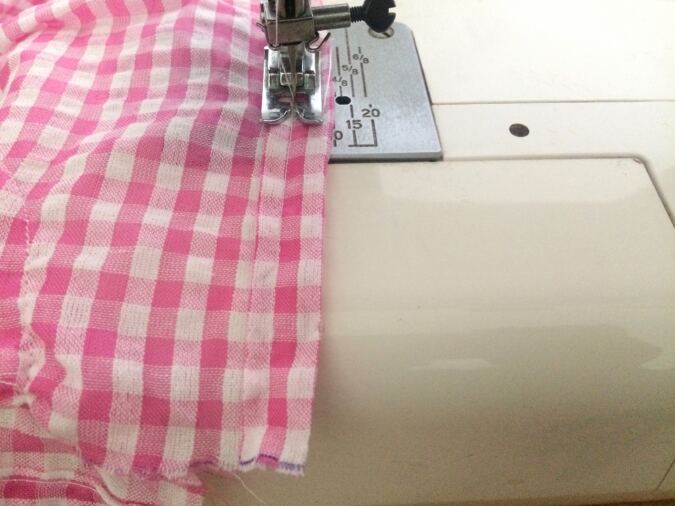
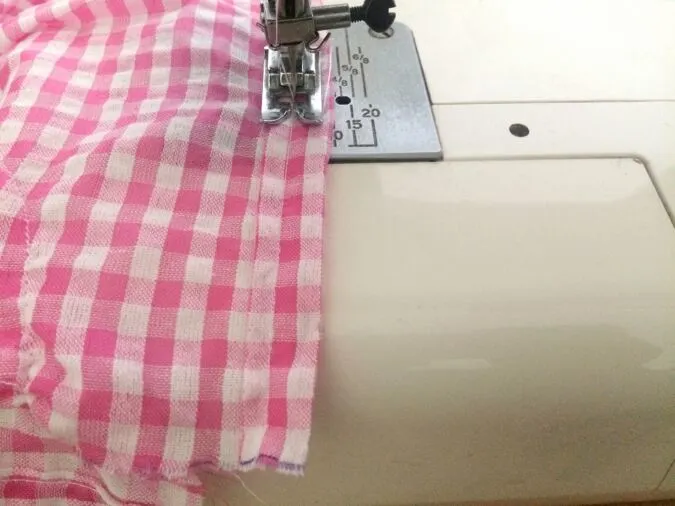
Sew down the hem. Repeat the steps on the other leg of the shorts.
Now we can insert the elastic through the hem of the shorts.

Take the required length of elastic, referring to the table-2 above and insert the elastic through the hem. Secure the ends by sewing back and forth a few times.
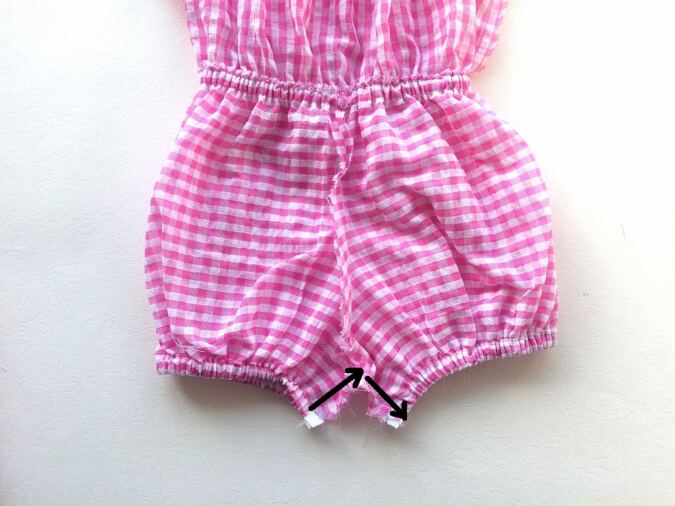
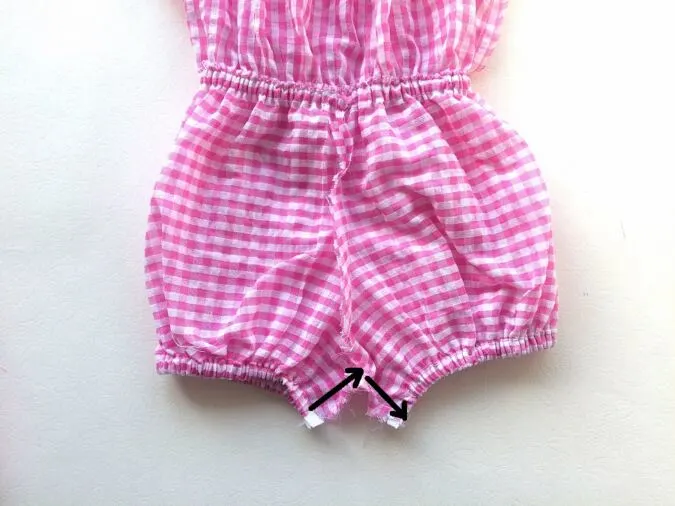
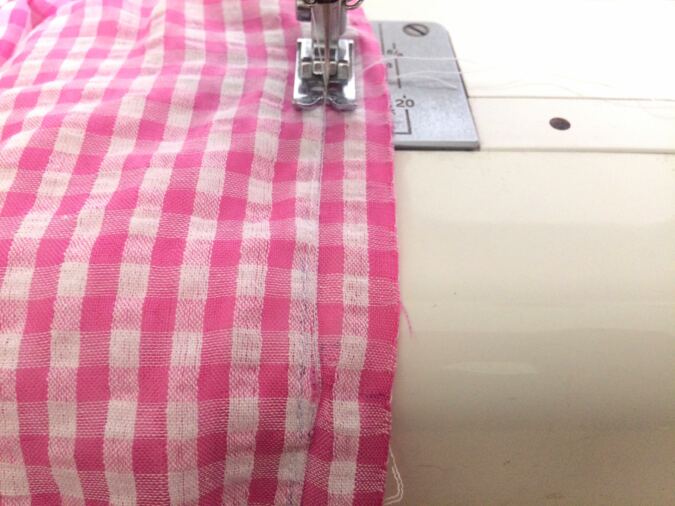
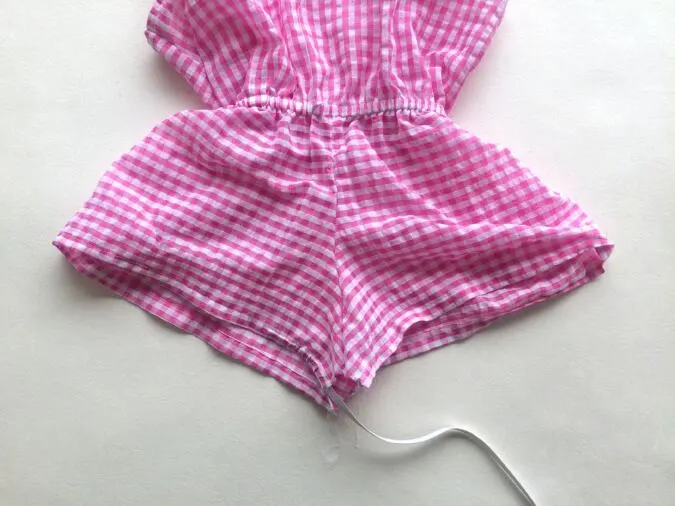
Sew the inseams shut as marked by the black lines above.
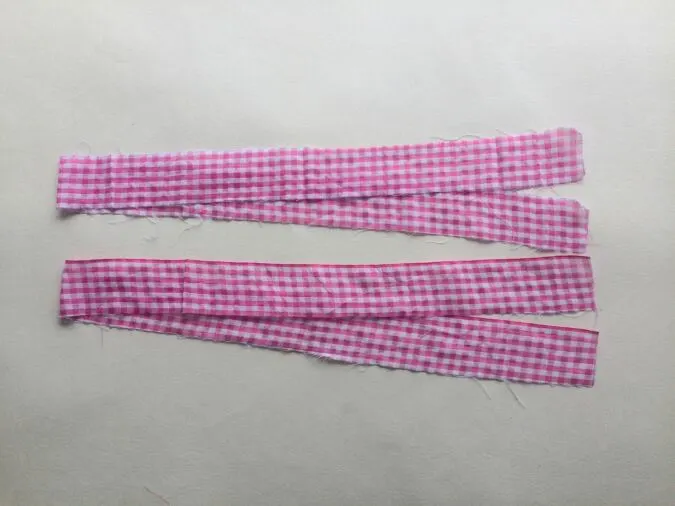
Let’s do the neck- tie.
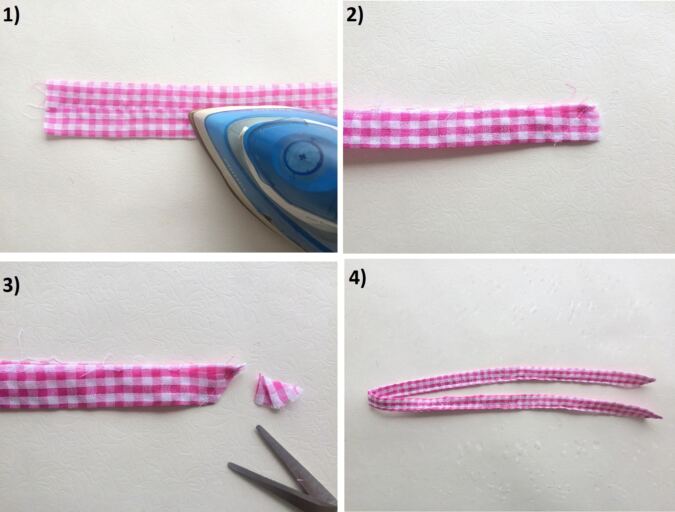
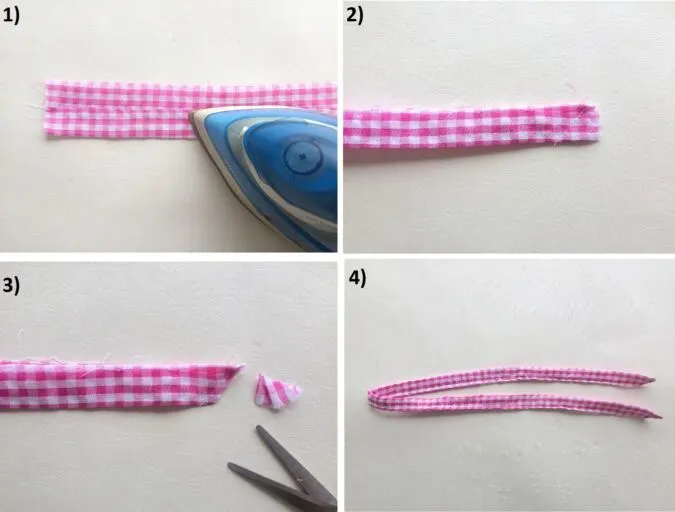
1) Take one of the fabric pieces required for the ties. Fold the two longer edges towards the wrong side by 3/8-inch and press.
2)Fold it again in half lengthwise, with the wrong sides together and press.
3) Flip the tie over to the wrong side and sew a straight line, one inch from the end of the open edge to the opposite corner to make the ends of the tie slanting. Clip the corners with the help of your scissors.
4) Flip the tie over to the right side, poke the corners out with the help of a wooden dowel and sew it shut along the open edge. Your tie is ready, make the other tie in a similar manner.
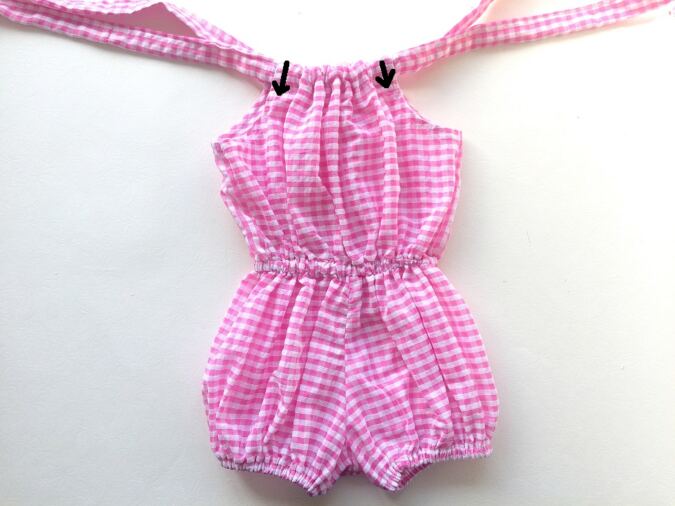
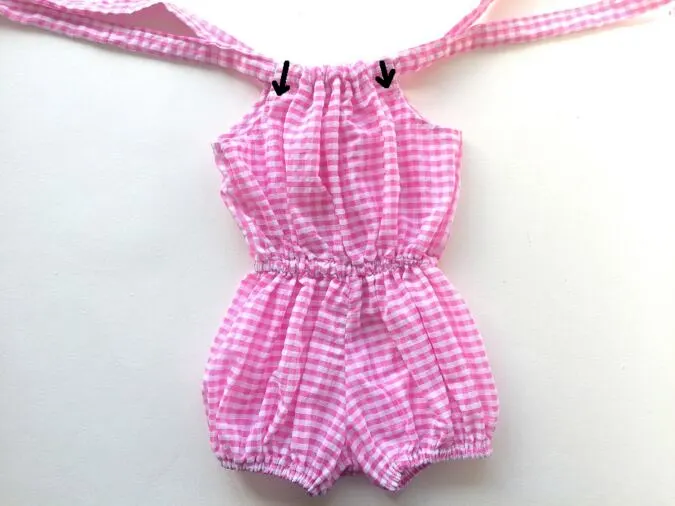
Scrunch the neckline and secure the ties by a straight- line stitch on both sides to set. And, your romper is ready!
Pin it for later here,
Leticia boseman
Friday 11th of April 2025
IS good parttern and easi
Elna
Sunday 19th of January 2025
I love the pattern
Sue
Tuesday 14th of May 2024
Look lovely