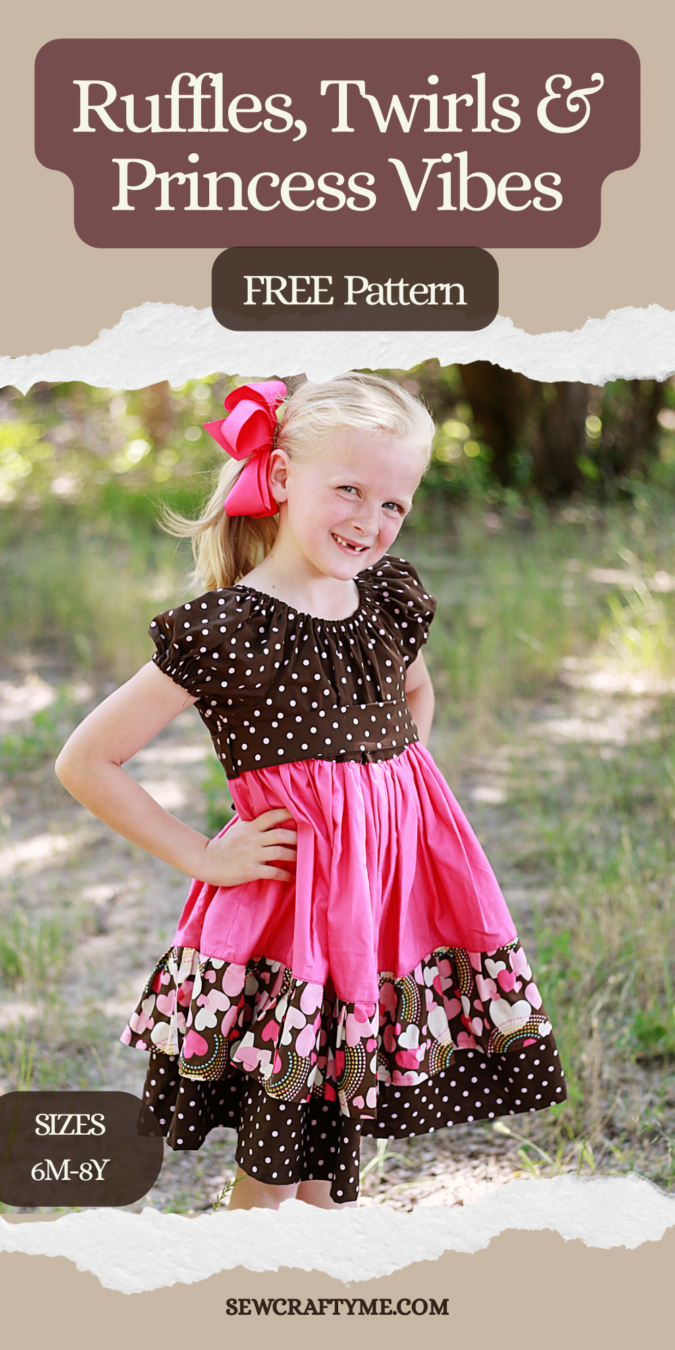
Take a moment to explore this timeless sewing pattern for a charming ruffled peasant dress, perfect for any young girl. The beautifully gathered neckline and the cascading layers of ruffles combine to bestow upon her the appearance of a true princess.

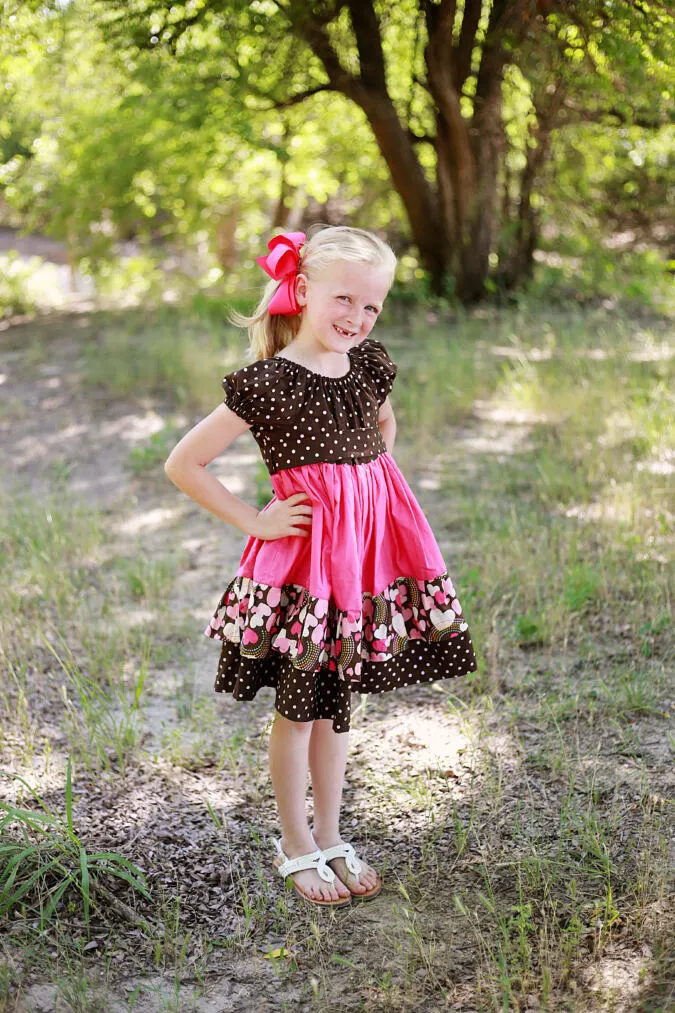
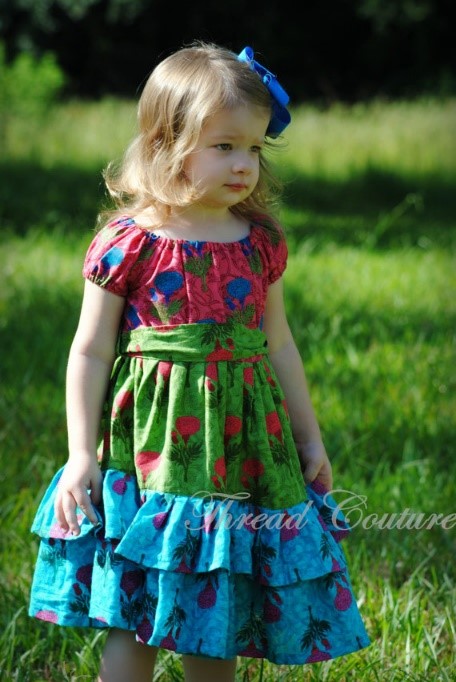

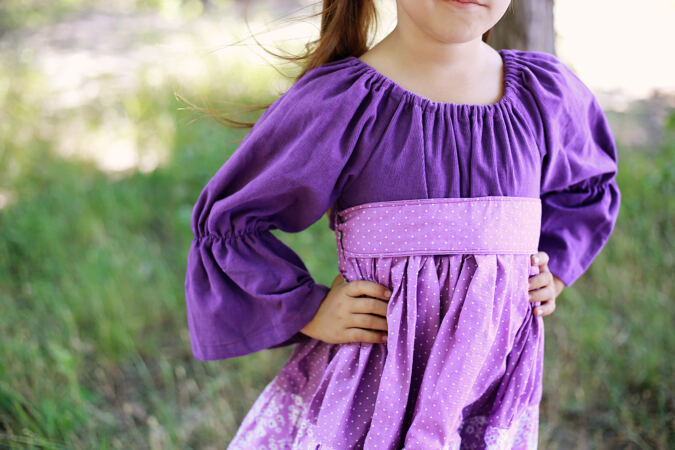
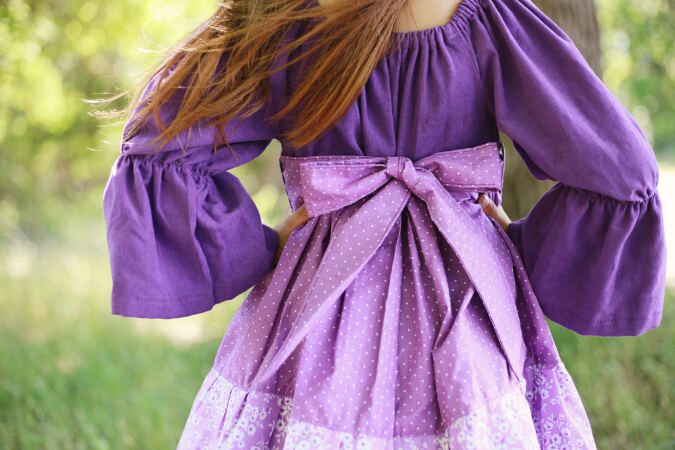
Customization is at your fingertips, with the flexibility to craft short sleeves for a breezy feel or long sleeves for added warmth. The inclusion of a broad sash offers a graceful touch, allowing you to elegantly tie it into a delightful bow.


Unleash your creativity by mixing and matching an array of captivating colors and enchanting prints – the possibilities are boundless. Delve further into the details, procure the pattern, and embark on this fun and fulfilling sewing journey. Your little one is just a few stitches away from experiencing the magic of this exquisite dress.
If you would like to have a look at an adorable bubble romper pattern for girls, click on the picture below:


****Please note that this is an intermediate to advanced level pattern. It involves a lot of gathering which in turn requires a significant amount of time for completion. If you have tried my previous patterns, you can easily go ahead and try it!
Allana Ruffled Dress Sewing Pattern
Materials Required
- Fabric for bodice and sleeve- requirement specified in the table below.
- Fabric for the skirt- requirement specified in the table below.
- Fabric for ruffles- requirement specified in the table below.
- 3/8-inch elastic- requirement specified in the table below
- Sewing Notions
- Pattern template. **Enter your e-mail address and click the subscribe button in the blue box below to download the template.
All the fabrics used here are of 44/ 45 inches width.
The fabrics shown here are only for illustration purposes and as such may vary from the original.
The seam allowance is 3/8-inch unless otherwise specified.
I suggest you read the entire pattern once before starting to get a general idea.
All seams are to be finished by zigzag or serger.
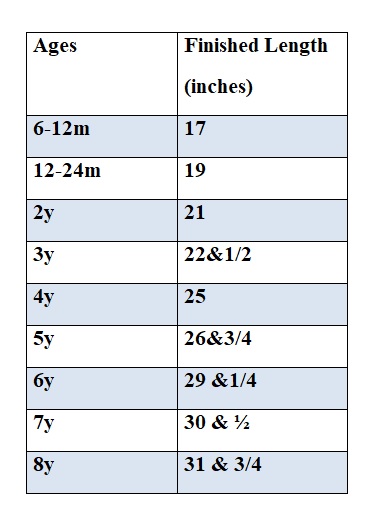
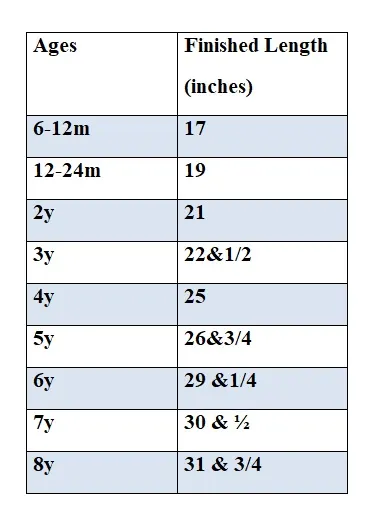
Approximate Finished Length
Table-1
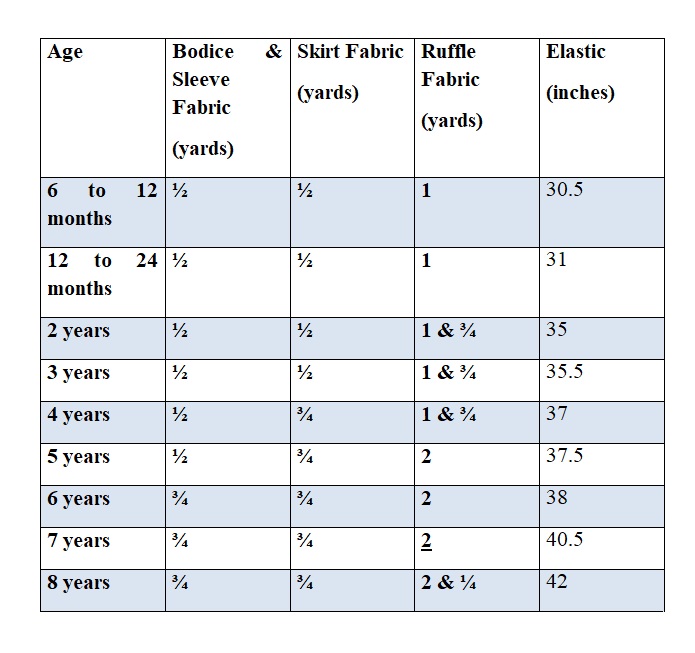
Fabric Requirements
Table-2
The fabric requirement given here is for the bodice and short sleeve. If you prefer a long sleeve, add ¼ yard extra to the fabric.

Measurements
Table-3
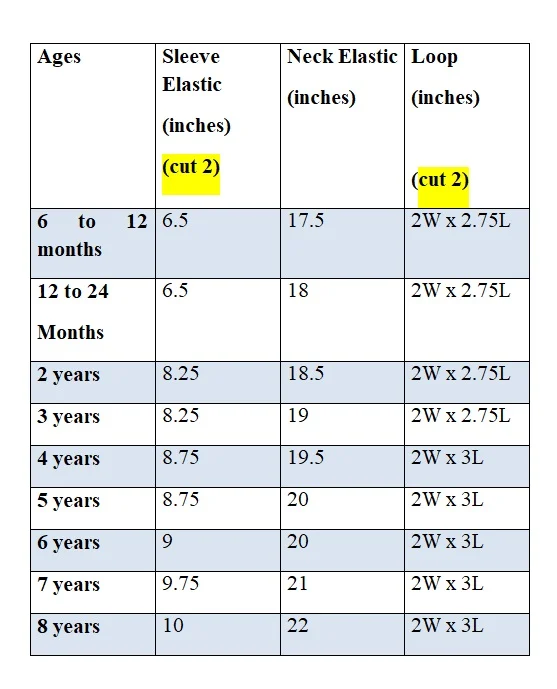
In the tables 3 and 4, “L” stands for the length and “W” stands for the width of the fabric.

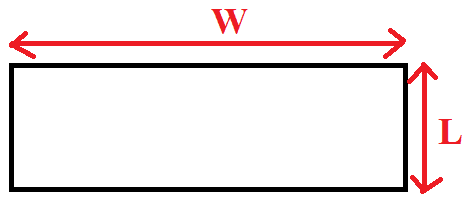

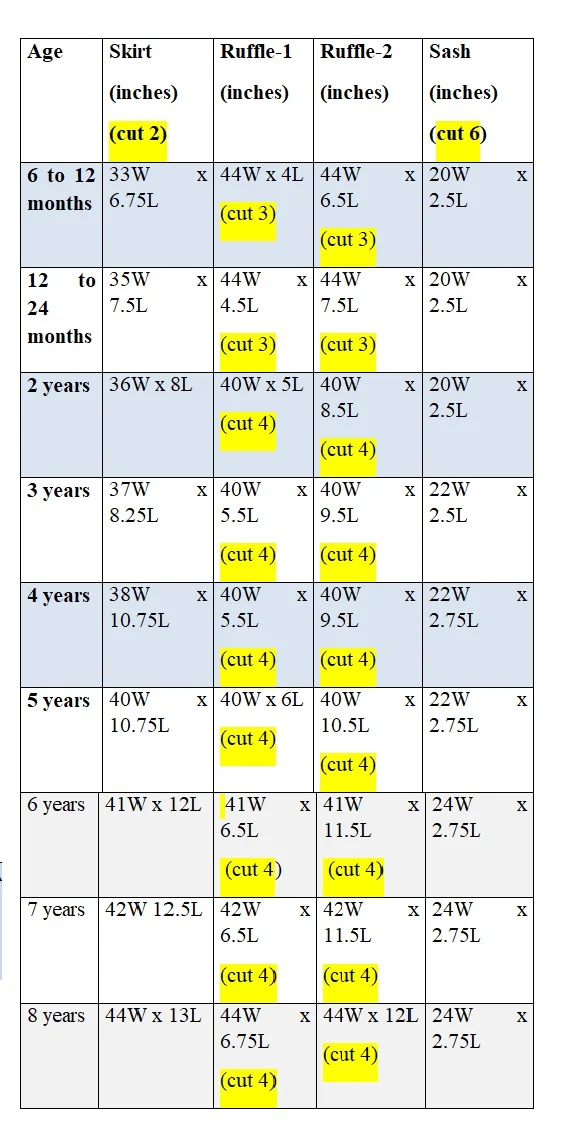
Table-4


Take the required fabric for the yoke, skirt and ruffles.
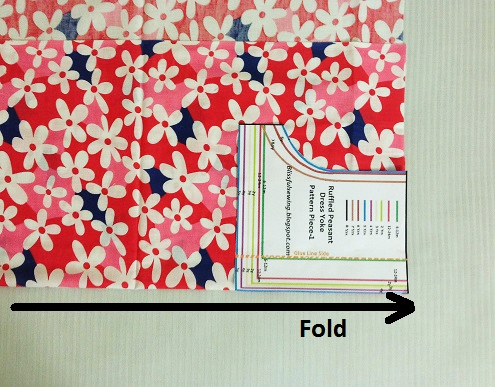
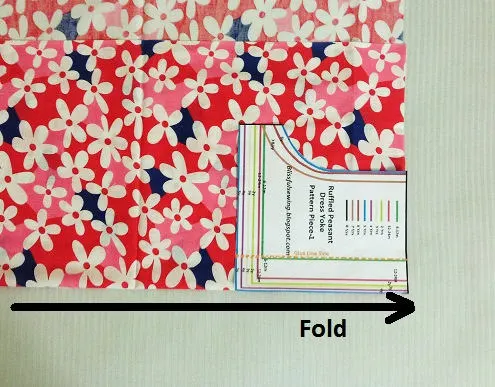
Cut the pattern template for the bodice at the end of this PDF, fold the fabric to fit the width of the template and place the template on the fold. Mark around it and cut to get the front bodice piece. Repeat the steps to get the back bodice piece (picture for illustration purpose).

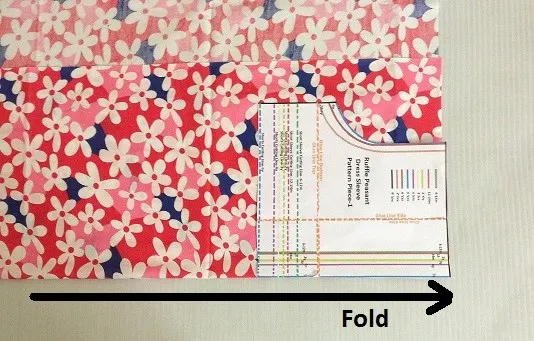
Next, cut the pattern template for the sleeve and cut the sleeve pieces, just like the bodice pieces (picture for illustration purpose).

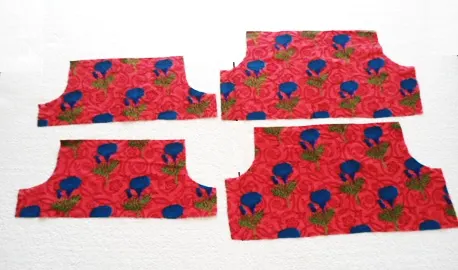
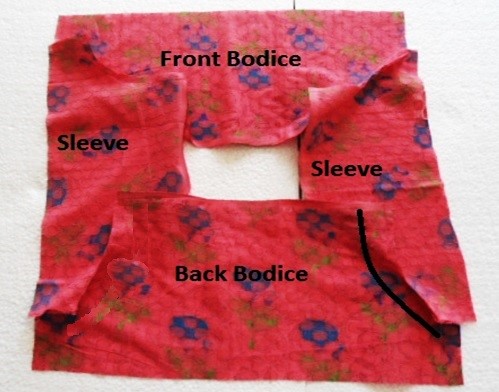
You will get the sleeve pieces and bodice pieces like this.
Also, cut the fabric strips for the skirt, ruffles and sash, referring to the tabl-3 above. The measurements for the elastic and loop are given in table-4.
Sewing
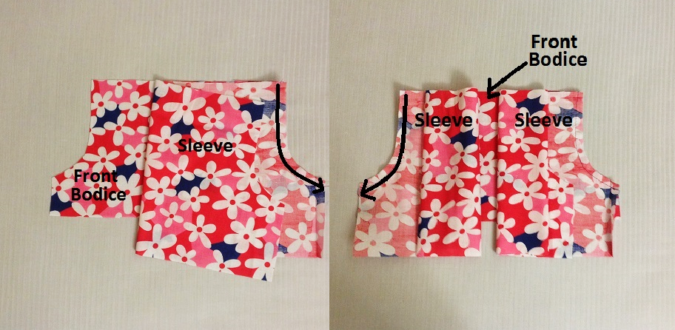
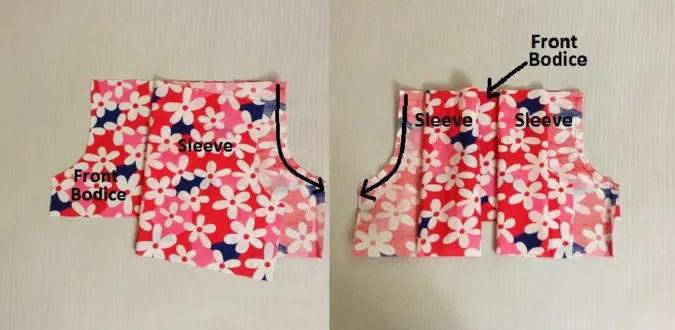
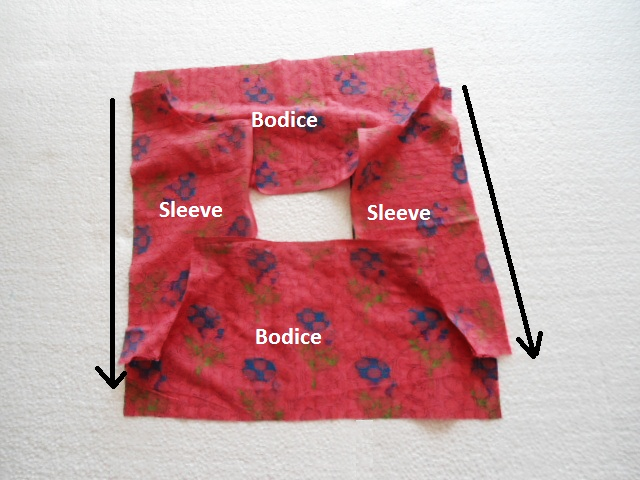
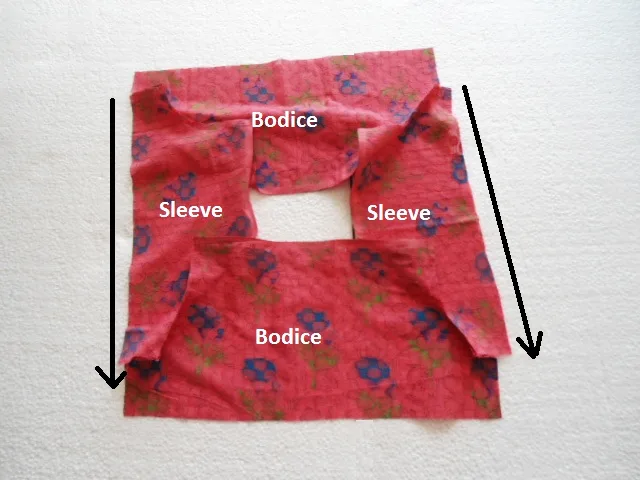
Take one sleeve piece and keep it over the bodice piece, (let this be the front bodice) with the right sides together, aligning the edges and armholes as shown in the above picture. Pin the sleeve onto the bodice. Repeat the steps with the other sleeve on the other armhole of the front bodice (picture for illustration purpose).
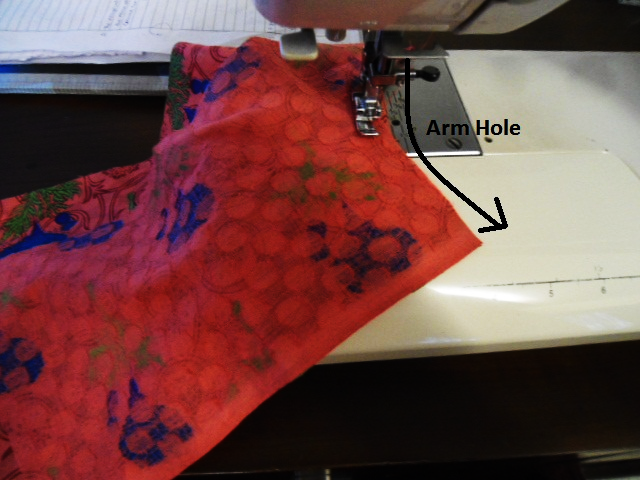

Sew along the armholes as marked in the picture above. Zigzag to prevent fraying.

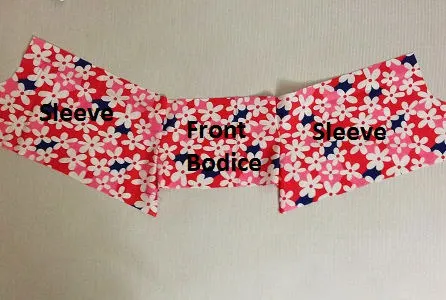
Your bodice will now look like this (picture for illustration purpose).
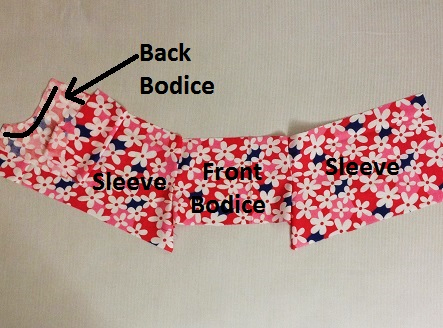
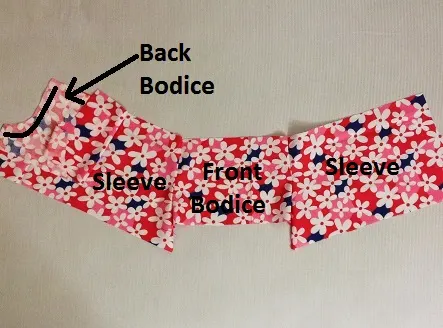
Take the back bodice and place it above one of the sleeves, with the right sides together and aligning the armholes. Sew the sleeve and back bodice together along the armhole, as marked. Here again do zigzag stitch to prevent fraying (picture for illustration purpose).
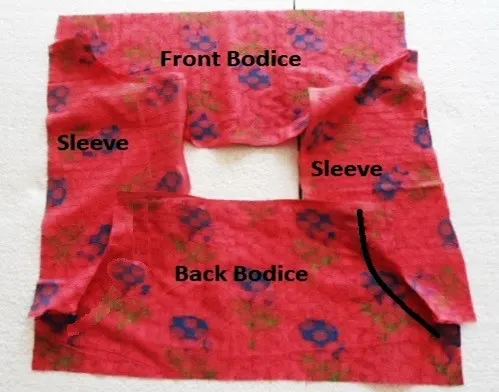
Next, align the remaining armhole of the back bodice with the raw armhole of the other sleeve, with the right sides together. Again sew the sleeve onto the bodice as marked. Repeat the zigzag stitch here also.

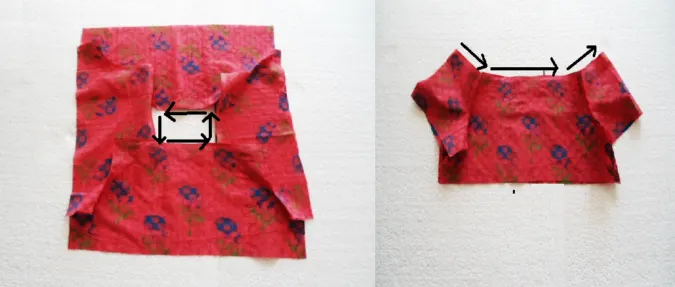
Let’s do the elastic casing along the neckline.

Fold the entire neckline by 3/8-inch and press. Fold again by ½- inch and press once more.
Sew the casing shut, as close to the edge as possible. Make sure to leave a one-inch gap to insert the elastic.

Take the required length of the elastic, referring to the table-4 above and insert it through the casing using a safety pin.

Keep the ends of the elastic overlapping and stitch back and forth a few times to secure. Sew the opening shut.
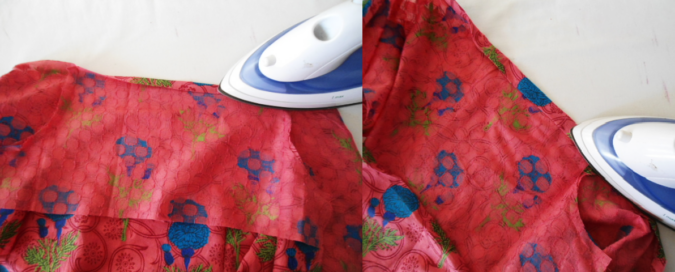
Let’s finish the sleeves. Here again, we have to do the elastic casing at the lower edge of the sleeve, as marked above.

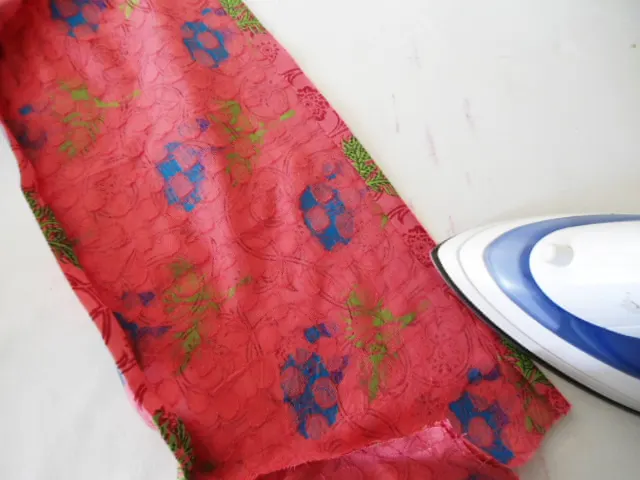
Fold the lower edge of the sleeve by 1/2- inch and press. Fold again by ½-inch and press once more.

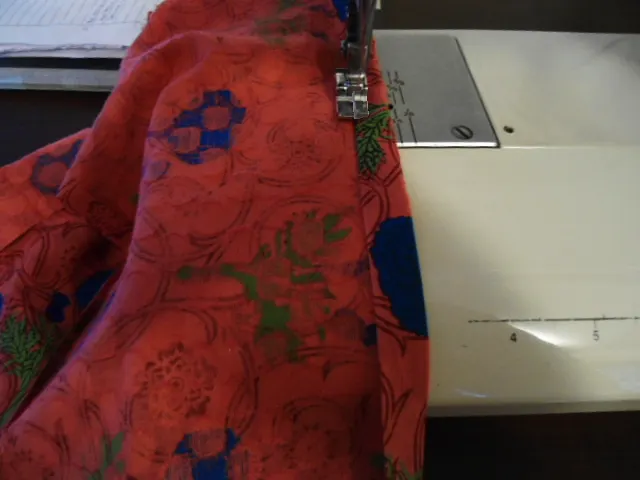
Sew the casing shut, close to the edge.
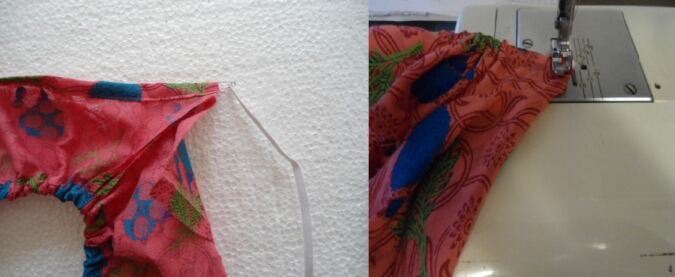
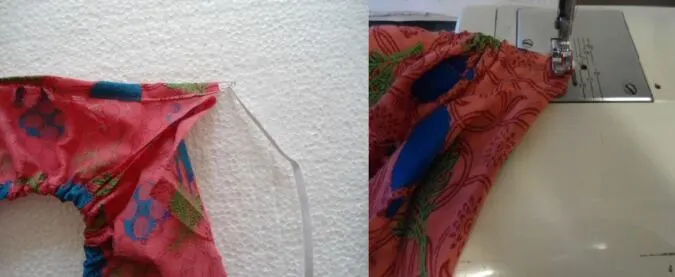
Take the required length of elastic, referring to the table-4 above and insert the elastic through the casing. Secure the ends by sewing back and forth a few times. Repeat the steps with the other sleeve.
If you prefer a long sleeve, you can attach the elastic at the middle of the sleeve. First do the lower hem of the sleeve as seen above.

Draw a line along the center of the long sleeve, as marked in the picture. Take the required length of elastic, referring to the table-4 above (picture for illustration purpose).
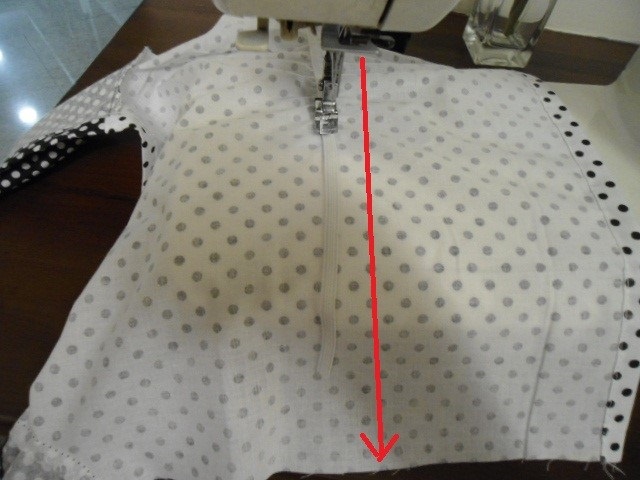

Sew the elastic along the marked line, keeping it stretched while sewing. Make sure to reinforce the stitch at the beginning and end.
Let’s sew the side seams.


Keep the bodice on its wrong side, aligning the side seams and edges. Sew both the side seams shut, from the lower edge of the sleeve to the lower edge of the bodice as marked in the picture.
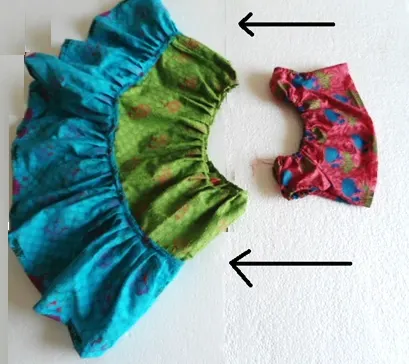
Our bodice part is ready, we move on to the skirt part. The skirt has two layers of ruffles attached at its lower edge. We first do the first ruffle layer.

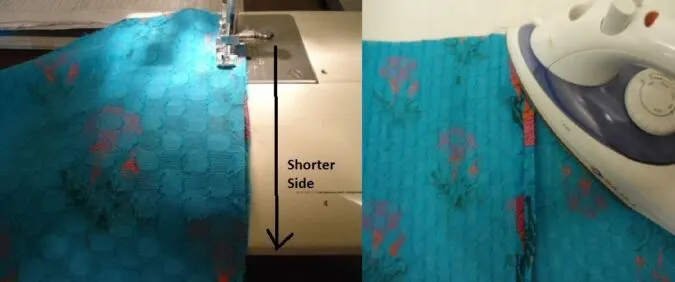
Take the fabric strips for the first ruffle. We have to join strips to get the required length. Join them along the shorter sides, keeping the right sides together and aligning the edges. Next we need to do the lower hem of the ruffle.

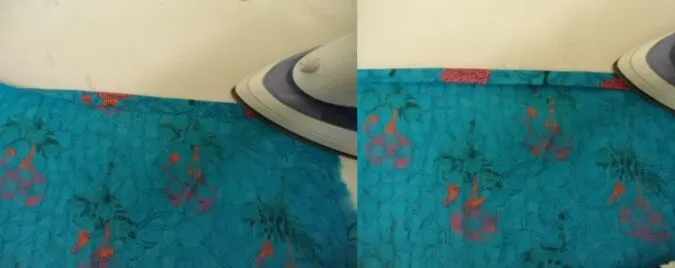
Fold one of the longer edges towards the wrong side by 1/2 –inch and press. Fold by another ½-inch and press again.
Sew Down the hem.
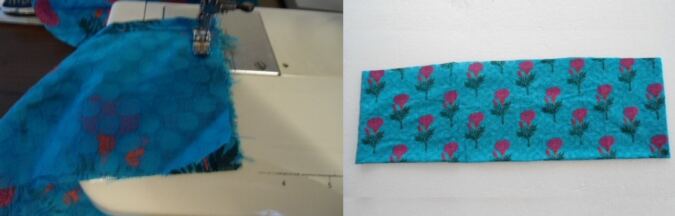
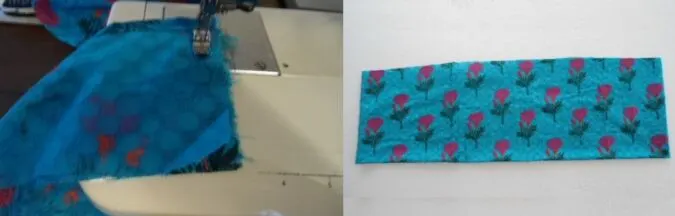
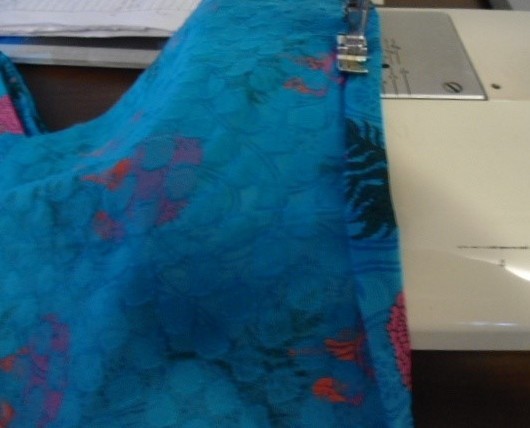
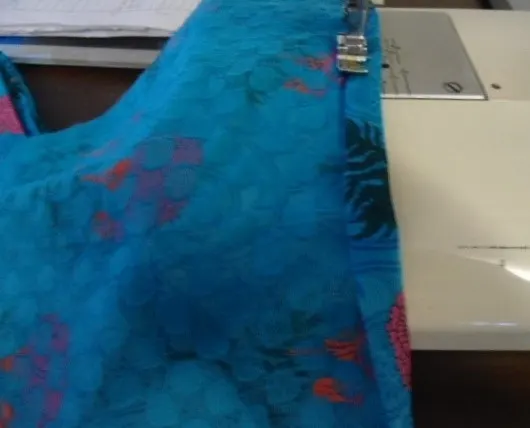
Join the other shorter sides together to form a fabric tube as shown above.
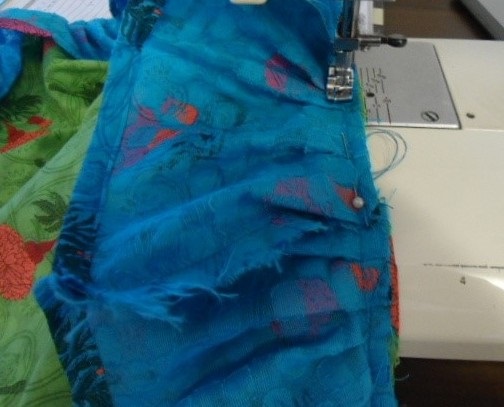
Let’s gather the ruffle.
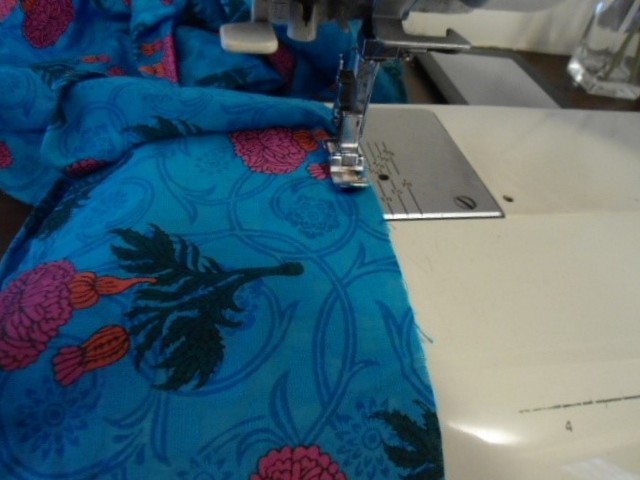
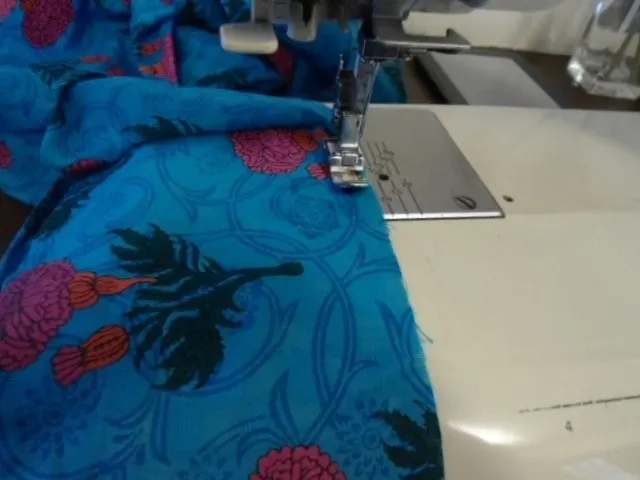
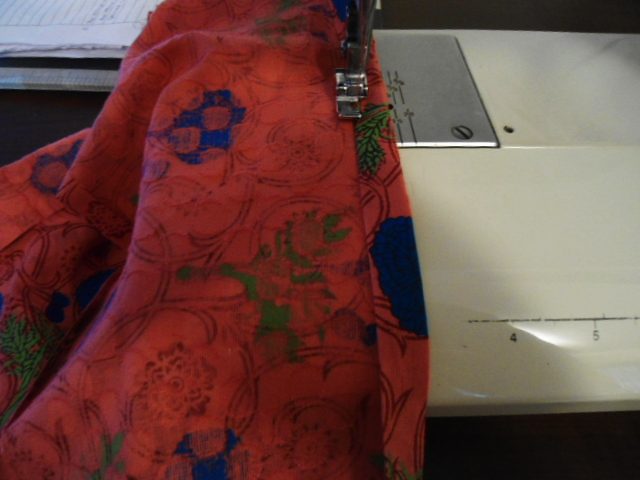
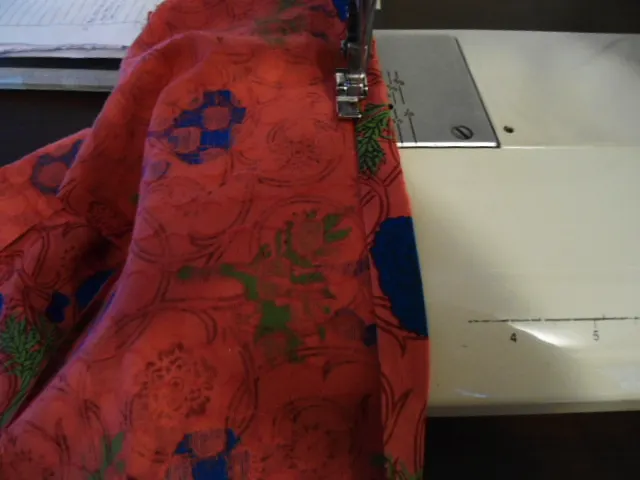
Sew a basting stitch, (for that you have to turn the upper thread tension of your machine to zero and the stitch length to the longest) along the upper raw edge of the ruffle. Leave a long tail of thread, about 5 to 6 inches long to pull and gather the ruffle. Pull the thread from the bobbin gently and gather the ruffle.
Turn your machine settings back to normal.
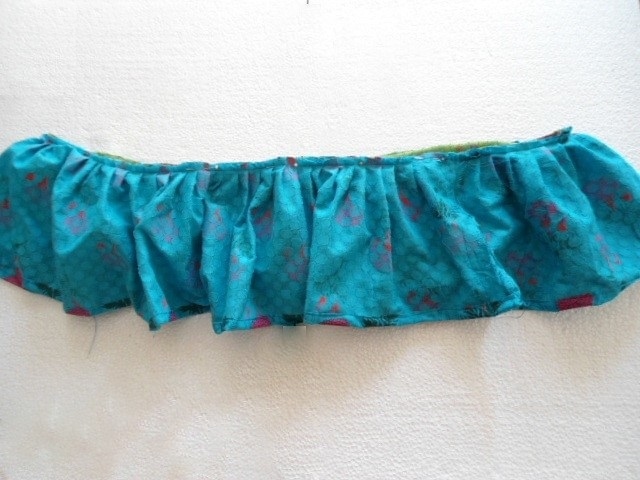

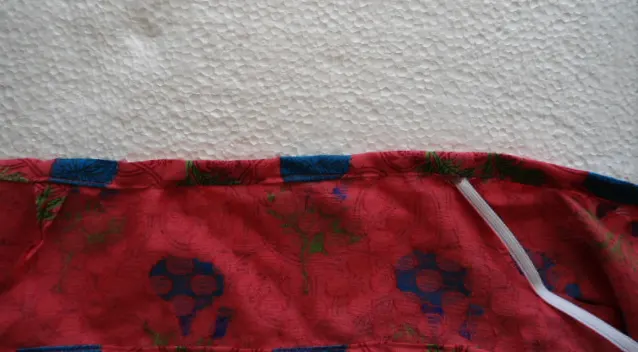
Your ruffle would look like this.
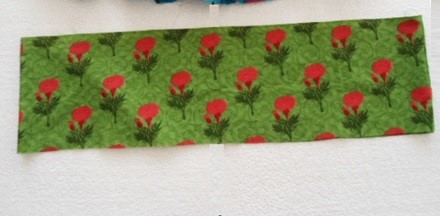

Take the fabric pieces required for the skirt and join them, as we did for the first ruffle, to get the skirt in the form of a fabric tube.
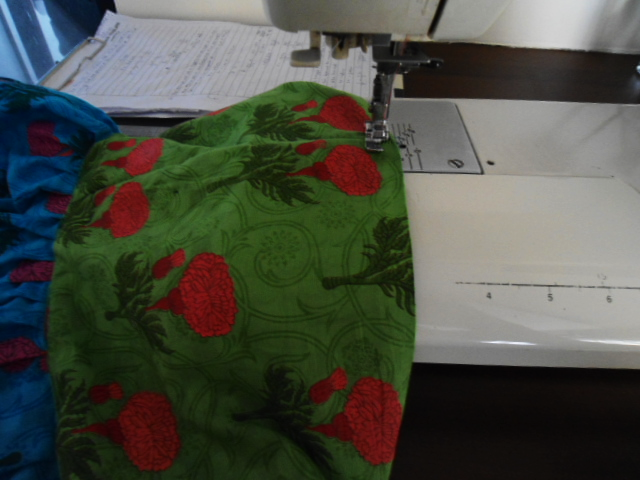
Let’s attach the ruffle onto the skirt. The skirt has two longer raw edges. The edge where the ruffle is attached becomes its lower edge.
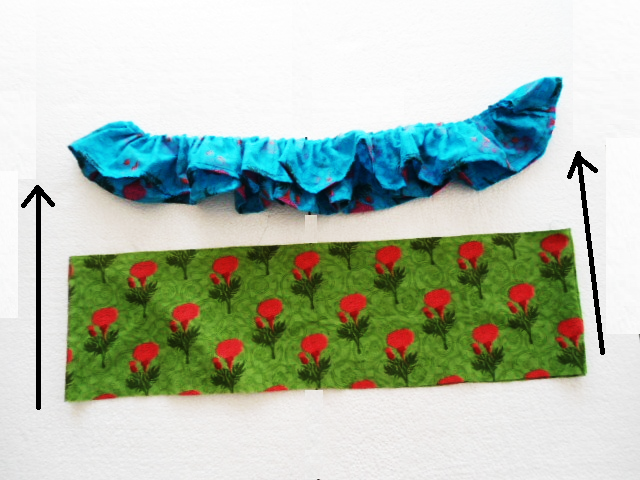

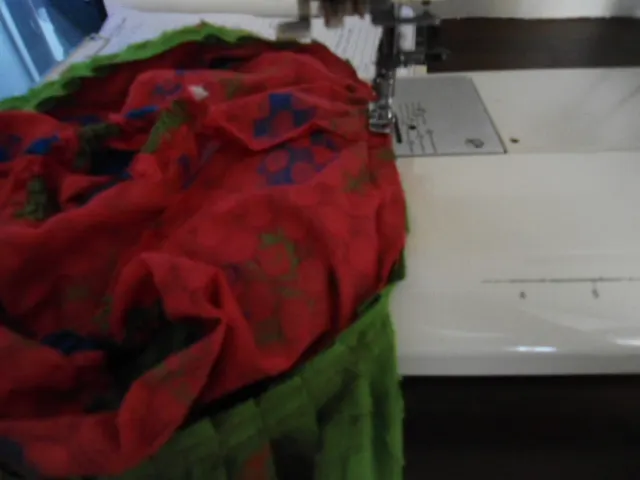
Place the ruffle with its wrong side out, above the skirt tube and the skirt tube on its right side, facing the hem of the ruffle. Slip the skirt into the ruffle.

Align the raw edge of the skirt with the raw edge of the ruffle and pin all around, adjusting the gathering as you go.
Turn the machine settings back to normal.

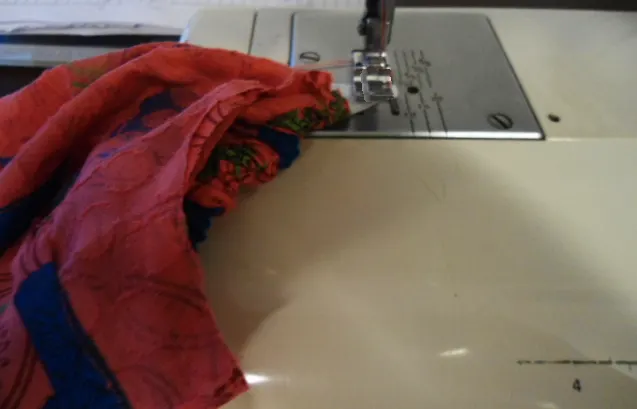
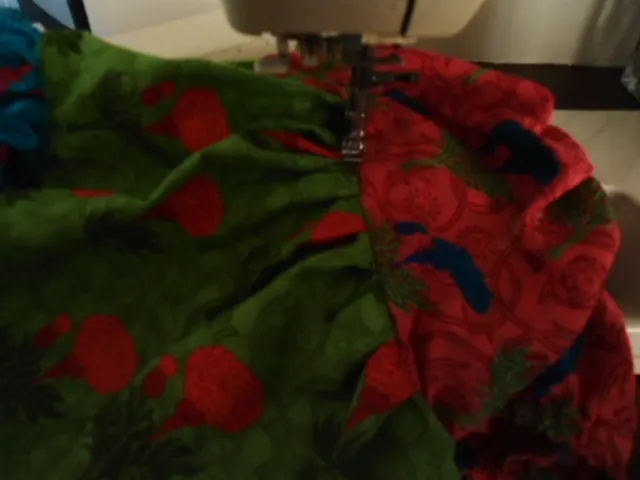
Sew the ruffle on to the skirt, removing the pins as you go.
Next we need to attach the second layer of ruffles. Take the fabric pieces required for the second ruffle and repeat the steps that you did for the first one to finish and gather the ruffle.
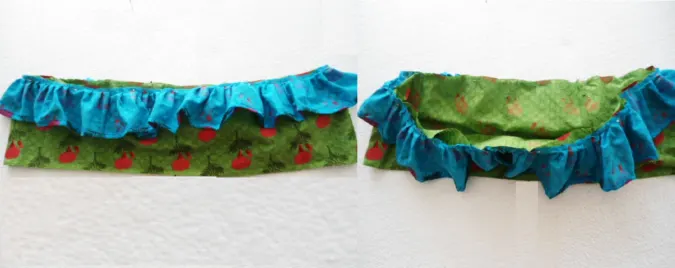
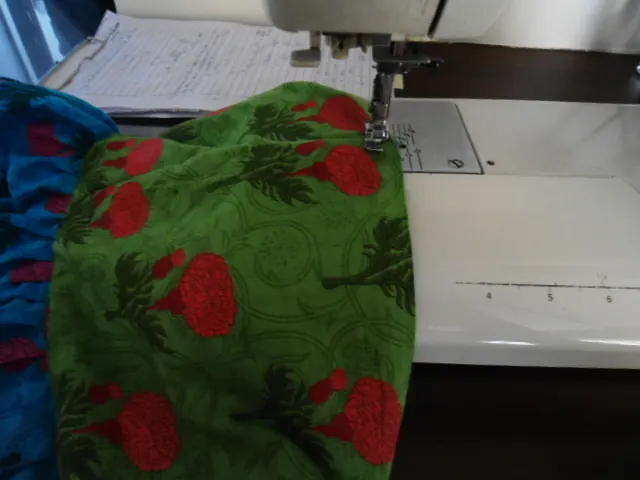
Let’s attach the ruffle onto the skirt.
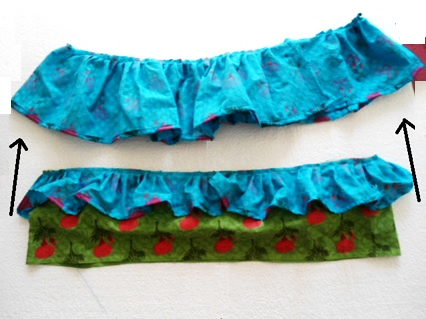

Keep the second ruffle on its wrong side, above the skirt, with its lower hem facing the lower edge of the skirt and slip the skirt into the ruffle as shown above.
Align the raw edge of the ruffle with lower edge of the skirt (where the first ruffle is already attached) and pin all around, adjusting the gathering as you go.
Turn the machine settings back to normal.

Sew the ruffle onto the skirt.

Turn over to the right side and topstitch along the seam line of the ruffle and skirt for a neater finish.
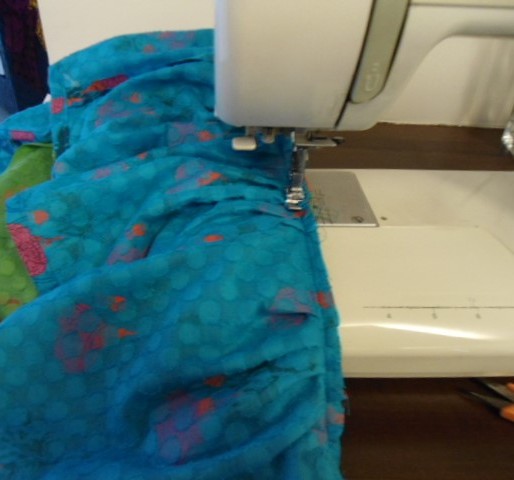
Let’s gather the skirt.
Sew a basting stitch along the upper raw edge of the skirt. Pull the thread from the bobbin gently and gather it. Adjust the gathering to make it uniform and to match with the lower edge of the bodice. Turn your machine settings back to normal.

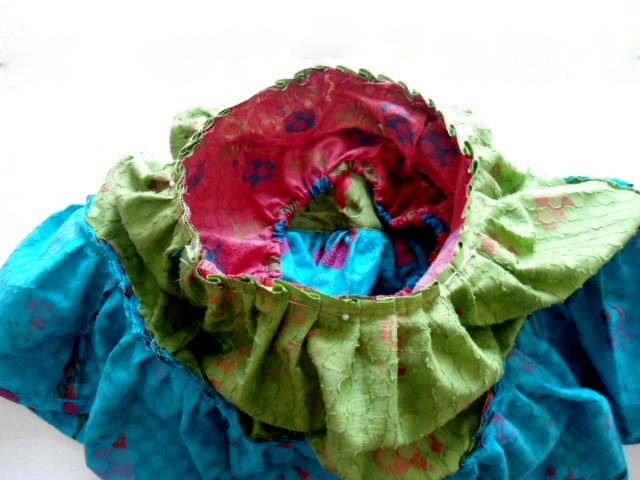
Your skirt will now look like this.
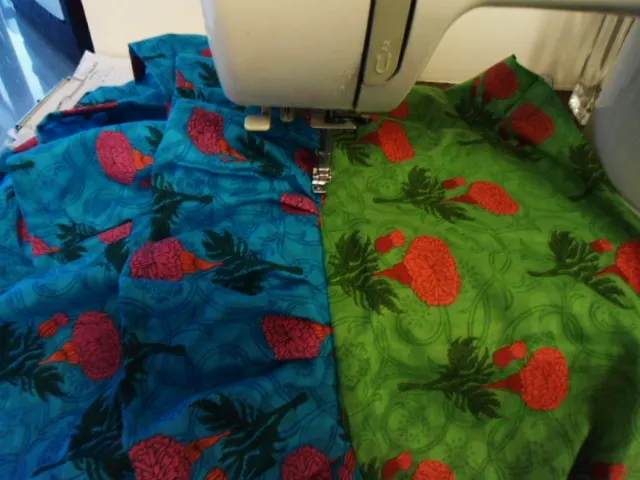
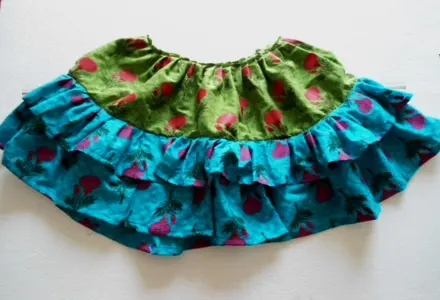
We attach the skirt onto the bodice.
Keep the bodice on its right side and the skirt on its wrong side, with the upper edge of the skirt facing the upper edge of the bodice. Slip the bodice into the skirt.

Align the lower edge of the bodice with the upper edge of the skirt and pin all around, taking care to bring the side seams of the skirt in line with the side seams of the bodice.

Sew the bodice onto the skirt, removing the pin as you go.

Turn over to the right side and topstitch along the seam line of the skirt and bodice to make it look neat and taut.
Next we need to do the sash.
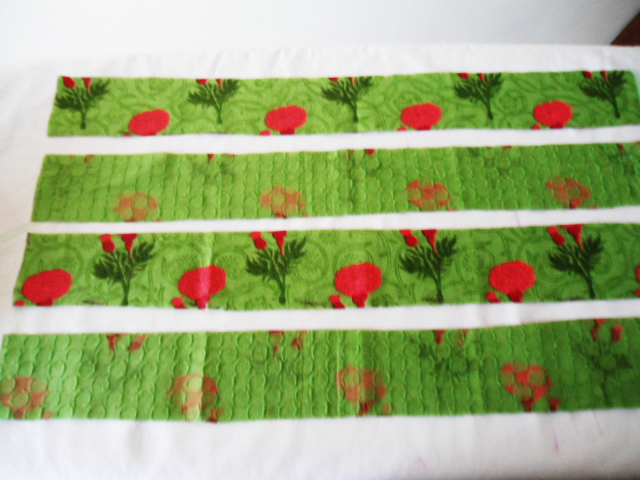

Take the fabric strips for the sash. You will have to join three fabric strips together to get one piece of the sash. Repeat with the remaining three strips to get the other piece of the sash.
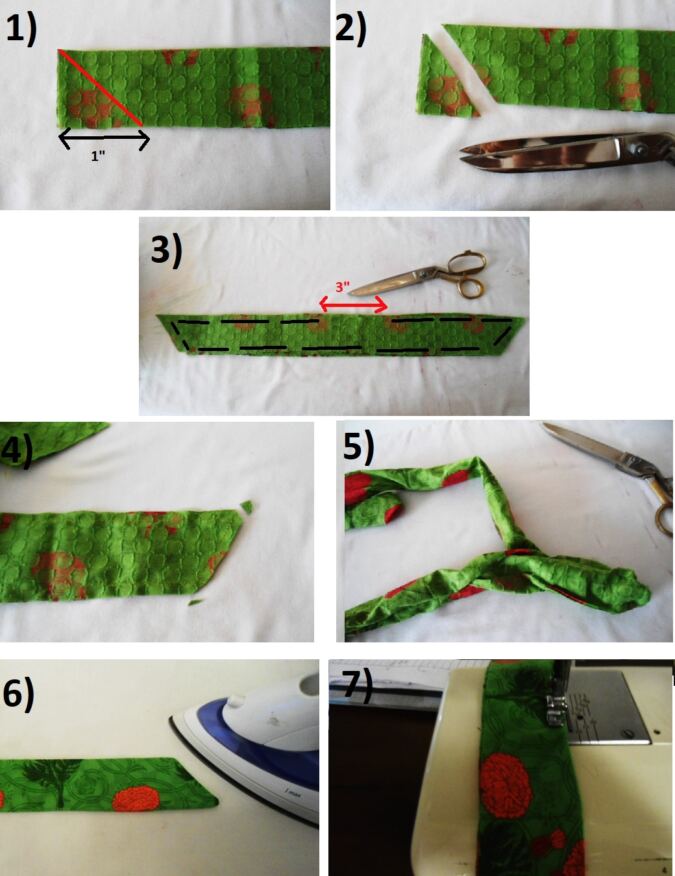
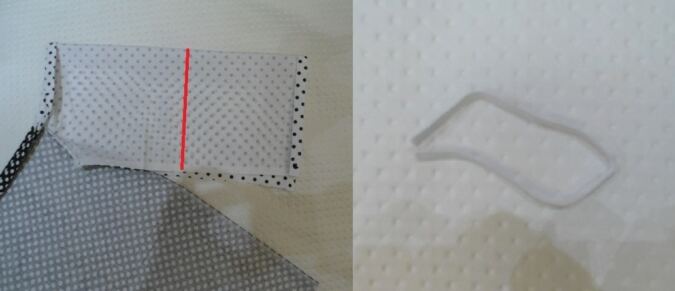
 1) Take the two joint strips and layer them with the right side together, aligning the edges.
Mark a slanting line as shown above. 2) Cut along the line to get a slanting edge. Repeat the same steps on the other end.
3) Sew around the four edges with a 3/8-inch seam allowance and leaving a 3” gap in the middle as shown above (this is to turn the strap inside out).
4) Clip the edges and the corners to reduce the bulk at the seam.
5) Turn the strap inside out.
6) Press down the strap, taking care to tuck in the raw edge (3-inches) in the middle.
7) Topstitch all around. Your sash is ready.
Next, let’s do the loops to insert the sash.
-
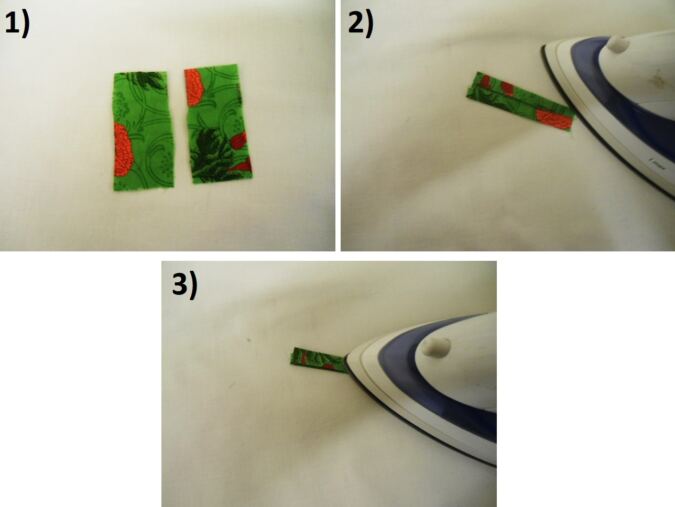

1) Take the two fabric pieces for the loops. Take one of the pieces and fold it in half lengthwise and press.
2) Open the strap and fold the two longer edges inside towards the center and press again.
3) Fold the loop back along the earlier center crease and press again. Sew the loop shut along the longer edge, making sure to catch both the folds.
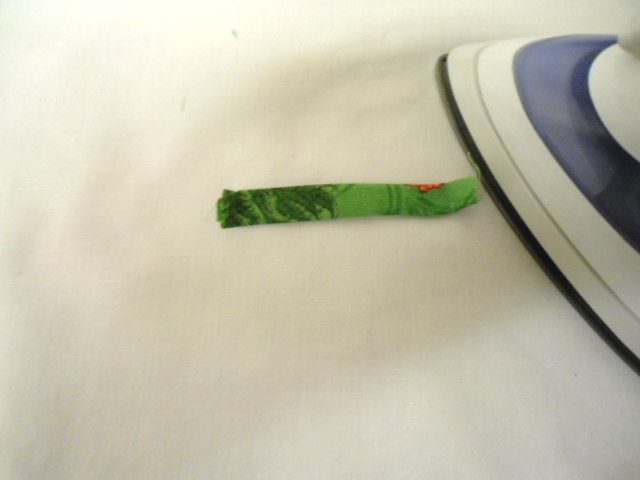
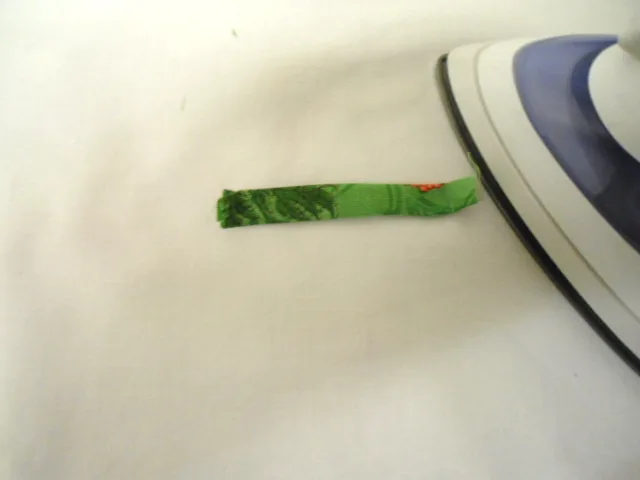
Fold the two raw ends of the loop by ½-inch inside and press.

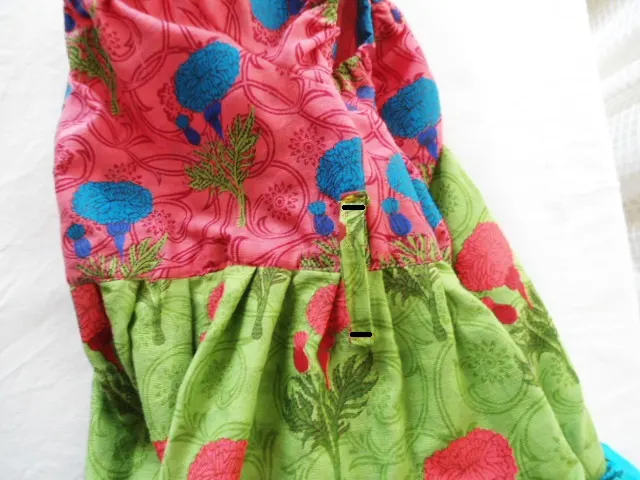
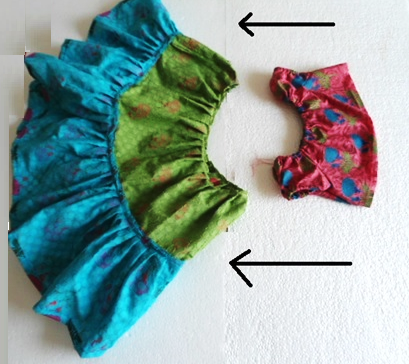
Place the loop along each side seam of the dress, such that half of it is on the bodice part and the other half is on the skirt part. Sew the loop onto the dress, along its folded shorter edge, as marked by the black line above. Sew back and forth a few times to reinforce it. Repeat the same steps to attach loop on the other side seam also. Feed your sash through the loops and tie it in a knot at the front or back of the bodice.
Find the webstory for the post here, DIY Style: Free Allana Ruffled Peasant Dress Pattern
Pin it for later here,
SMB
Friday 29th of August 2025
I’m afraid the double roll of ruffles will be too much on an 18 month old. Can I just use the 2nd, longer ruffle to finish the dress or will it hang funny?
Surayya
Sunday 7th of September 2025
You're right to be cautious—using just the second, longer ruffle might not give the dress the balanced look you're hoping for. Without the first, shorter ruffle, the longer one could hang awkwardly or look out of proportion, especially on such a small frame.
Sandy Debens
Sunday 8th of September 2024
This looks a lovely easy dress but I can’t find the free pdf pattern, please can someone point me in the right direction? I’ve scrolled many times through the written instructions. Thank you
Sandy Debens
Monday 9th of September 2024
@Surayya, many thanks. I have the patttern now
Surayya
Monday 9th of September 2024
You may enter your email id and click the subscribe button, given in the blue box to download the template free.