Friendship Bands DIY is a simple and creative craft suitable for kids as well as adults. And, after my candy stripe friendship band, I am here with the tutorial on how to make chevron friendship bracelets.
![]()
![]()
![]()
![]()
There is only a slight difference between the two. For candy stripe bracelets, you just tie the knots in one direction, that is forward. But the chevron bracelets are made by tying forward and backward knots. If you have learned to make the earlier one, you can easily make this one.
![]()
![]()
Just increase the number of strands in each color to get thicker chevron stripes and wider friendship bands.
How to Make Chevron Friendship Bracelets
Candy Stripe Friendship Bracelet:
The bracelet is made by tying both forward and backward knots. This would give you a chevron-striped bracelet with the colors of embroidery floss you use. The larger, the number of strands in each color, the wider the chevron stripes would be. If you are looking for tutorials on how to make a friendship bracelet for beginners, this is one of the best choices.
Supplies Needed:
Embroidery floss, macramé cord, or knitting or crochet yarn in the desired colors.
Washi tape.
Measuring tape.
Scissors.
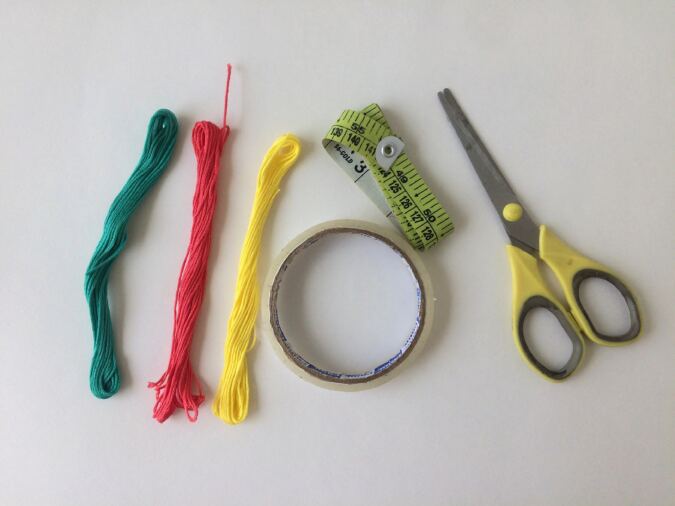
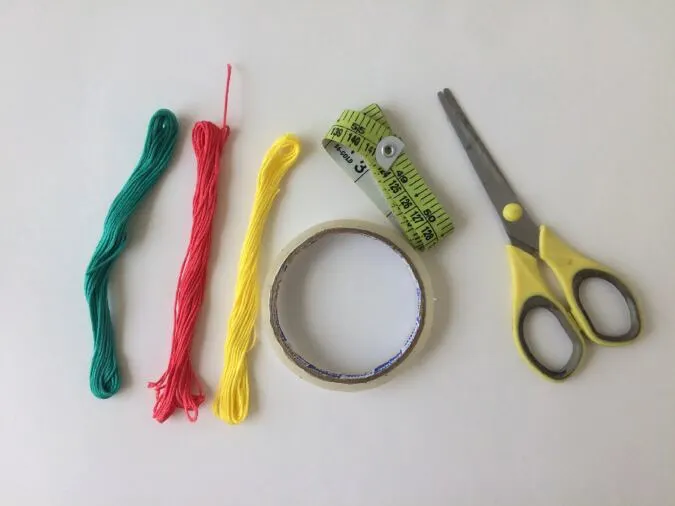
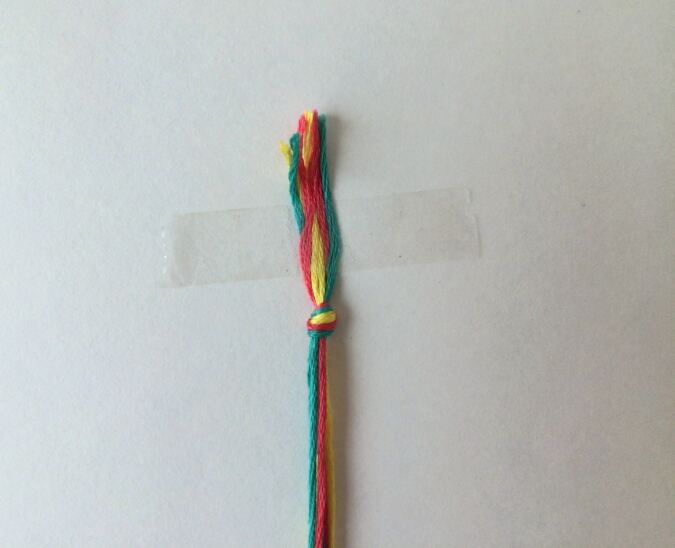
Gather your supplies. Here I took blue, pink, and yellow embroidery threads.
***Here again, I have made a friendship band that is tied around the wrist. It can be cut off while it wears off.
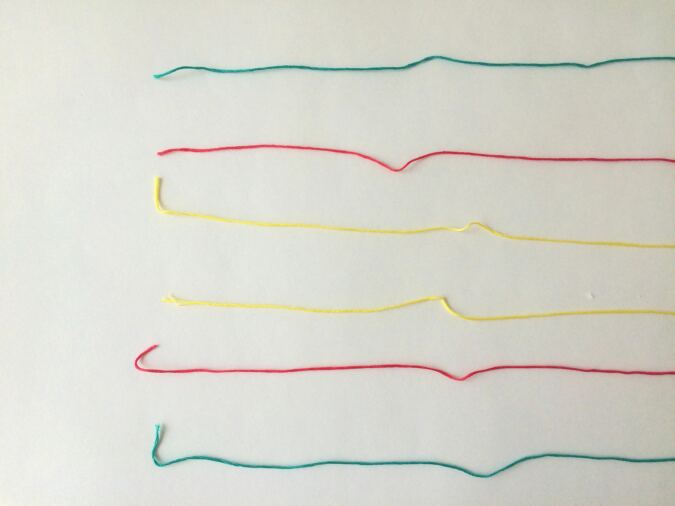

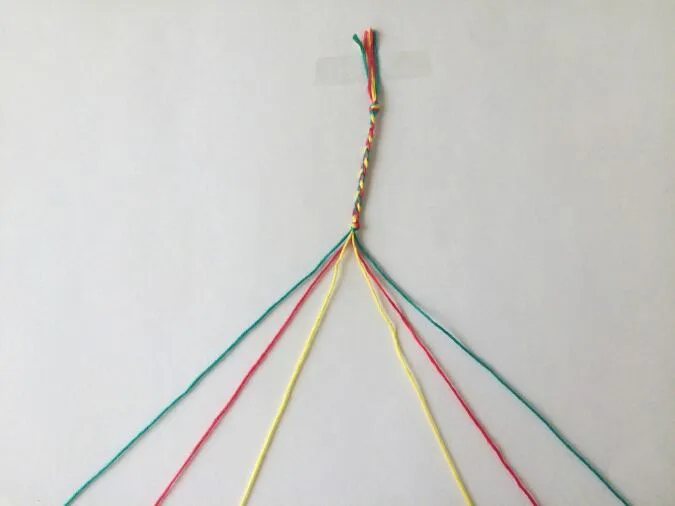
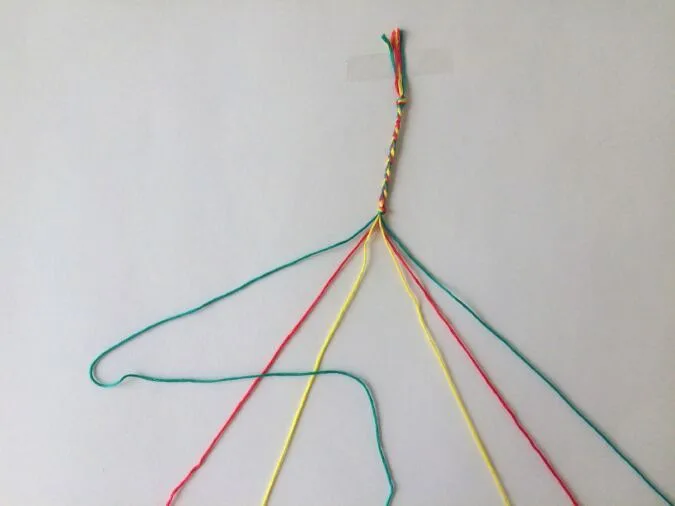
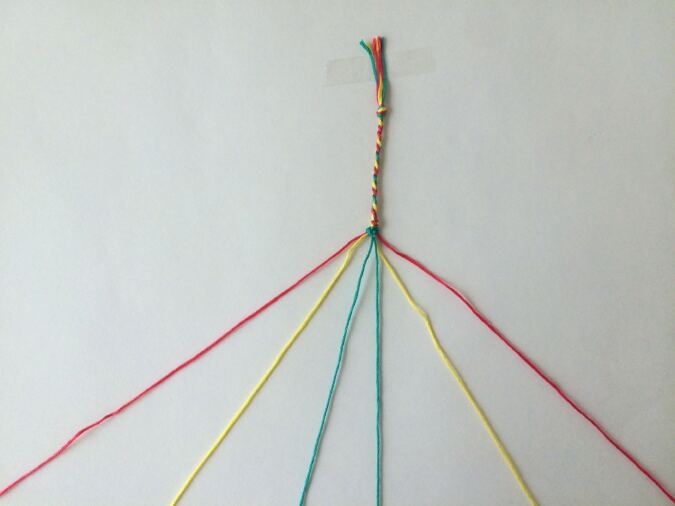
Gather 6 strands of the embroidery floss, 30- inches long. ( here I have taken two strands in the same color). * Note that the width of the friendship band increases with the number of strands; the more strands, the wider the band.
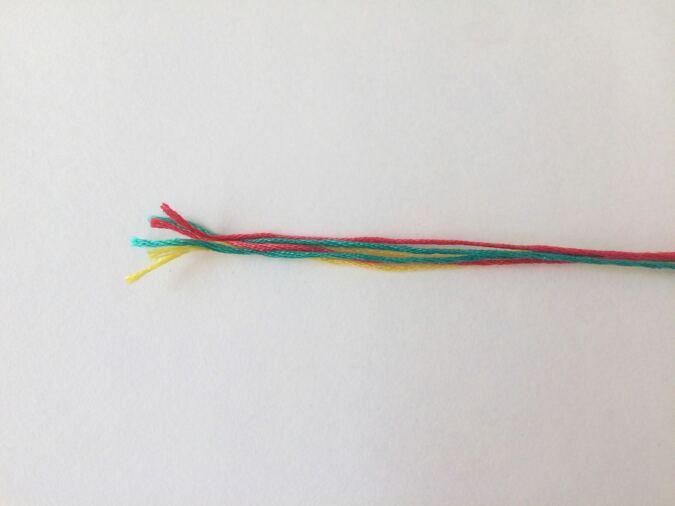

Keep all the strands, lined up together.
Next, we finish the end with a single knot.
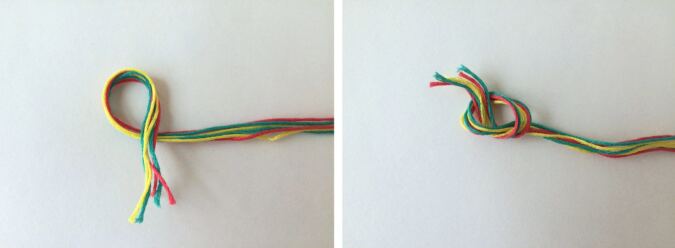
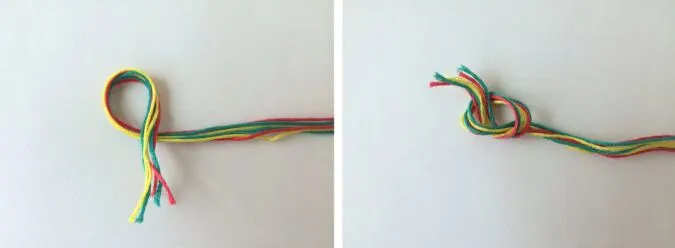
Leave 1/2” from the edge and bring one end over the strand, bring it under the loop formed, and then through it.
Pull the ends to tighten (the part beyond the knot should be approximately 1/2- inch long).
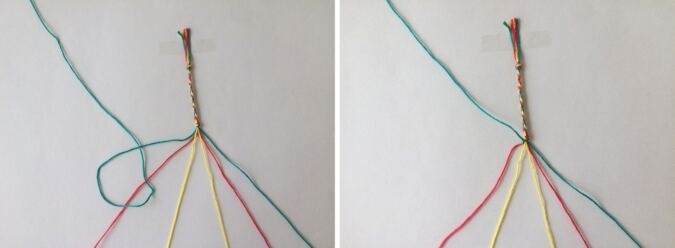
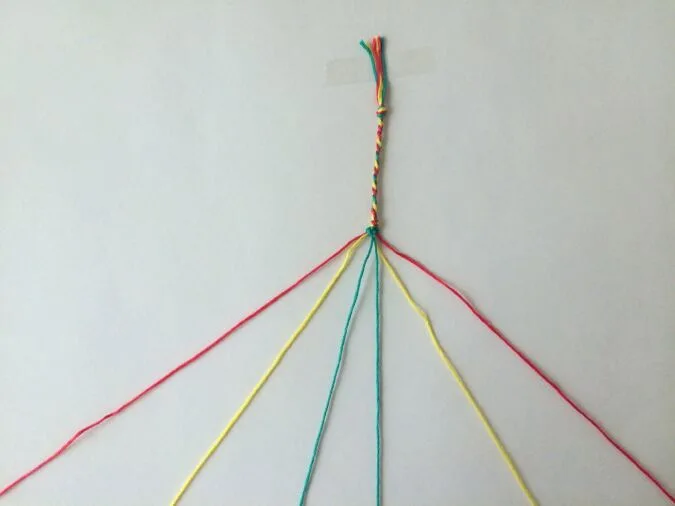
Let’s braid a few inches of the bracelet before we start our chevron stripes.
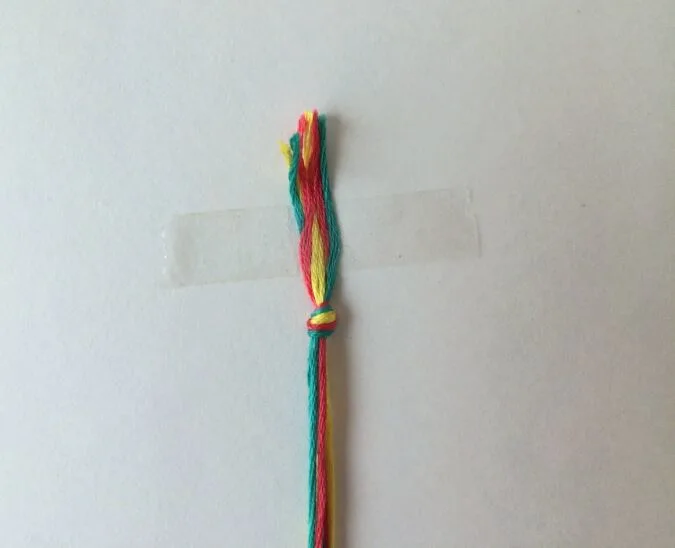
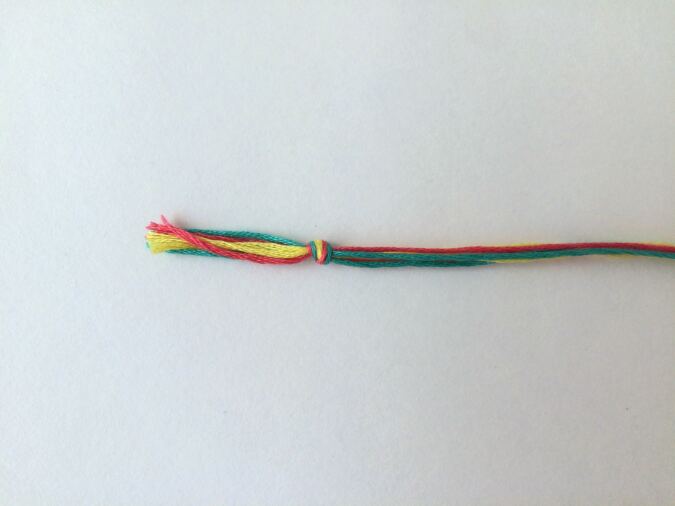
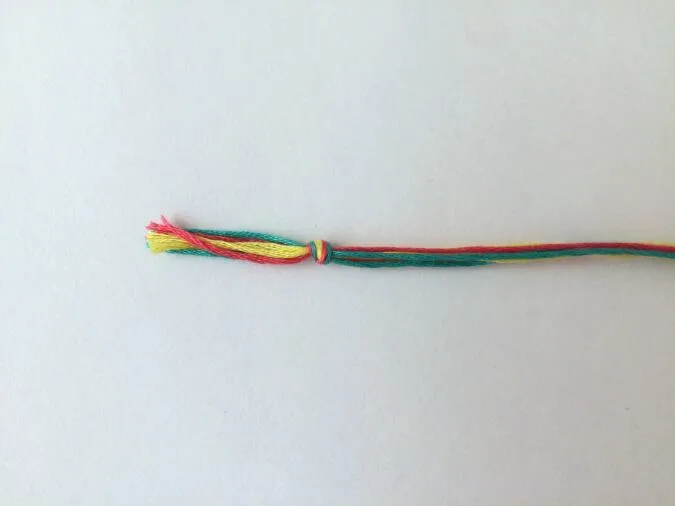
Tape the edge down to your table.

Separate the strands in 3. You may choose to pair the same colors together or pair different colored strands.
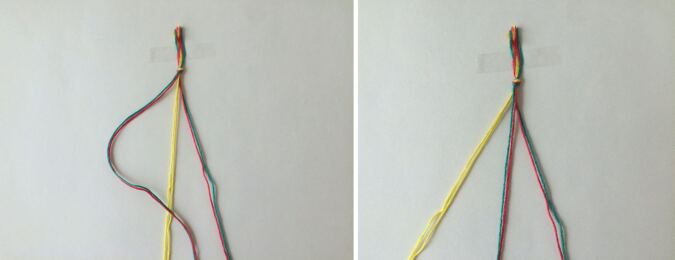
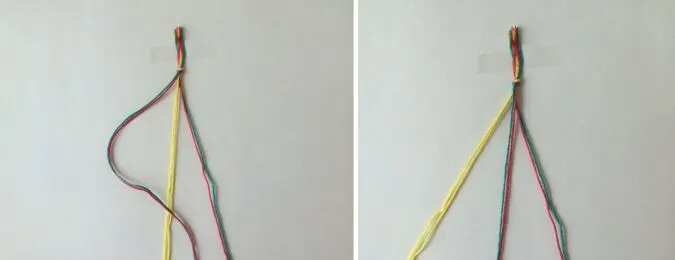
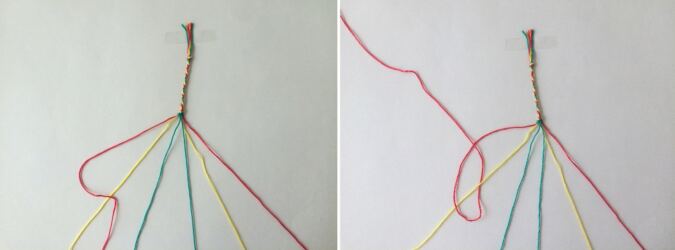
Bring the first strand over the second. Pull the first and second strands tight for the braid to move up close to the knot.
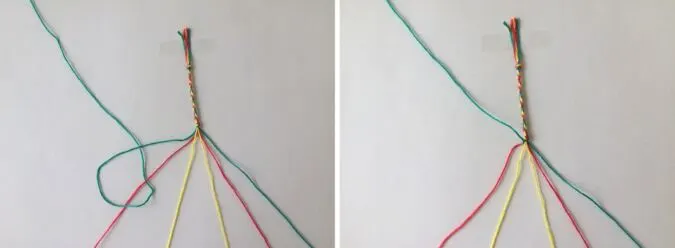
Next, bring the strand on the right, over the strand along the center. Pull both strands to bring up the braid.
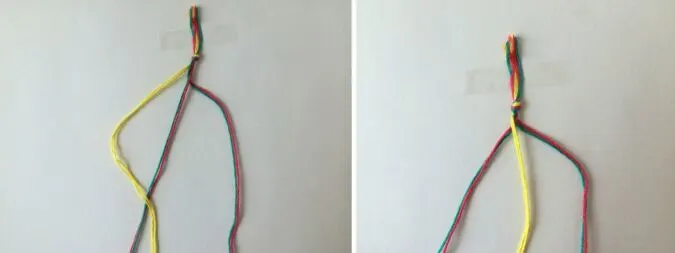
Again bring the strand along the left over the strand on the center. Repeat the process.

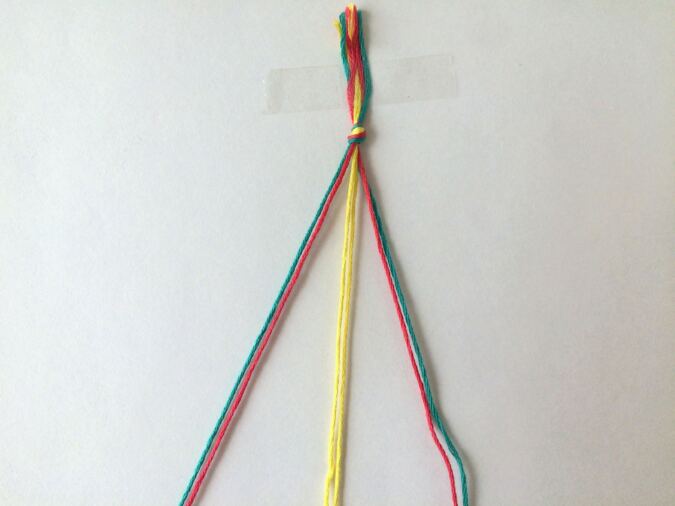
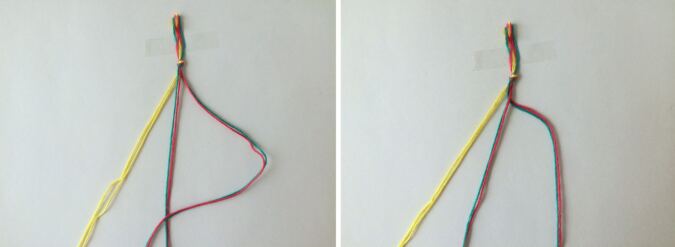
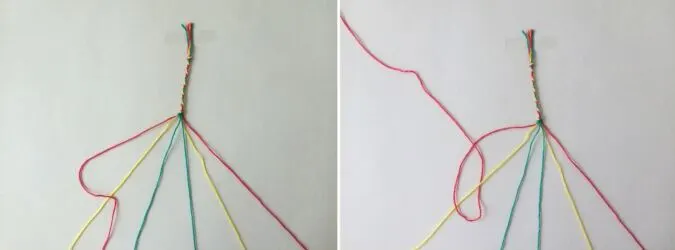
This is how it would look after a few braids. Continue braiding this way until you get approximately 2.5 inches of the bracelet braided.

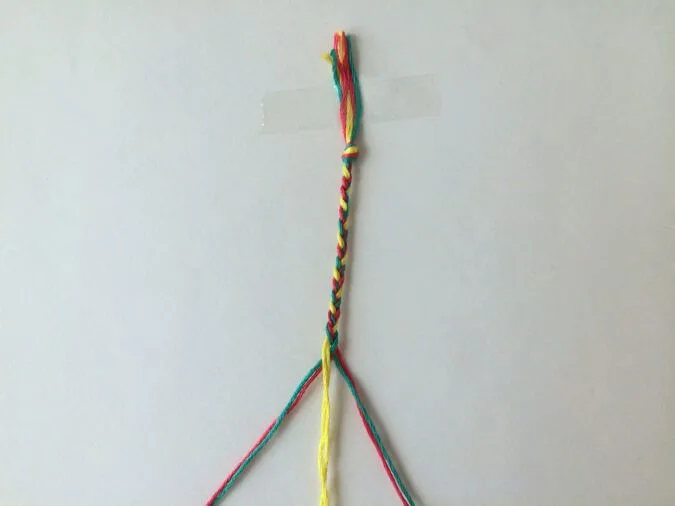
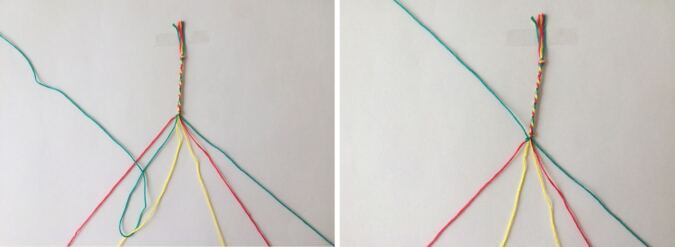
Tie a single knot to secure the braids. Keep it as close to the braided strand as possible.
Next, we start our forward knot for the chevron stripes.

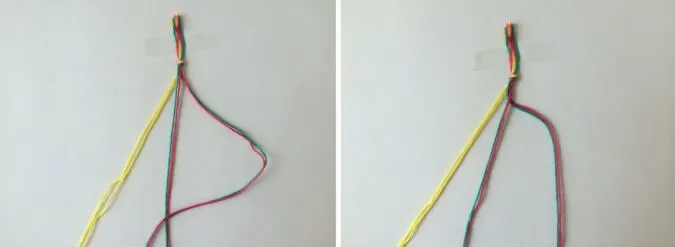
Separate the six strands. Since I used just 3 colors, I separated them in this order to make the tutorial easy to understand: blue, pink, yellow, and then yellow, pink, and blue. If you want to keep your blues, whites, and pinks together, you will get wider chevron stripes (as I mentioned at the beginning of the tutorial).
The chevron stripes are made by doing forward knot stitches and backward knot stitches. Basically, you keep knotting the leftmost (first) strand with the subsequent strands, till it reaches the middle and then go to the rightmost strand and do the backward knots till it reaches the middle.

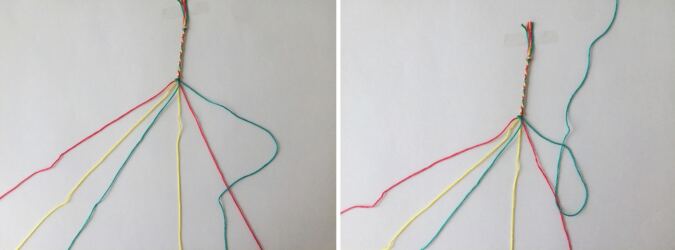
Take your first strand (blue), pull it tight, and bring it over the second strand (pink) like a “4”.
Bring it under and then through the loop. Pull it tight to bring the knot closer to the knot at the top.

The blue color has moved one strand to the right. Next, bring it over the third strand (yellow) again in a “4, bring it under, and then through the loop. Tighten the knot. The blue color has again moved one strand to the right.
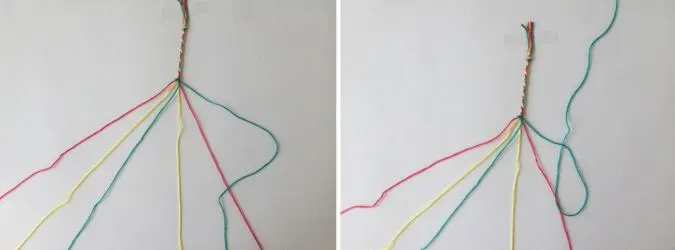
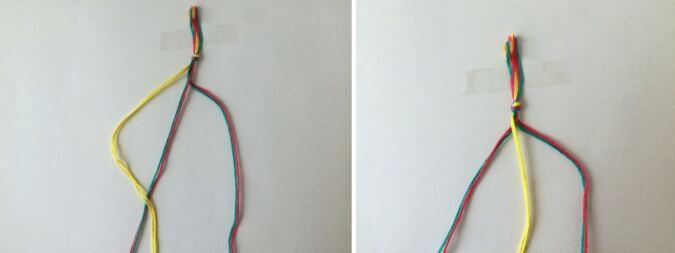
Next, we start the backward knots. Bring the rightmost strand (blue) in a”4” over the strand just before it (pink). Then under and through the loop. Pull the strands to move the knot to the top.
The blue thread has moved one strand backward. Next, bring it over the next thread (yellow) in a “4”, Under and through the loop. Tighten the strands to bring up the knot.
The blue thread has reached the middle. Again we go back to the leftmost thread.
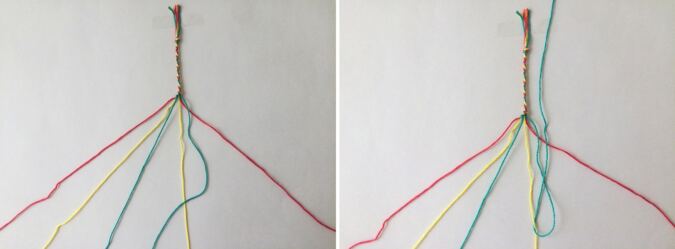
Repeat doing the forward knots till the pink thread reaches the middle and then go back to tie the backward knots.
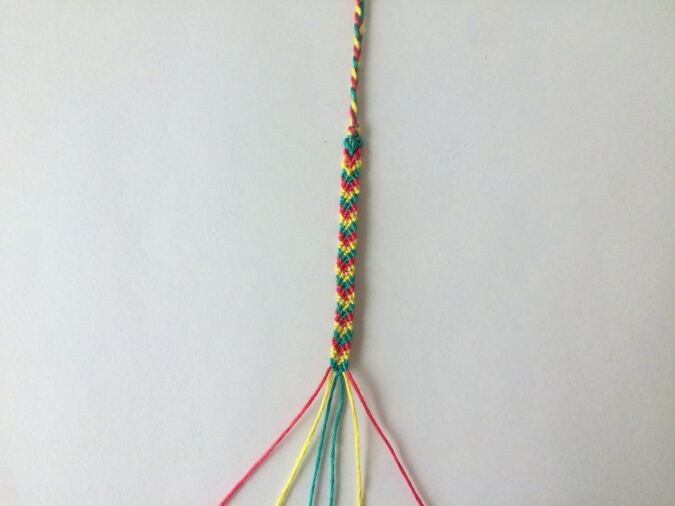
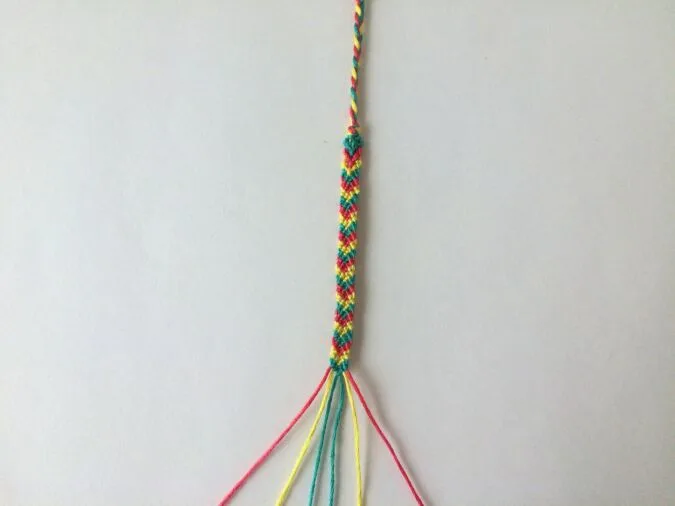
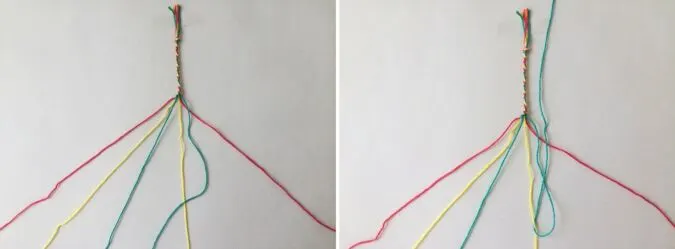
Keep repeating the pattern with the strands till you get approximately 7- inches of the chevron stripes. **Optionally, you may measure your wrist and make the length of the chevron stripes equivalent to your wrist measurements.
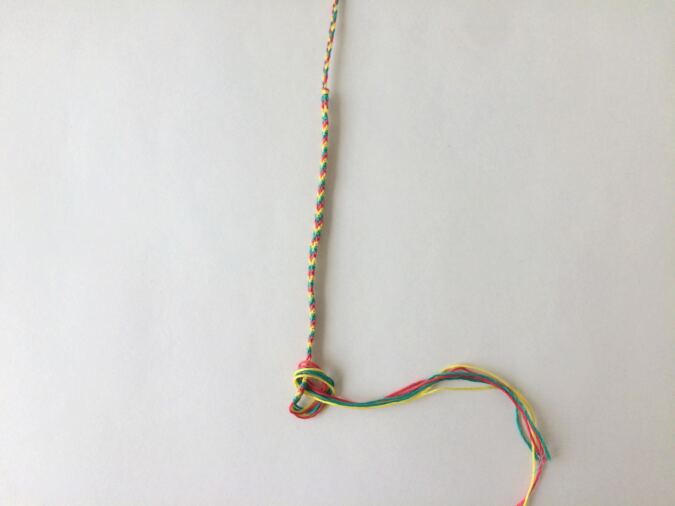
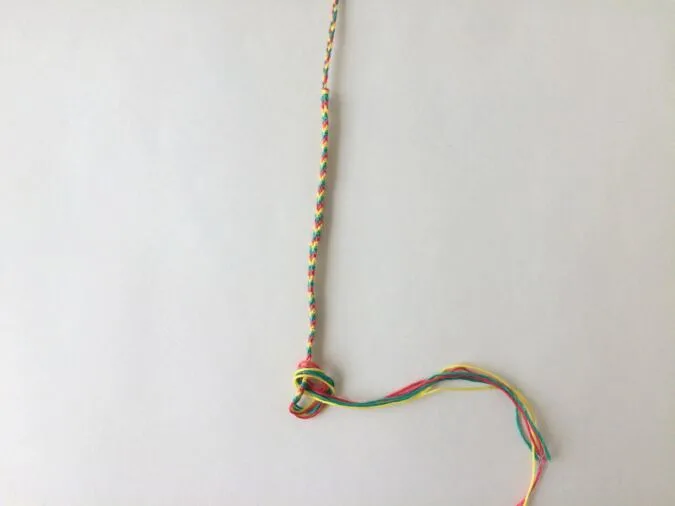
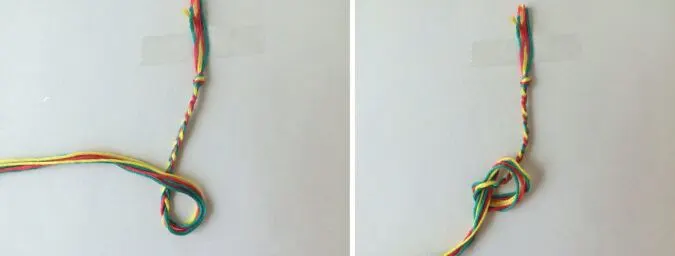
Again tie a single knot to secure.
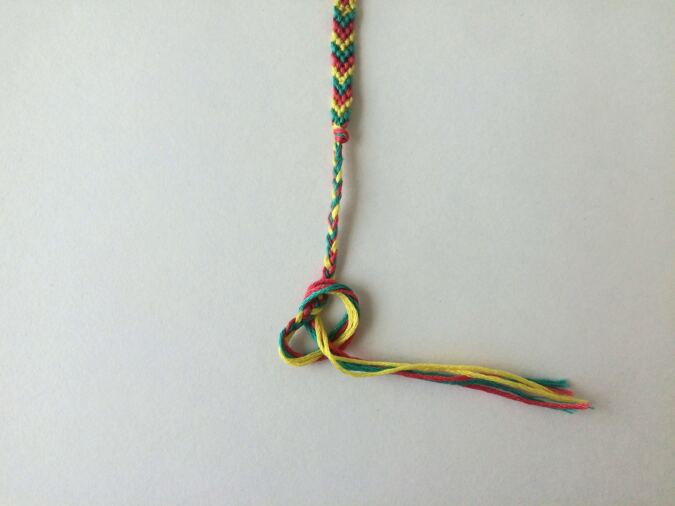
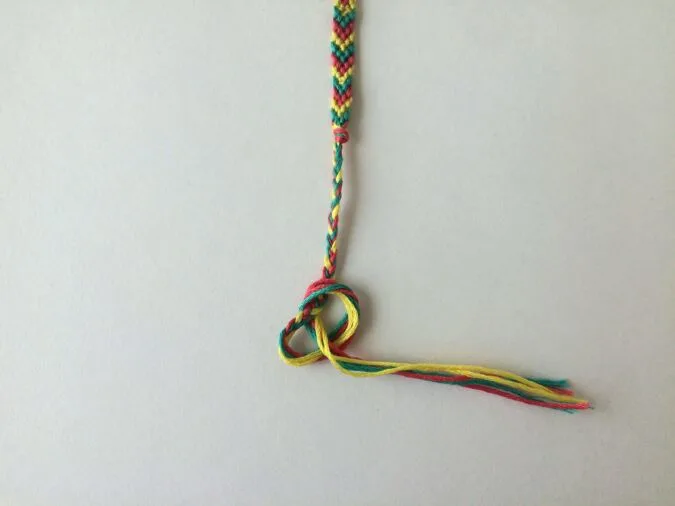
Braid 2.5 more inches and tie one more single knot to secure.
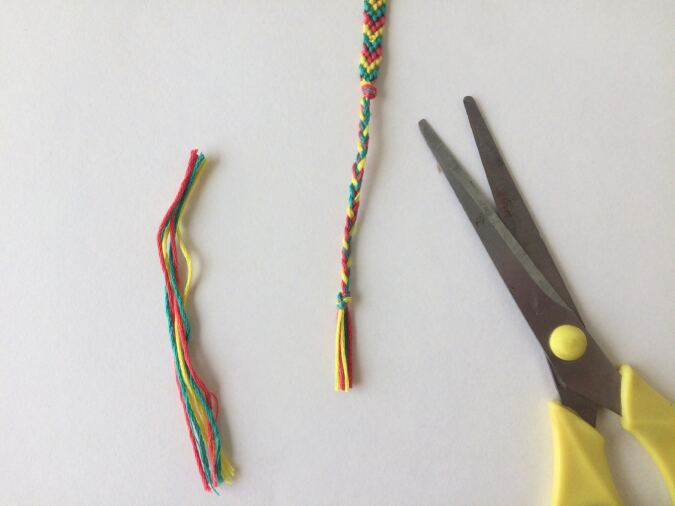

Leaving 1/2- inch beyond the knot, cut off the extra threads.
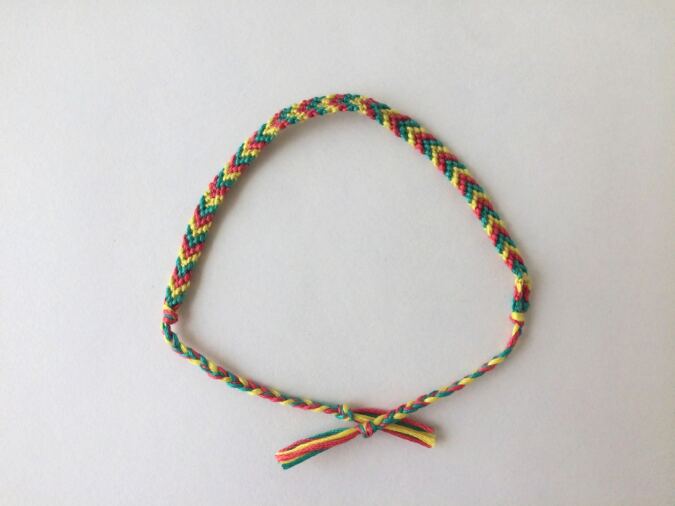

Your Chevron stripe friendship bracelet is ready.
Find the webstory for the post here, Zigzag Your Way to Style: Free Chevron Bracelet Pattern
Pin it for later here,
![]()
![]()