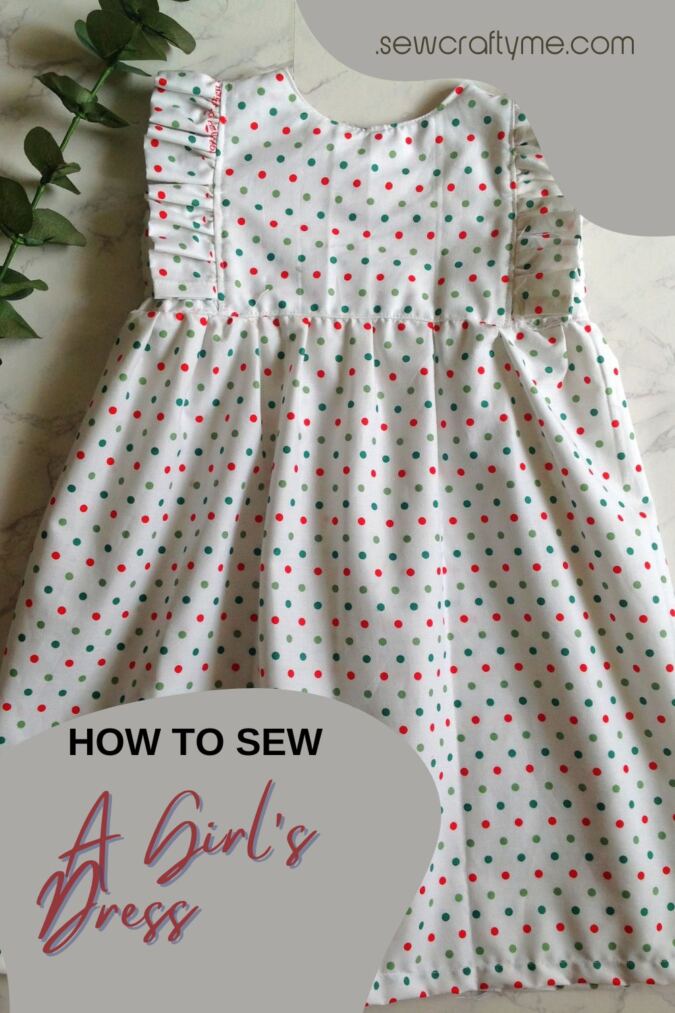
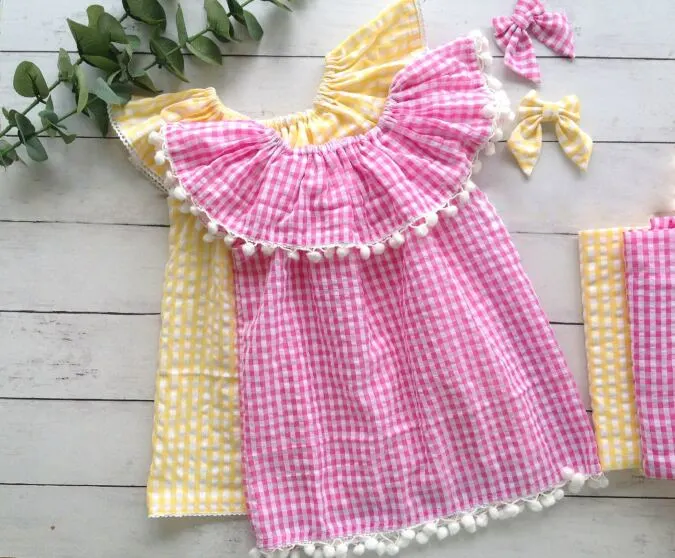
Say hello to the “Daffodil Dress Pattern for Girls”!
Featuring beautiful ruffles along the bodice and elasticized side panels for a comfortable, better fit, this pattern has everything you need to give a little girl’s outfit that extra oomph factor.
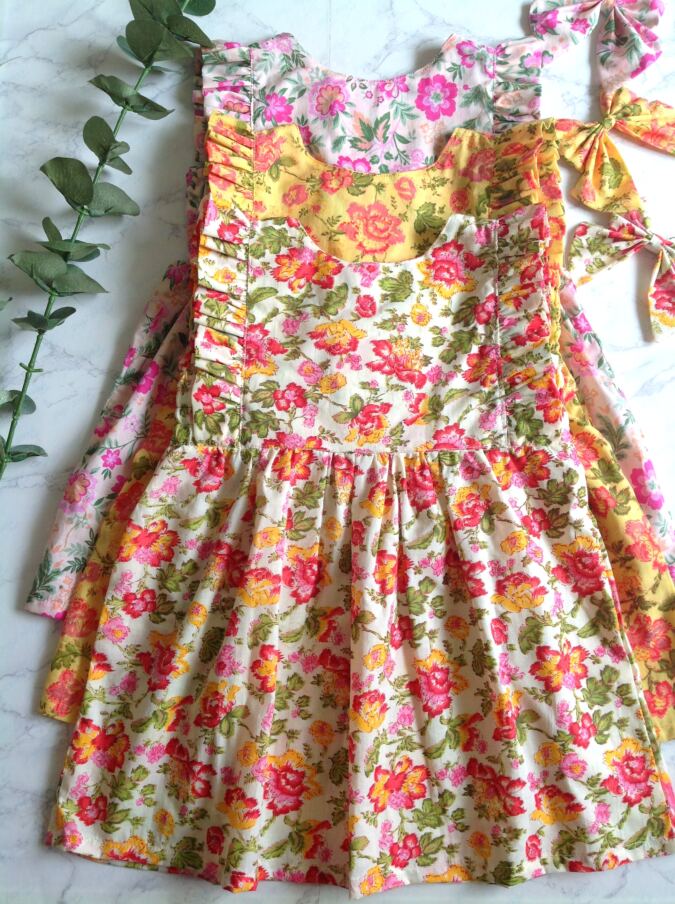

I’ll admit, this isn’t a beginner-level pattern. But if you’ve been sewing along with me—trying my classic styles and sundress designs—I’m sure you’re skilled enough to take this one on!
Although I’ve used a single fabric here, this pattern is perfect for adding trims and mixing fabrics for a more customized look. So follow along as I walk you through putting together this beautiful girls’ dress!
If you would like to sew the easiest ruffle dress pattern for girls, click on the picture below:
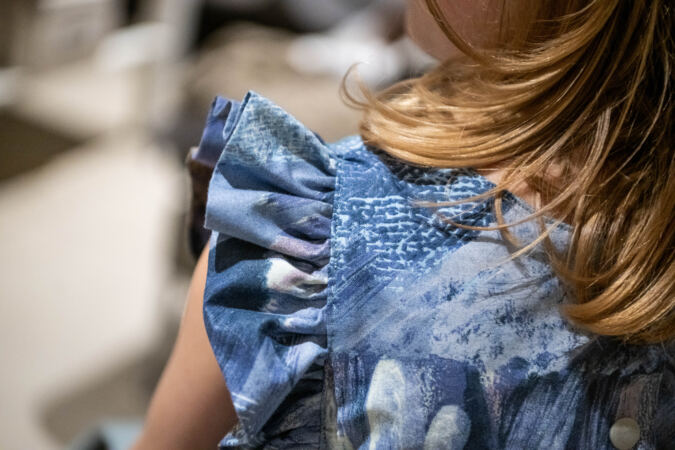
The Daffodil Side- Elastic Dress Sewing Pattern for Girls
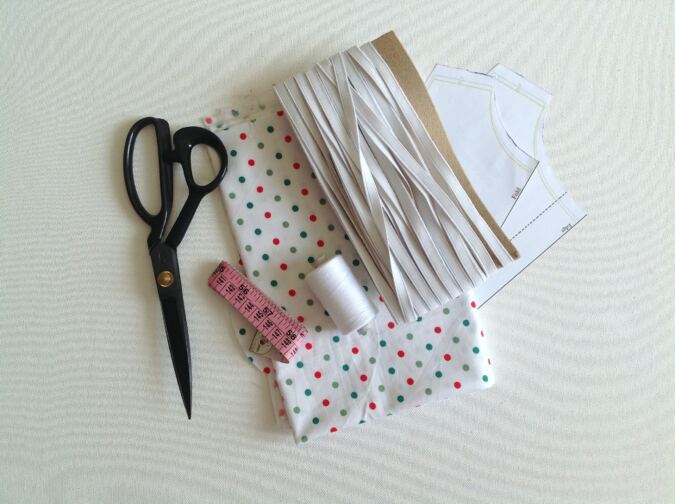
Materials Required
- Medium- weight cotton Fabric for the dress- requirements specified in the table-3 below.
- Sewing Notions.
- Fabric Marking Pen.
- KAM snaps or ordinary buttons (if you know how to sew buttonholes)- 3 sets.
- 3/8- inch elastic- requirements specified in the table-3 below.
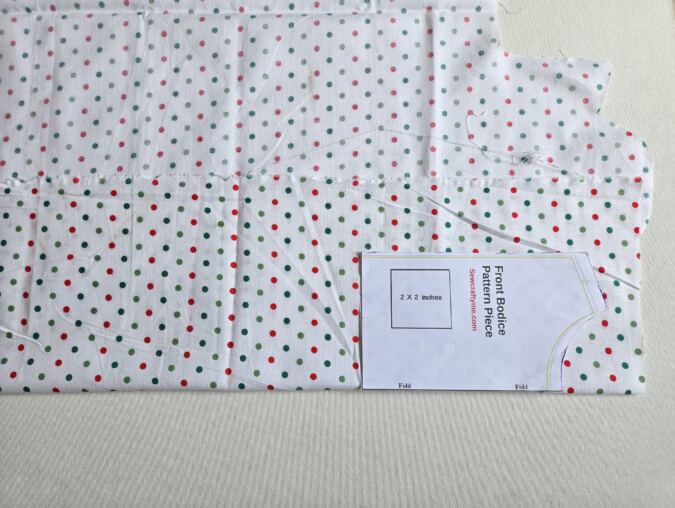
- Pattern template. **Enter your email address and click the subscribe button in the blue box below to download the template free.
All the fabrics used here are of 44/ 45 inches width.
The seam allowance is 3/8-inch unless otherwise specified.
I suggest you read the entire pattern once before starting to get a general idea.
All seams are to be finished by zigzag or serger.
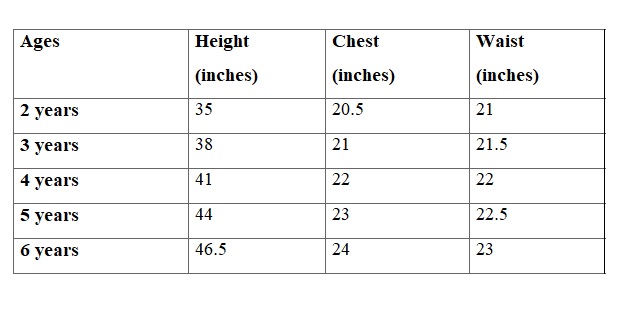
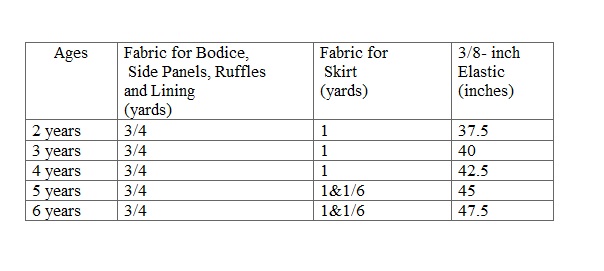
Size Chart
Table-1
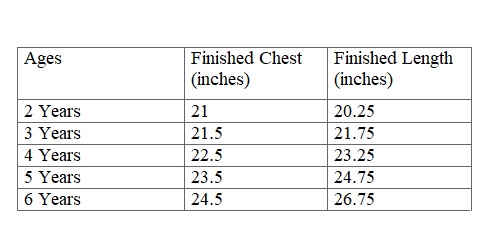
Approximate Finished Measurements.
Table-2
*The finished chest measurement is taken with the elastic unstretched.
Material Requirements.
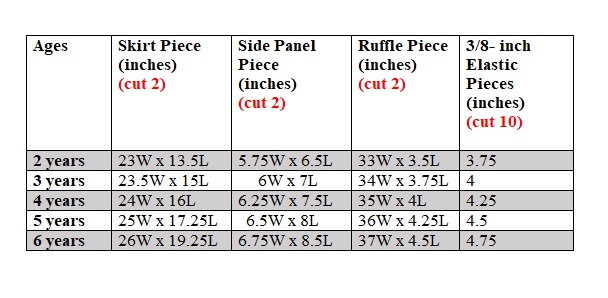
Table-3
Measurements
**The dress is supposed to hit below the knee. Change the length of the skirt piece, if you would like it shorter or longer.
In the table below, “W” stands for the width and “L” stands for the length of the fabric piece to be cut.
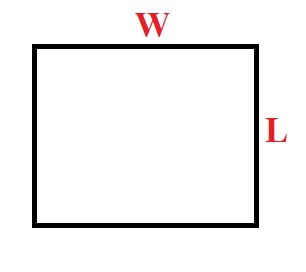
Table-4
Gather the supplies. Cut the templates for the bodice front and bodice back from the attached PDF.
Take the dress fabric and the template for the front bodice. Fold the fabric to fit the width of the template and place the template on the fold. Mark around it and cut to get the front bodice piece. Repeat the steps to get the front lining.

Let’s cut the back bodice. Here again, fold the fabric, but this time, place the template for the back bodice, along the edge of the fabric. Mark around it and cut to get two pieces for the back bodice (the back part of the dress is done in two pieces, for button opening). Repeat the steps to get the back lining pieces.
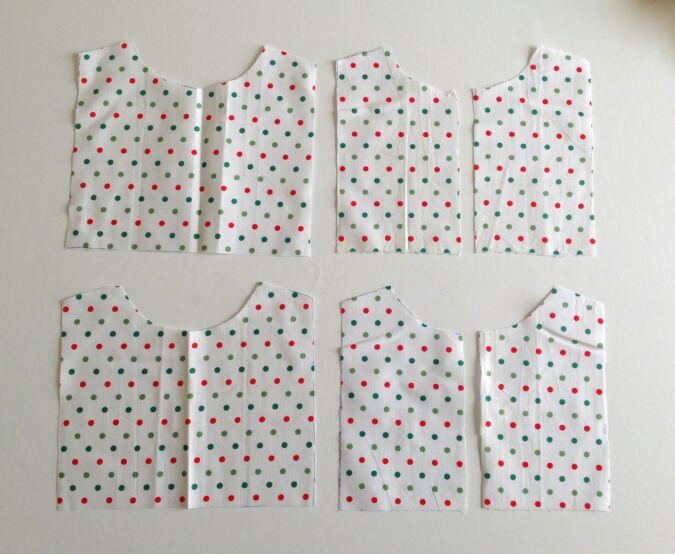
Your bodice-front, lining, bodice –back and lining pieces will look like the picture above.
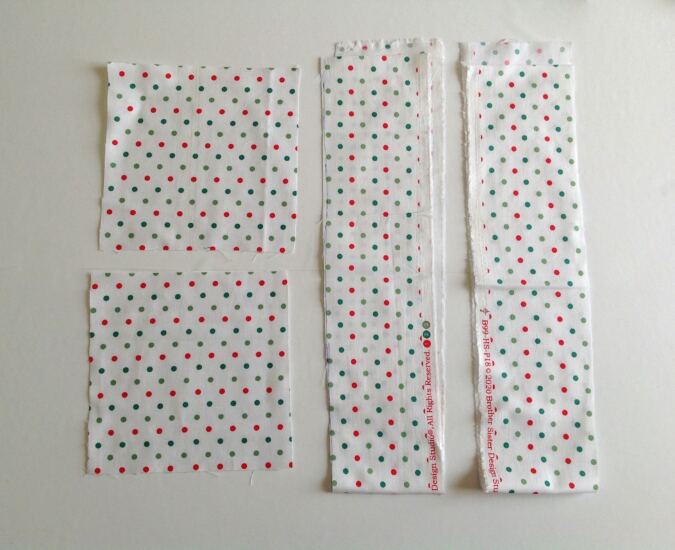
Cut the side panel and ruffle pieces, referring to the table-4 above.
Also cut the skirt pieces referring to the table-4 above.
Sewing
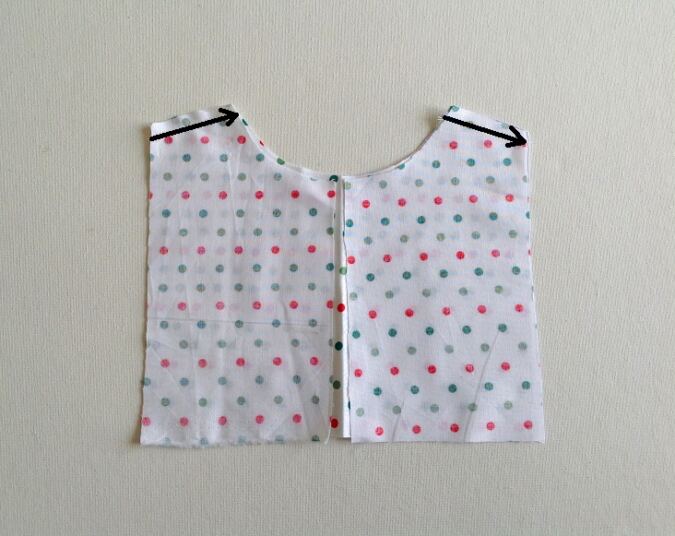
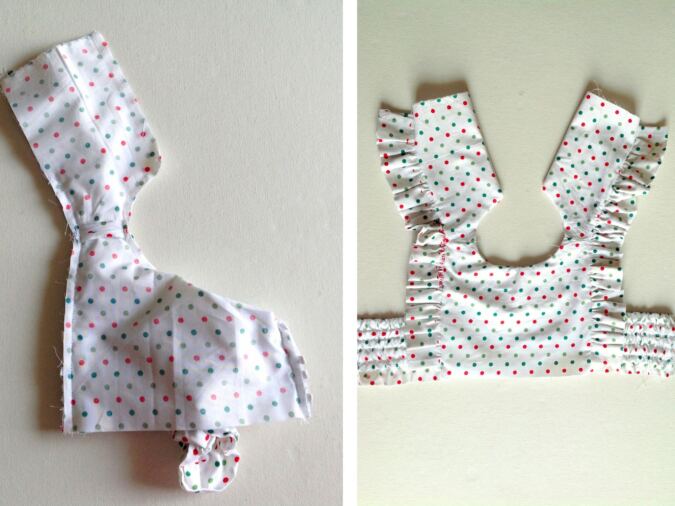
Take the two back bodice pieces and place them over the front bodice piece, with the right sides together, aligning the shoulders and side seams and sew the shoulders shut. Sew the front and back lining pieces together, just as the bodice pieces.
Press the seams flat (picture for illustration purposes).
Let’s prepare the ruffles.
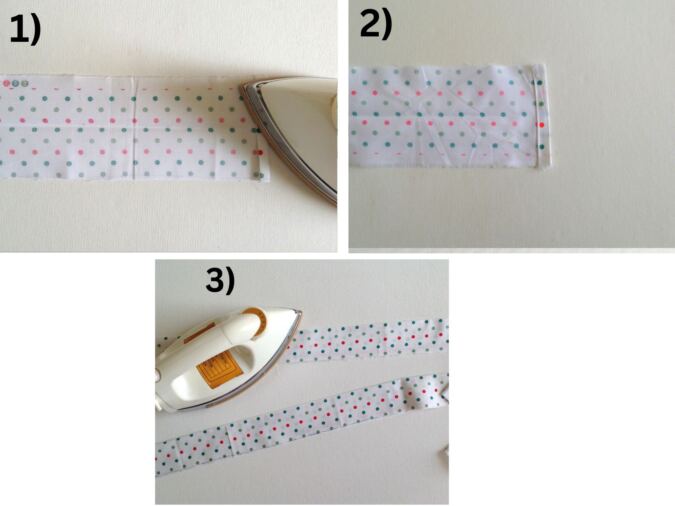
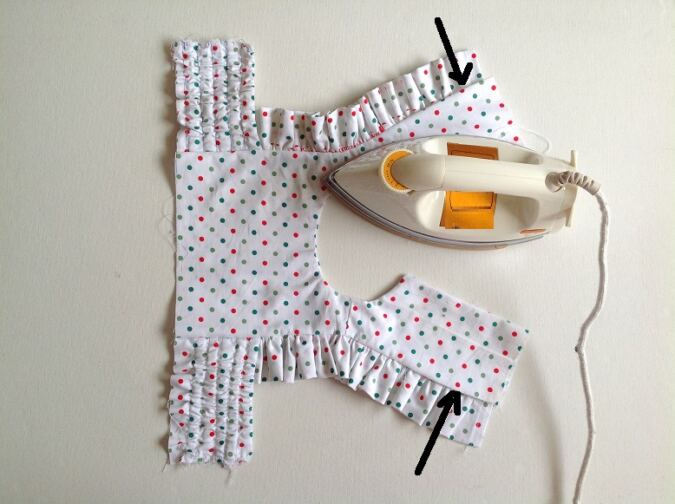
1) Take one of the ruffle pieces, fold the two short edges twice towards the wrong side by 1/2- inch and press to set.
2) Sew down the folds.
3) Fold the ruffle lengthwise in half, with the wrong sides touching and press to set. Repeat the steps on the other ruffle piece.
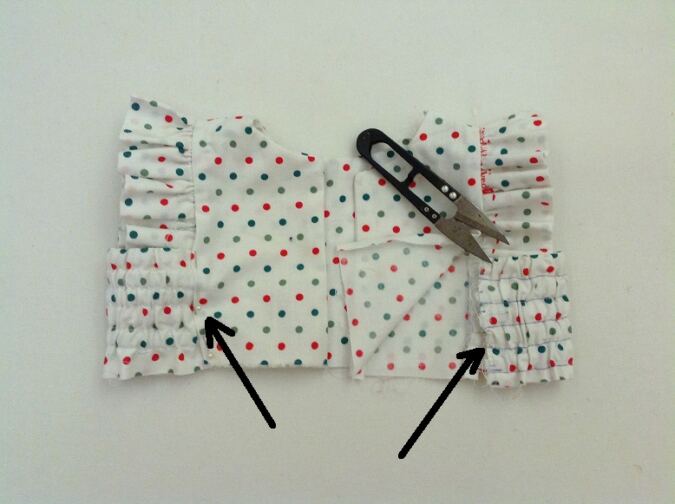
Let’s gather the ruffles. Turn the upper thread tension of your machine to zero and the stitch length to the longest to get a basting stitch.

1) Sew a basting stitch along the raw edges of the ruffle piece.
2) Pull the thread from the bobbin to gather the ruffle. Adjust the gathers to make it uniform.
3) Fold the gathered ruffle in half and mark the center as shown in the third picture.
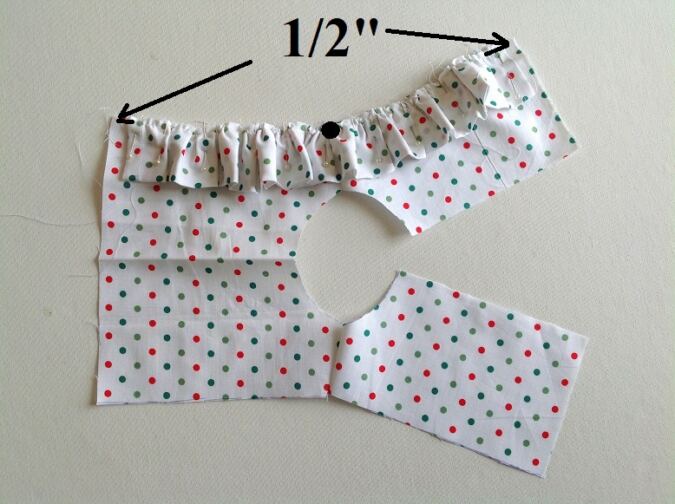
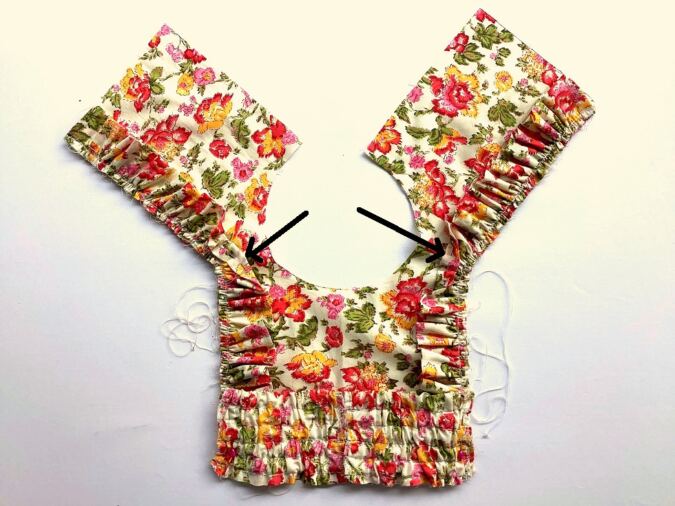
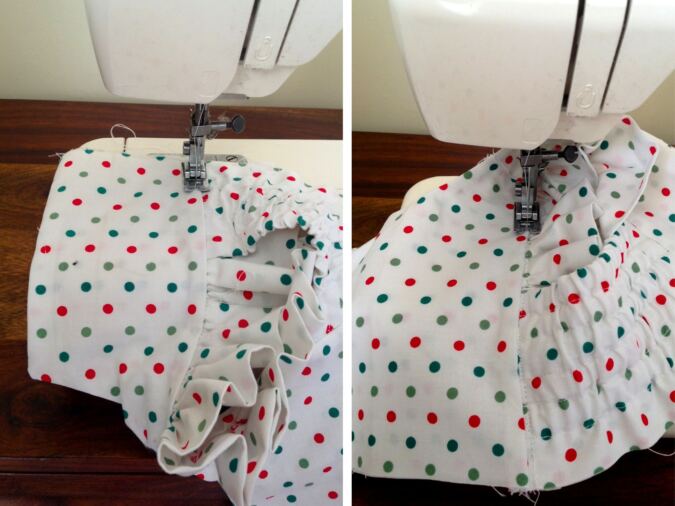
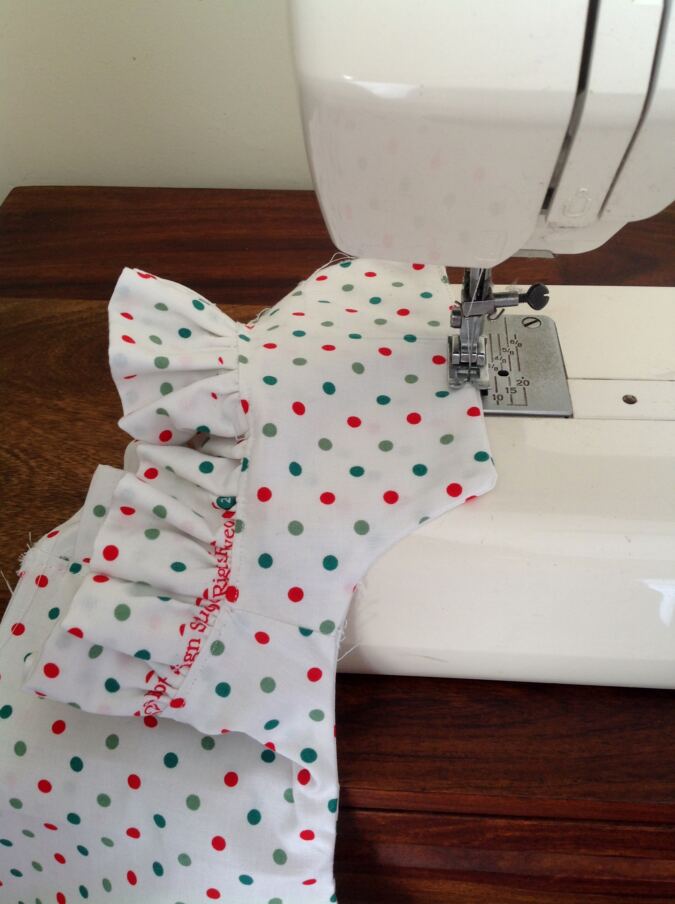
Place the ruffle on the right side of the bodice, matching the center mark with the shoulder seam. Line up the ruffle along the edge adjusting the ruffle to match the side edge of the bodice, leaving 1/2” along the lower edge on both sides. Pin the ruffle along the edge.
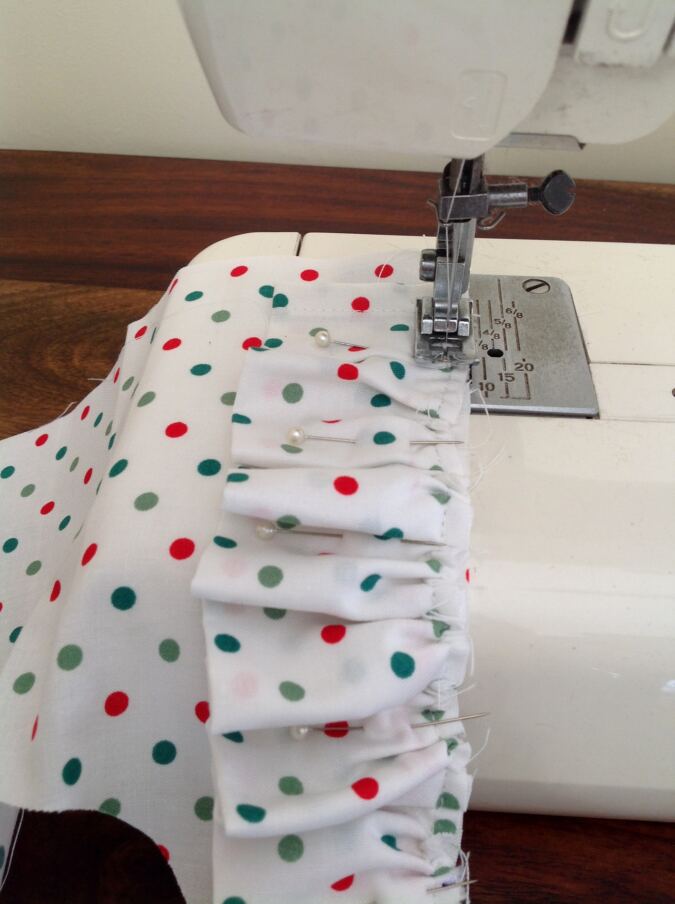
Turn the machine settings back to normal and sew the ruffle to the bodice, removing the pins as you go.
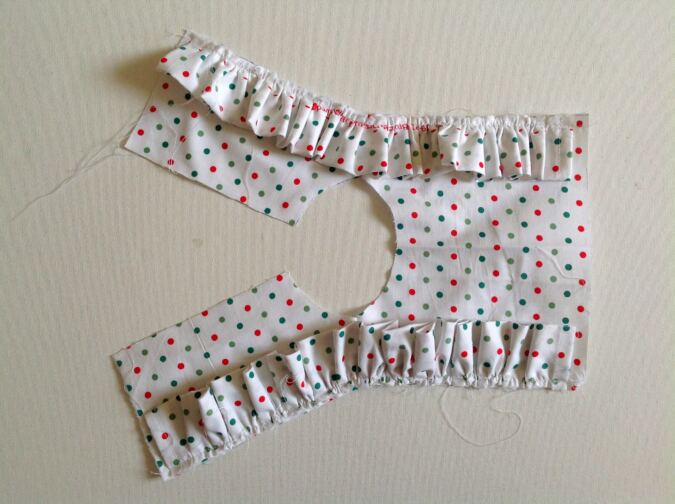
Repeat with the other ruffle along the other side edge of the bodice.
Next, let’s prepare the side panels. Cut the elastic into 10 pieces (5 each for each side panel), referring to the table-4 above.
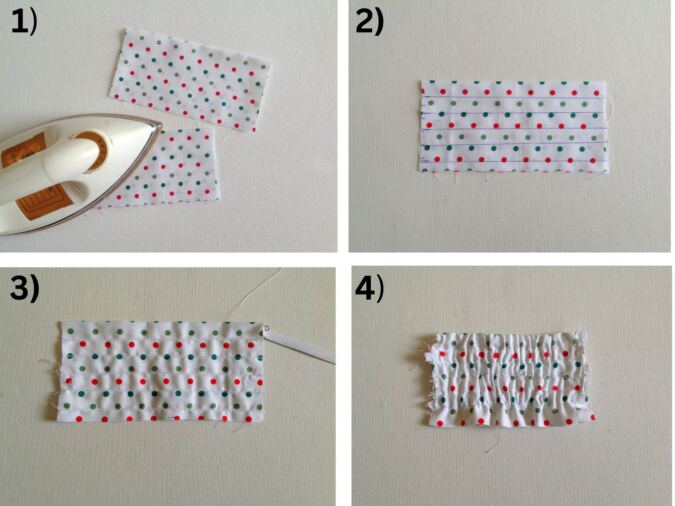
1) Take the two panel pieces and fold each one in half lengthwise, with the wrong sides touching. Press to set.
2) Draw 5 parallel lines, on the folded piece, 5/8 inch apart. Sew along the lines to form casings for the elastic.
3) Take one piece of elastic and insert it through the top casing using a safety pin. Sew back and forth along the edges to secure the elastic.
4) Repeat with the remaining four elastic pieces, inserting one into each of the remaining casings. Prepare the other side panel in a similar manner.
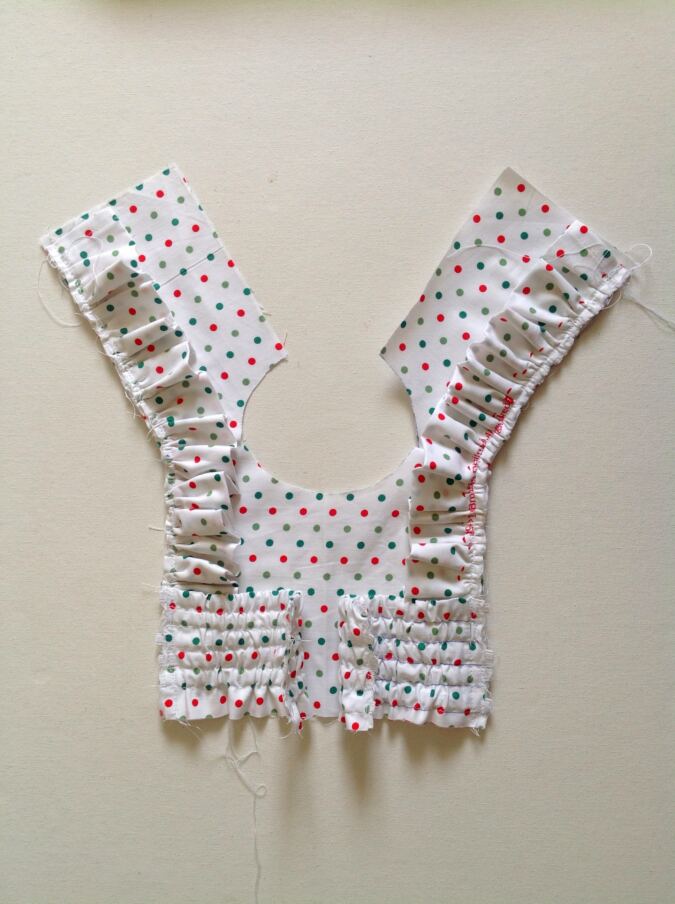
Take the side panels, line up one of the raw edges with the raw side edge of the bodice (above the ruffles) and pin in place.
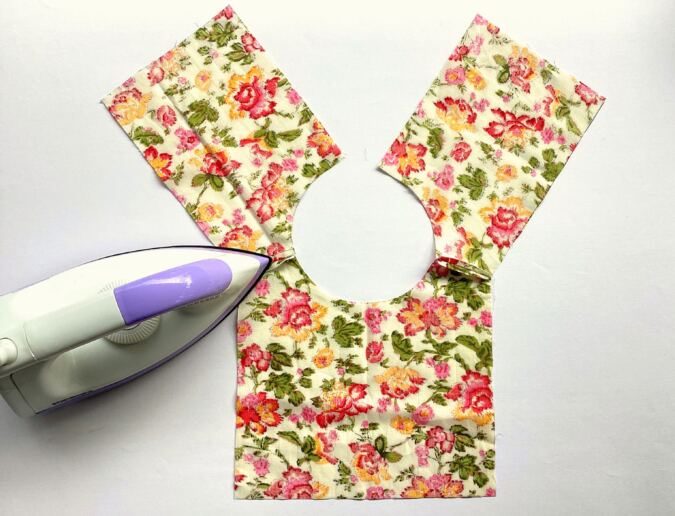
Thread your hand- sewing needle, fold the ruffle away from the neck and baste it in place (picture for illustration purposes). **This step is very important to prevent the ruffle from getting sewn into the neck seam when attaching the lining.
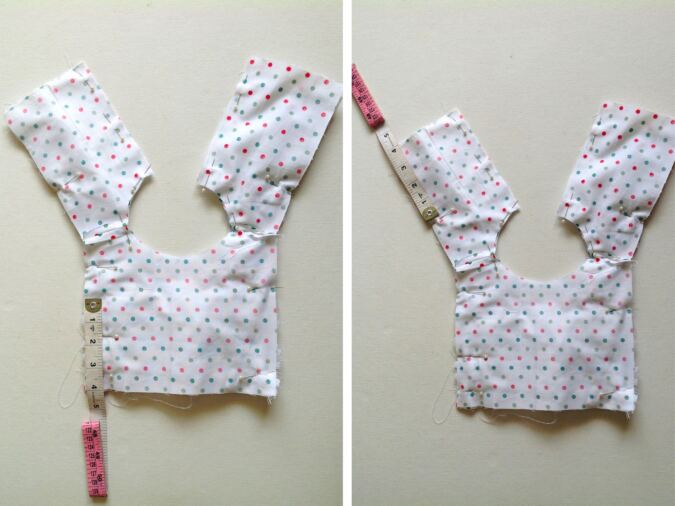
Place the lining over the main bodice with right sides together, aligning the center back, neckline, and side edges. Measure from the lower edge of the front bodice to the top of the elasticized side panel inside and note the measurement. Then measure the same distance up from the lower edge of the back bodice and mark it. Pin along the neckline and center back, as well as along the side edges, leaving the sections below the marked points unpinned (see the next picture).
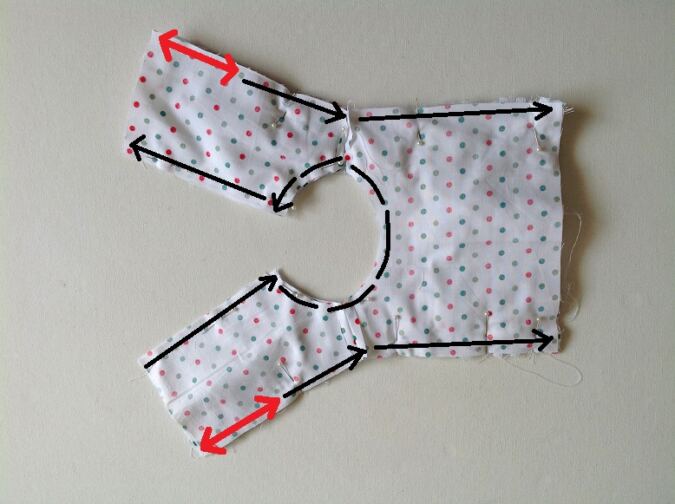
Sew along the pinned edges, leaving the unpinned section (marked in red) unsewn.
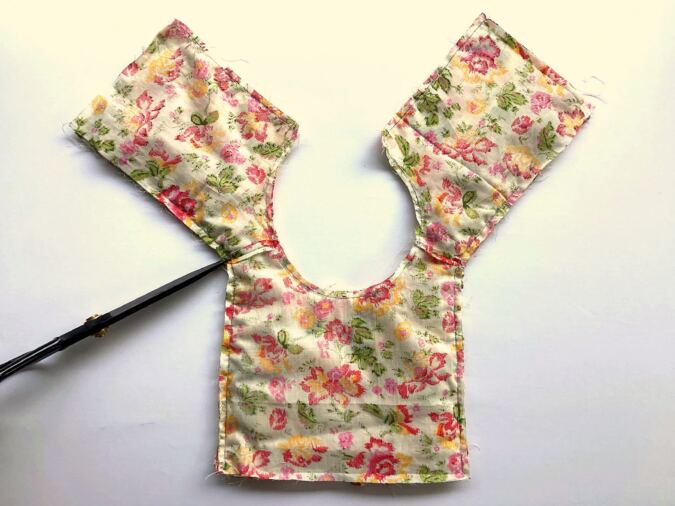
Clip the edges and cut the corners (picture for illustration purposes).
Pull the right side of the back bodice out, through the shoulders. Keep pulling the back bodice on either side, till the whole bodice is turned inside- out.
Poke the edges sharp, with the help of a wooden dowel and press taut. Fold the open side edge by 3/8- inch towards the wrong side, on either side while pressing.
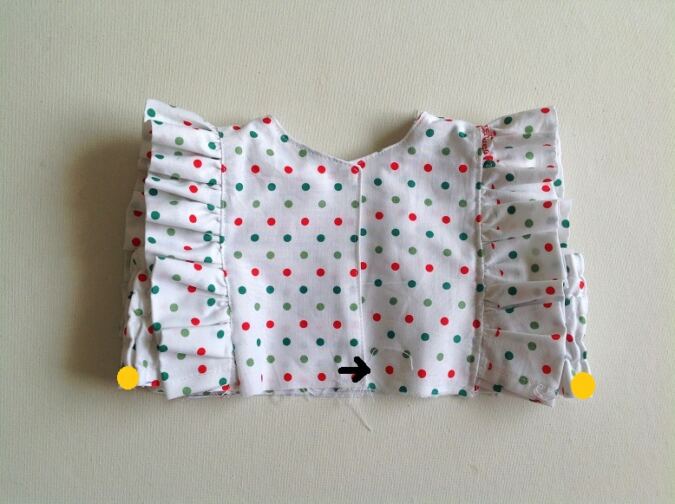
Fold the bodice to line up the ruffles along the front and back, as well as to align the lower edges. Flip the back bodice and insert the raw edge of the side panel 3/8 inch into the opening. Flip the back bodice back into place and pin the three layers together (now the edges of the elastic panels are sandwiched between the back bodice and lining). Repeat on the other side.
Start sewing the side edge shut, from the lower edge of one of the back bodice, topstitch up along the ruffle seam and down the front bodice to finish. Repeat on the other side.
Topstitch along the buttonhole edges and the neck.
Our bodice is done. We move on to the skirt.
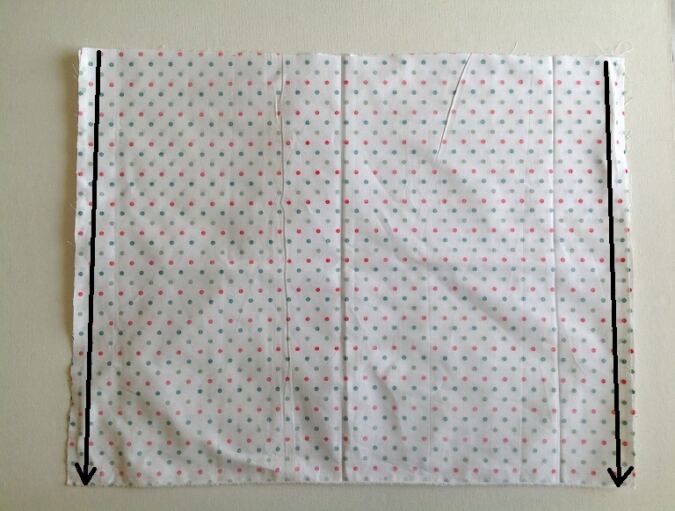
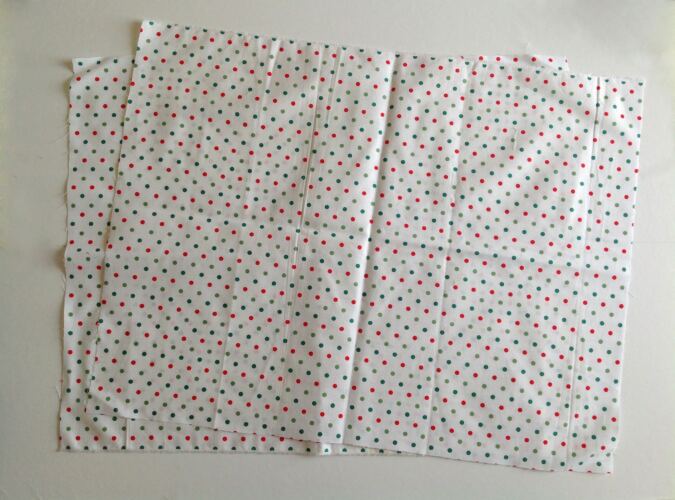
Keep the two skirt pieces layered, with the right sides together and the edges aligning. Sew the side seams on both sides.
Next, we need to gather the skirt. Turn the upper thread tension of your machine to zero and stitch length to the longest to get a basting stitch.
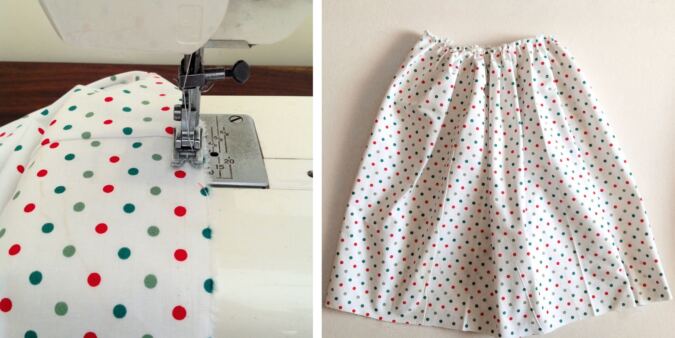
Sew a basting stitch along the upper edge of the skirt and gather it. Adjust the gathering to make it uniform and to fit the lower edge of the bodice.
Let’s attach the skirt pieces to the bodice.
Turn the bodice over to the back. Keep the side panels in place and the edges of the ruffle along the back and front lined up, The center- back would now overlap. Sew the overlapping edges shut, 0.25- inches above the lower edge. Also mark the lower edge of the folded side panels to align with the side seams of the skirt later.
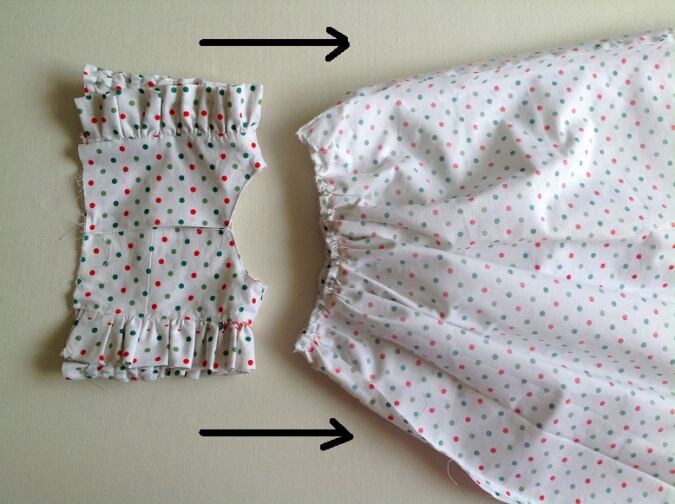
Keep the skirt on its wrong side. Keep the bodice on its right side, with its shoulders facing the skirt and slide the bodice into the skirt.
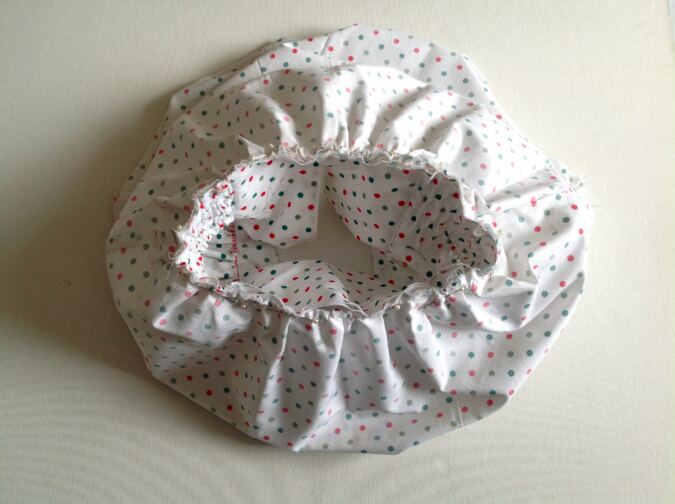
Align the ruffled edge of the skirt along the lower edge of the bodice, with the right sides together and pin all along. *Note: make sure that the side seams of the skirt fall in line with the center mark of the side panels while you pin.
Turn the machine settings back to normal.
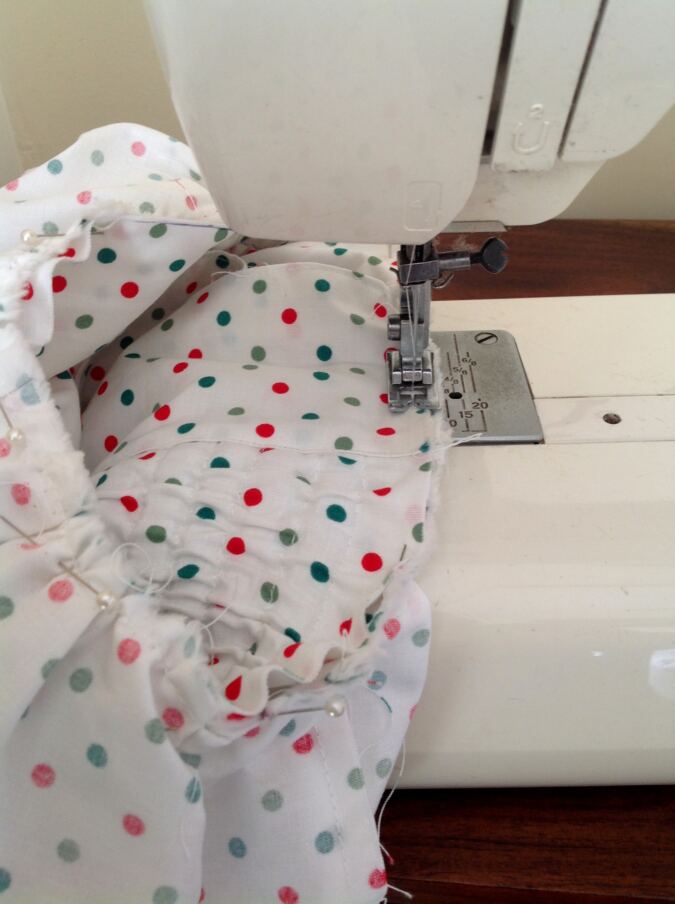
Sew the skirt to the bodice, removing the pins as you go. Zigag the edges to prevent fraying.
Next, we need to hem the lower edge of the dress.
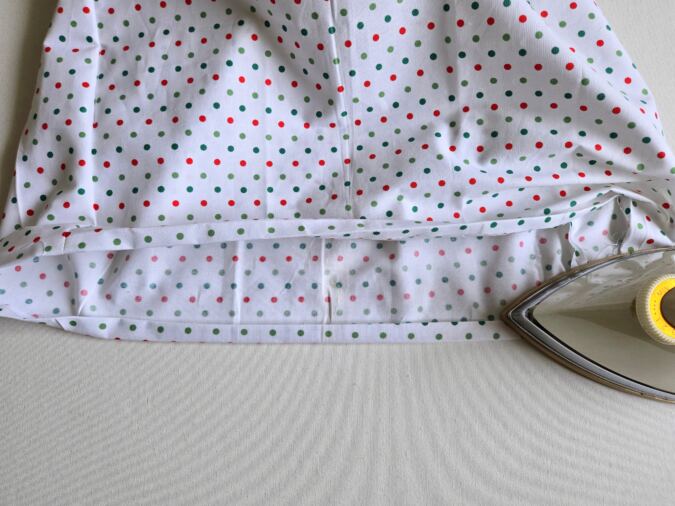
Fold the lower edge of the dress by 1/2-inch twice towards the wrong side and press.
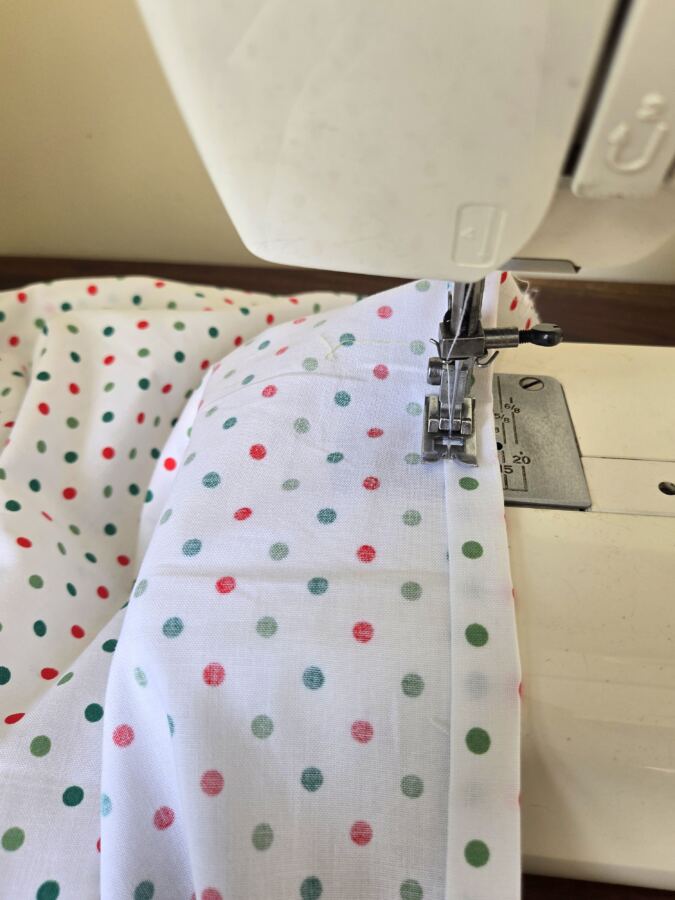
Sew down the hem along the edge of the fold.
Let’s attach the KAM snaps.
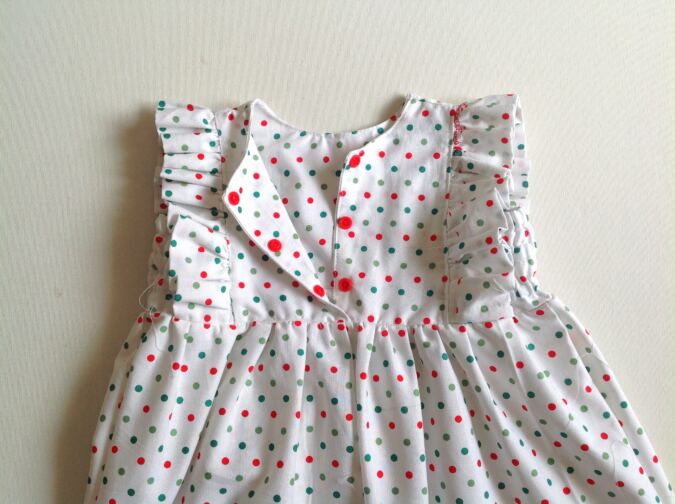
Starting from the top edge, make markings at 2-inches gap from each other, on the right side of one of the back pieces and attach the KAM snaps. Make markings with a 2-inch gap on the wrong side of the other back piece also and attach the complimentary KAM snaps.
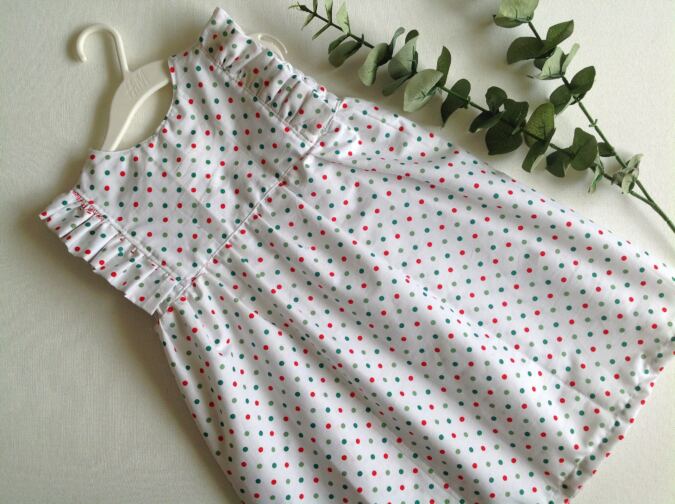
Cut off the hanging thread and our dress is done!
Pin it for later here,