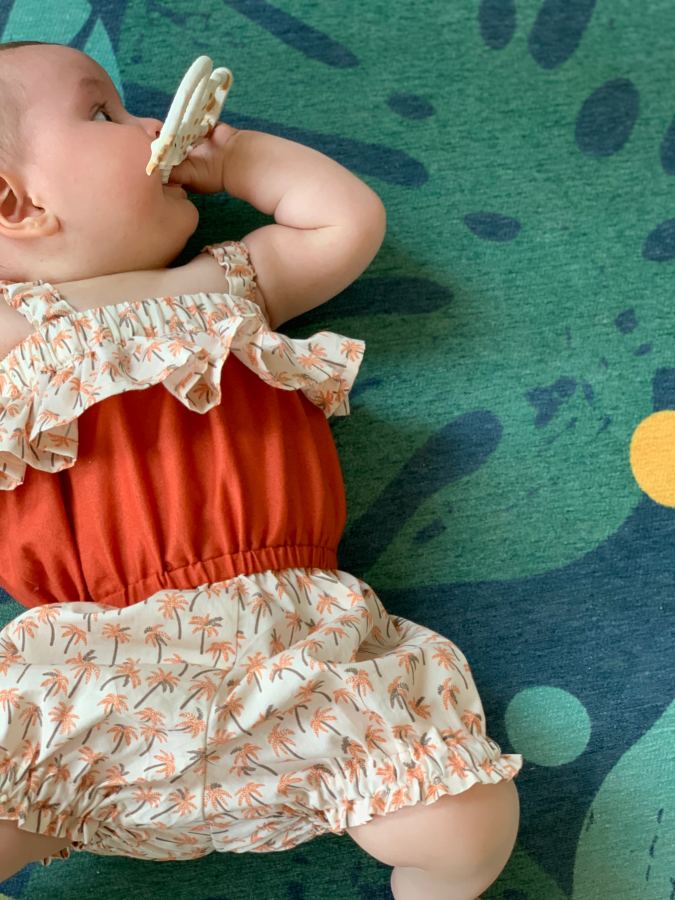


Most mothers like to dress their baby up in onesies, overalls, and rompers. Rompers are the best choice for dressing up a little one. You don’t have to hunt for matching tops and shorts or skirts, just choose this two- in- one outfit and let your little munchkin be ready for summer play.

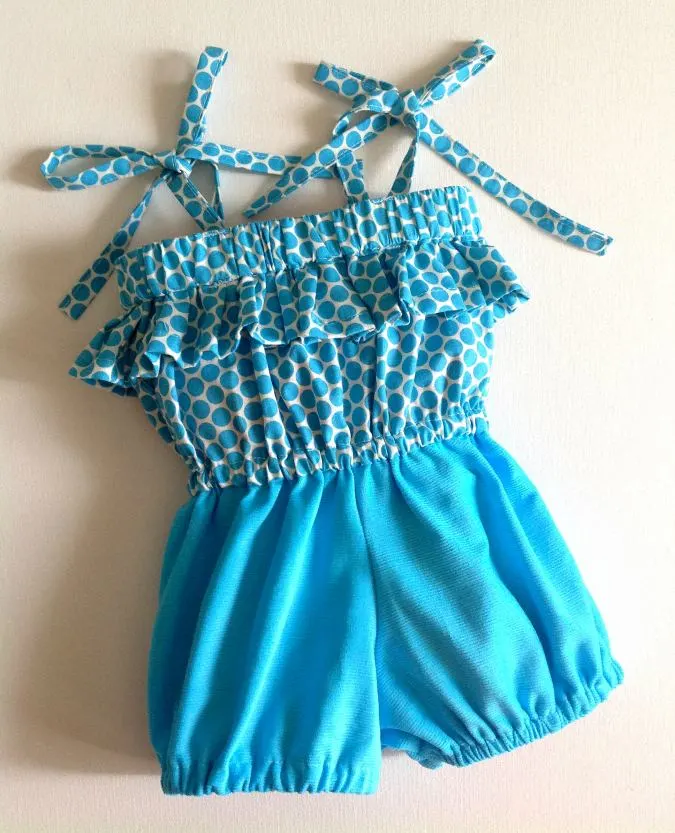
This tutorial will teach you how to sew a baby ruffled romper that is puffy and roomy enough to accommodate diapers and to give maximum comfort to your baby. When I mention puffiness, you don’t have to be bothered about the fit and think that the romper would hang loose. The romper pattern is designed with elastic along the chest and waistline to give it the perfect store-bought look.

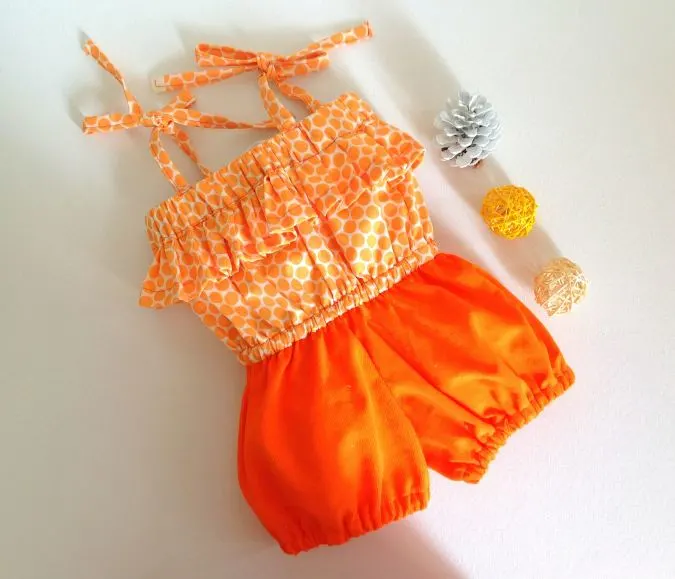
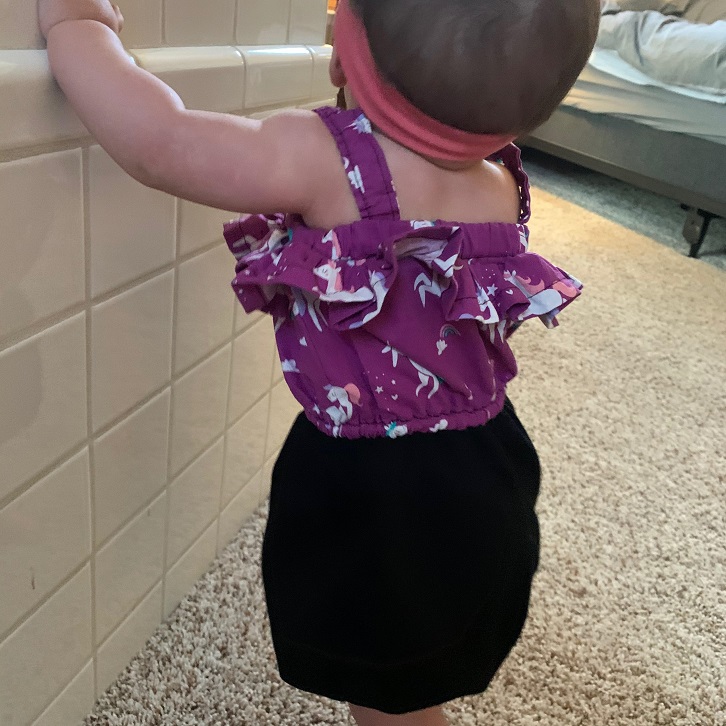
If you need to sew a plain baby romper, you can choose not to sew the chest ruffle and directly sew the chest band to the romper bodice. You may even replace the chest ruffle with lace for embellishment. There are also options to sew elastic straps or ties. You may either choose to make a simple elastic casing for the leg holes or choose to make a flutter- ruffle hemline. The options to customize are endless, the choice is yours!
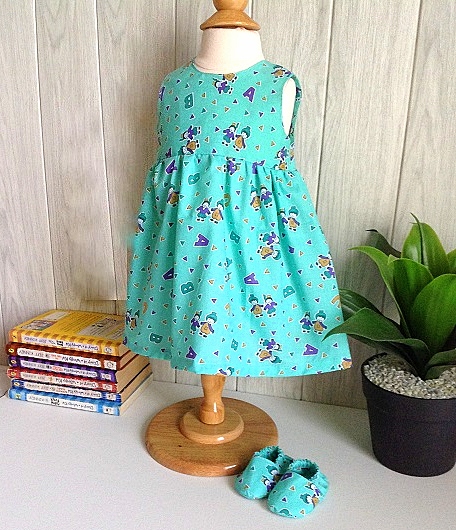

If you wish to sew a simple baby dress with yoke, click here.

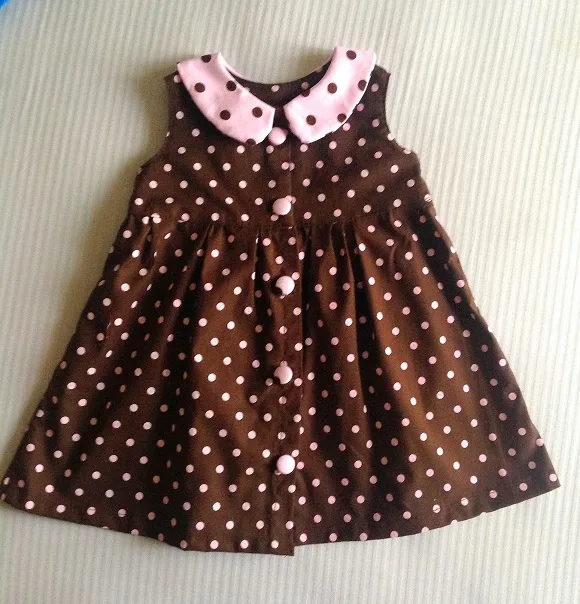
If you wish to sew a baby dress with a collar, click here.
How to Sew a Baby Romper
- Pinch to zoom for mobile users.
Materials Required:
1. Medium- weight cotton fabric in a desired color and print for the romper shorts, ruffle, chest band and straps (ties)- refer table-1 below.
2. Medium- weight cotton fabric in a coordinating color and print for the romper top- refer table-1 below.
3. One-inch elastic for the chest band- refer table-1 below.
4. 3/8-inch elastic for the waist, leg holes, and shoulder straps- refer table-1 below.
5. Snap button tape- Approximately 10 to 12- inches (Optional).
6. Sewing Notions.
7.
Pattern Notes
1. I suggest you read the entire pattern once before starting to get a general idea
2. All the fabrics used here are 44/45 inches in width.
3. The fabrics shown here are only for illustration purposes and as such may vary from the original.
4. The seam allowance is 3/8-inch unless otherwise specified.
5. All the seams are to be finished by zigzag or serger.
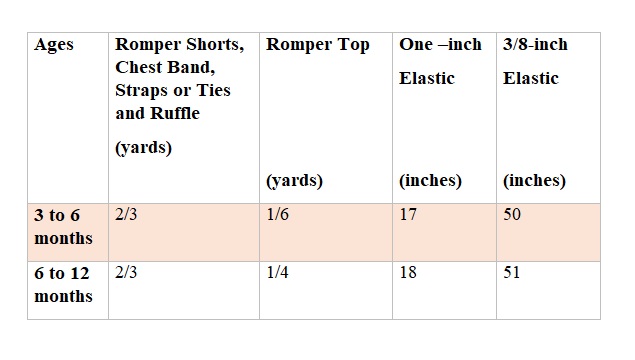
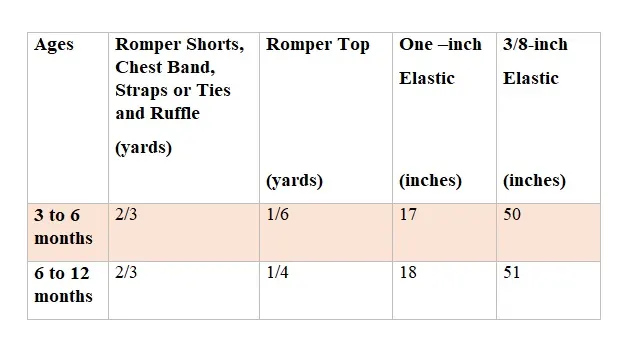
Fabric Requirements:
Table-1
*Note: If you prefer to use the same fabric for the romper shorts, ruffle and top, add up the fabric requirements in the first two columns.
- Pinch to zoom for mobile users.
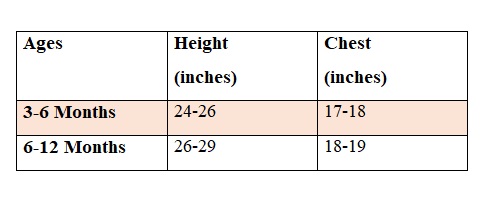
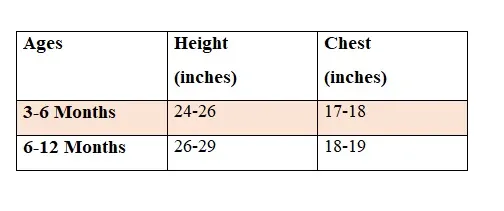
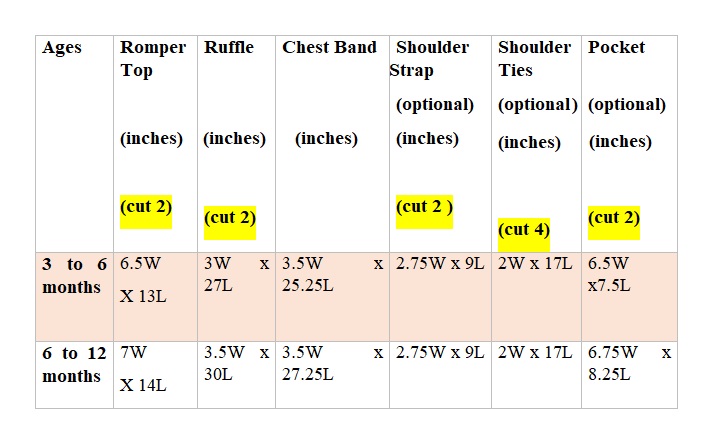
Measurements:
Table-2
In the table below, “L” stands for the length of the fabric, and “W” stands for the width.
- Pinch to zoom for mobile users.

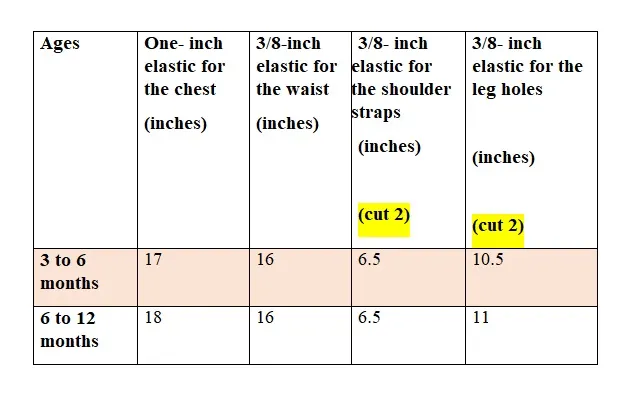
Elastic Lengths
Table-3
- Pinch to zoom for mobile users.

Take the fabric for the romper.
We first cut the romper shorts.
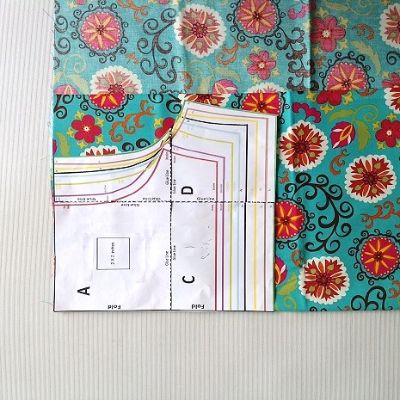
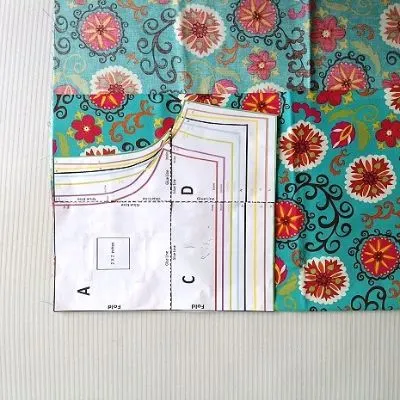
Cut the template for the romper shorts at the end of this PDF, fold the fabric to fit the width of the template and place the template on the fold. Mark around it and cut to get the romper shorts. Repeat the steps to get one more of the same.
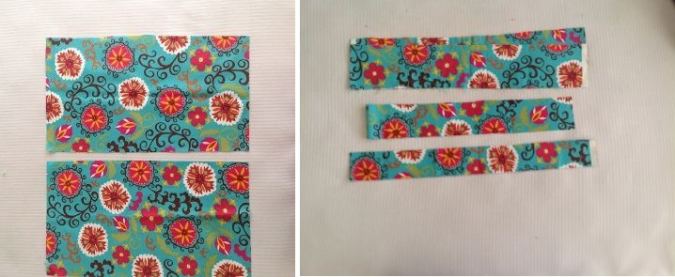
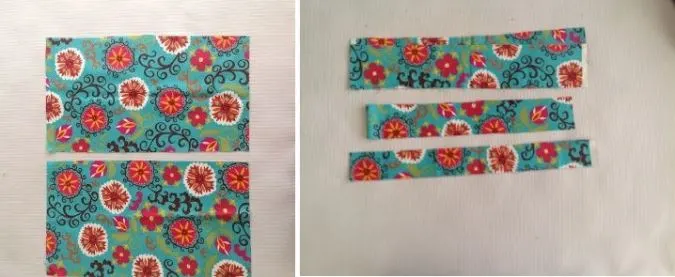
Cut the fabric pieces for the romper top, ruffle, chest band and shoulder straps, referring to the table-2 above.
Let’s move on to sewing.
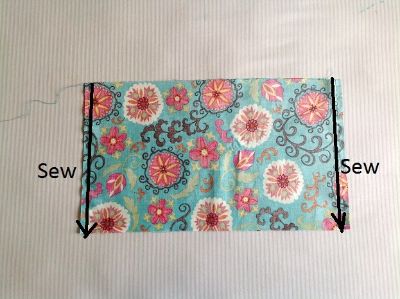

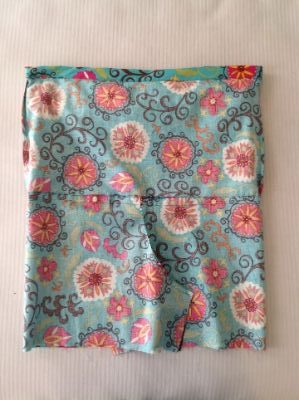
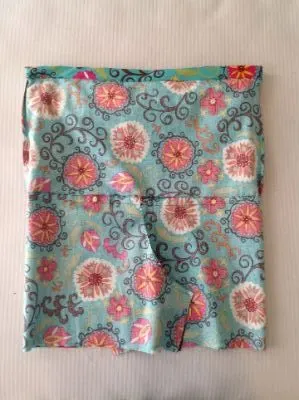
Keep the two romper top pieces layered, with the right sides together and aligning the edges. Sew both the shorter sides shut.
Next, we do the ruffle.

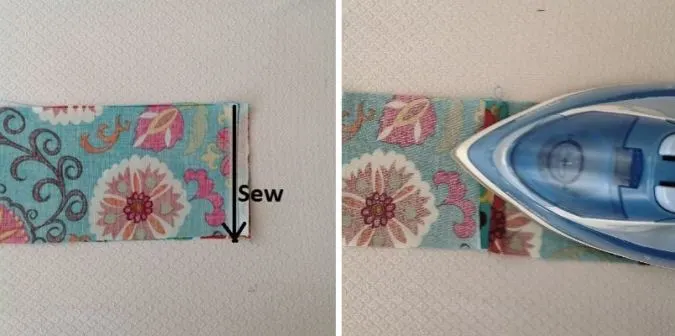
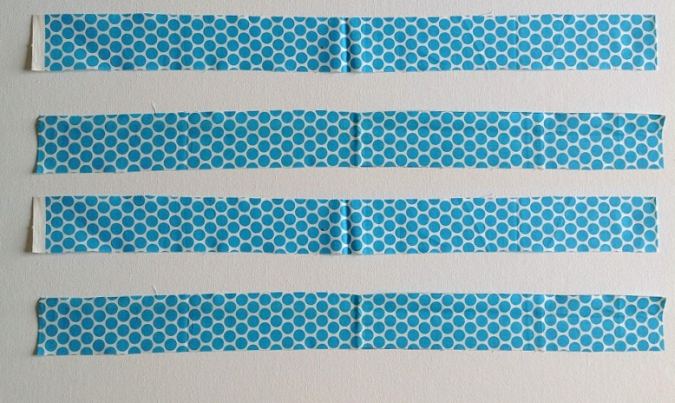
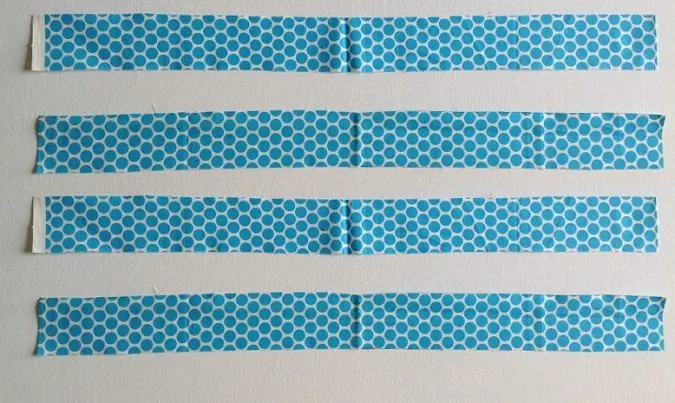
Take the fabric strips for the ruffle and keep them layered with the right sides together and aligning the edges. Sew the two shorter sides shut to get a fabric ring. Press the seams open.

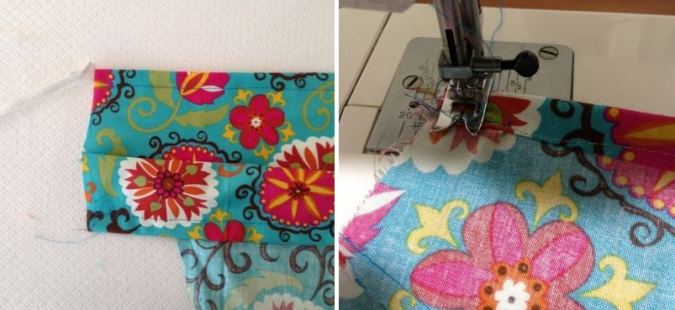
To hem the ruffle, fold one of the longer edges twice by ½-inch and press to set. Sew down the hem.
Next, we gather the ruffle. * Turn the upper thread tension of the machine to zero and stitch length to the longest to get a basting stitch.
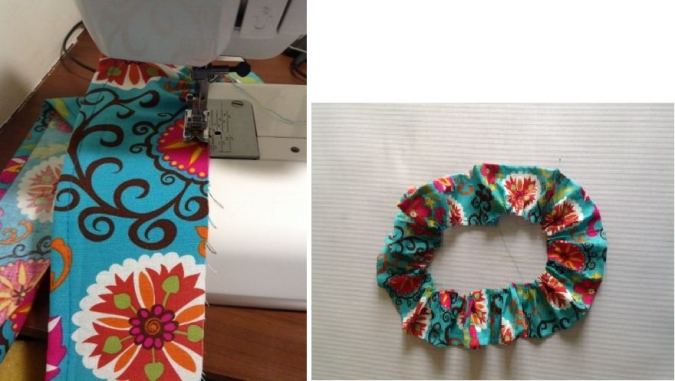

Sew a basting stitch along the raw edge of the fabric ring, leaving 3/8-inch along the edge. Pull the thread from the bobbin gently and gather the ruffle.

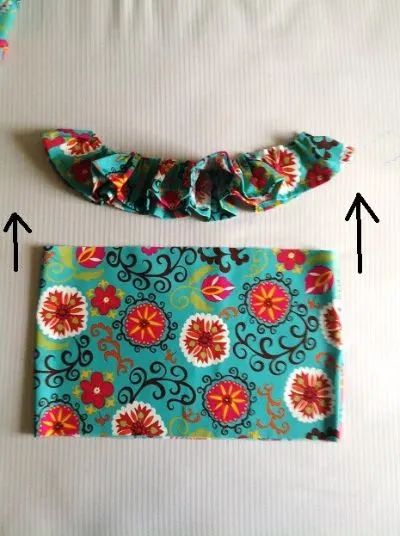
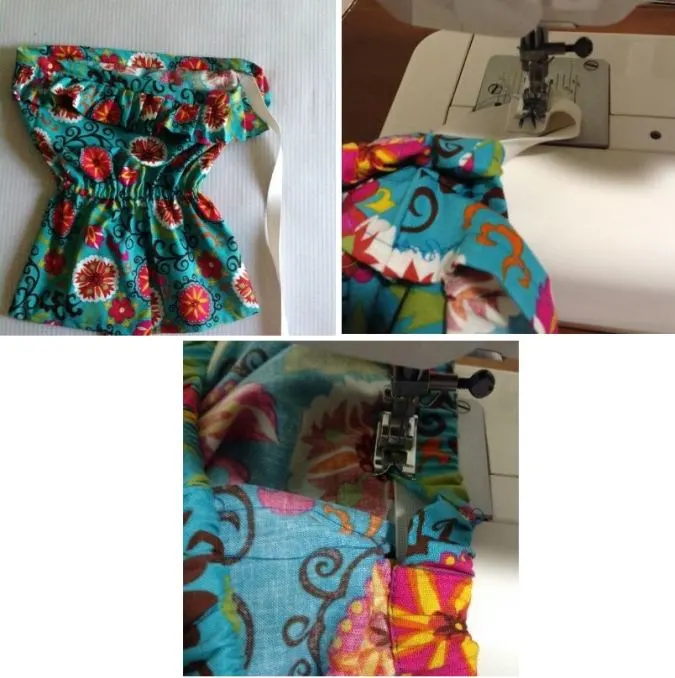
Adjust the gathering in the ruffle to make it uniform and to match it with the upper edge of the romper top. Place the top and the ruffle on the right side, with the upper edge of the top facing the hemmed edge of the ruffle and slide the top into the ruffle ring.

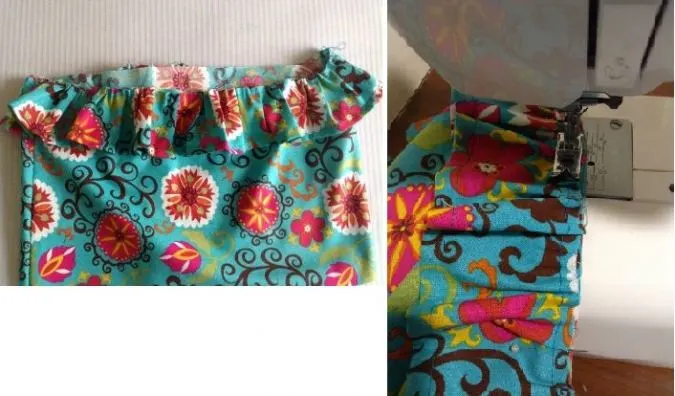
Align the raw edges of both the pieces together and pin all around. Turn the machine settings back to normal and sew the ruffle to the top with a ¼-seam allowance. Keep removing the pins as you go.
We move on to the chest band.


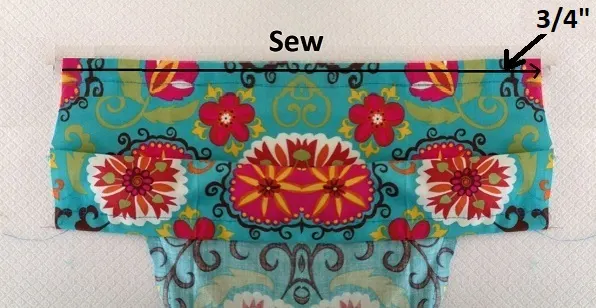
Fold the chest band piece in half width-wise, with the right sides together, aligning the edges, and sew the shorter sides shut to form a fabric ring (picture for illustration purpose).

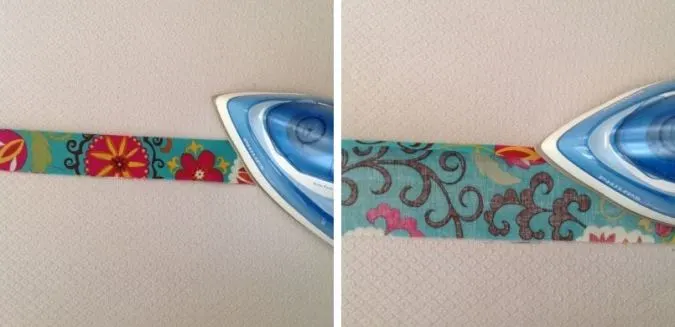
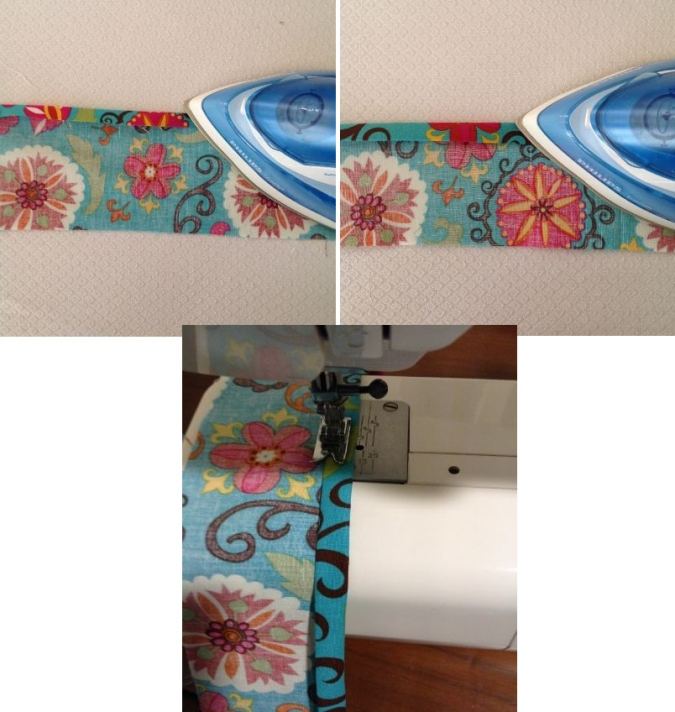
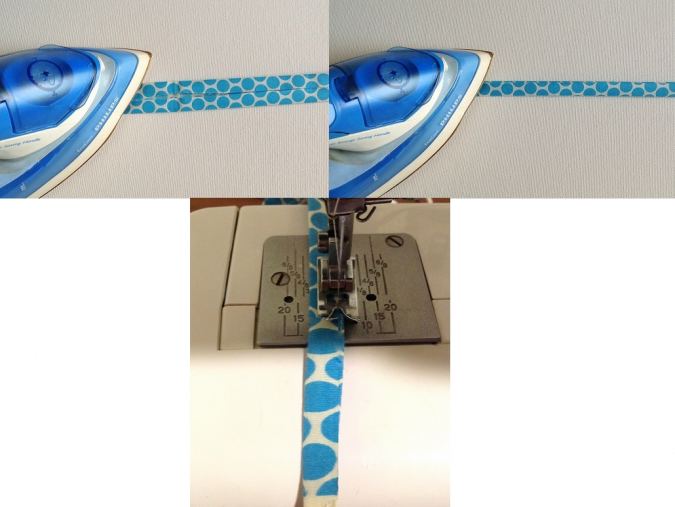
Next, fold the chest band tube in half, lengthwise, with the wrong sides together and press to form a crease along the center. Open and fold one of the longer edges towards the wrong side by 3/8-inch and press to set.
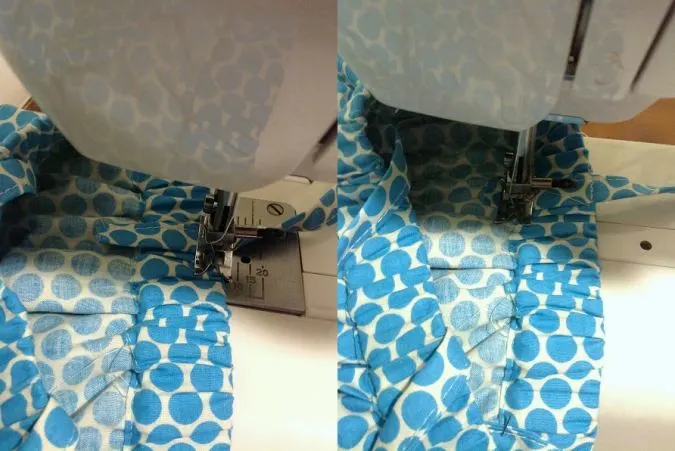
Let’s attach the chest band to the romper top.

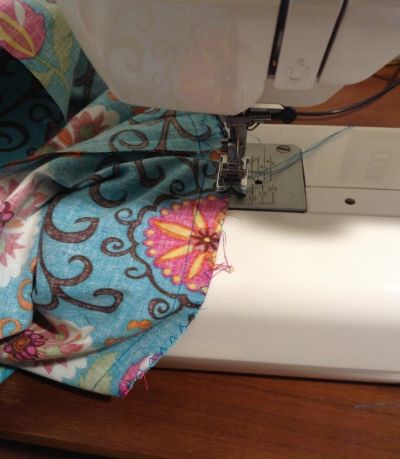
Place the romper top on its right side. Place the chest band on its wrong side above the romper top, with its folded edge facing the ruffled edge of the romper top and slide the top into the chest band. Align the raw edges of the two together and pin all around. Take note to keep the side seams of both the pieces in line while pinning.
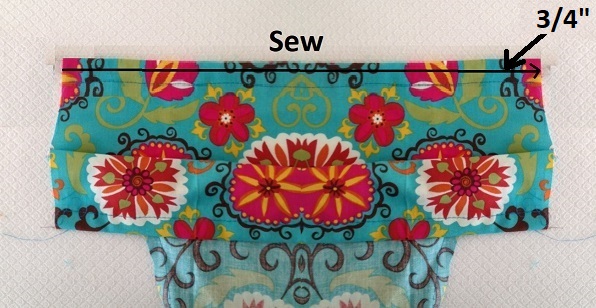
Sew the chest band to the top (picture for illustration purpose).

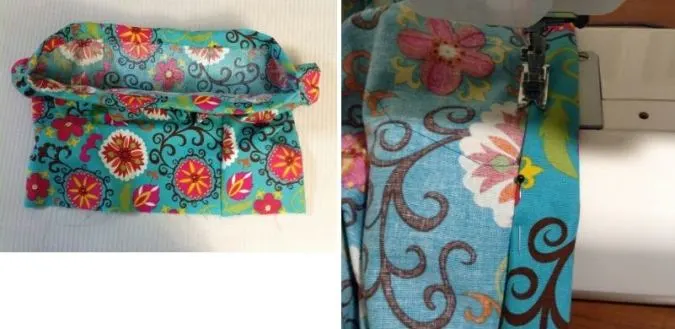
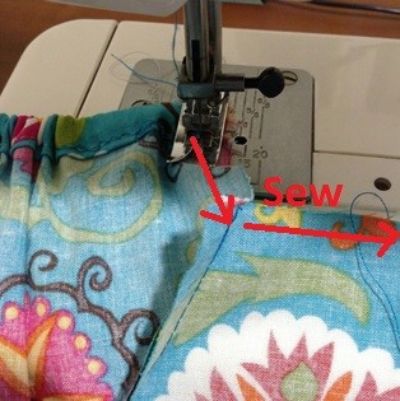
Fold the chest band over to the wrong side of the top, along the center crease, covering the seam line at the back and pin all around. Sew the chest band down, along the edge of the fold, leaving a gap of about 2-inches to insert the chest elastic.
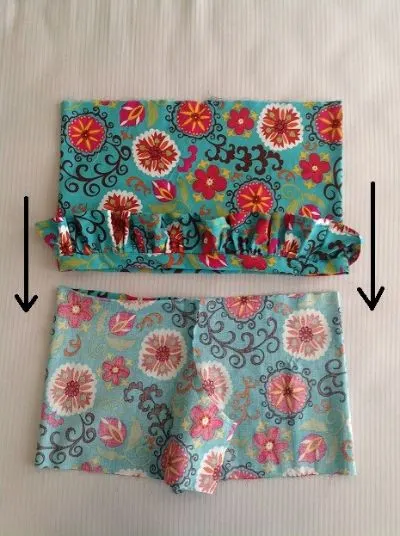
Next, we move on to the shorts part.

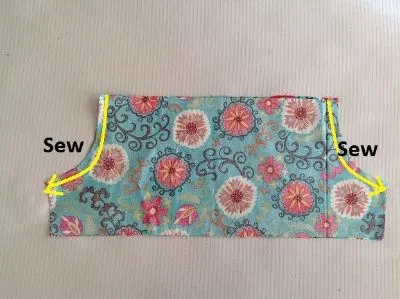
Take the two pieces for the romper shorts and keep them layered with the right sides together and aligning the edges. Sew along the two curved edges to join.
We need to join the romper top and shorts together.
Fold the romper top in half, aligning the edges, and mark the center of its lower edge (at the front and back). This is to be aligned with the crotch seam of the shorts while joining the two together.

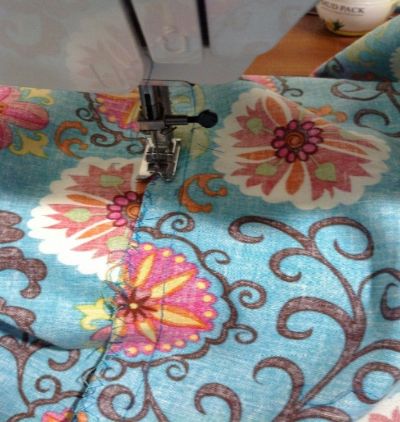
Rearrange the shorts such that the crotch seam falls at the center. Keep the romper shorts on its wrong side and place the romper top above it on its right side, with its ruffle edge facing the romper shorts. Slide the top into the shorts.

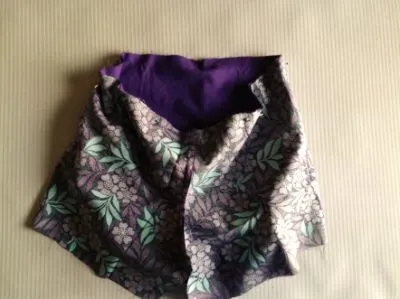
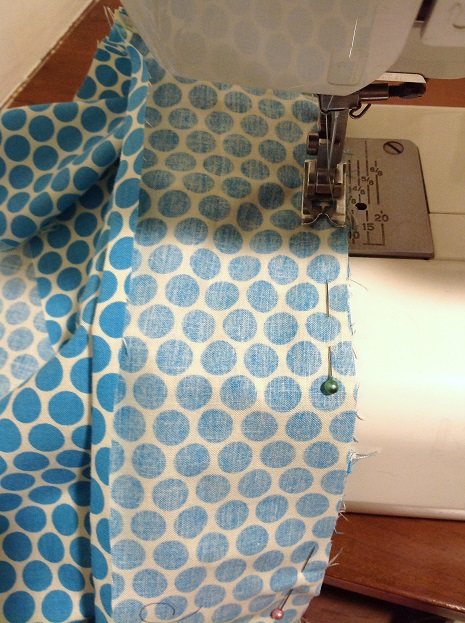
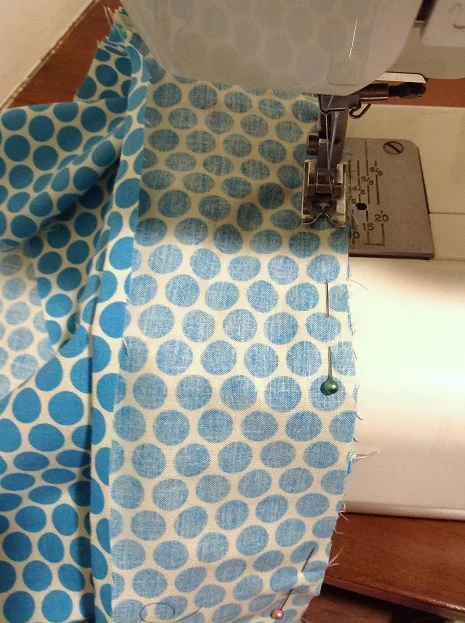
Align the raw edges of the two together and pin all around. Make sure the center markings at the lower edge of the top is aligned with the crotch seam of the shorts on both sides (picture for illustration purpose).

Sew the top to the shorts, leaving a seam allowance of 5/8 -inch and removing the pins as you go. *Note that here we make use of the seam allowance to make a casing for the waist elastic. Zigzag to prevent fraying.
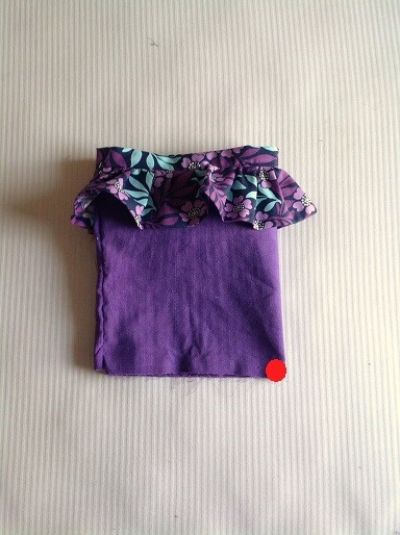
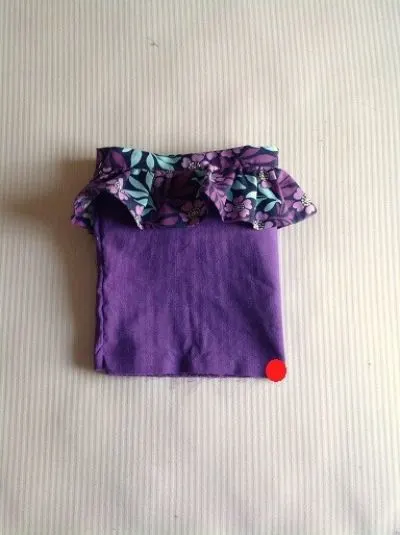
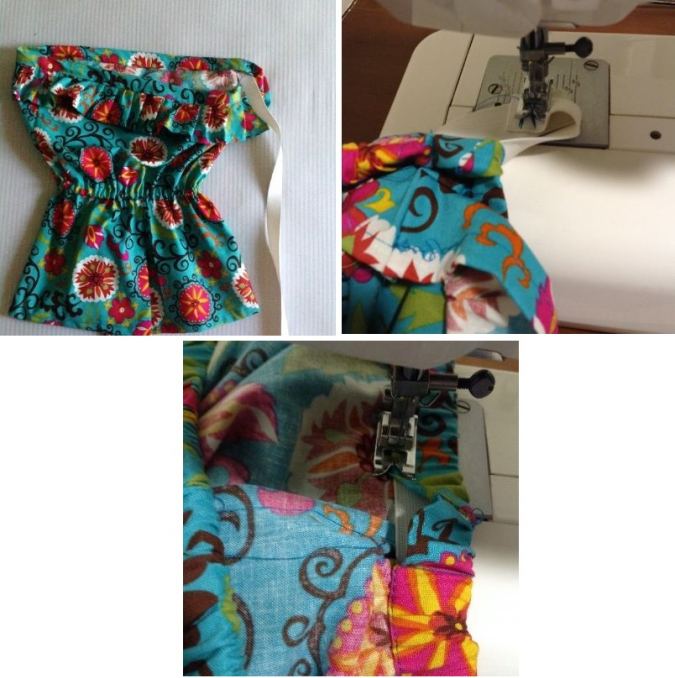
Pull out the top from the inside of the shorts and it will now start looking like a romper.

Fold the casing upwards and sew it shut along the edge to make a casing for the elastic. Leave a gap of 2-inches for elastic insertion.

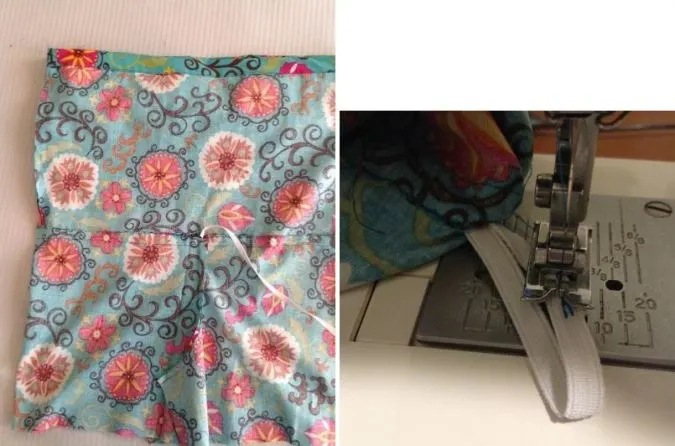
Take the required length of the elastic for the waist, referring to the table-3 above, and insert it through the opening in the casing using a safety pin. Keep the ends of the elastic overlapping by ½-inch and sew back and forth to secure. Sew the opening in the casing shut.
Let’s hem the romper shorts.
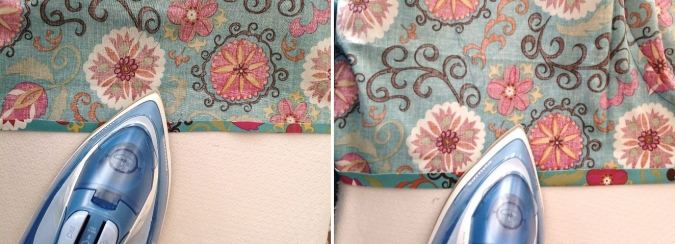

Fold the lower edge of the shorts by 3/8-inch and press. Fold again by 1 & ¼-inches and press once more.

Sew down the hem, along the edge of the fold.
Next, sew a straight line, ¾-inch from the fold to create a casing for the elastic.

Take the elastic for the leg hole, referring to the table-3 above, and insert it through the upper casing in the hem (if you wish to sew the romper without the flutter ruffle hem, insert it through the lower casing). Secure the ends of the elastic by sewing back and forth a few times.
Repeat the steps on the other leg of the shorts.
*Note: If you opt for a romper with a snap button, the instructions for that are given at the end of this blog post.
Let’s finish the inseams.

Sew the inseams shut, starting from the hemline of one of the legs as marked above.
Let’s insert the chest elastic.
Take the required length of the elastic for the chest, referring to the table-3 above, and insert it through the chest casing, using a safety pin. Keep the edges of the elastic overlapping by ½-inch and sew back and forth to join. Sew the opening in the casing shut.
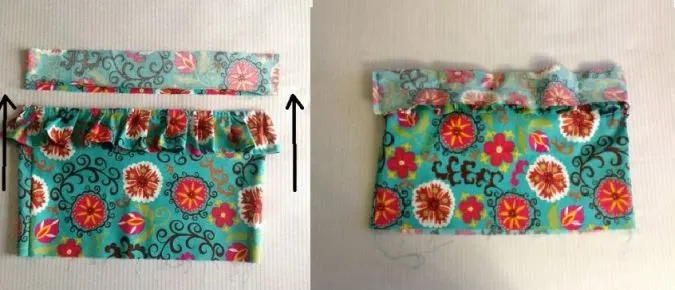
Next, we do the shoulder strap.
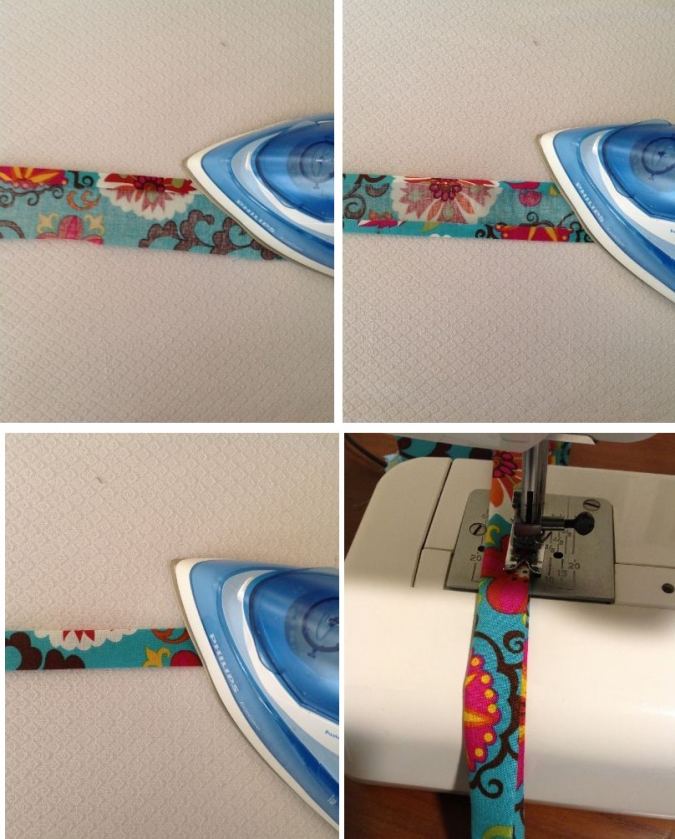

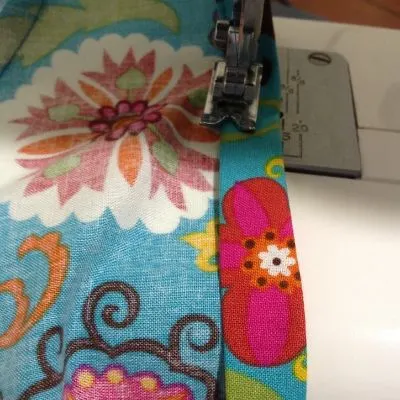
Take the pieces for the shoulder strap. Fold its two longer edges towards the wrong side by 3/8-inch and press to set. Fold it in half lengthwise and press again. Sew it shut along the edge of the fold.
Next, we do the casing for the shoulder elastic.
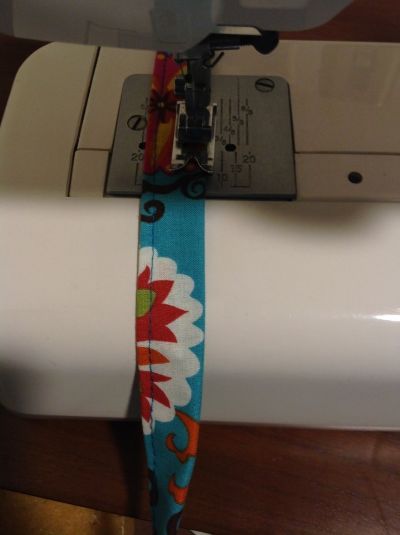

Sew a straight line ½-inch from the folded edge to form the casing.
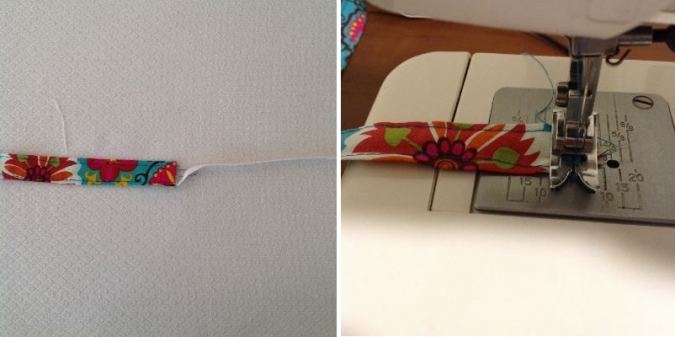

Take the required length of the elastic, referring to the table-3 above, and insert it through the casing using a safety pin. Secure the ends by sewing back and forth a few times. Repeat the steps on the other strap piece.
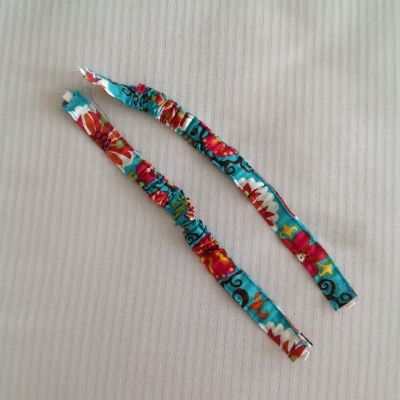
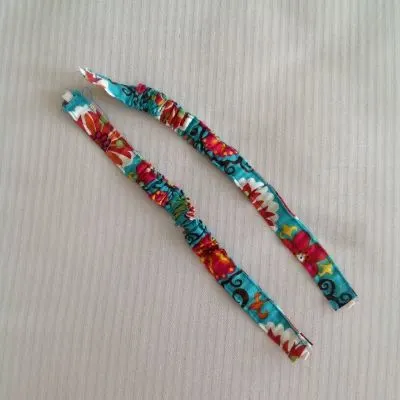
Once done, you will get your shoulder straps like the above.
Next, we need to attach the straps to the romper.
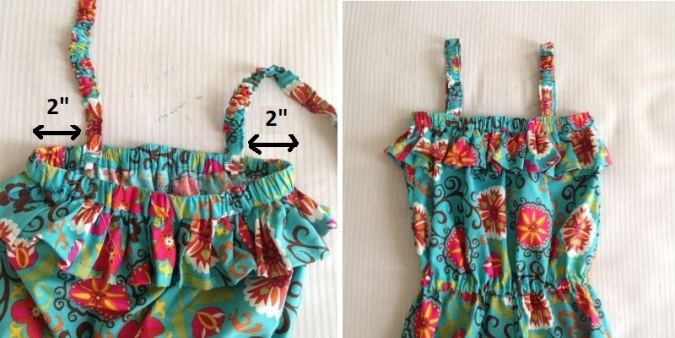

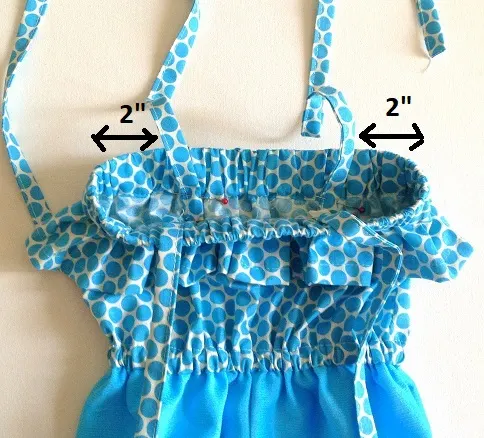
Place the ends of the strap on the wrong side of the romper front, 2- inches from the side seams, with its lower edge extending a little beyond the lower edge of the chest band and pin. Sew back and forth on the strap, at the top and base of the chest band, to secure. Repeat the steps on the romper back.
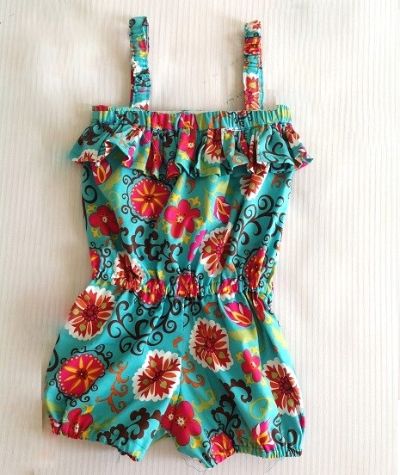

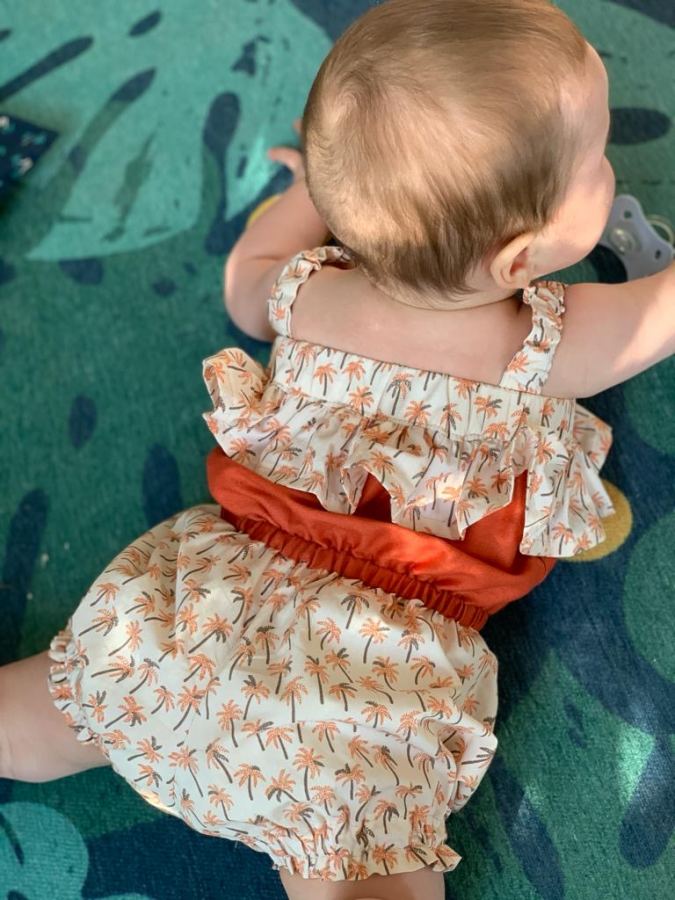
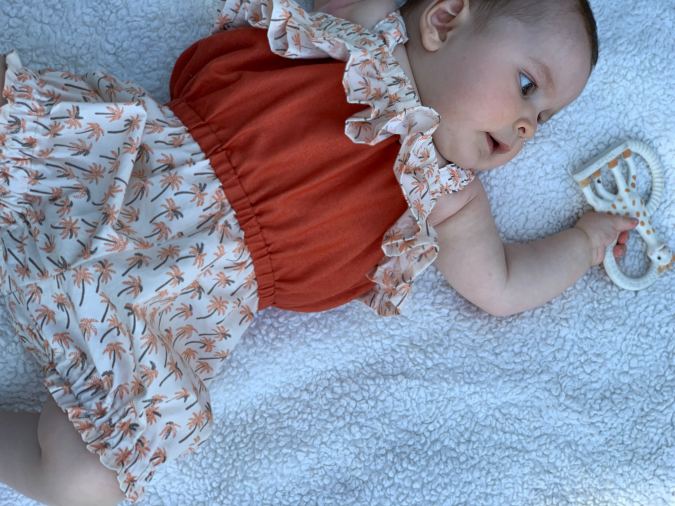
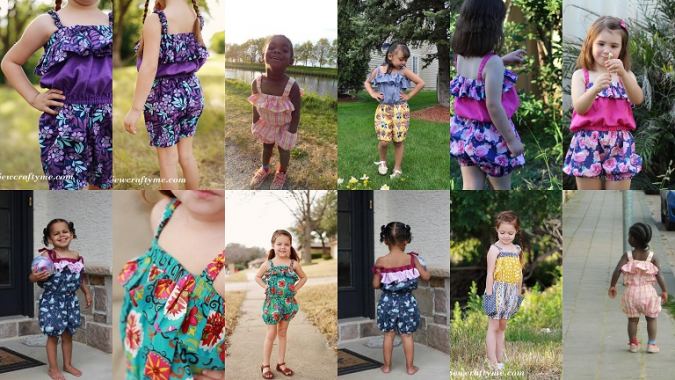
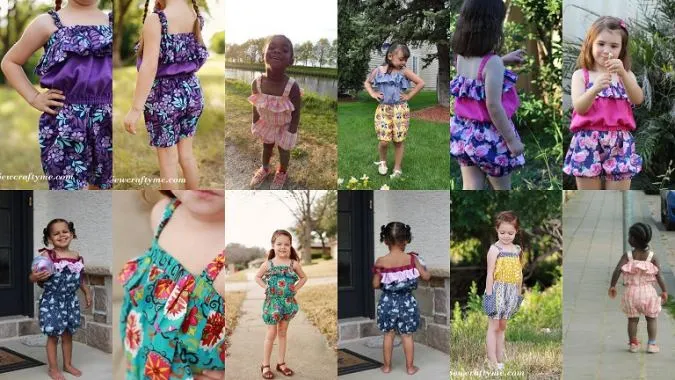
Your cute little ruffled baby romper is ready!
Optional Shoulder Ties
Cut the four pieces for the ties, referring to the table-2 above.

Take one of the tie pieces, fold the two long edges and one short edge towards the wrong side by ½- inch and press. Fold again in half, lengthwise, and press to set.
Sew the tie shut along the edge of the fold. Repeat to get the other three ties ready.

Place the ties on the wrong side of the romper, 2- inches from the side seams and pin. Note that the lower edges of the ties should extend the lower edge of the chest band by ½- inch.

Sew back and forth on the tie, at the top and base of the chest band, to secure. Repeat the steps with the remaining ties.
Pin it for later here,

Sherry Kurin
Tuesday 13th of April 2021
I am trying to figure out if I am being mailed the pattern in sizes 3 months to 6 years. Nowhere do I see it's a pdf but I am a little confused. Hoping I get pattern in the mail. Thank you. Its adorable!
Surayya
Tuesday 13th of April 2021
The pattern is in PDF format and it has been e-mailed to your Paypal e-mail.
Sherry Kurin
Tuesday 13th of April 2021
I am trying
Carol Wilkins
Sunday 11th of April 2021
I have gone from burp cloth to bibs to sensory toys to bloomers, dresses, overalls, rompers...All because if you! I never in my wildest dreams thought I would be making baby clothes! Next clothes for me. Thank you so much. I hope you realize just how valuable your posts are!!! ❤💖❤
Surayya
Monday 12th of April 2021
Thank you so much! It made my day!
Carol Wilkins
Sunday 11th of April 2021
Thank you for the romper pattern. I think its darling. By the time I went to sew the inseam there was none. I sewed straight across matching leg holes. What did I do wrong?
Surayya
Sunday 11th of April 2021
You are welcome! Kindly e-mail me the picture of your project so that I can check where you went wrong. My e-mail Id is [email protected]
Shanaaz
Monday 28th of September 2020
Hi this pattern that you have here for the romper, there is no pattern piece for the top
Surayya
Monday 28th of September 2020
Hello, There is no pattern piece for the romper top. The romper top pieces are rectangular and you can find the measurements in the table- 2 of the tutorial.