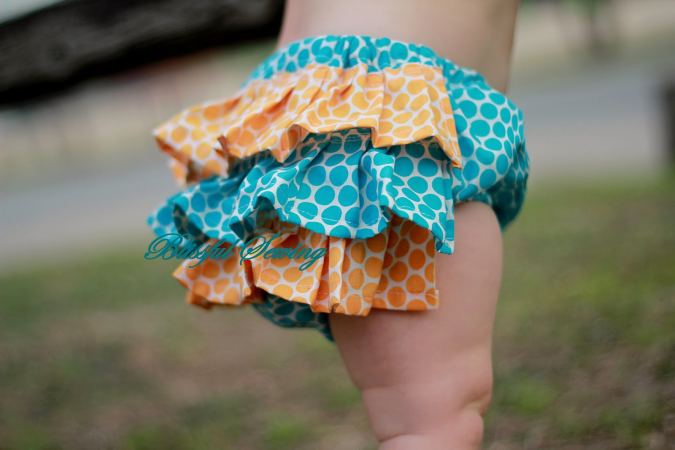
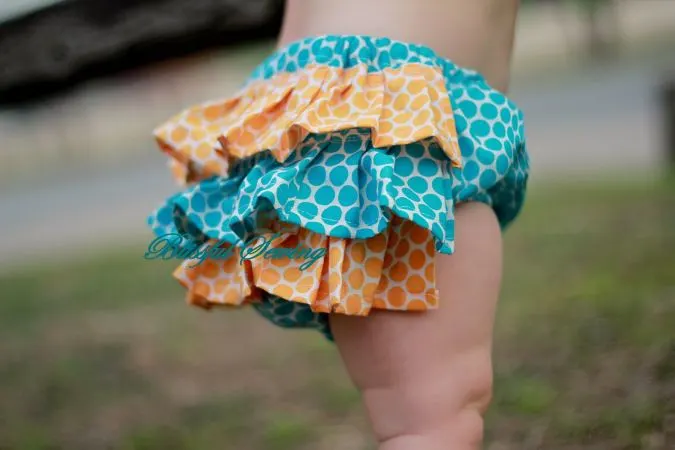
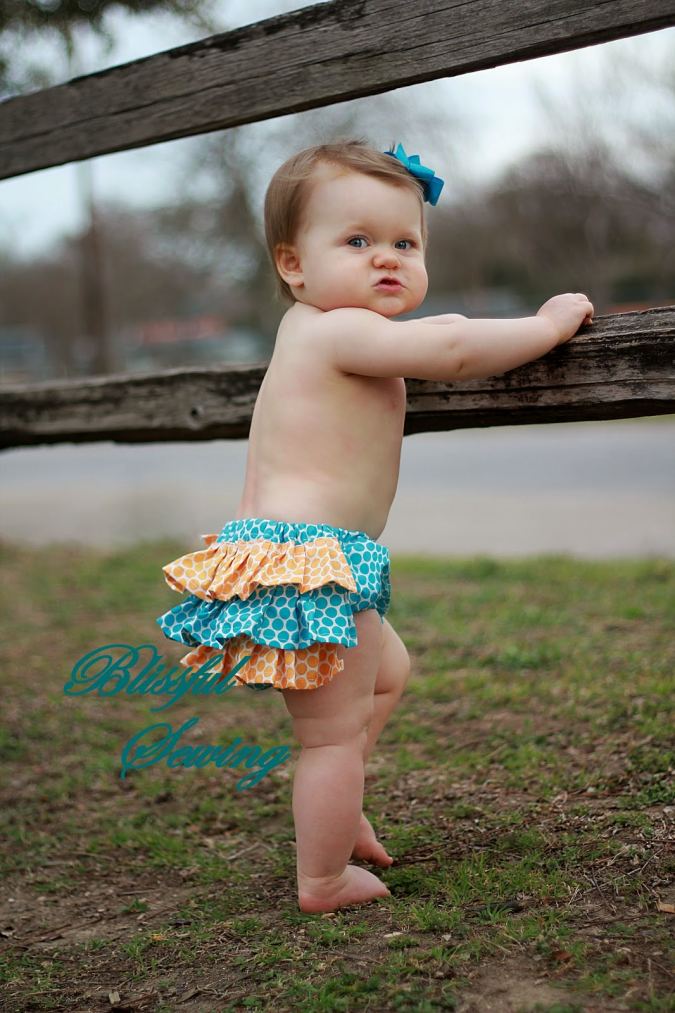
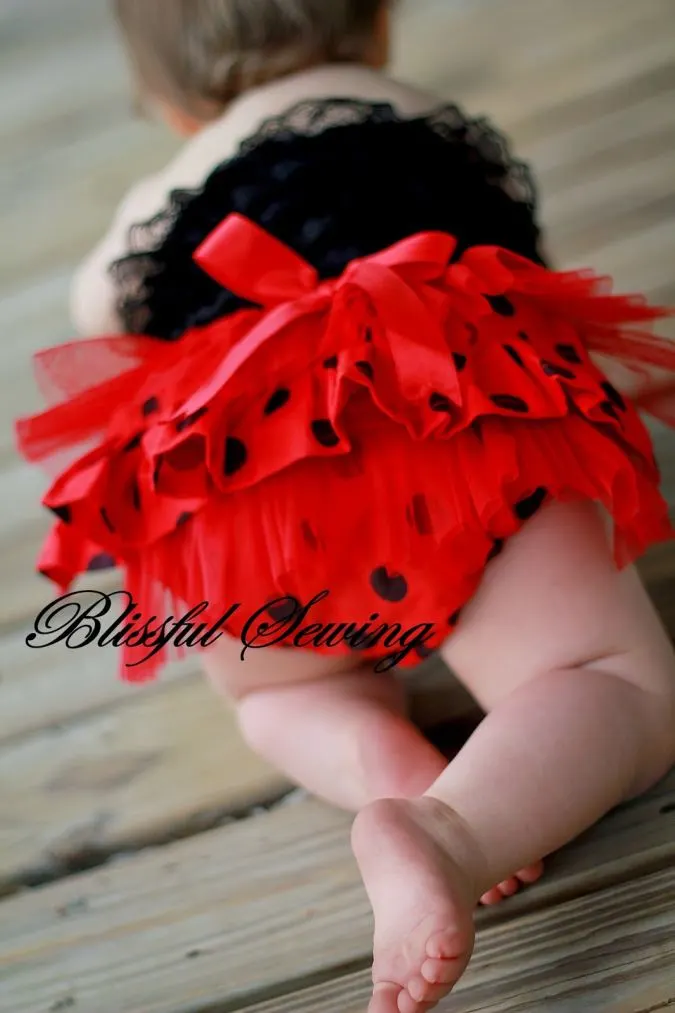
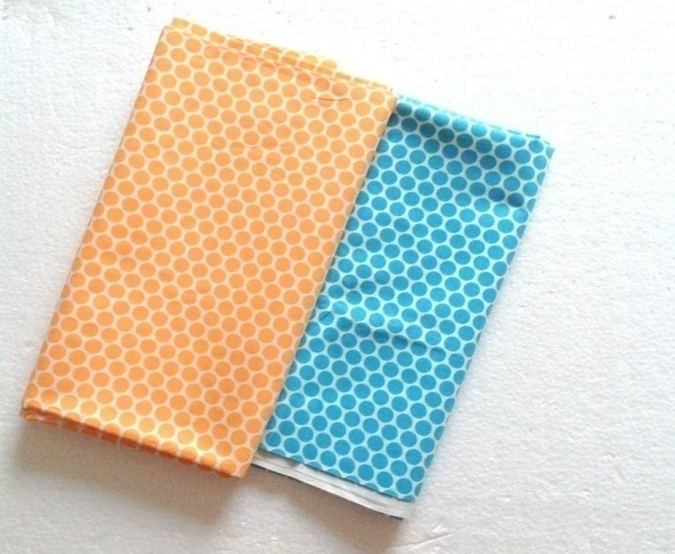
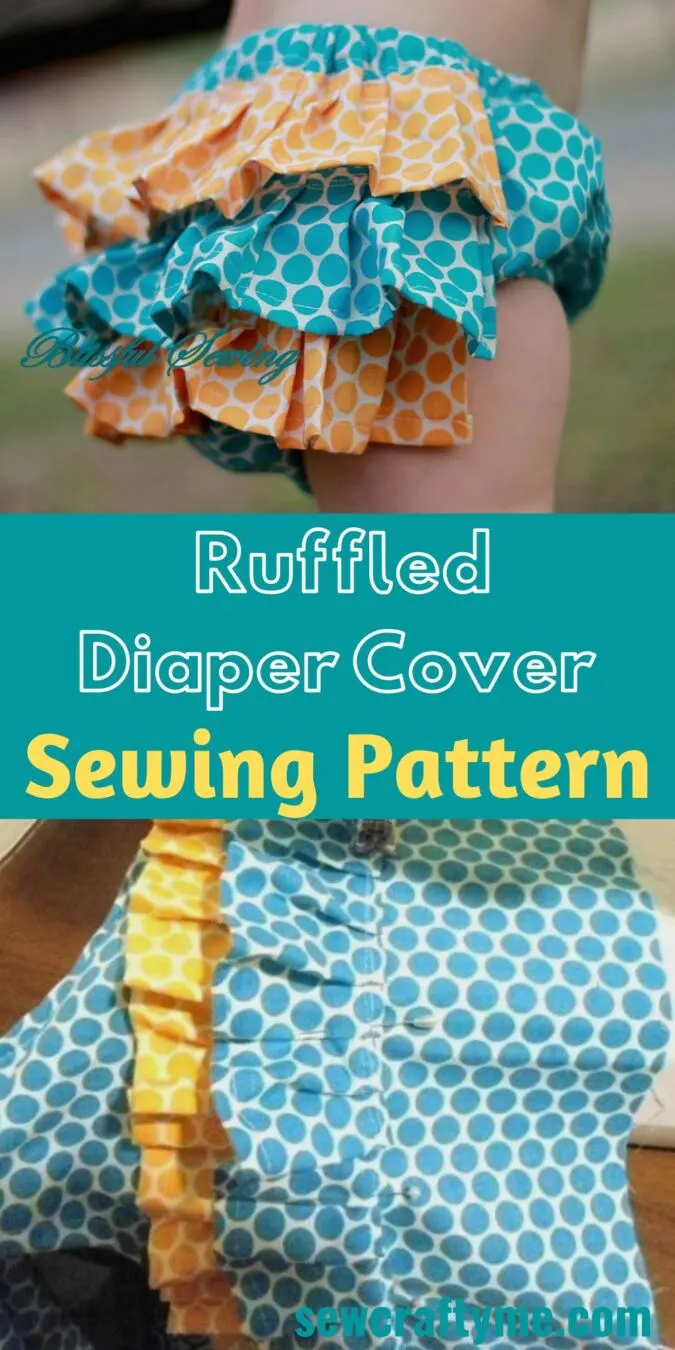
The ruffled diaper cover sewing pattern has been available on my blog earlier as a paid pattern. This summer, I planned to release it free for all to sew up. Doesn’t the bummies pattern look adorable on the little ones?

Rather than the simple, plain diaper covers, that are meant for beginner seamstresses, I believe my readers have advanced to an expert level in their seamstress skills and are ready for more challenging projects. 😊

Here I have mixed and matched tulle fabrics with medium-weight cotton to make an adorable diaper cover. Doesn’t it look adorable on the little one?
So here I am with the ruffly girly DIY diaper covers that can look great on the little ones.
How to Sew a Ruffled Diaper Cover
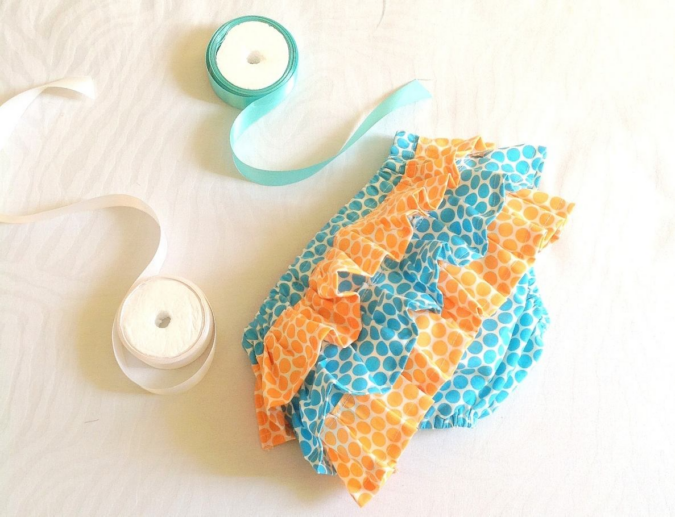
Materials Required Diaper
- Fabric for diaper cover-requirement specified in table – 1 below.
- Fabric for ruffles- requirement specified in the table -1 below
- 3/8-inch elastic- requirement specified in the table -1
- ¼-inch elastic- – requirement specified in the table -1
- One-inch satin ribbon- 22 inches (optional) for the bow
- Sewing
- Water-soluble fabric pen for marking
- Pattern template. **Enter your e-mail address and click the subscribe button below to download the template:
I suggest you read the entire pattern once before starting to get a general idea.
All the fabrics used here are of 44/45 inches width.
The fabrics shown here are only for illustration purposes and as such may vary from the original.
All seam allowance is ½-inch unless otherwise specified.
Fabric requirements
Table-1
| Ages | Diaper Cover Fabric
(yards) |
Ruffle Fabric
(yards) |
¼- inch Elastic
(inches) |
3/8- inch Elastic |
| 0-3 months | ¾ | ¼ | 18 | 16 |
| 3-6 months | ¾ | ¼ | 20 | 17 |
| 6-12 months | ¾ | ¼ | 22 | 18 |
| 12-24 months | ¾ | ¼ | 24 | 18.5 |
| 2 years | ¾ | ¼ | 26 | 19 |
Measurements
Table-2
In the table below, “l” stands for the length and ‘w” stands for the width of the fabric
| Ages | Ruffle (inches) | ¼-inch (leg) Elastic (inches)
(cut 2) |
| 0-3 months | 27l x 3w | 9 |
| 3-6 months | 28l x 3.5w | 10 |
| 6-12 months | 29l x 3.5w | 11 |
| 12-24
months |
30l x 3.5w | 12 |
| 2 years | 32l x 4w | 13 |

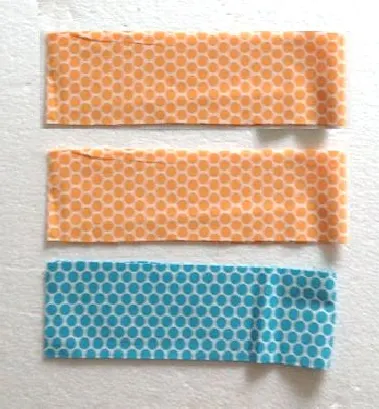
Take the required materials for the diaper cover and the ruffles.
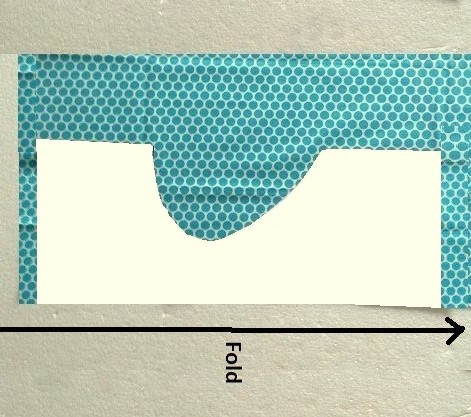

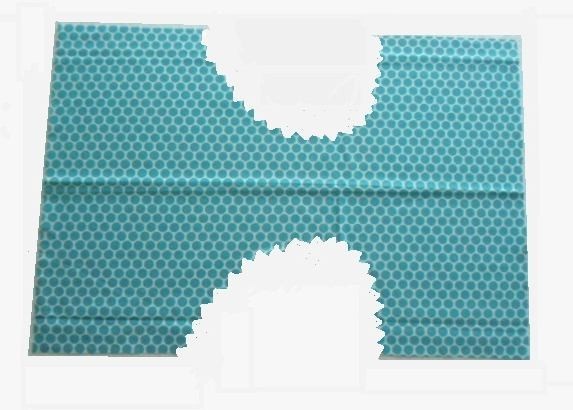
Cut the pattern template for the diaper cover at the end of this pdf. Fold the diaper cover material lengthwise and keep the template on the fold as shown above. Mark around the template and cut.

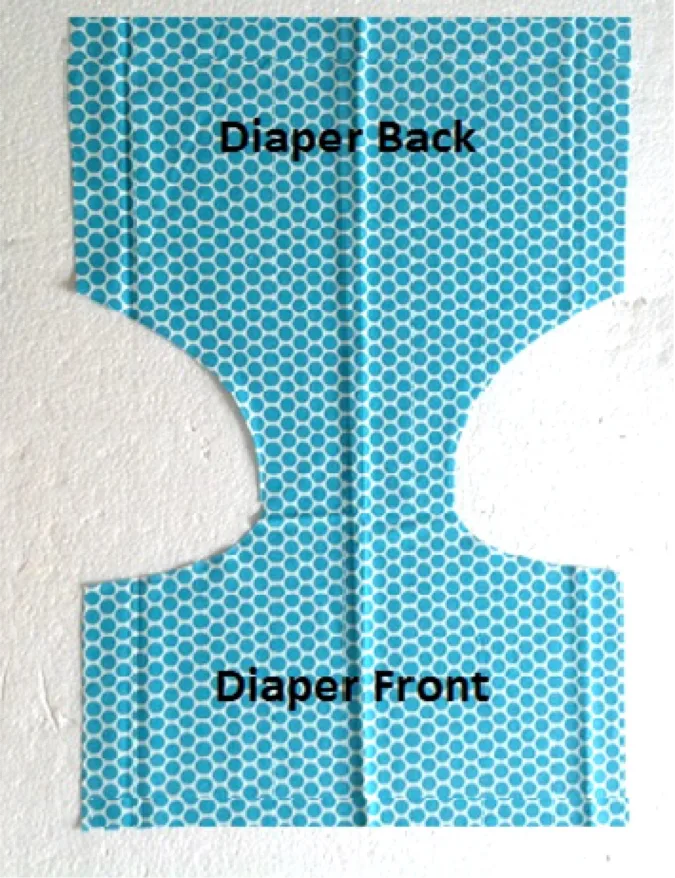
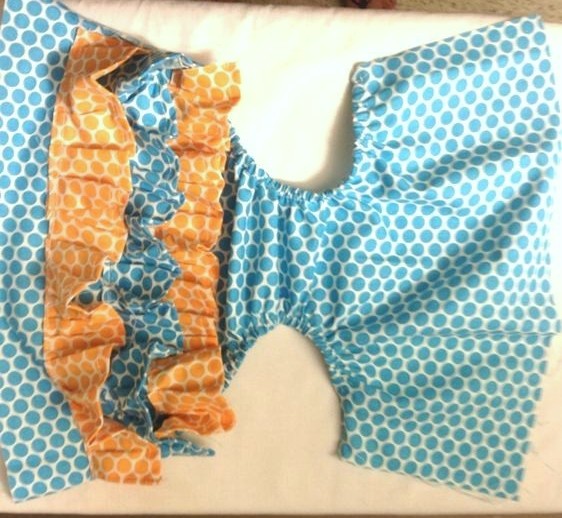
You will get your diaper cover piece like this. Mark the front and back parts, referring to the pdf.
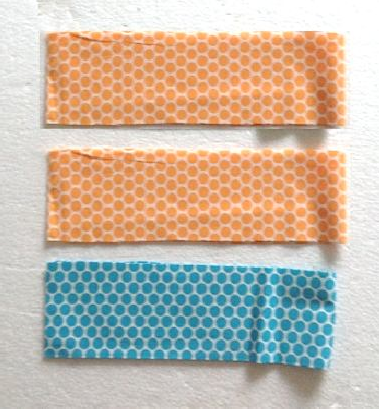
Cut the fabric pieces for the ruffle, referring to the table-2 above. Note that here I have cut two contrasting ruffle pieces and one matching piece; you may choose the ruffle fabric according to your choice. If you opt for tulle, keep its width ½-inch less than what is given in the table-2 since the edges of the tulle do not need any finishing.
We now need to finish the ruffle edges.

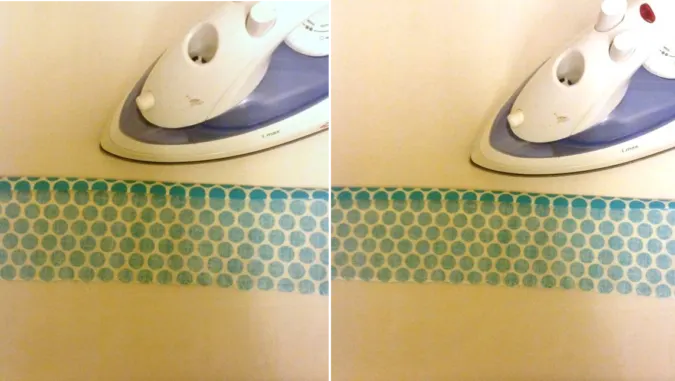
Take one ruffle piece and fold one of its longer edges by ¼-inch and press. Fold by another ¼-inch and press again. Repeat the same on both the shorter edges. Leave one longer edge raw. This is where you gather the ruffle.
.

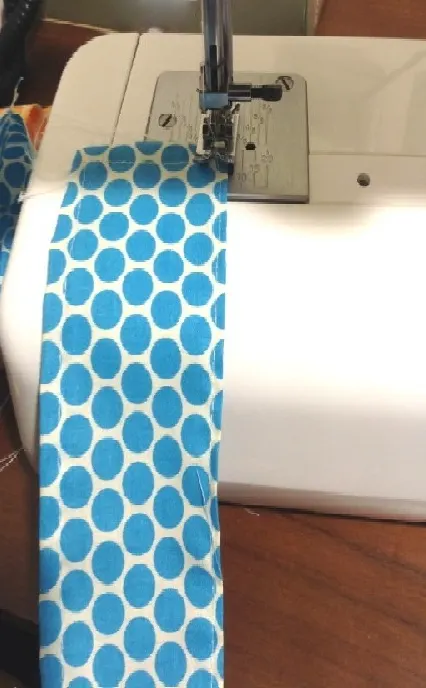
Sew down all the three folded edges. Let’s gather the ruffle.

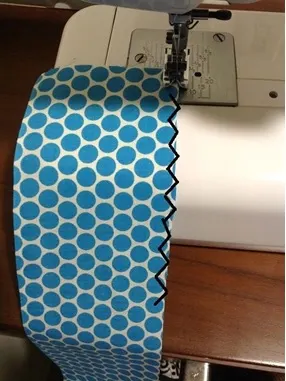
Zigzag the raw edge to prevent fraying.

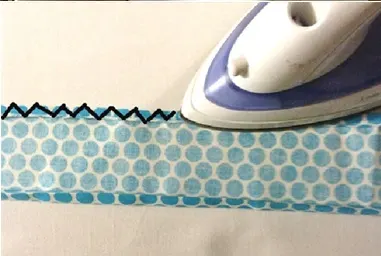
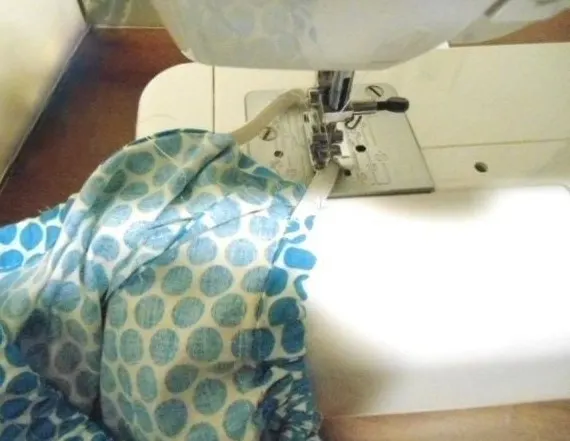
Fold it by ¼ -inch and press. This is where we do the basting stitch and gather the ruffle

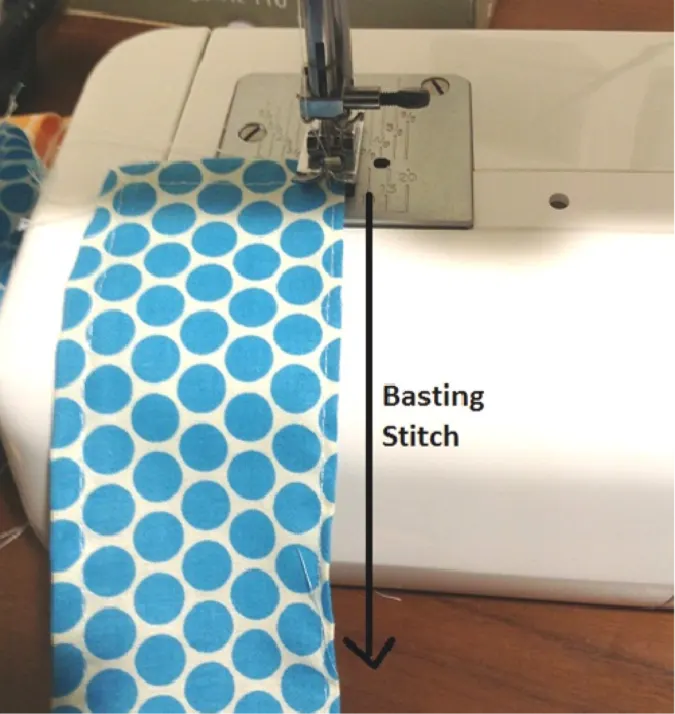
Do a basting stitch along the single folded edge, leaving a long tail of thread, 6-7 inches long to pull and gather the ruffle. *Note that to do a basting stitch you have to turn the upper thread tension of your machine to zero and the stitch length to the longest.
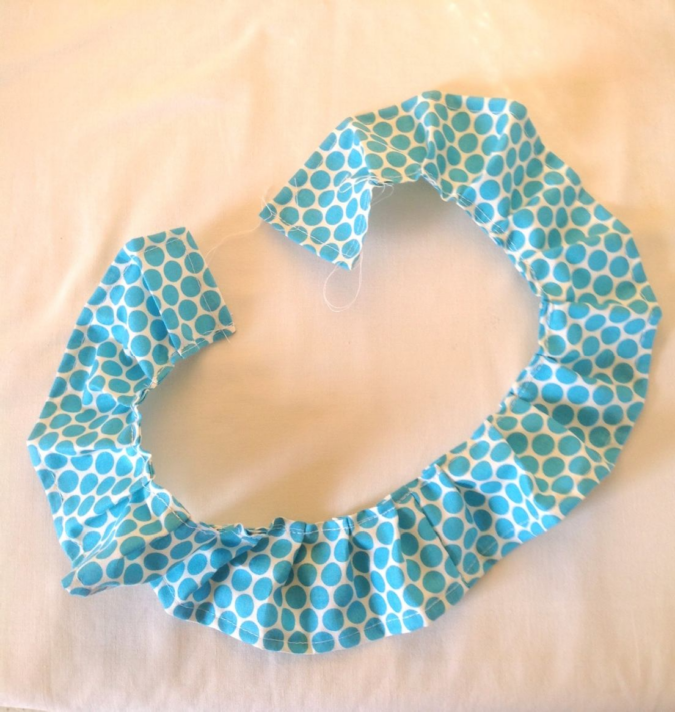
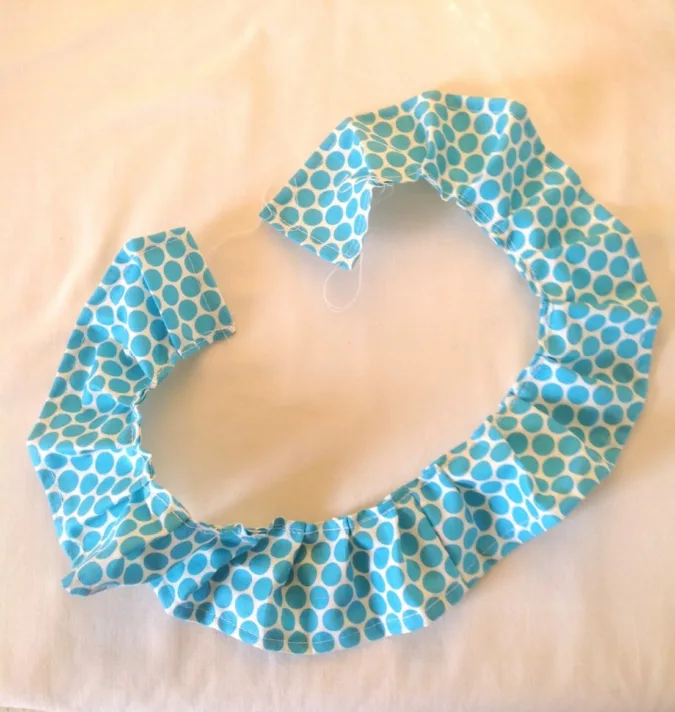
Pull the thread from the bobbin gently and gather the ruffle. Repeat the steps on the other two ruffle pieces.
Now we need to sew the elastic casing for the leg hole before we attach the ruffle to the diaper cover.

Make small notches along the two curved edges with your scissors (you may use your pinking shears (if you have one).

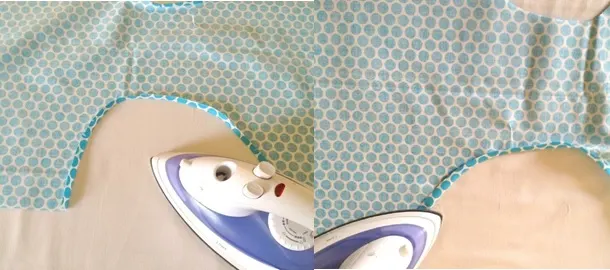
Fold the curve for the leg hole by ¼-inch and press. Fold again by 3/8- inch and press again. Repeat the steps on the other leg hole.

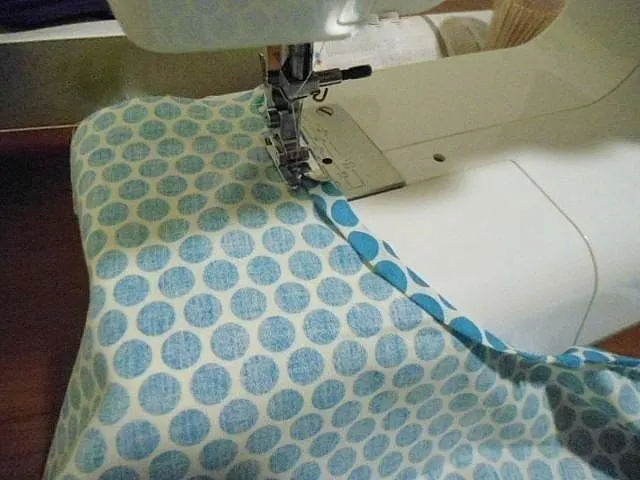
Sew along the edge of the fold slowly and carefully. Your diaper cover may look uneven and wrinkled when the leg holes are sewn but don’t worry it will all get leveled out once you insert the elastic. The elastic is inserted later, once the ruffles are done.
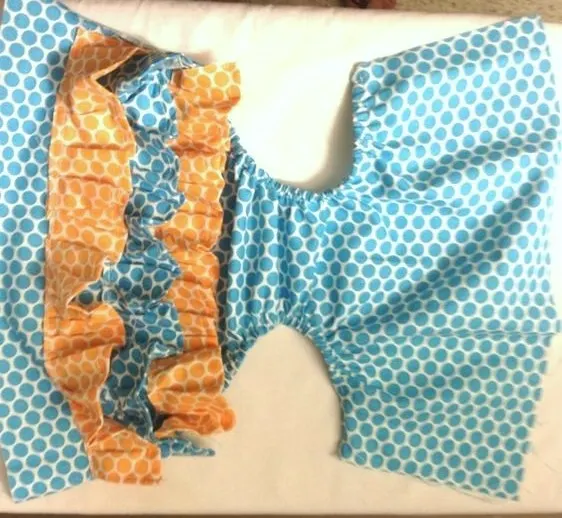
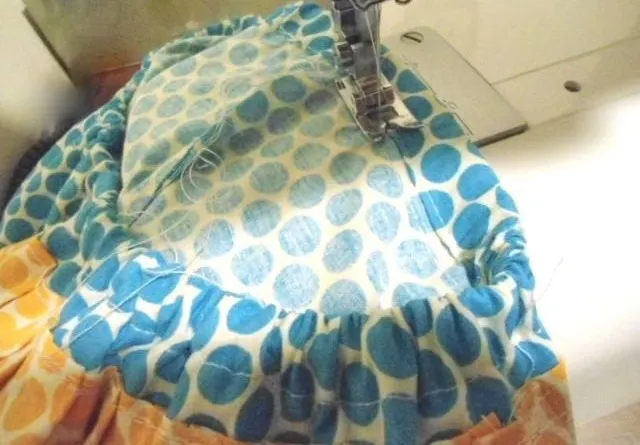
Let’s attach the ruffles. The ruffles are attached to the back part of the diaper cover.

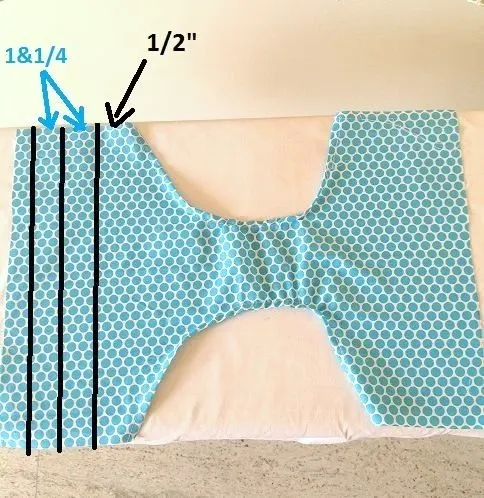
Draw a line ½-inch above the leg hole for the first ruffle. Draw another line 1 & ¼” from the first line and a third line at a similar distance as shown in the picture above.
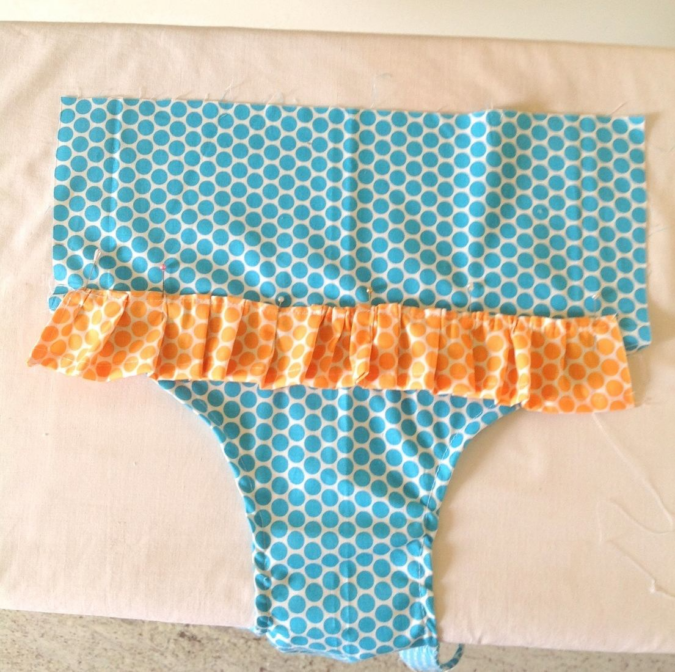
Take the first ruffle, adjust the gathering to leave ½-inch on either side of the diaper cover, and pin it along the first line as shown above.

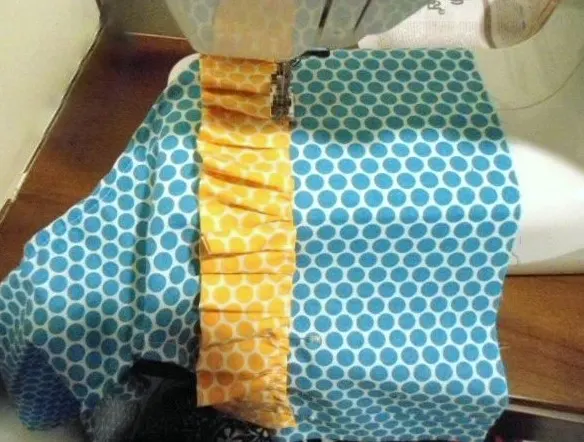
Sew the ruffle onto the diaper cover.

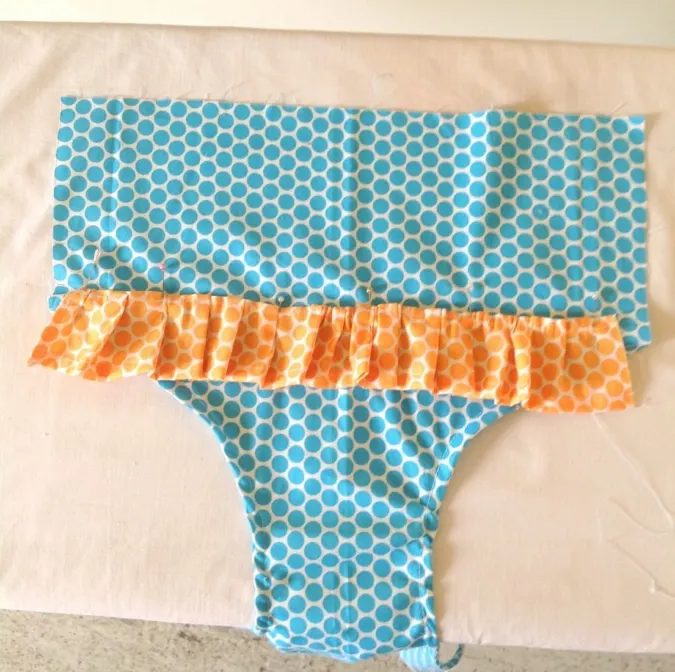
Take the second ruffle, adjust the gathering, and pin the second ruffle along the next line, again leaving ½-inch on either side. Sew it onto the diaper cover, removing the pin as you go.
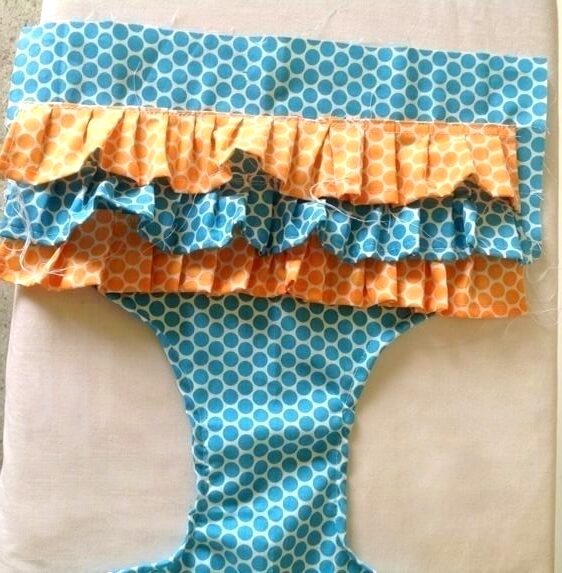
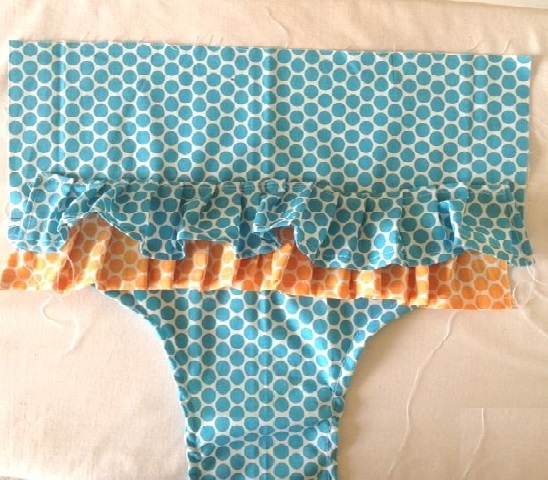
Repeat the steps with the third ruffle.
Now let’s insert the elastic through the casing in the leg holes.

Take the required length of the ¼ -inch elastic, referring to the table-2 above, and insert it through the casing as shown in the picture. You can start with the front part of the diaper, as I did so that the ruffles don’t come in the way while you insert the elastic. Secure the ends of the elastic by sewing back and forth a few times. Repeat the steps on the other leg hole.
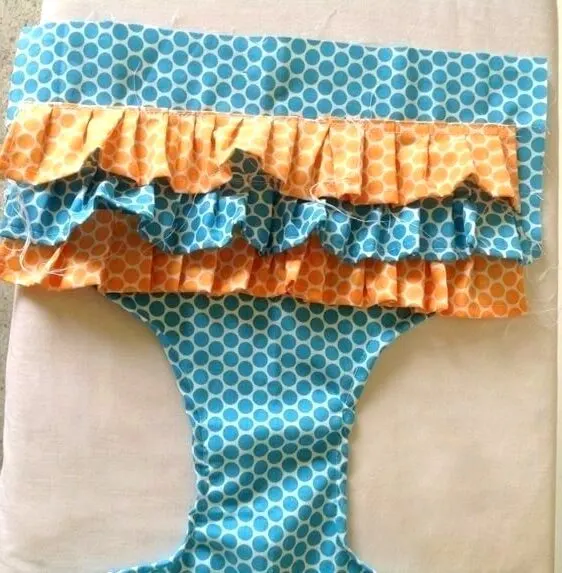
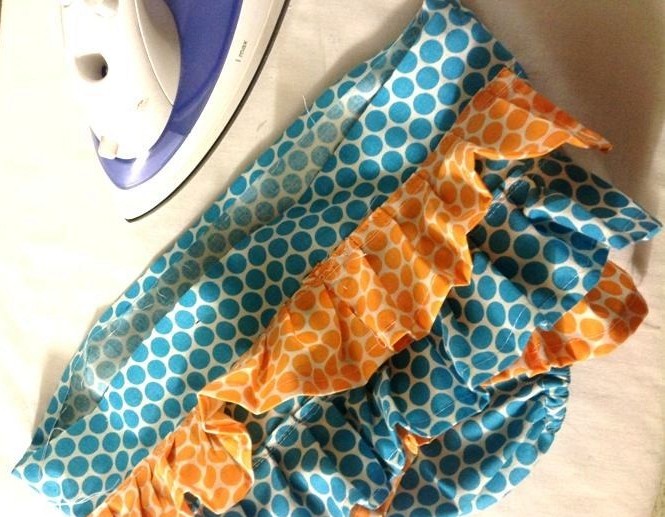
Your diaper cover would now look like this. Adjust the gathering over the elastic to make it uniform.
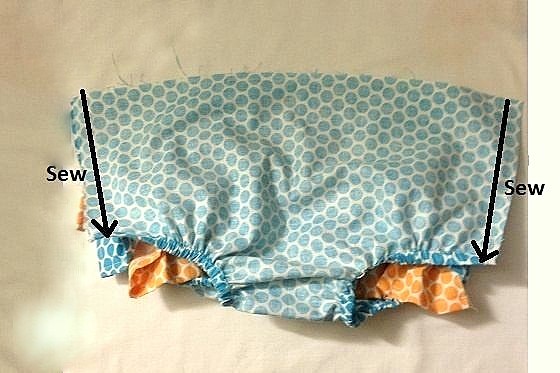

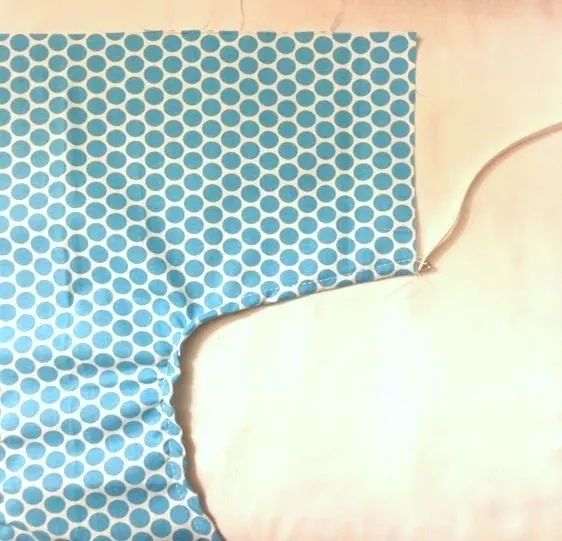
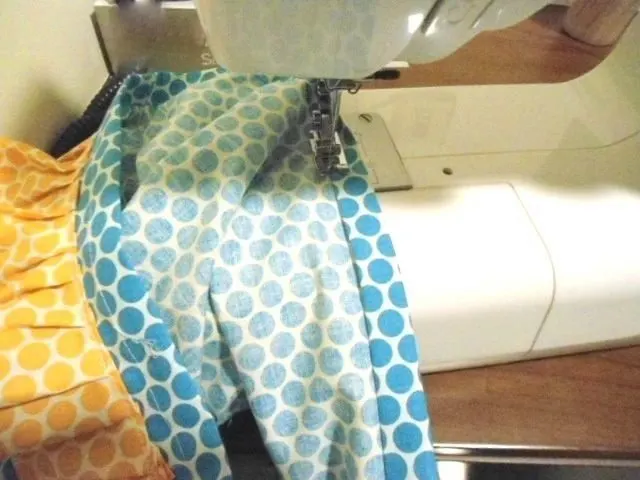
Fold the diaper cover over with the right sides together and align the edges. Sew the side seams shut as marked above. Zig-zag the side seams to prevent fraying.
Now let’s do the casing for the waist elastic.

Fold the upper edge of the diaper cover by ¼-inch and press all around.

Fold again by ½-inch and press.

Sew the casing shut along the edge of the fold, leaving a one-inch gap to insert the elastic.

Take the required length of the 3/8-inch elastic, referring to the table-1 above and insert it through the casing, using a safety pin.

Keep the ends of the elastic overlapping and sew it back and forth a few times to secure.

Sew the opening shut.

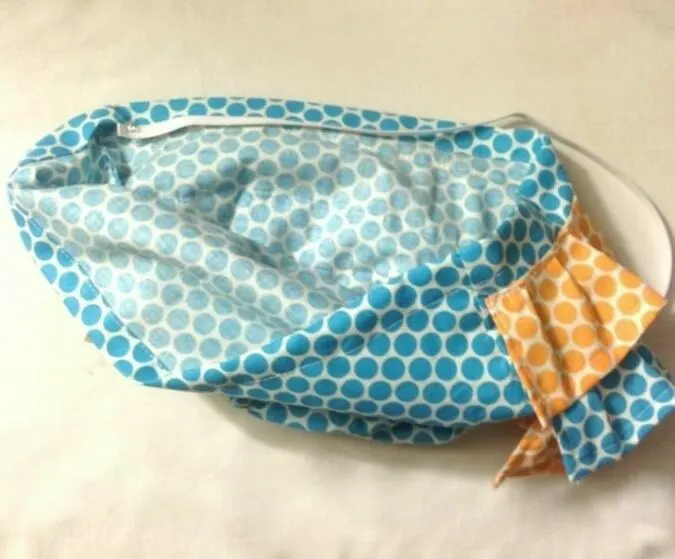
Our diaper cover is done!
Find the webstory for the post here, Sew a Sweet Diaper Cover with Ruffles
Pin it for later here,

Johanna
Monday 15th of May 2023
Just got the pattern n ready to start. Thank you
tina
Monday 24th of April 2023
so cute cannot wait to make these
Paula
Monday 3rd of April 2023
Thank you very much for this pattern! I have some big eyelet and light blue chambray fabric I will be using for this. Should turn out cute!
SNdy
Friday 10th of March 2023
How would you suggest rounding off corners of ruffles. I don’t think they are pleasing to the eye. Thanks
Terresa Gradon
Friday 10th of March 2023
Hi I have tried to copy the free pattern for the ruffled diapers but have been unable to find the link to download it,
Surayya
Friday 10th of March 2023
Yes, after cutting the ruffle pieces, you may keep a circular object along the corner, mark and cut it. This would help make the corners round if you would love it that way.
Surayya
Friday 10th of March 2023
Kindly enter your e-mail id and click the subscribe button in the blue box below the "supplies needed" section to download the free template.