

.JPG)
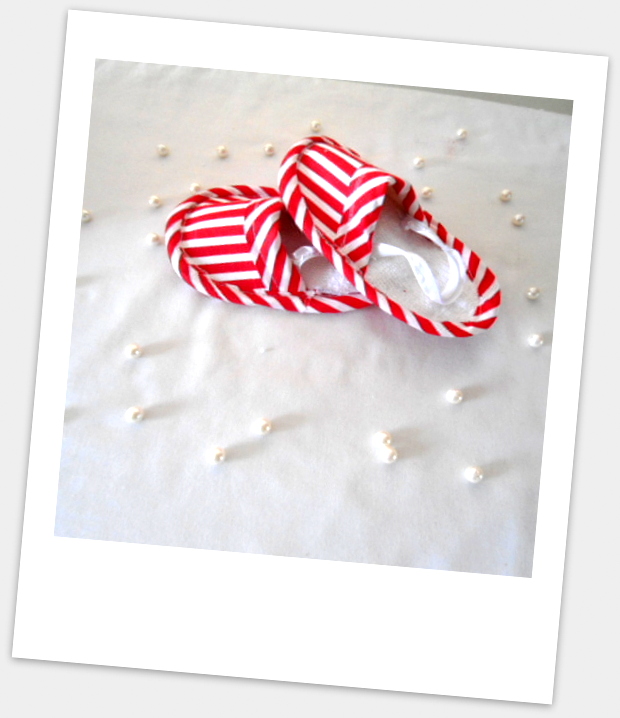
These cuddly carpet slippers are interesting and easy to sew. Make them in cotton insoles to brighten up your little one’s summer and in fleece to keep her warm and cozy during the winter months. With a layer of foam inside, this carpet slipper would provide extra comfort for your little one. You can sew as many of them as you want in different colors and combinations, as it is very inexpensive to make. You can use up any left over scrap you have. The slipper I have shown here is of a one-year-old baby girl, you can make it in any size from baby to adult using my tutorial!
*Note that I have mentioned cotton fabric for the outer sole as it is meant to be worn on carpets, you can use jiffy-grip fabric for the outer sole to make it non-slippery.
Materials Required
Fabric for inner sole- fleece or cotton. You can also use your old bath towel if you wish to recycle.
Fabric for outer sole – cotton or jiffy grip (optional).
One side fusible heavy weight interfacing.
0.5cm foam or felt.
Bias binding.
1/2-inch elastic
1/2-inch satin ribbon.
Sewing Notions.
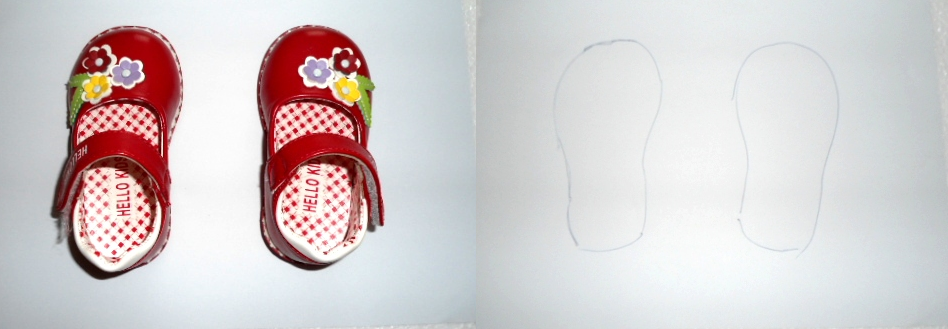
Take your little one’s shoe and keep it on a white paper. With a pencil, mark around the shoe as close to it as possible. Do the same with the left and right pieces.
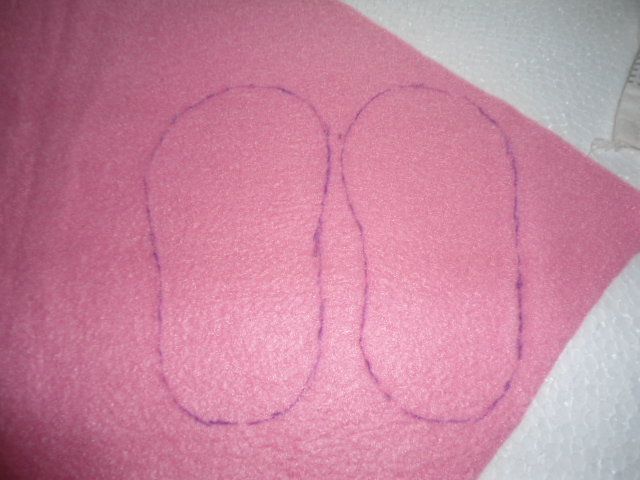
Cut out the two marked pieces to form the right and left templates. Now keep the template on the fleece (cotton), foam and interfacing, mark them and cut them out.
Let’s do the template for the upper of the slipper.
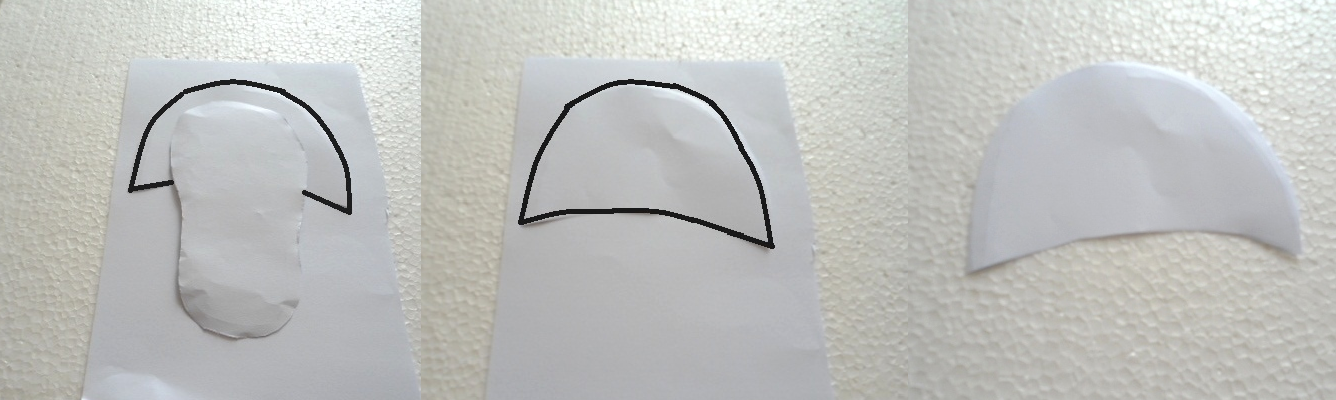
Keep the slipper template on a white paper, draw a line about half-inch around the upper (wider) half of the template. Notice that at the lower end, the upper widens a tad more to provide more room to insert the feet. Also, the lower edge of the upper curves slightly upwards.
Mark and cut the template. Keep the template on the fleece and cut four pieces from the fleece for the upper of the slipper.
*Note that if you are using cotton fabric for the upper, you can cut two pieces of foam or felt to sandwich between the two pieces, this would add strength and comfort to the upper.

You will get your outer sole, foam, interfacing, inner sole and upper pieces like the above.

Now take the cotton piece for the outer sole and the interfacing and fuse them following the manufacturer’s instructions.

Layer the foam and fleece above the fused material, aligning the edges and pin. Sew the four layers together, removing the pins as you go.
Let’s do the back strap for the slipper.
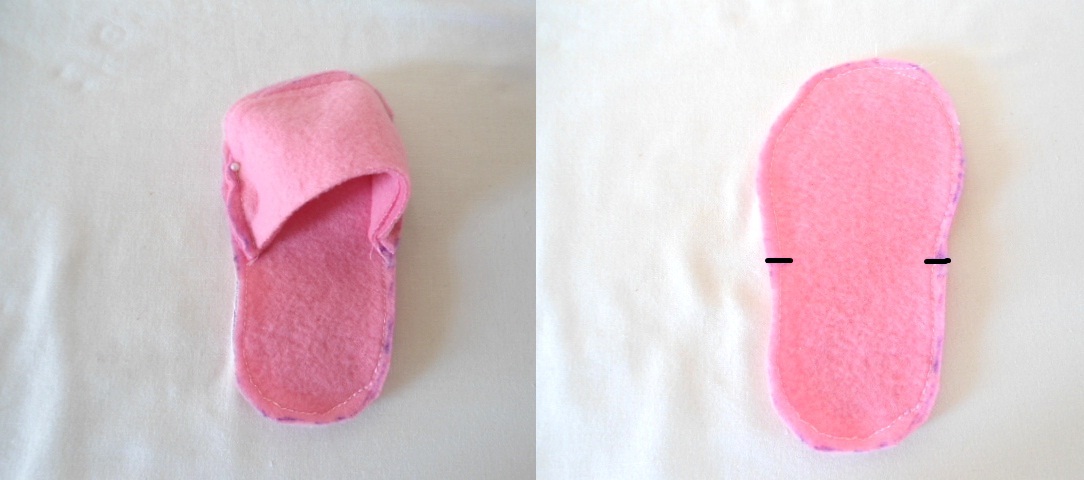
We need to mark the point where the elastic back-strap is to be attached. Take the upper part of the slipper, pin it around the sole and mark the two points where the ends of the upper touch the sole. I have used satin ribbon attached to elastic for the back strap. While you attach the satin ribbon onto the elastic, it ruffles up.

To find the length of the satin ribbon for the back-strap, hold the tape around the lower edge of the sole, from the first marked point to the second. The length of the elastic required would be two-inches less than the length of the satin ribbon.

Take the elastic and satin ribbon and attach them together by using your machine, keeping the elastic stretched all the time. Your satin ribbon would ruffle up.

Attach the ruffled satin ribbon onto the two points.
Now we need to attach the bias tape.

If you are not using a ready-made one, you can easily make one. Take a piece of cotton material (cut along the bias) about 2 & 1/2 -inches wide and of the required length. Fold it in half lengthwise and press. Open and fold the two raw edges inwards towards the center and press again. Your bias binding is ready.

Attach the binding onto the lower edge of the upper of the slipper. Pin the upper part of the slipper onto the sole, aligning the edges and sew it onto the sole.
Let’s find out the length of the bias tape required for the sole.

Keep a tape all around the edge of the sole and find out the length of the bias tape required.

Sew the bias binding around the slipper as shown above. Keep the ends overlapping, tucking in the raw edges.
Your slipper is ready! So come on, what are you waiting for? your quest for sewing something awesome is over. These slippers are so easy and cheap that you can make as many of them as you want in different fabrics, designs, and sizes! Add a bow or a flower as an embellishment on the upper of the slipper and lo! you get a boutique product which does not weigh heavy on your pocket! You can make these sassy little spa slippers to adorn your little girl and make her feel fabulous and special for any spa party.
Bobbie S
Tuesday 12th of March 2013
You were the #1 clicked on link this week. Thanks for linking up to Check Me out Saturday craft link party on A Vision to Rememberhttp://iamonly1woman.blogspot.com/2013/03/check-me-out-saturday-craft-link-party_12.html
You were featured on this weeks highlights for check me out saturday
Diana - FreeStyleMama
Saturday 9th of March 2013
Adorable!!! I'd like to invite you to participate in my Pin Me Linky Party. It goes Fri-Tue. I allow up to 3 links each week! I'm a new follower!
Julia Forshee
Thursday 7th of March 2013
I think these are the cutest things in the world!! I just got an adjustable bias tape foot, so I think this will be my first project!! We are starting a link up party on Thursdays (today:), and we would love for you to join us with this post and/or any others you would like to include. We are at allthingswithpurpose.com. Hope to see you there!!
Chelsea@getyourcraptogether
Monday 4th of March 2013
These are so cute! I'd love for you to check out our Pattern Party! Those with patterns and templates to share are invited to link up! Check it outhttp://getyourcraptogether.blogspot.com/search/label/Pattern%20Party
Maria
Monday 4th of March 2013
New follower from the blog hop. These are so cool! It makes me want to fire up the sewing machine. I am hoping to learn some more sewing ideas through your blog. Thanks!
Maria @ keepingitstepford.com